Sharpening! A quick trawl of the internet reveals a bewildering array of opinions on this topic, and if you look a bit further afield you will find entire books covering the same. But don't be deterred: the basics can be understood and learned with a relatively modest investment in time and do not require any special skills, just a bit of practice.
Over the past year or so I read a lot of theory and – with a bit of practice and experimentation – I have learned how to sharpen all my planes and chisels, and you can too.
The usual caveats apply, I am not an expert, but if you are new to the subject or are interested to read a brief summary of the theory of sharpening with a historical perspective, then read on.
The basic principles
- An edge is created by the intersection of two surfaces
- smoother surfaces create sharper edges
- the angle at which the surfaces intersect affects the durability of the edge (edges formed from narrow angles fracture easier than wide angles).
that’s it!
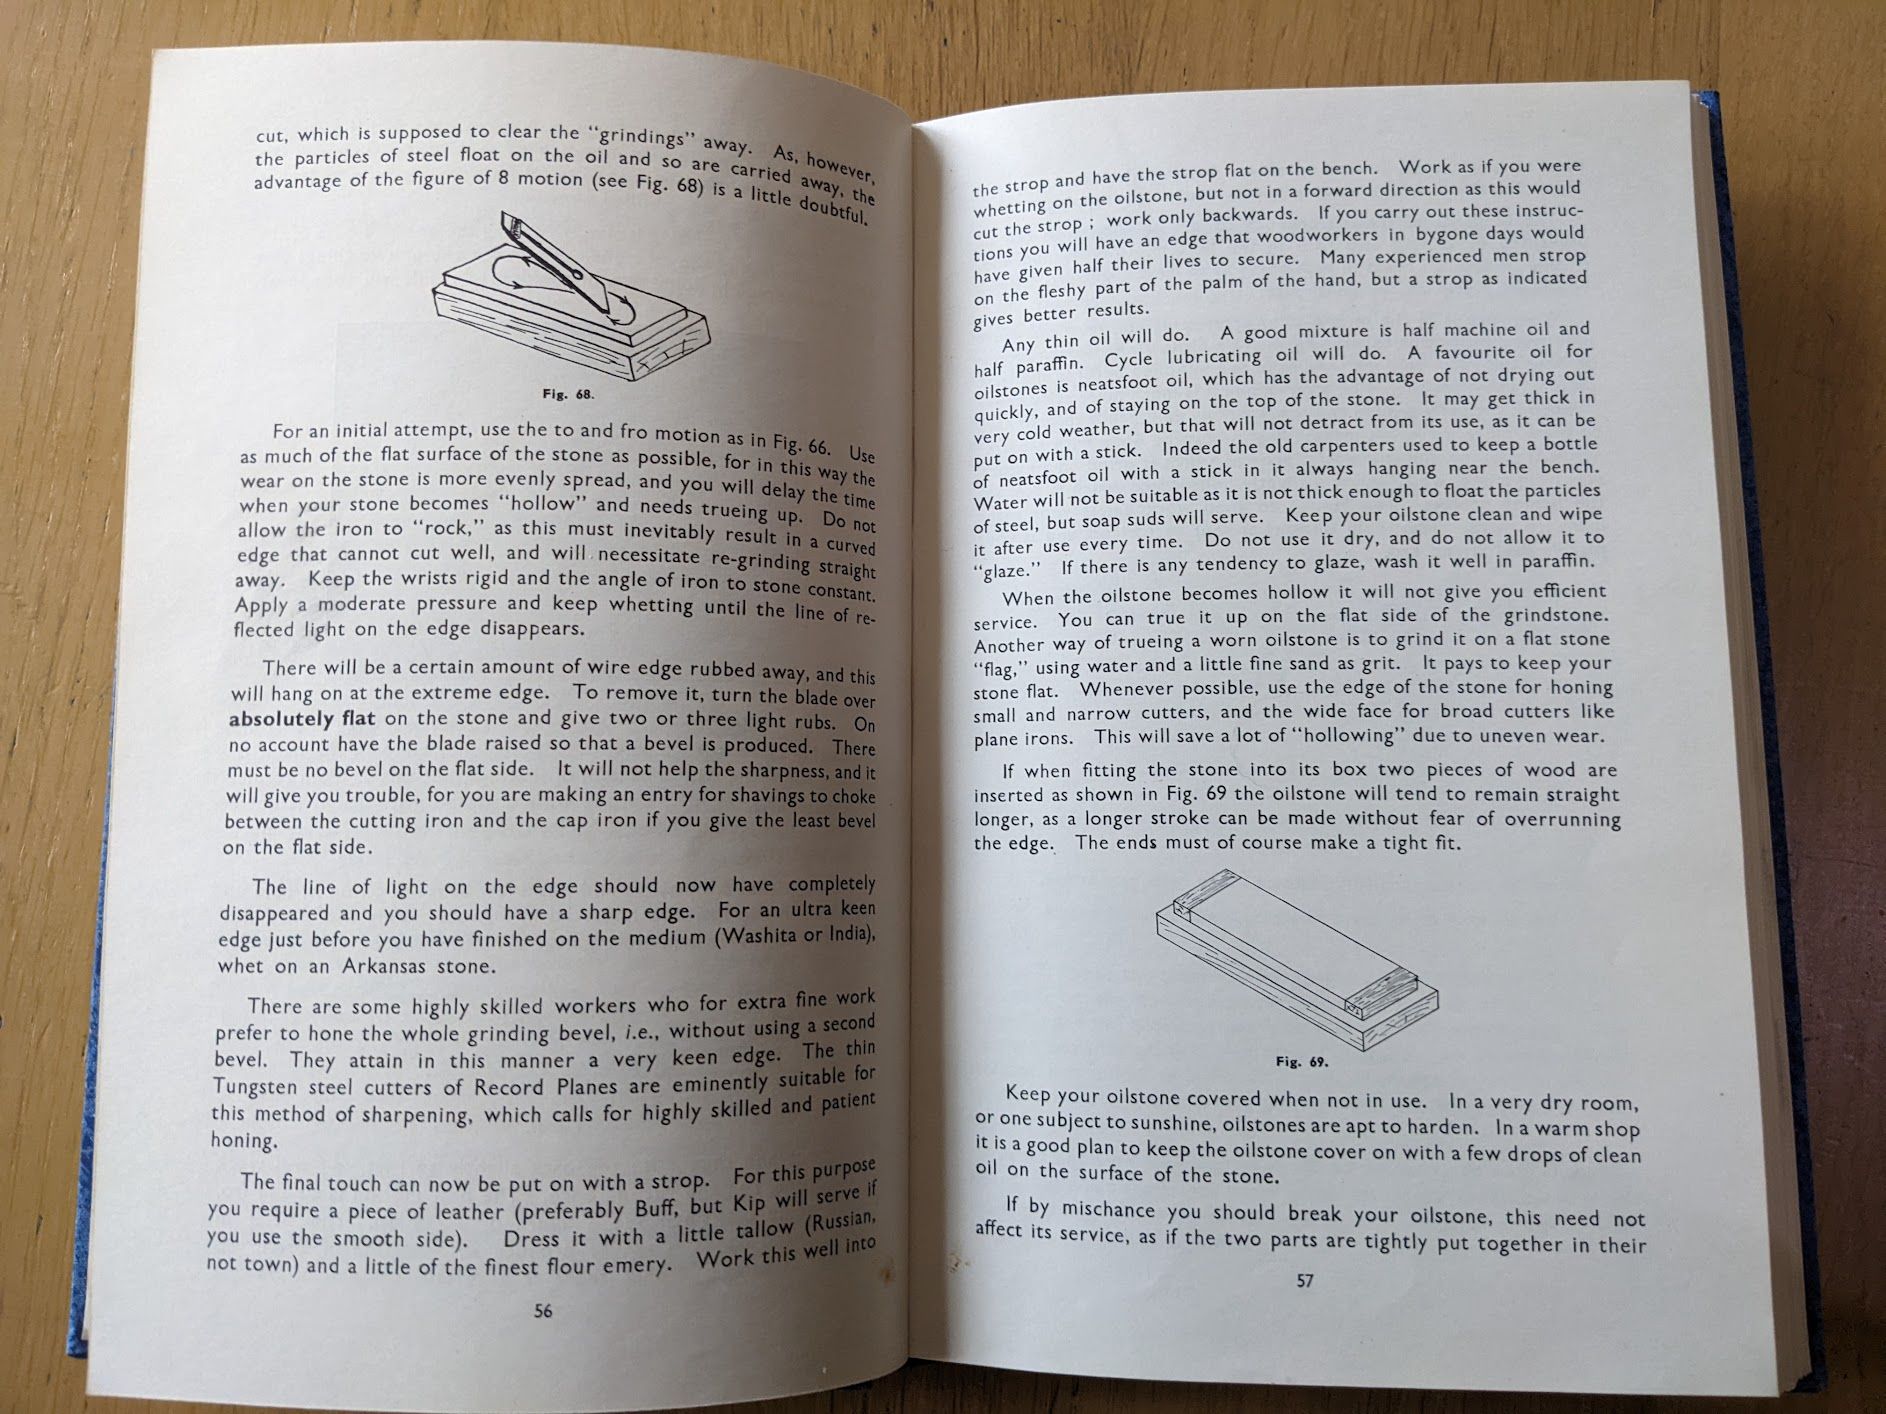
All sharpening methods follow the same basic steps, initially the shape of the bevel is defined by using a coarse abrasive – people often use a mechanical grinder for this stage and, although it can be done without one, this step is generally referred to as grinding as a result. The next step, called honing or whetting, involves the use of progressively finer abrasives until you are satisfied with the sharpness of the edge.
Since the edge is made by the intersection of two surfaces, both surfaces should be smoothed to an equal degree, and you may as well start on the flat face. No one can agree on which side of a plane blade is the back and which is the front – in this blog we’ll refer to the flat face, ie. the one without the bevel, as “the face”.
Working on the flat face
Flattening the faces of plane irons is tedious, so a good question to ask yourself is: do I really need to do it?
The first thing is to consider is the state of the iron itself. This blog post is written from the perspective of someone who only owns second-hand planes and my experience has been that the irons in old planes are generally in pretty rough shape and nearly always suffering from the effects of corrosion. The rust sometimes results in pitting that causes irregularities in the surface that – when near the cutting edge – will interfere with sharpening. One benefit of flattening the face of the iron is that it will remove this damage.
Furthermore, the faces are often not flat also, by which I mean they do not form a level plane (rather than being simply rough, e.g due to rust) . Presumably they left the factory this way or have become out of flat due to previous sharpening activity, and this didn’t bother the previous owner enough for them to do something about it. So why would we care to make improvements now? There are two possible reasons I think, and the impact of each will vary according to just how wonky your blades are:
- when you are sharpening the abrasive process causes a small burr to form (the burr is the wire edge that has been rubbed away from the metal surface and will hang on to the edge) on the opposite side to where you are rubbing. The burr is generally removed by turning over the blade and pulling backwards on the same abrasive. If the face is not flat then it is tricky to remove the burr across the width of the blade as the abrasive will not reach some parts of the burr. It is easy enough to work around this by removing the burr on the palm of your hand – ‘elf and safety notwithstanding – which is rather more forgiving of unflat surfaces that an oilstone or the like.
- if the face is not flat near the cutting edge, then the tip of the cap iron may not register completely and wood shavings can get trapped in the gap created between the two (which in turn can cause the plane mouth to choke with shavings)
This also gives an indication of how much of the face must be flat. Strictly speaking you only need enough of the face to be flat to allow the easy removal of the burr, and also to allow the cap iron to register without any gaps (in other words not much of the face needs to be flat – say a few mm).
So in conclusion, if you have an old iron then you probably have to do something about the face – although perhaps not as much as you think. If you have a new blade it will quite probably already be flat and need no work.
If you are going to do a bit of flattening then you have a couple of choices:
- the first is to abrade the face of the plane iron until you get a smooth and polished surface for say about 1 or 1 ½ inches behind the cutting edge.
- the second is to use a coarse abrasive to get the back reasonably flat – which is to say flat enough near the edge so that the cap iron fits closely without gaps, and then to stop there. After you have honed the bevel then you can come back and work on the flat face again, but in this case rather than polishing a large area you just focus on the bit that is immediately behind the blade, using a technique popularised by David Charlesworth and known in the wacky world of sharpening as The Ruler Trick.The idea is to place a thin ruler under the blade to slightly elevate the back of the plane, such that only the tip touches the abrasive and a small bevel is created on the flat face. This greatly reduces the amount of metal you have to remove to make it smooth. You can read all about it here .
The ruler trick effectively creates a a tiny bevel on the face of the iron. An equivalent process occurs naturally when you attempt to sharpen a plane iron that is not flat near the tip – in these cases the burr is not removed cleanly when the face of plane iron is placed flat on your sharpening medium and there is a a naturally tendency to lift the iron very slightly to compensate. This action will – over time – introduce a small flat area on the face of the iron near the tip. The difference between result of this naturally tendency and the ruler trick is that the latter will repeatably produce a back bevel that is exactly the same size each time.
In terms of labour saving, it is hard to argue with David Charlesworth. I have tried it on a couple of my planes and it really does cut down on otherwise lengthy process to prepare a large part of the blade to the same standard
The other benefit – and I believe a key part of DC’s motivation for proposing it in the first place – is that this approach helps get consistent results by ensuring that of the edge touches the stone so that the burr created is completely removed even if your blade or stone are less than perfectly flat.
One note of caution: you may recall from an earlier post bench planes – the cap iron that the cap iron can be used to reduce tear-out by setting it very close to the cutting edge and, as explained above, the Ruler Trick will create a tiny bevel on the same surface where the cap iron mates. Let’s say that – depending on where you place the ruler – you are creating a bevel of between 1 and 1.5 mm then this may interfere with the cap iron setting when the tip of the cap iron is over some of the bevel, since the resulting gap may be cause savings to become trapped. In practice this issue can be avoided by undercutting the cap iron slightly, but it is another consideration to be borne in mind.
This problem is noted in Planecraft –
In defence of proponents of the ruler trick they are advocating the creation of a repeatable bevel and are able to control the size of the bevel by using a very fine stone and selecting exactly where to place the ruler, whereas Hampton is warning against more general sloppy practice.
For most of my planes and chisels I took the long road and flattened and polished about an 1” or 1 1/2” of the face, taking solace in the thought that it only needs to be done once, and enjoying a sense of smug satisfaction when I had finished.
Get Flattening
There is not a lot to say about technique: find the flattest surface you can, pick your abrasives and rub away.
I found it was best to use sandpaper to get the back reasonably flat and then to refine on diamond stones, followed by a strop.
Depending on the state of the iron this can take a long time, particularly since many blades contain a small hump on the back. You can read the next post for some more information on abrasives.
If you use sandpaper here are a few tips:
- You’ll need a “reasonably” flat surface (c.f bench planes – flattening the sole)
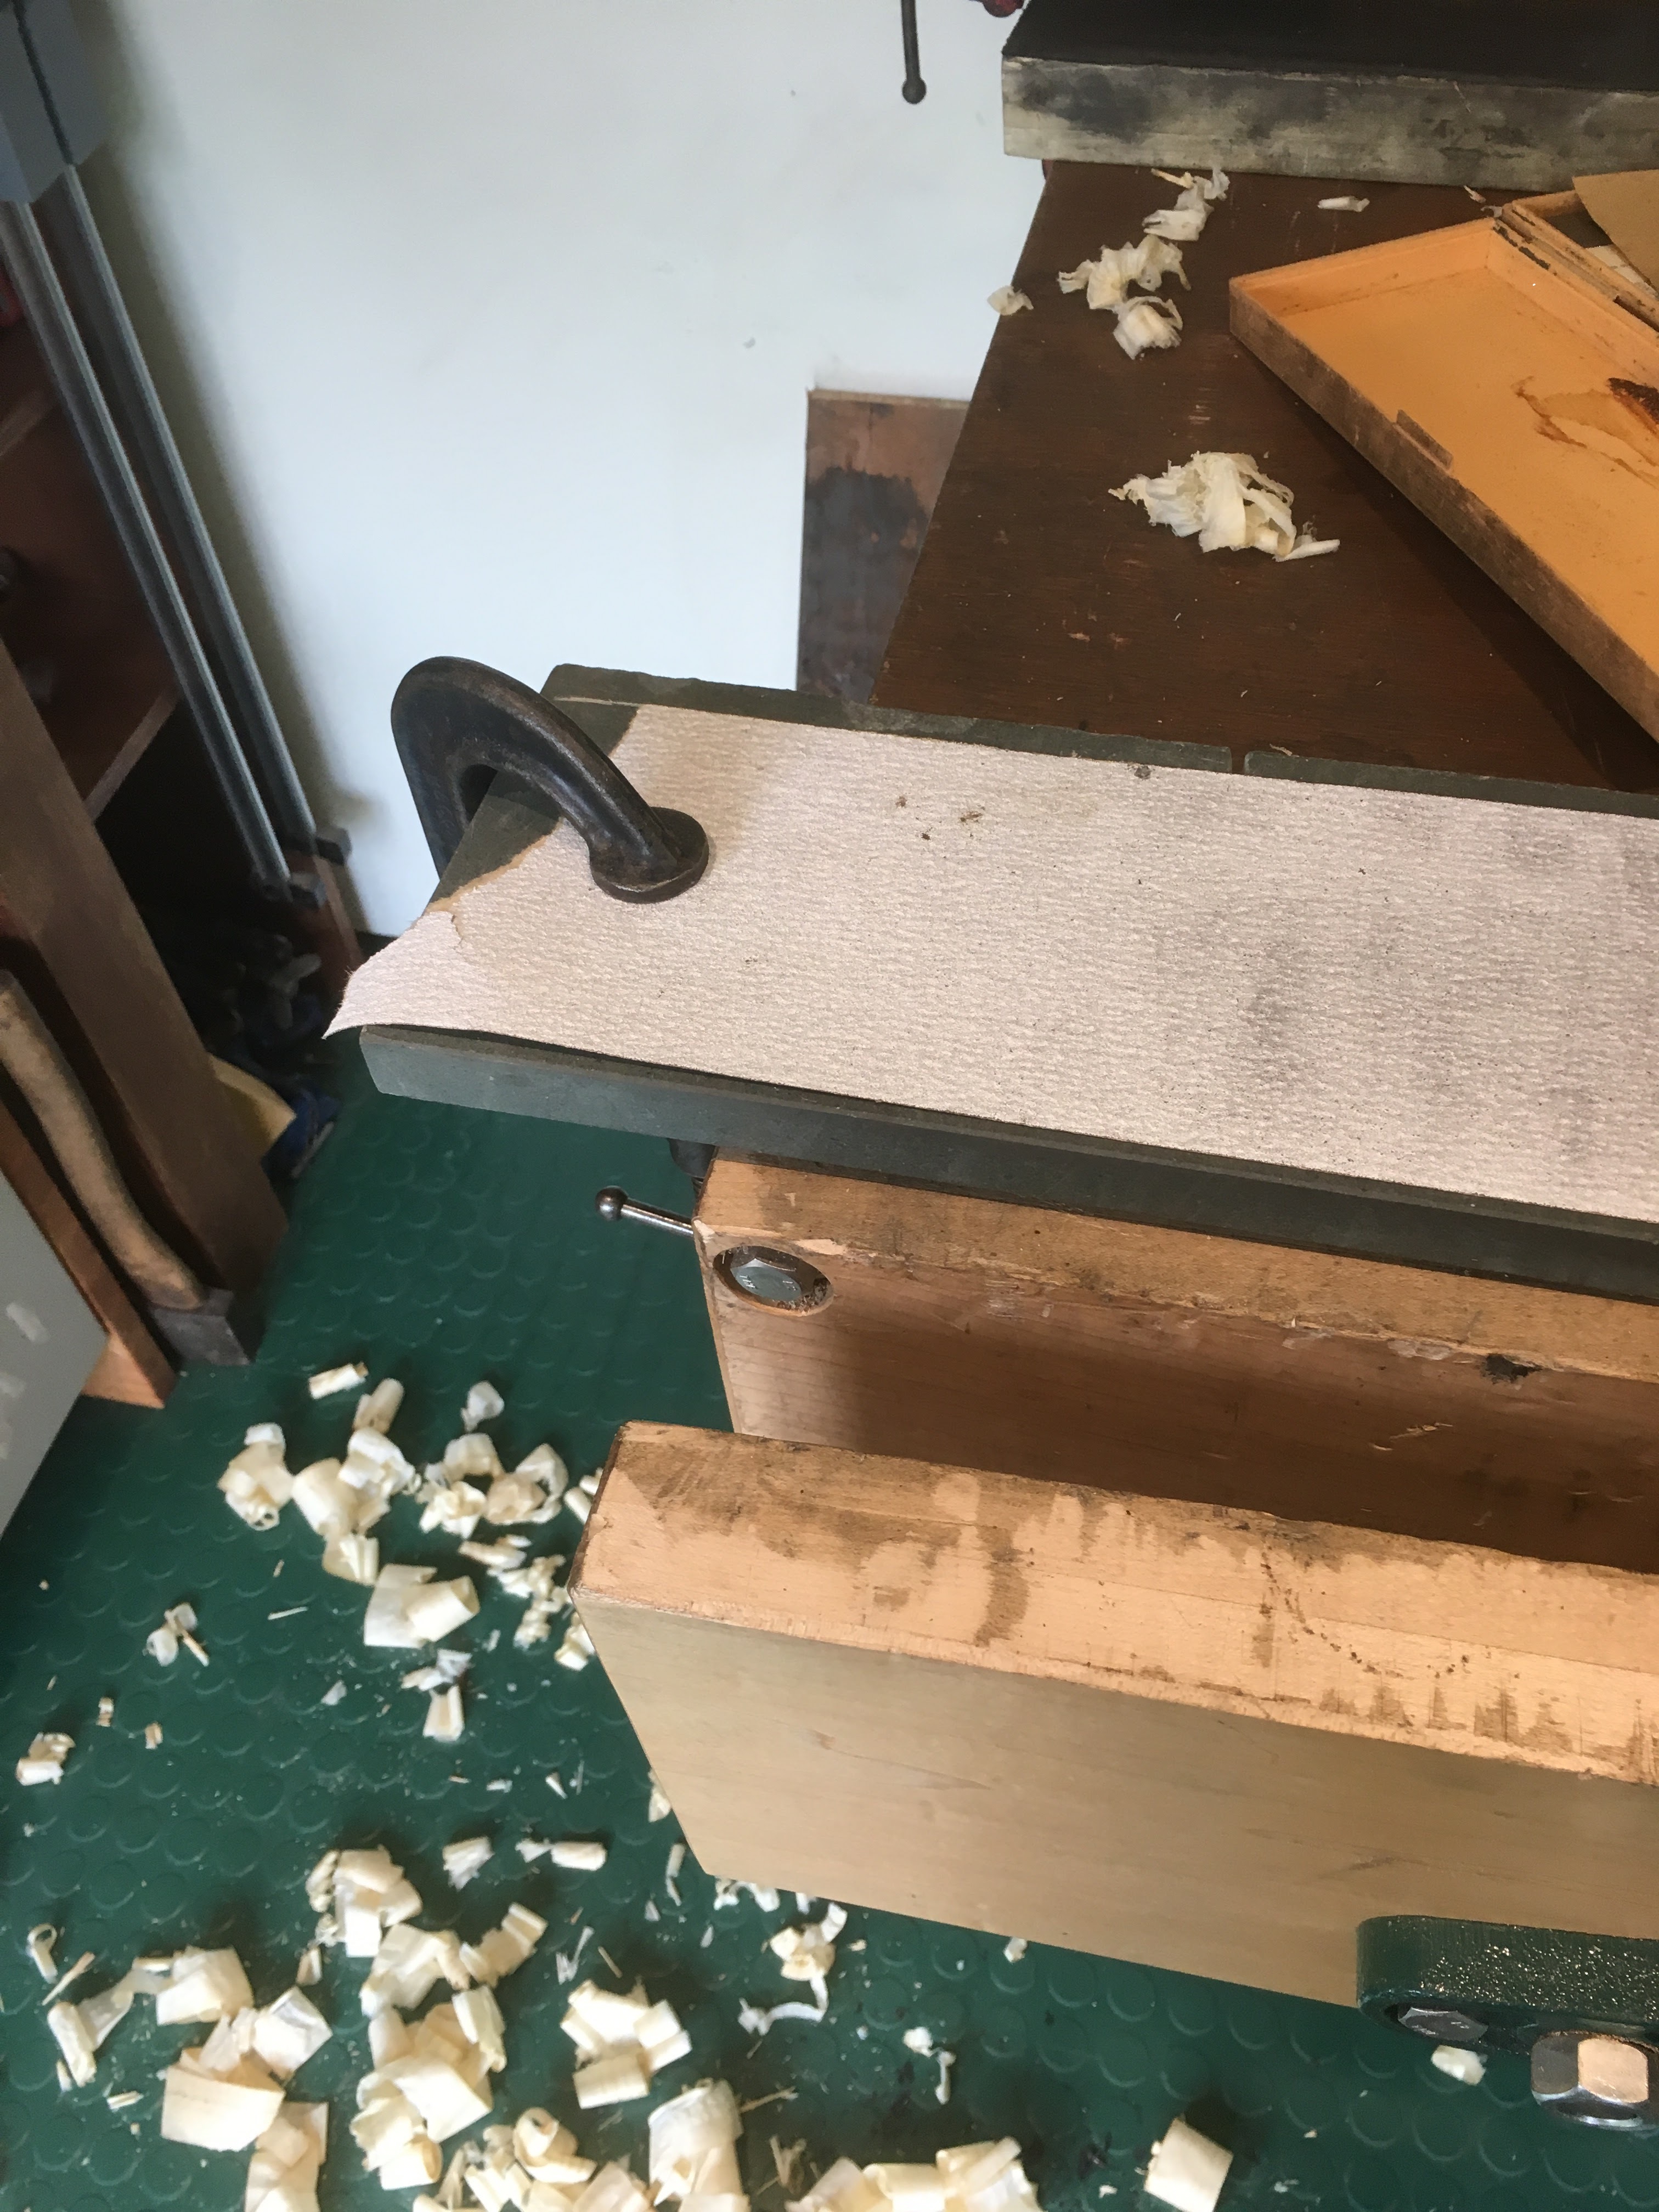
- You need to fix your sandpaper firmly to your flat surface – I used G cramps to clamp the ends of a roll of sandpaper. However, if you only use mechanical means to hold the paper, it is very difficult to stop it riding up and taking the edges off the surface you are trying to keep flat, thus undoing all your hard work. A few dots of contact adhesive (e.g 3m 77 spray adhesive or even Pritt Stick at a pinch) helps to prevent this.
- Don’t rush: if you inadvertently tilt the blade on the abrasive it is very easy to “dub” the corners such that you remove a relatively large amount of metal where the corner is pressed hard to the abrasive. This then means you have to remove a lot more metal from the rest of the face to get it all to the same level again. Very annoying.
- Be patient: the 2nd picture above is fairly typical where there are one or more low spots on the face. It is a dispiriting fact that, as the size of the flattened area increases, so does the amount of metal you have to remove, meaning the longer you work, the slower your rate of progress will get. Persevere and you will eventually have a completely flat surface that can be polished up as you can see in the final picture above.
What happened in the olden days?
My guess is that generally people who used these tools to earn a living did not spend hours polishing the backs of their plane irons. I do not have a lot of evidence for this, other than a not particularly scientific survey of the old irons I own (only 2 of about 20 show any signs of having being flattened) . Obviously this is a small sample and of course there is no way to know if they were ever used by a professional tradesman. I also have not been able to find any specific instructions in old wood working tomes about flattening the backs of plane irons, although they are all full of advice on sharpening the bevel. Obviously none of this is concrete proof one way or the other, but it seems to me that a plausible explanation for the lack of evidence supporting ye-olde-back-flattening is that it rarely happened.
What could be the explanation for this? Quite possibly it was just a fact that irons generally left the factory already ground “flat enough” requiring little work and that, where manufacturing problems did need adjusting for, the owner would spend the minimal amount of time possible to correct it (e.g by raising the iron ever so slightly when removing the burr) or would simply reject them.
Read here to find out about working on the bevel and creating a sharp edge.
Richard Maquire's top tips
I am in the process of watching Richard Maquire’s entertaining video series on sharpening and have learned several new things, the first of which is you can significantly reduce the flattening time by using a hammer to carefully move the metal of the blade to remove low points. For instance, where the corners have been rounded over by a previous owner, he gently taps the very tips to bring them back in line with the rest of the face. Based on my experience using only sandpaper and stones to get the face flat this can save hours of work. To prove the point he prepares an old Record iron ‘live’ while explaining how he goes about it, reducing an exercise that has taken me hours to about 10 mins.
He also explains that the typical ‘humps’ you find on the faces of old plane irons have generally been introduced over the years as the blades take on the shape of the (usually unflat) stones used to keep them sharp.
There is a mixture of free and paid videos on his web site – highly recommended!