If you buy a new plane from Lie Neilsen, Veritas or some other high-end maker then you can rest assured it has been manufactured to very high tolerances and therefore won’t need any work (and if it isn’t you can always return it and ask for a replacement). However, in the event you have acquired a second-hand plane or a cheap new one, then it is possible you will find the sole is far from flat due to wear and tear in the former case and poor manufacturing in the latter. The good news is you can make it demonstrably flatter with little effort.
In the previous post we found out how to check your plane’s sole for flatness and make up your own mind about whether this is worth all the bother.
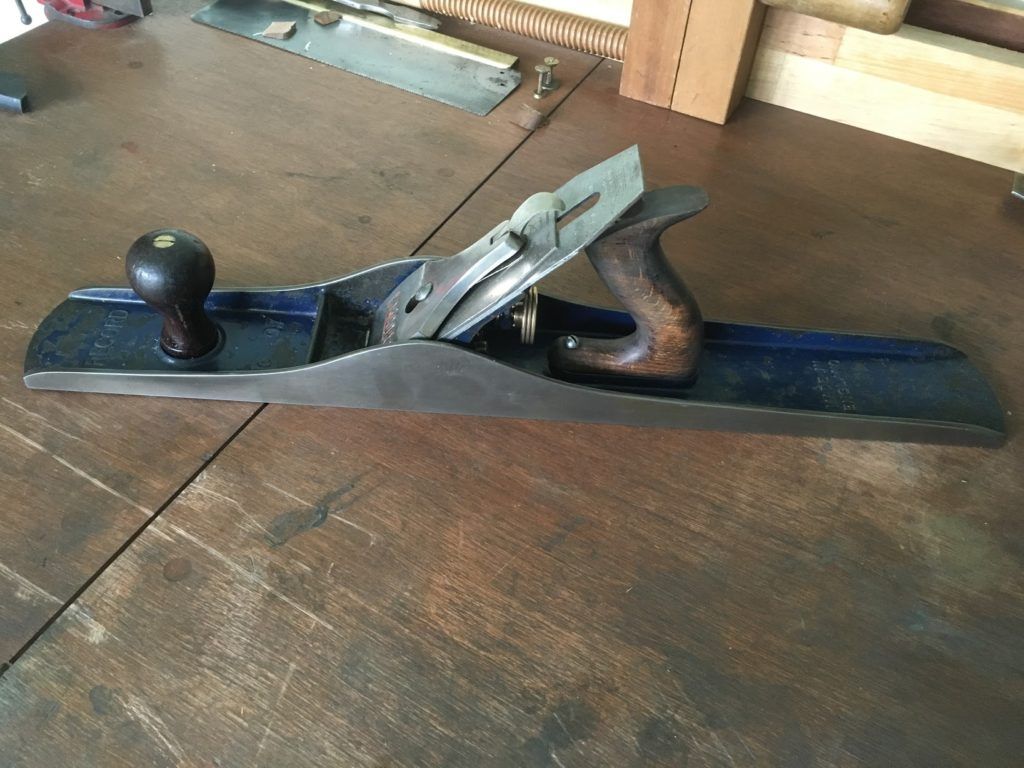
I ended up doing some level of flattening on all my second-hand planes bar the very last one that I purchased which had apparently been sorted out by a previous owner. This was a stroke of luck since it was a Record #07, or a jointer plane (jointers are designed to create flat surfaces, and are therefore much longer than other planes). This one was made in the 1930s and the blade had been sharpened so often there was only ¼” of the usable metal remaining so I knew it had been put to good use in at least one of its past lives and hope I will put it to similar good use in the future.
The flattening process is straight forward:
- get hold of the flattest surface you can find
- attach some 80 or 120 grit abrasive paper to it
- rub the plane back and forward until the wear pattern is even across all of the sole
There is not a lot else to know, other than the fact that plane soles deform slightly under pressure[1], so it is advisable to do the sanding with normal amounts of pressure applied to the handle and knob and with the frog installed so that this distortion is taken into account as you work.
flat working surfaces
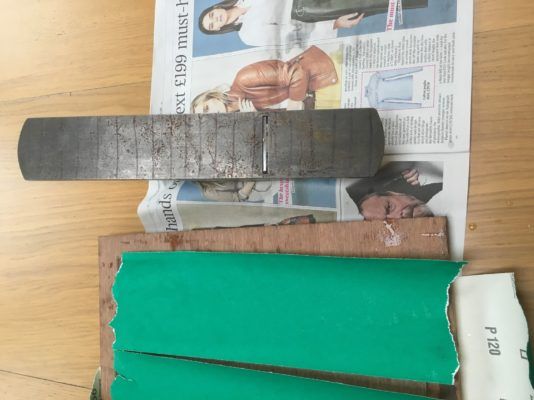
People use a variety of “flat” surfaces. You can buy marble plates made to engineering tolerances of flatness – nice if you have one, but not necessary if you are just aiming for “flat enough”. Note that, while In the previous post I remarked facetiously that it was possible to achieve Lie Neilsen levels of flatness with your el-cheapo ebay plane, most of us are unlikely to have access to the engineering equipment needed to establish whether this is true or not. Perhaps a more realistic goal is really just to make it flatter than when your received it.
Initially I bought some thick plate glass, which you can get from Workshop Heaven if you are in the UK, although it is a little too small for anything larger than a #4 plane. Eventually I got hold of a piece of marble from an old fireplace which is pretty flat and much more convenient to use. Others have been successful finding flat bits of mdf or large ceramic floor tiles.
Abrasive paper
The best I found was also from Workshop Heaven – aluminium oxide 120 grit in 5M lengths and very reasonably priced (£2.99 a roll at the time of writing). It is important to stop the paper from lifting up from the flat surface, else it will quickly remove material from the leading edge that pushes into the raised paper, thus making more flattening work for you. I found it easiest to unroll a stretch of paper and to use quick releases clamps or tape to hold the ends to my workbench. Others use contact adhesives, which looks very effective, at least as far as I can tell from watching videos of people using it (edit – I eventually experimented with Pritt Stick, which worked surprisingly well!).
Regarding wet and dry paper, which many people swear by, I tried it but found the paper quickly wears out or tears and I was not able to effectively hold it down by simply wetting the back of the paper, despite reading in many places that this works. It is also far more expensive than the rolls of sandpaper.
Flattening – checking your progress
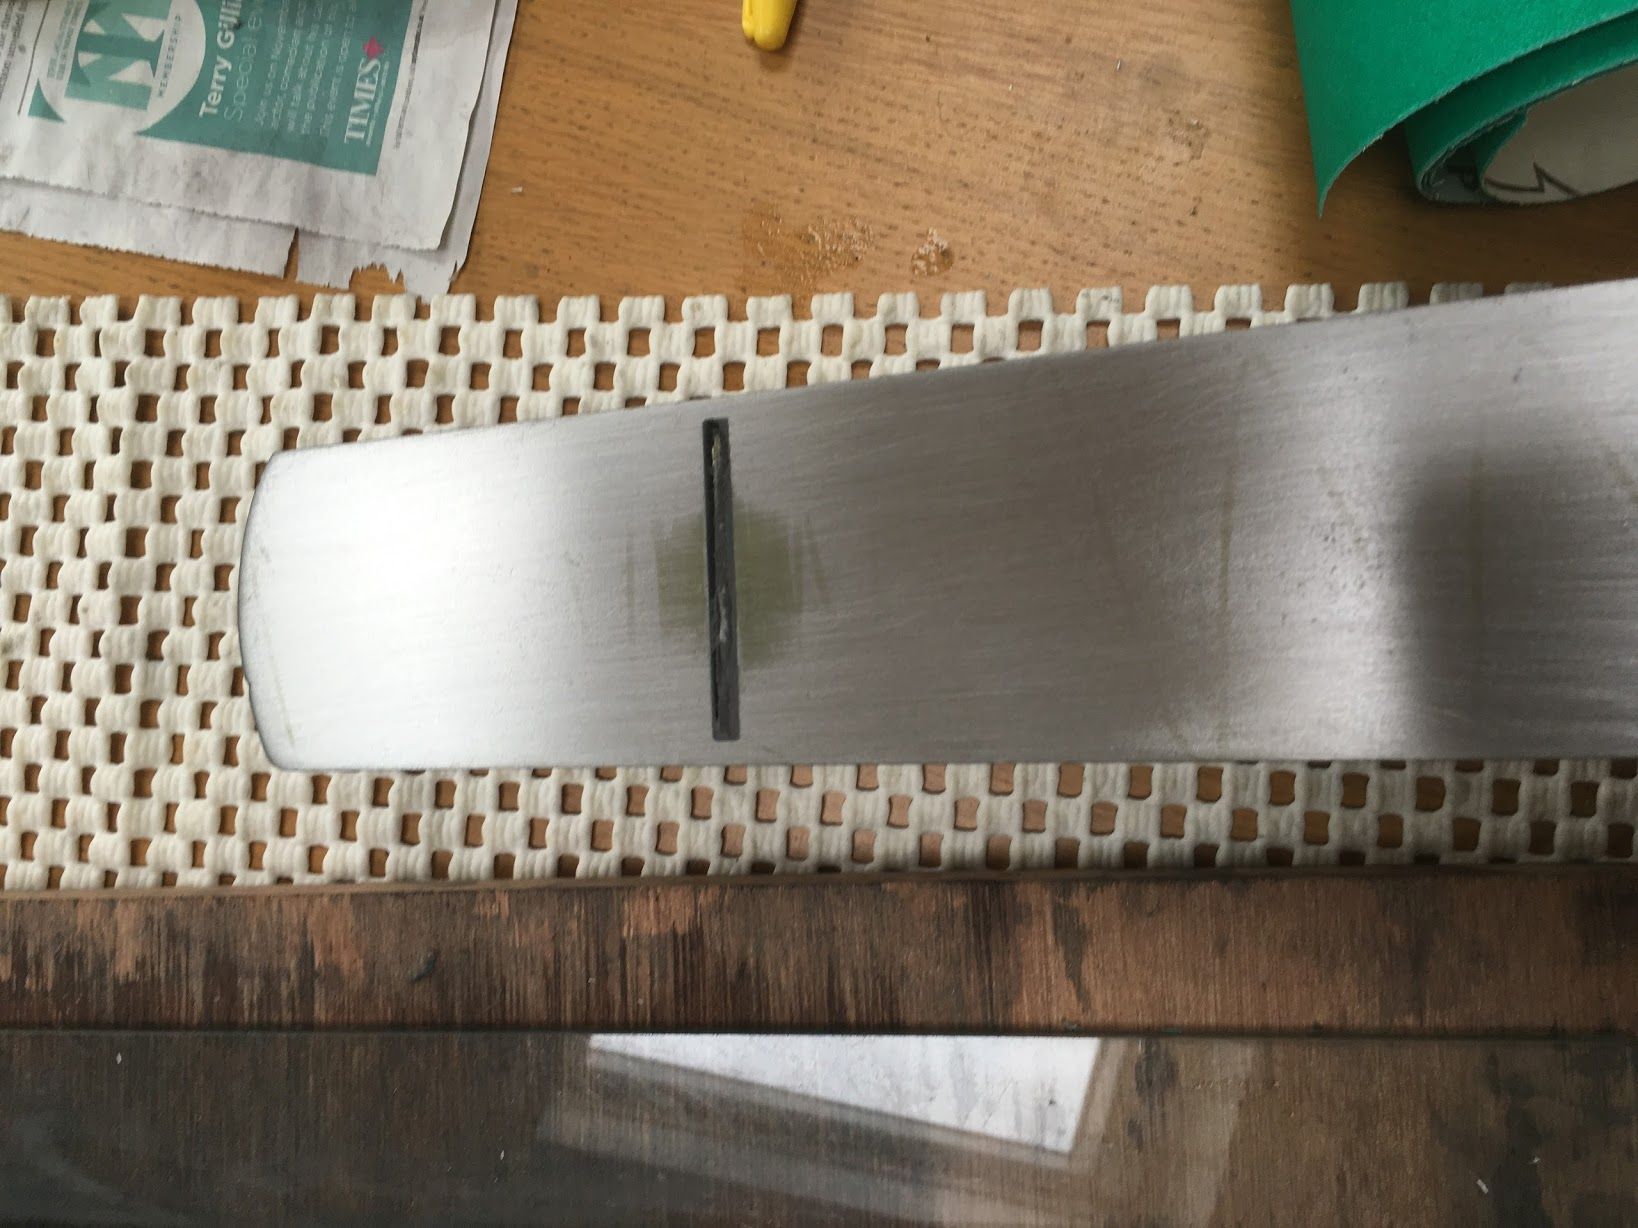
If you like you can scribble with a felt tip on the sole of the plane to more easily see where material is being removed, however, even without this it is pretty obvious which parts of the sole are not yet in contact with the abrasive as you can see in the pics below.
You will find that the metal particles quickly clog up your abrasive paper and this reduces the rate it removes material. You can actually wet ordinary abrasive paper, just like wet and dry , to help carry the particles away from the paper (white spirit keeps the paper intact for longer than water) but it is messy. For a while I used a magnet inside a small plastic bag to remove the metal particles, but in the end found it easier just to use a hoover to clean up the paper now and then.
The amount of work you will need to do is largely dictated by the size of the plane and, of course, how out of flat it is and how flat you want it to end up. As you work and the sole gets closer to being flat the amount of material you need to remove increases and so the harder it gets. Dispiriting, but persevere and you will get there in the end – my planes took between 45 mins and 4 hours depending on how wonky they were.
finishing up
Paul Sellers likes to add a small bevel to the outside ¼” of the sole[1]. As a minimum you may want to gently ease off any sharp corners with a bit of abrasive paper or a file to prevent them scratching the wood you are working on.
You can also use 220 grit paper to create a smoother finish, although the sole gets polished in use anyway.
end results
It is interesting to reflect on the fact that, at least on the basis of my small unscientific survey of 7 planes manufactured between the 1930-1950s very few of them were anything like flat, at least compared to the reference surfaces I was using. Although some of this may be the result of wear and tear, what I suspect, but will never know for sure, is that they were never perfect and the original owners of these planes just never found it necessary to flatten them – something to consider before you embark on a multi-hour flattening session.
In a similar vein, I think you can safely ignore all the doom mongers on the internet who will tell you that you will most likely make a plane worse by attempting to flatten it without suitable engineering facilities and expertise. Try it for yourself and you will see that it would be very hard to make things worse, and that it is quite obvious that you are making the sole flatter, albeit perhaps not to the level of engineering tolerances our engineering friends may expect.
Other approaches
Other than simply not bothering with this flattening malarkey at all at all – a perfectly reasonable option according to many – the only other approach to flattening your sole involves ”scraping” . With this technique you reduce high spots on the sole using a hard steel edge to remove material at isolated points. The proponents claim it is quick, effective and more accurate than using abrasives. In my case I concluded that, since it looked like it would require significantly more skill than simply rubbing the plane up and down on flat abrasive, it was safer to stick with the simpler approach. There is a good description of the process here.
By the way, the engineering term for what we have been doing – rubbing two surfaces together with abrasive between them – is lapping.
References
| 1⏎ | peter Sellers has a good blog post demonstrating this and a video of him flattening a #4 plane |