The CT90 has a simple ignition system, consisting of a power source (a battery), a switching device to start and stop current flow at set intervals (contact breaker points), a device to produce a high voltage (ignition coil) and a spark plug.
This is the wiring diagram for the ignition system on a 1969 K1 model:
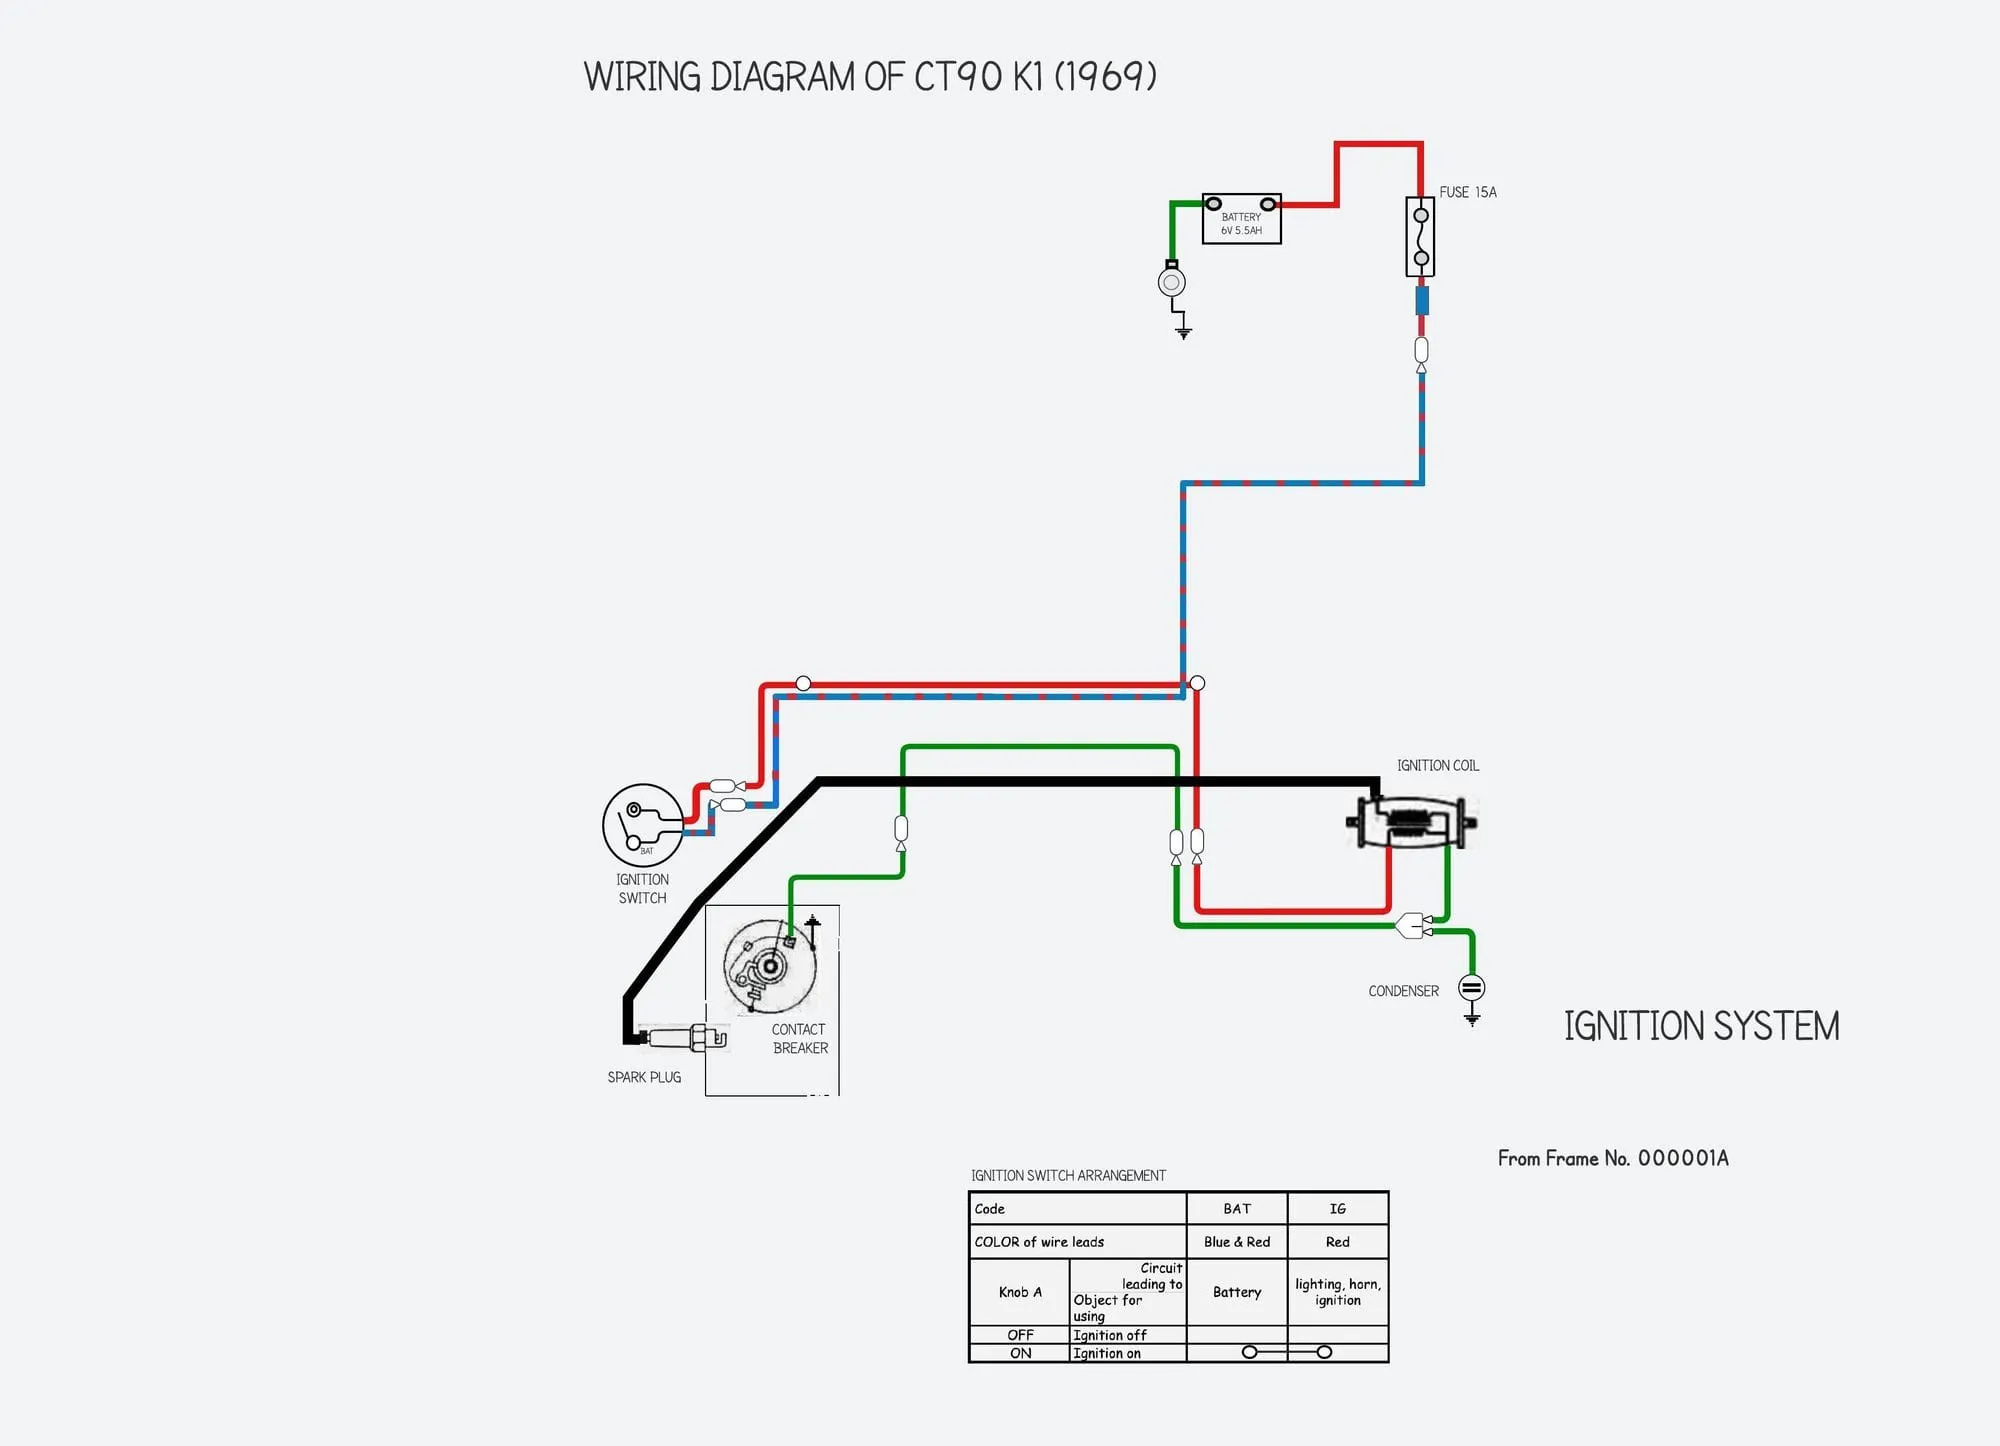
The ignition wiring in the later models is identical, although you do sometimes come across ignition coils with a black & white (rather than red) input wire.
As you can see from the diagram the power for the spark comes from the battery, and therefore this type of ignition system is commonly known as battery ignition or Kettering Ignition (named after Charles Kettering who invented it in in the early part of the 20th century).
Battery Ignition
Battery ignition was invented in 1911. Until the mid 1960s introduction of the CM90, Honda used an even older system called magneto ignition that dated from the turn of the 20th Century. Although there are pros and cons to each solution, when motorcycle manufacturers moved over to battery ignition in the 1950s and 1960s it was generally regarded as a more reliable (and cheaper) system.
The main disadvantage of battery ignition is that if the battery is not sufficiently charged the quality of the spark is effected and this can cause the bike to run poorly. Sometimes the resulting problems announce themselves when the battery is running low but still has enough charge to run the ignition. When this happens the bike will run properly until an extra demand is placed on the battery - for instance holding your foot on the brake - at which point the ignition system no longer has sufficient current and the engine stalls or misfires.
Here are the components involved:
Ignition Coil
Creating a spark requires potential energy of thousands of volts. Since motorcycle electrical systems run at 6 or 12 volts a device is needed to transform the low voltage to a high voltage, and this is the job of the ignition coil.
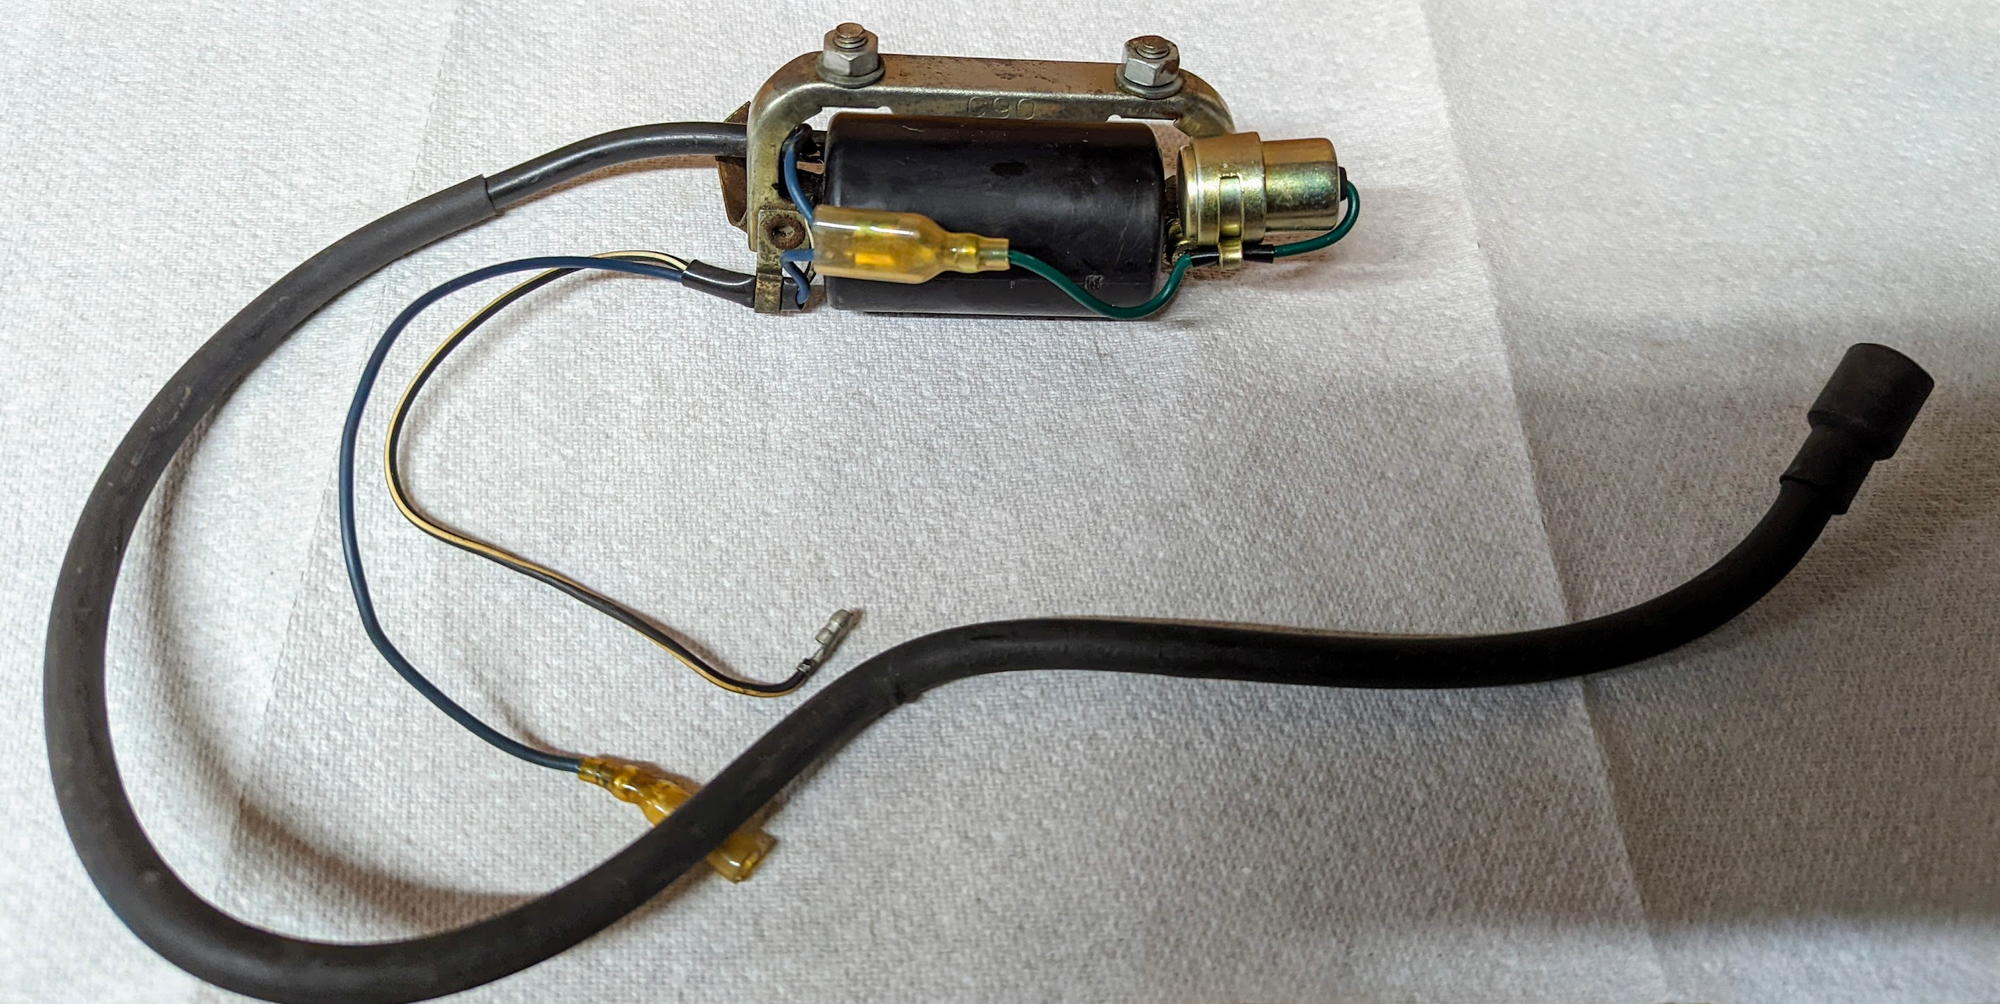
As the electrical current passes from the battery through the ignition coil (which is made up of an iron core, primary and secondary coils) a magnetic field is created around the primary coil.
The magnetic field is effectively a store of energy which can then be converted back into electricity. When a coil of wire is exposed to a magnetic field and the magnetic field then changes it creates an electric current in the coil of wire. This process is known as ‘inductance’.
When a spark is required the contact breaker stops the flow of electricity into the primary coil causing the magnetic field to collapse. The collapsing magnetic field from the primary coil cuts through the secondary coil's windings and induces a voltage in each turn and - because there are thousands of turns in the coil - this transforms the original 6-volt supply into the high voltage needed by the spark plug.
The very high voltage created in the secondary winding is sufficient to cause the electric current to arc across the gap between the spark plug electrodes, creating the spark.
It is uncommon for ignition coils to fail but, if you need to find a replacement, be sure to get one designed for a 6v bike DC ignition systems - sellers sometimes mislabel coils intended for 12v AC ignition systems.
Condenser
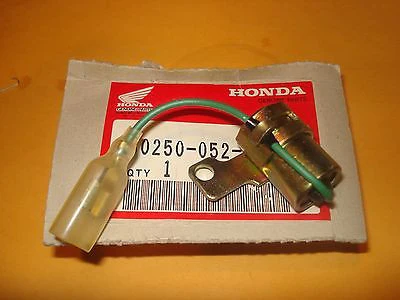
The Honda manuals say the condenser (a device that can store electrical energy) has two functions in the system
"the condenser prevents arching at the points and helps to hasten the collapse of the magnetic field...... and a symptom of a failing condenser is therefore increased arching across the points when the engine is running and consequent hard starting or poor running.
The condenser can be fitted at any point between the coil and the points, but in the original configuration is fitted on the back of the coil - thereby making it equally annoying to remove, requiring the removal of the petrol tank first.
Spark plug
Honda specified a NGK D8HS spark plug for the CT90 sold in the US (this model was superseded by the D8HA - either can be used).
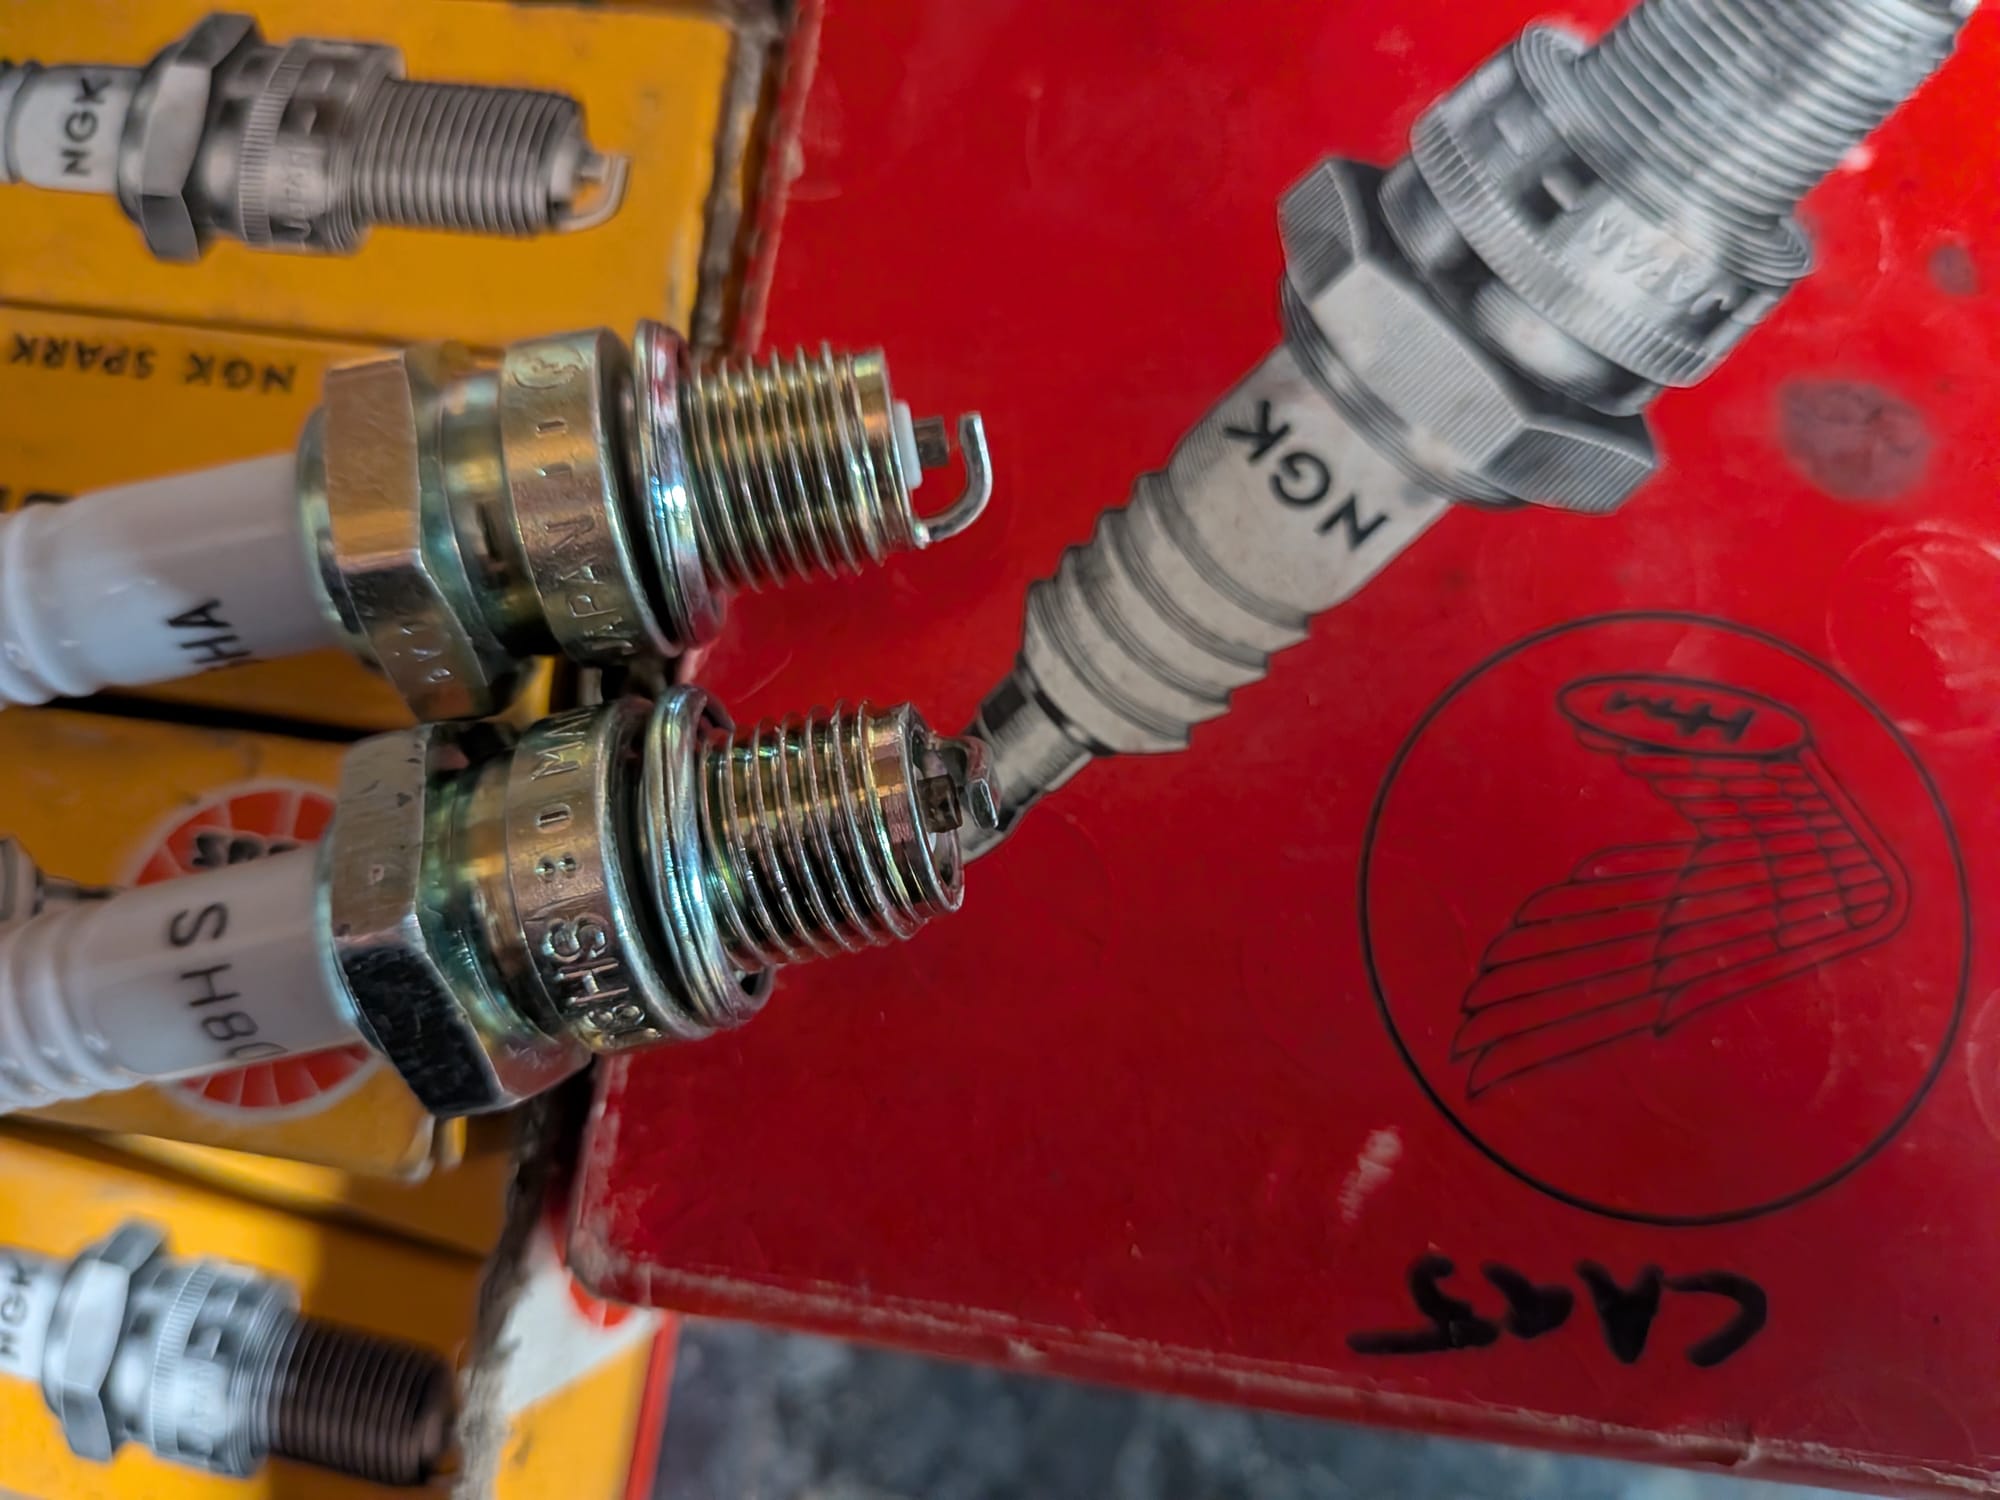

The 'HA' version of the plugs have a longer electrode - see top left - but can be used safely and were specified in some Honda 90s sold in other markets outside the US.
In some markets the DR8HS was specified - the 'R' stands for resistor, and these plugs were specified where legislation required their use in order to minimise EFI interference with unshielded electrical equipment like radios and TVs.
Many people recommend avoiding using a resistor spark plug cap when also using a resistor plug - at best the additional protection against EFI radiation is redundant and, at worst, the doubled-up resistance weakens the spark to the point it makes it more difficult to start the bike.
Most NGK caps produced these days contain a 5kΩ or 10kΩ resistor - the last time I looked the only non-resistor cap they still produced was the LZFH.
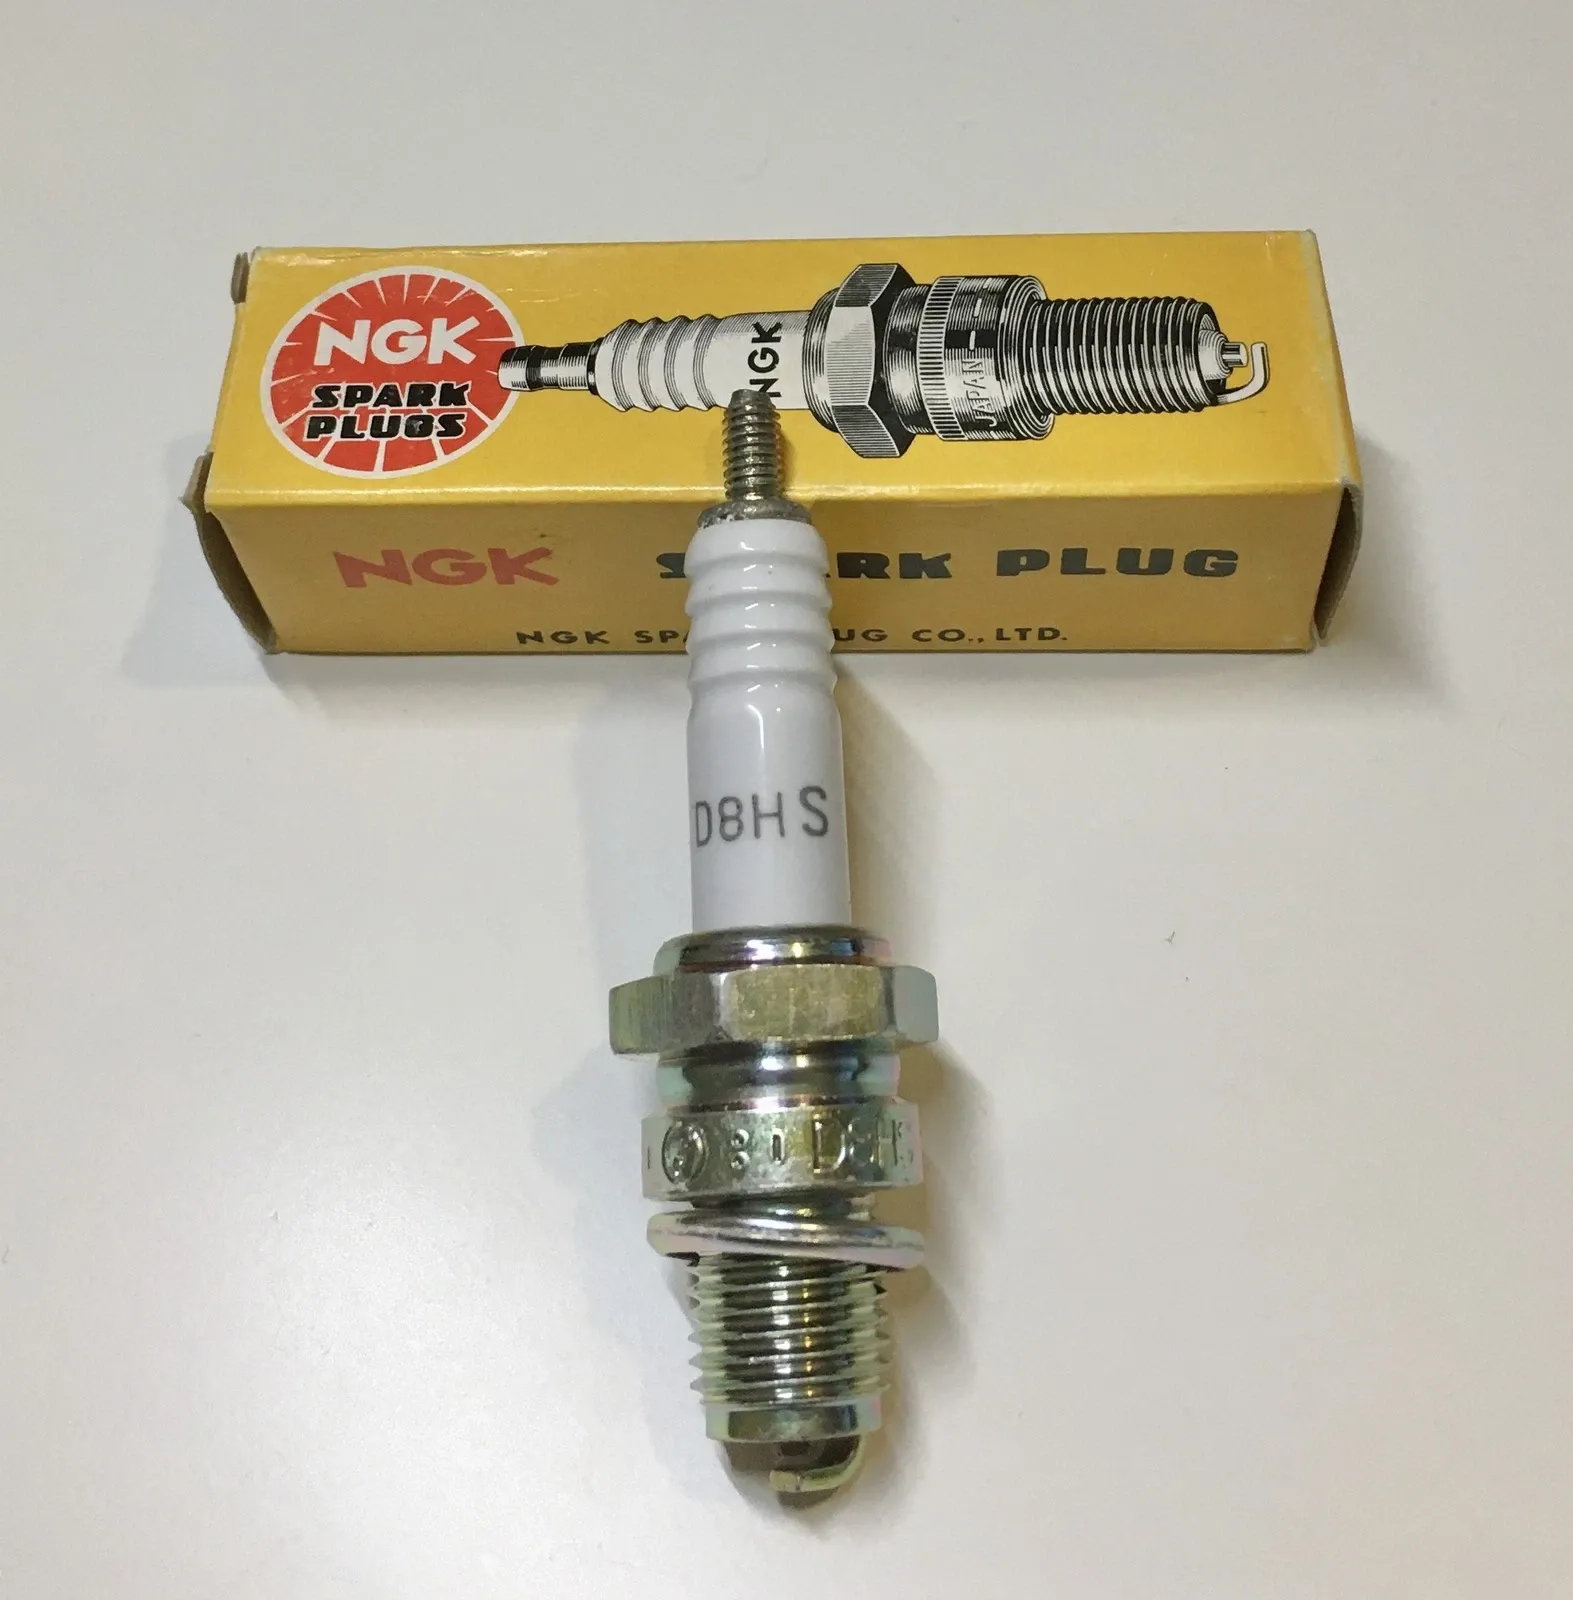
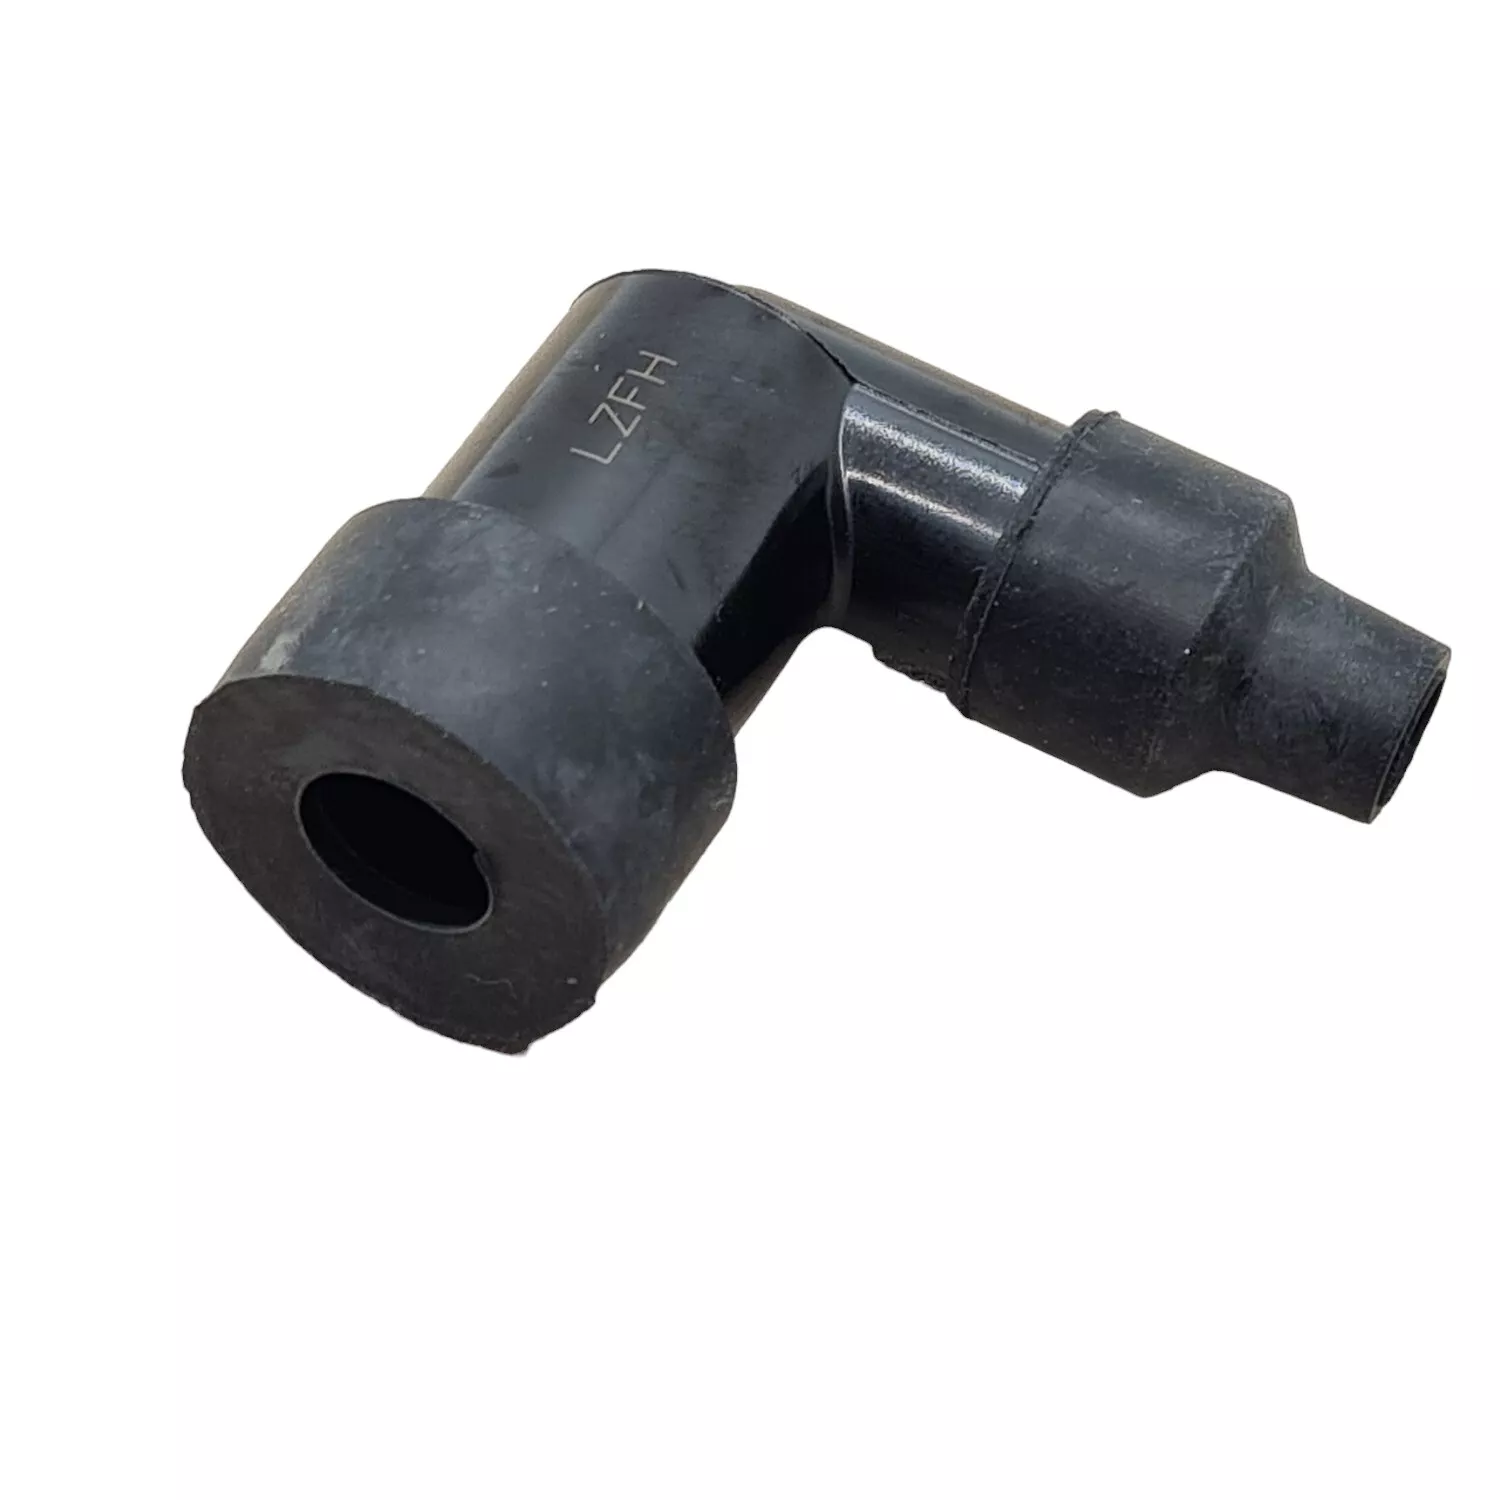
NGK D8HS spark plug / non resistor cap - NGK LZFH
Ignition timing
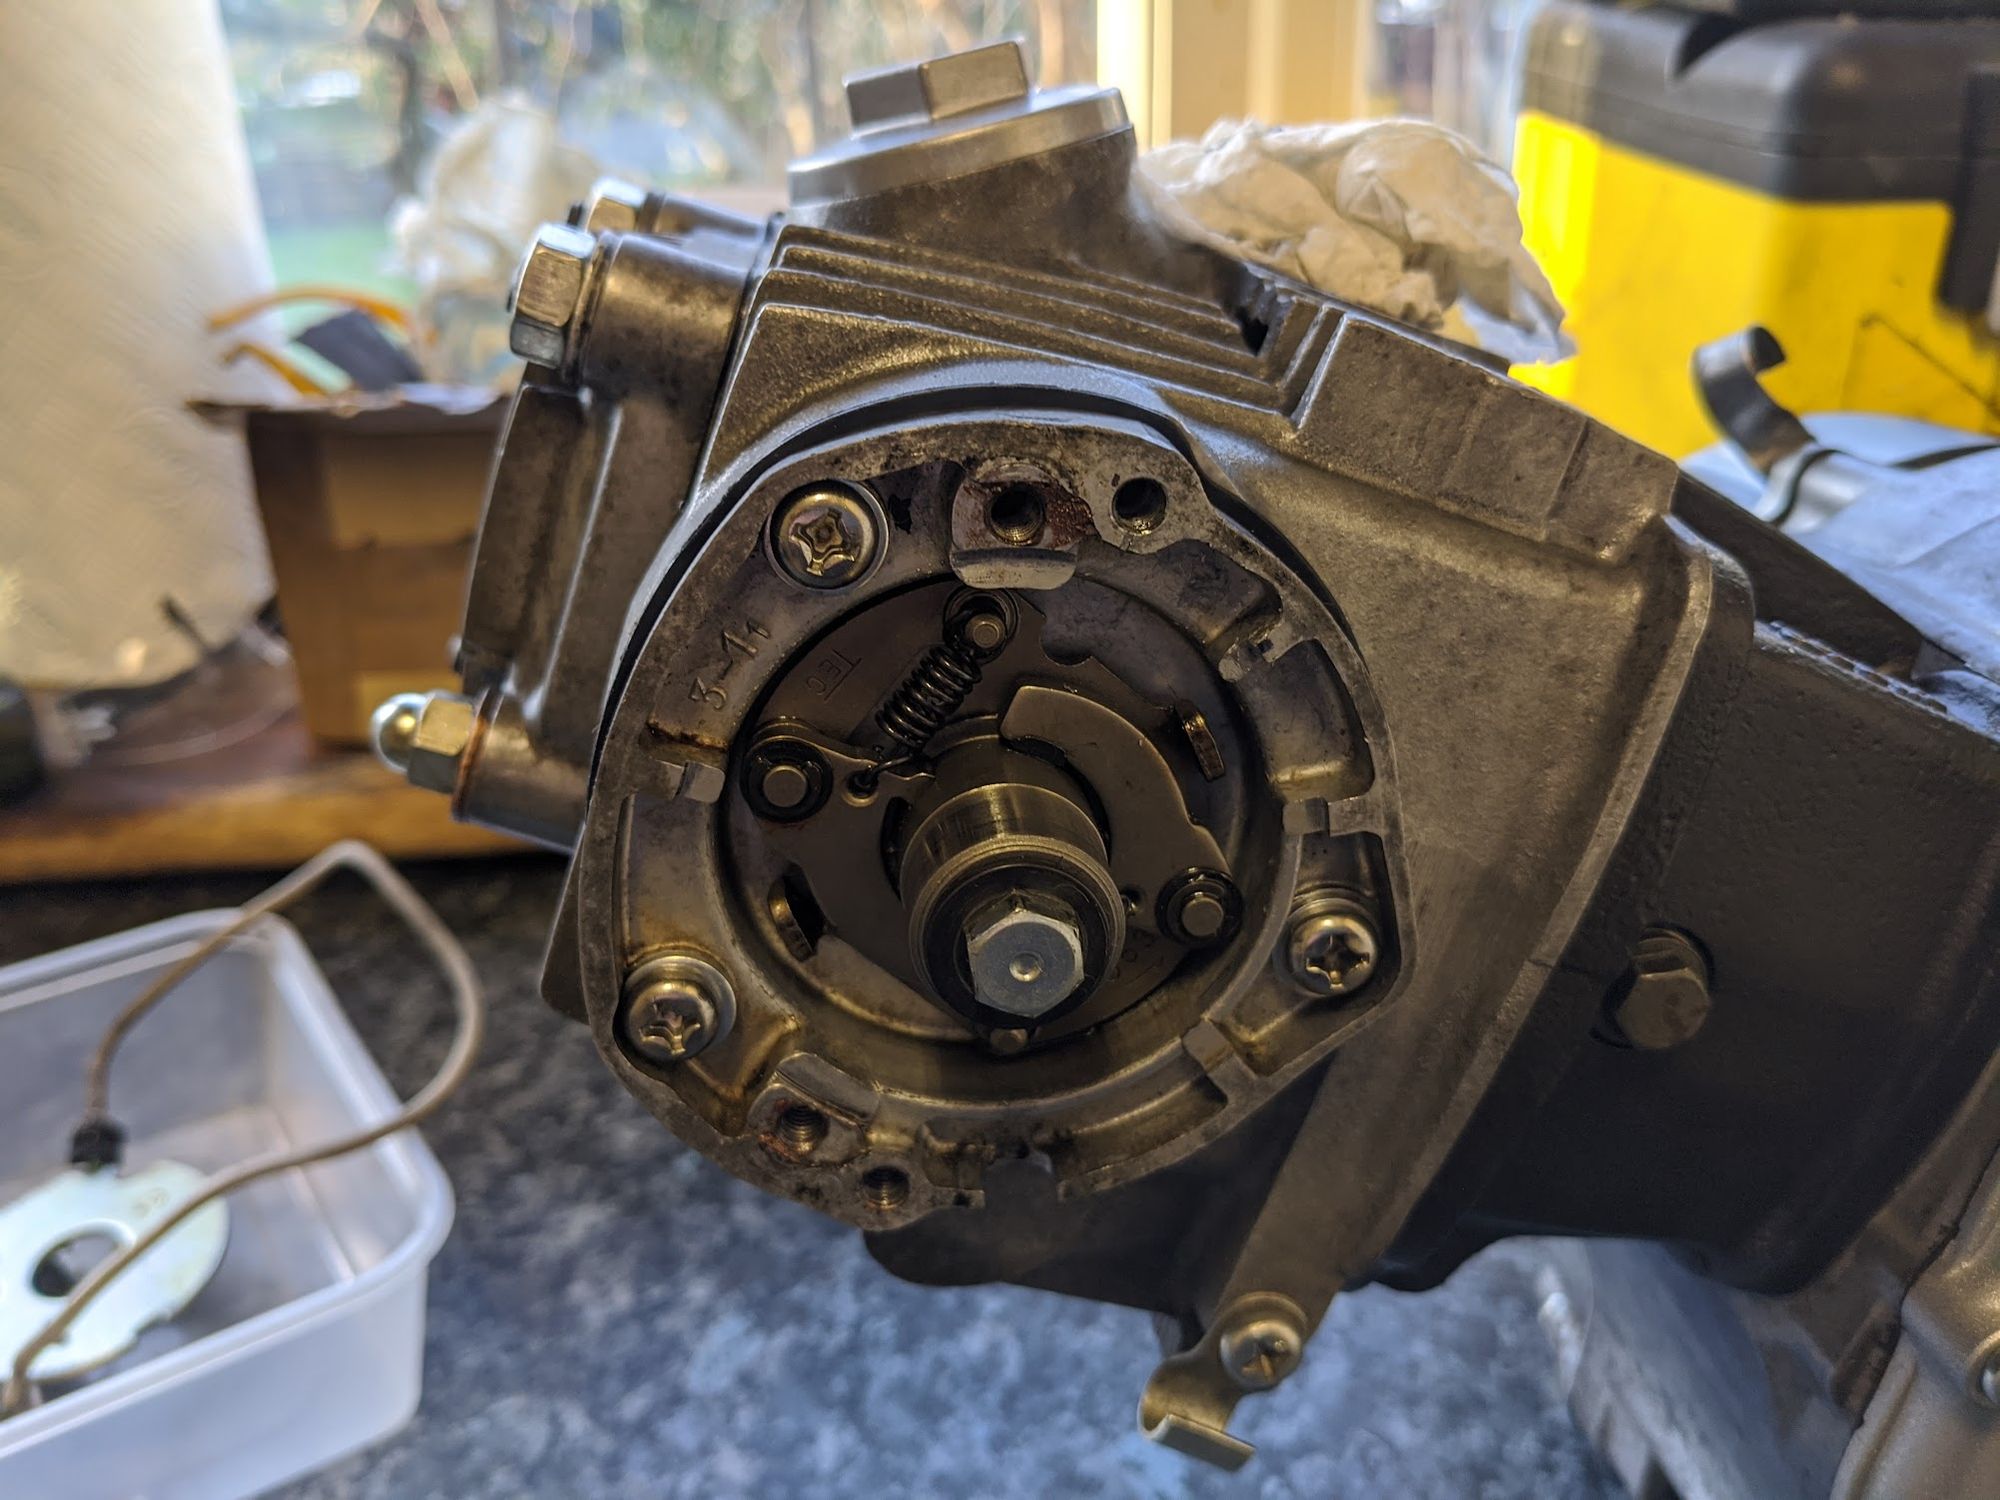
Ignition timing is controlled by a contact breaker and spark advancer.
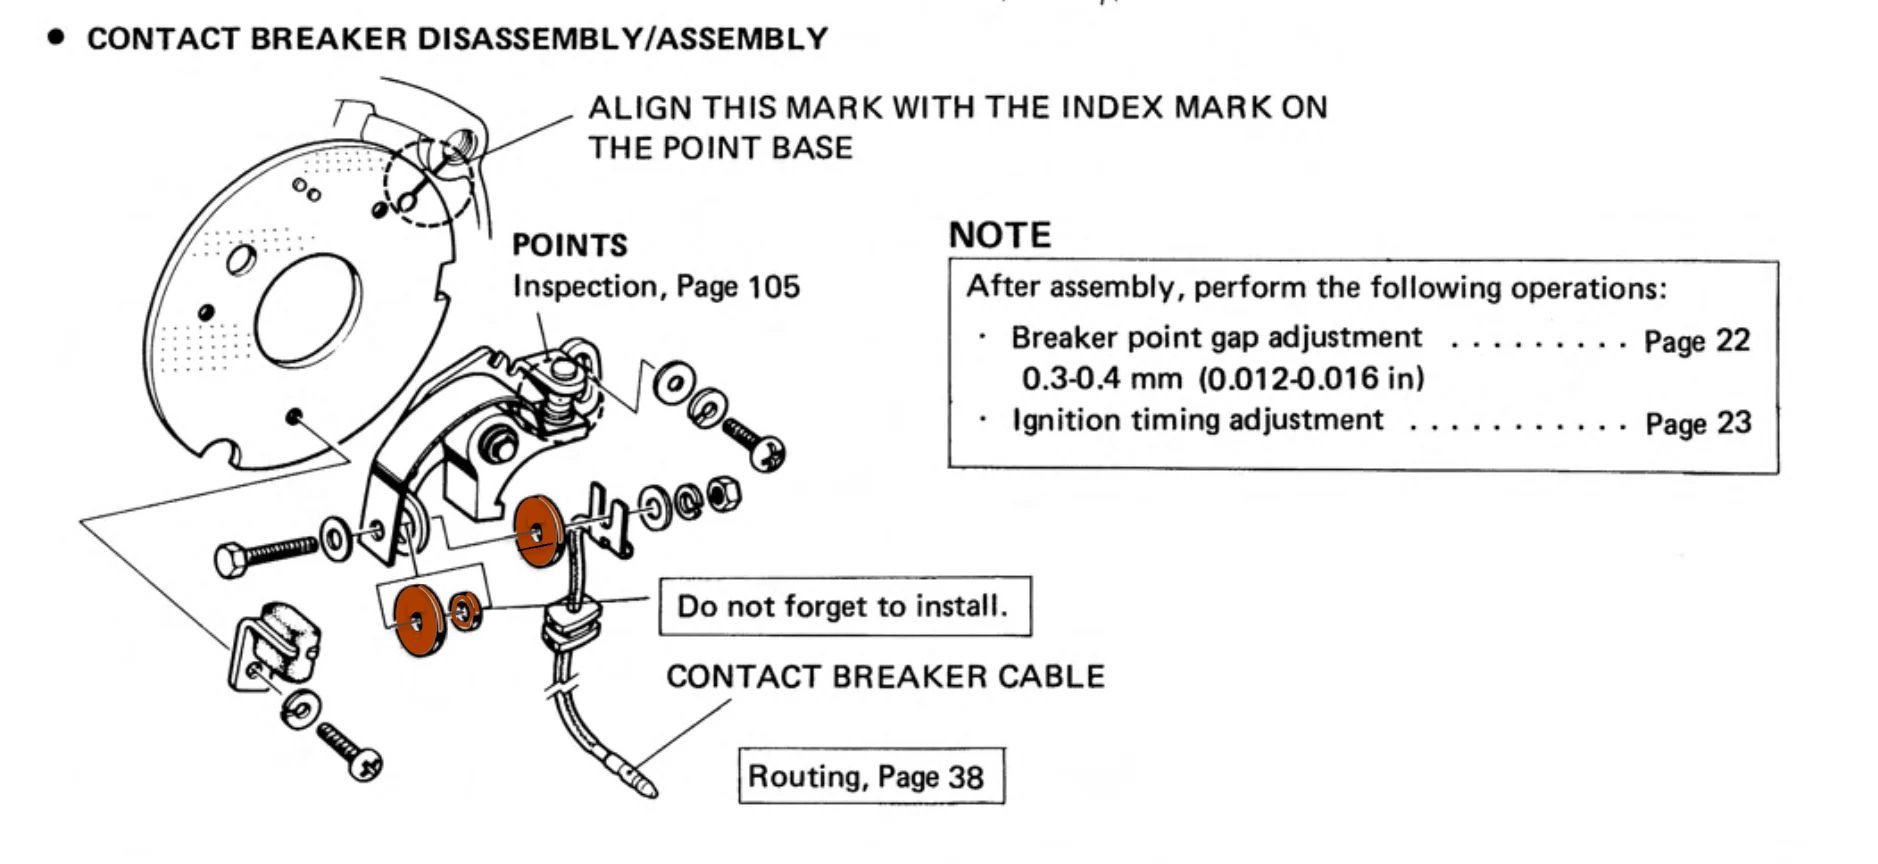
Contact Breaker
Contact breakers (or "points") are cam operated switches that make a connection at the point a spark is required. When the points open the current flow to the coil ceases and this generates a spark that ignites the fuel and air mixture in the cylinder.
The original CT90 points were made by TEC. This version was superseded by an unbranded part (made by Nippon Denso, I believe).
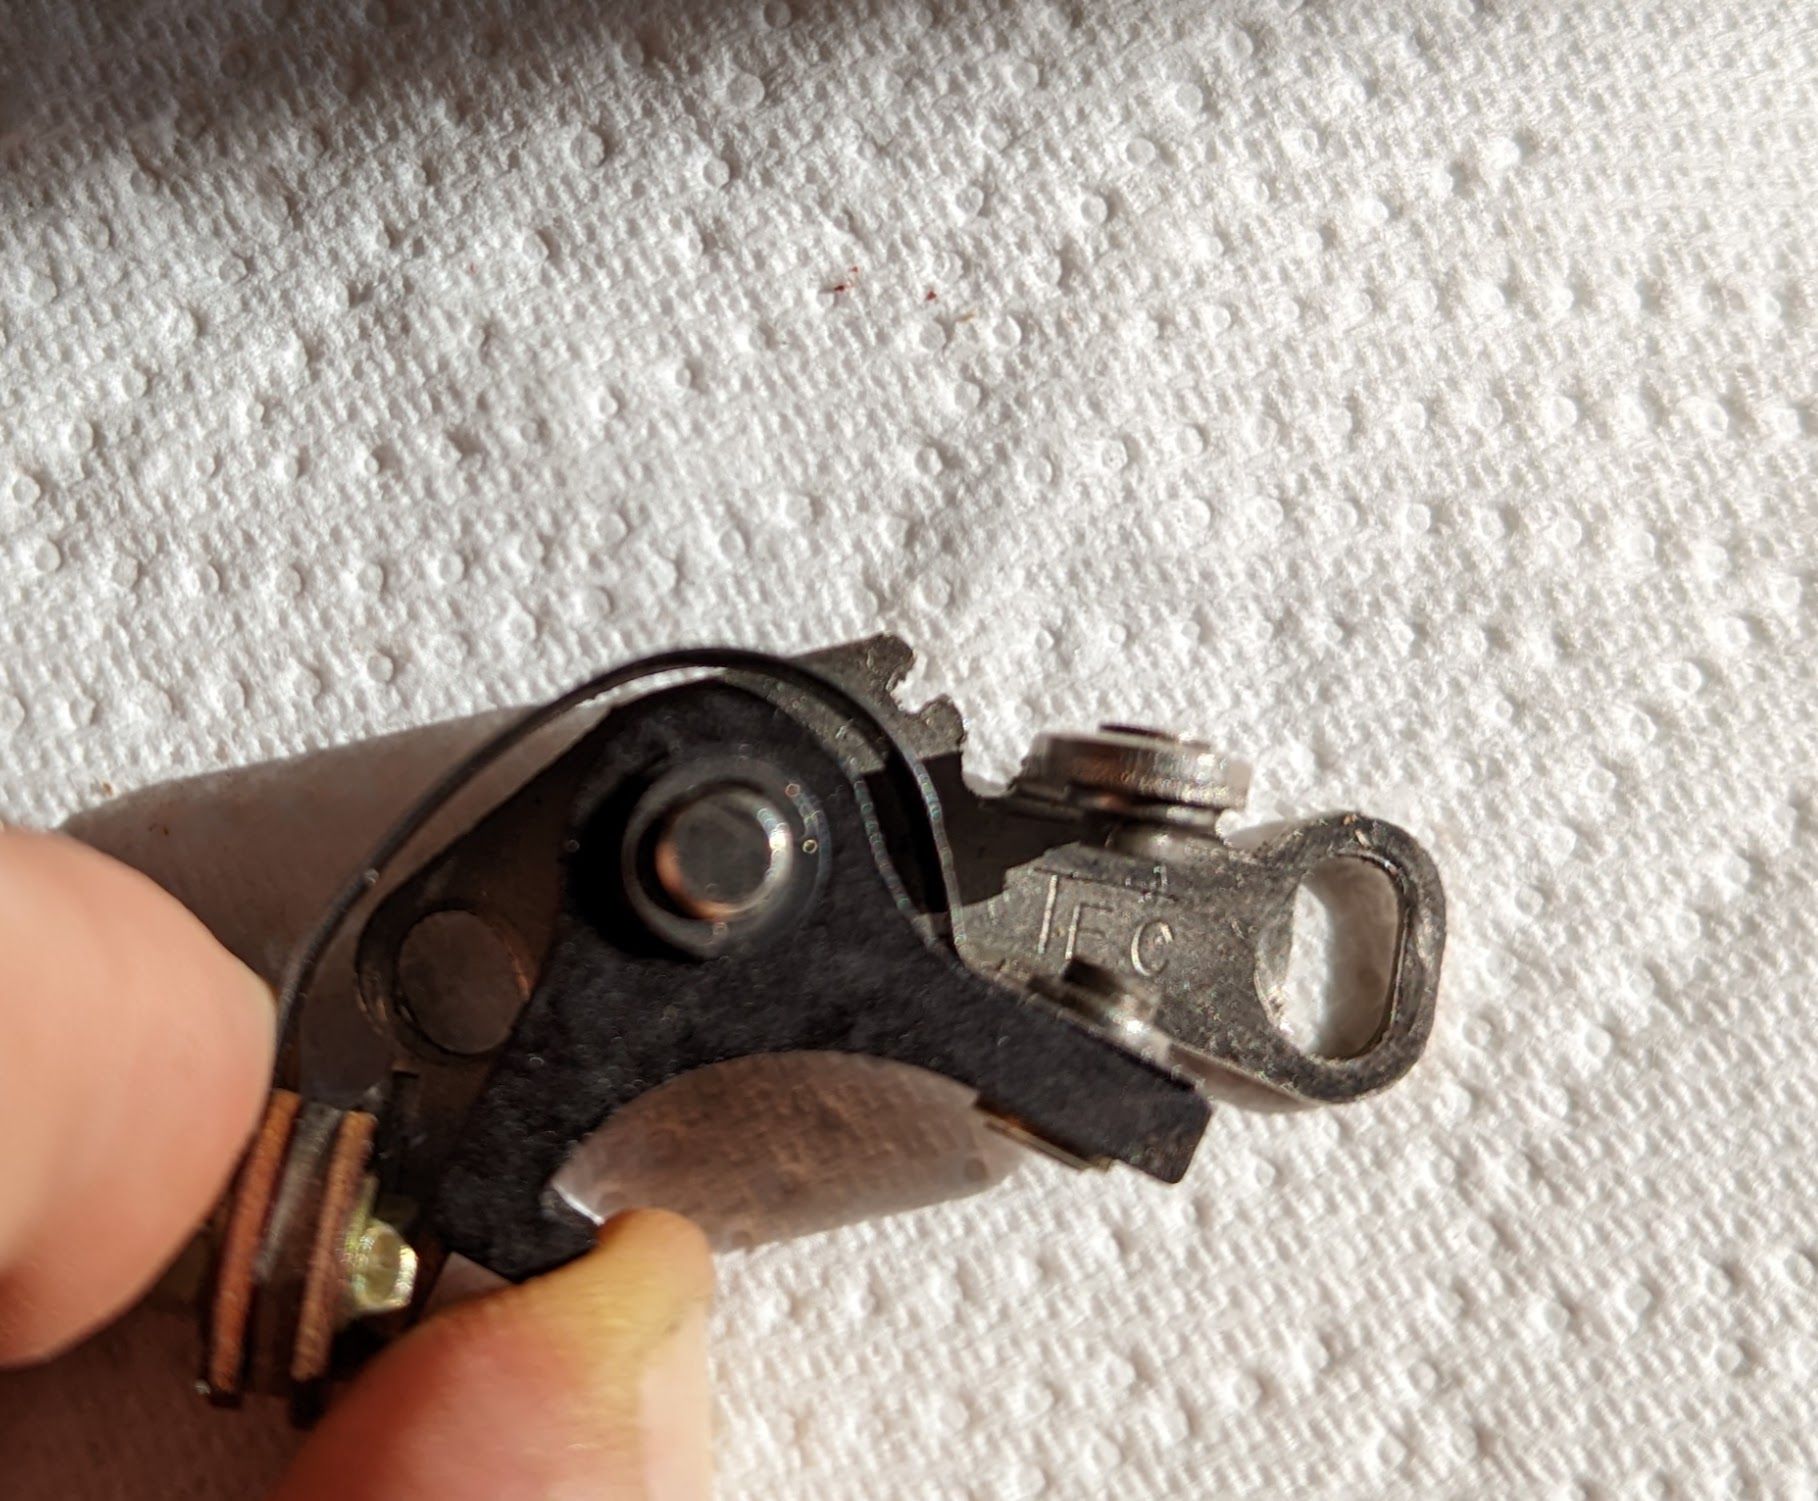
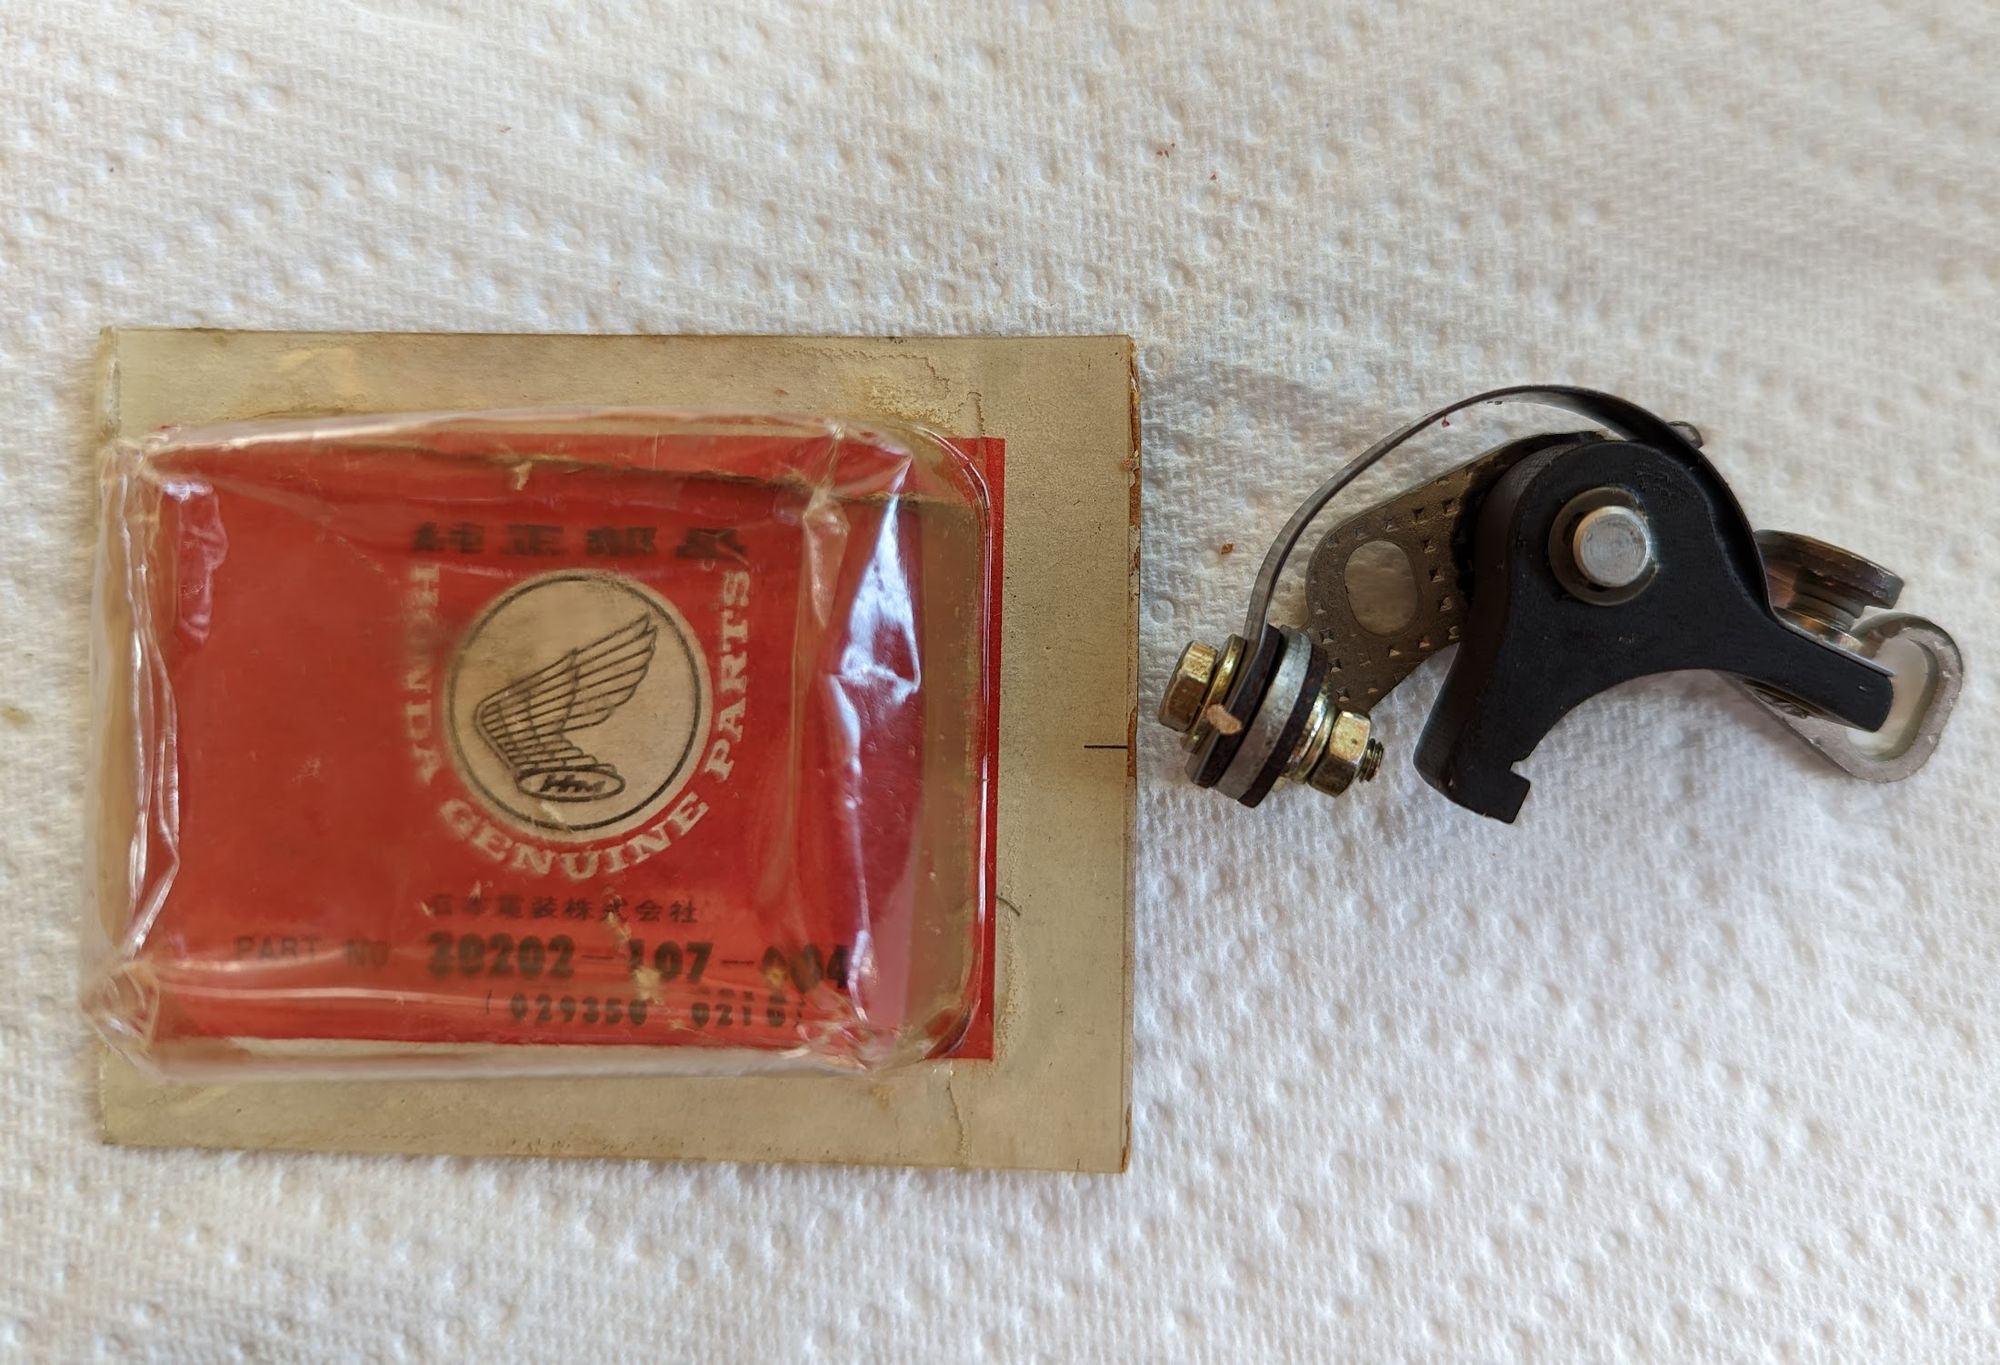
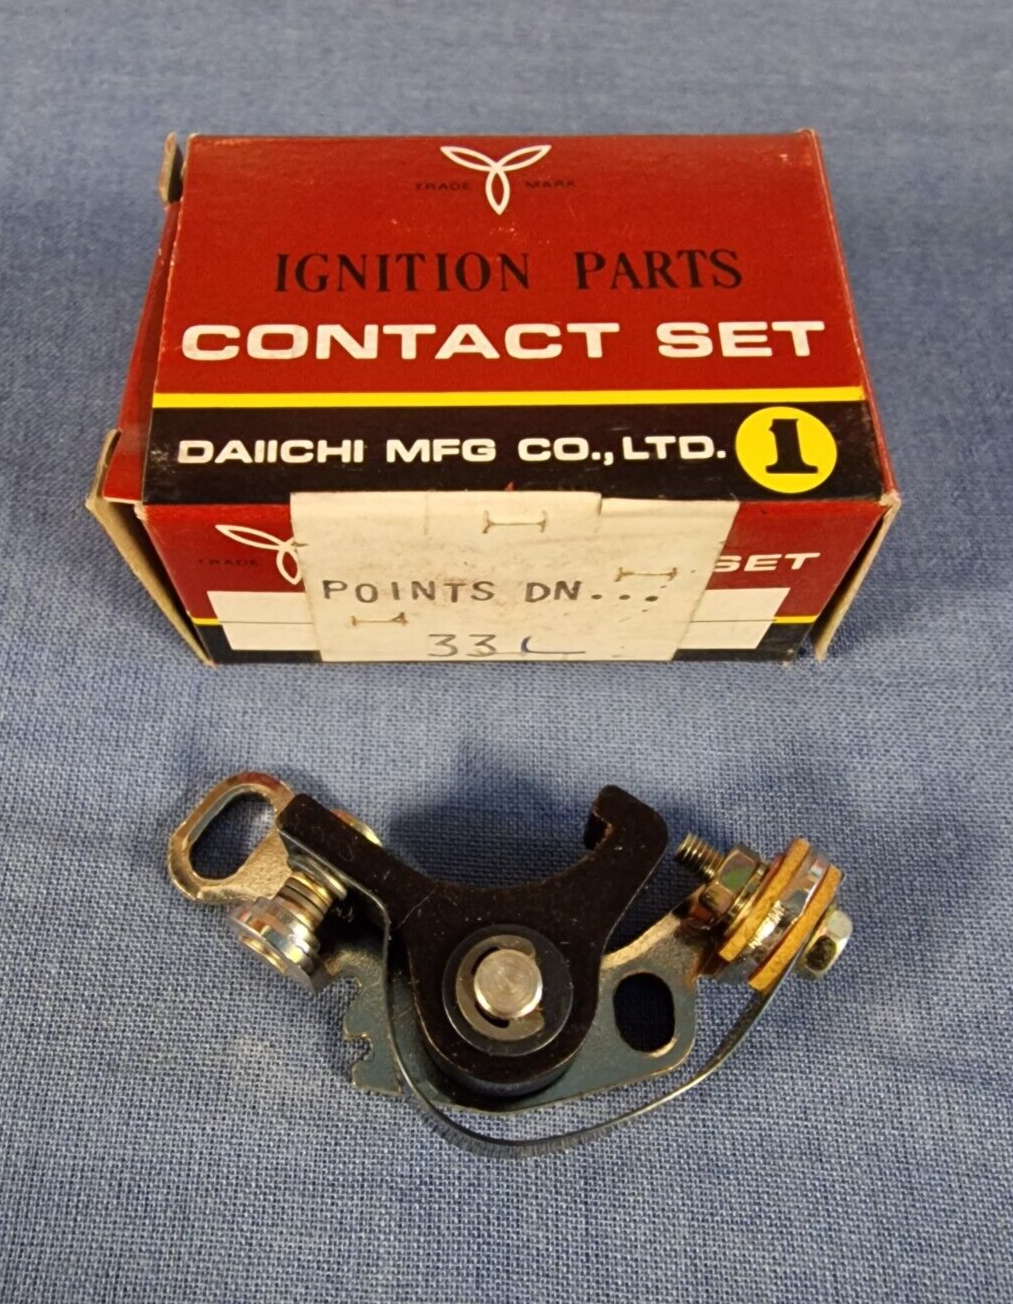
Original equipment parts:TEC (left) and a newer Nippon Denso (centre) - the aftermarket versions are of dubious quality (the one on the right is by Daiichi)
Cheaper pattern parts from FEW and Daiichi are available, but these were not fitted by Honda and are of dubious quality.
Dwell Time
The contact breaker 'heel' rides on a cam that has a flat spot on it. As the cam rotates and flat area reaches the heel of the contact breaker the points are pulled closed by the metal ribbon spring shown below and this completes the circuit between the battery and the ignition coil.
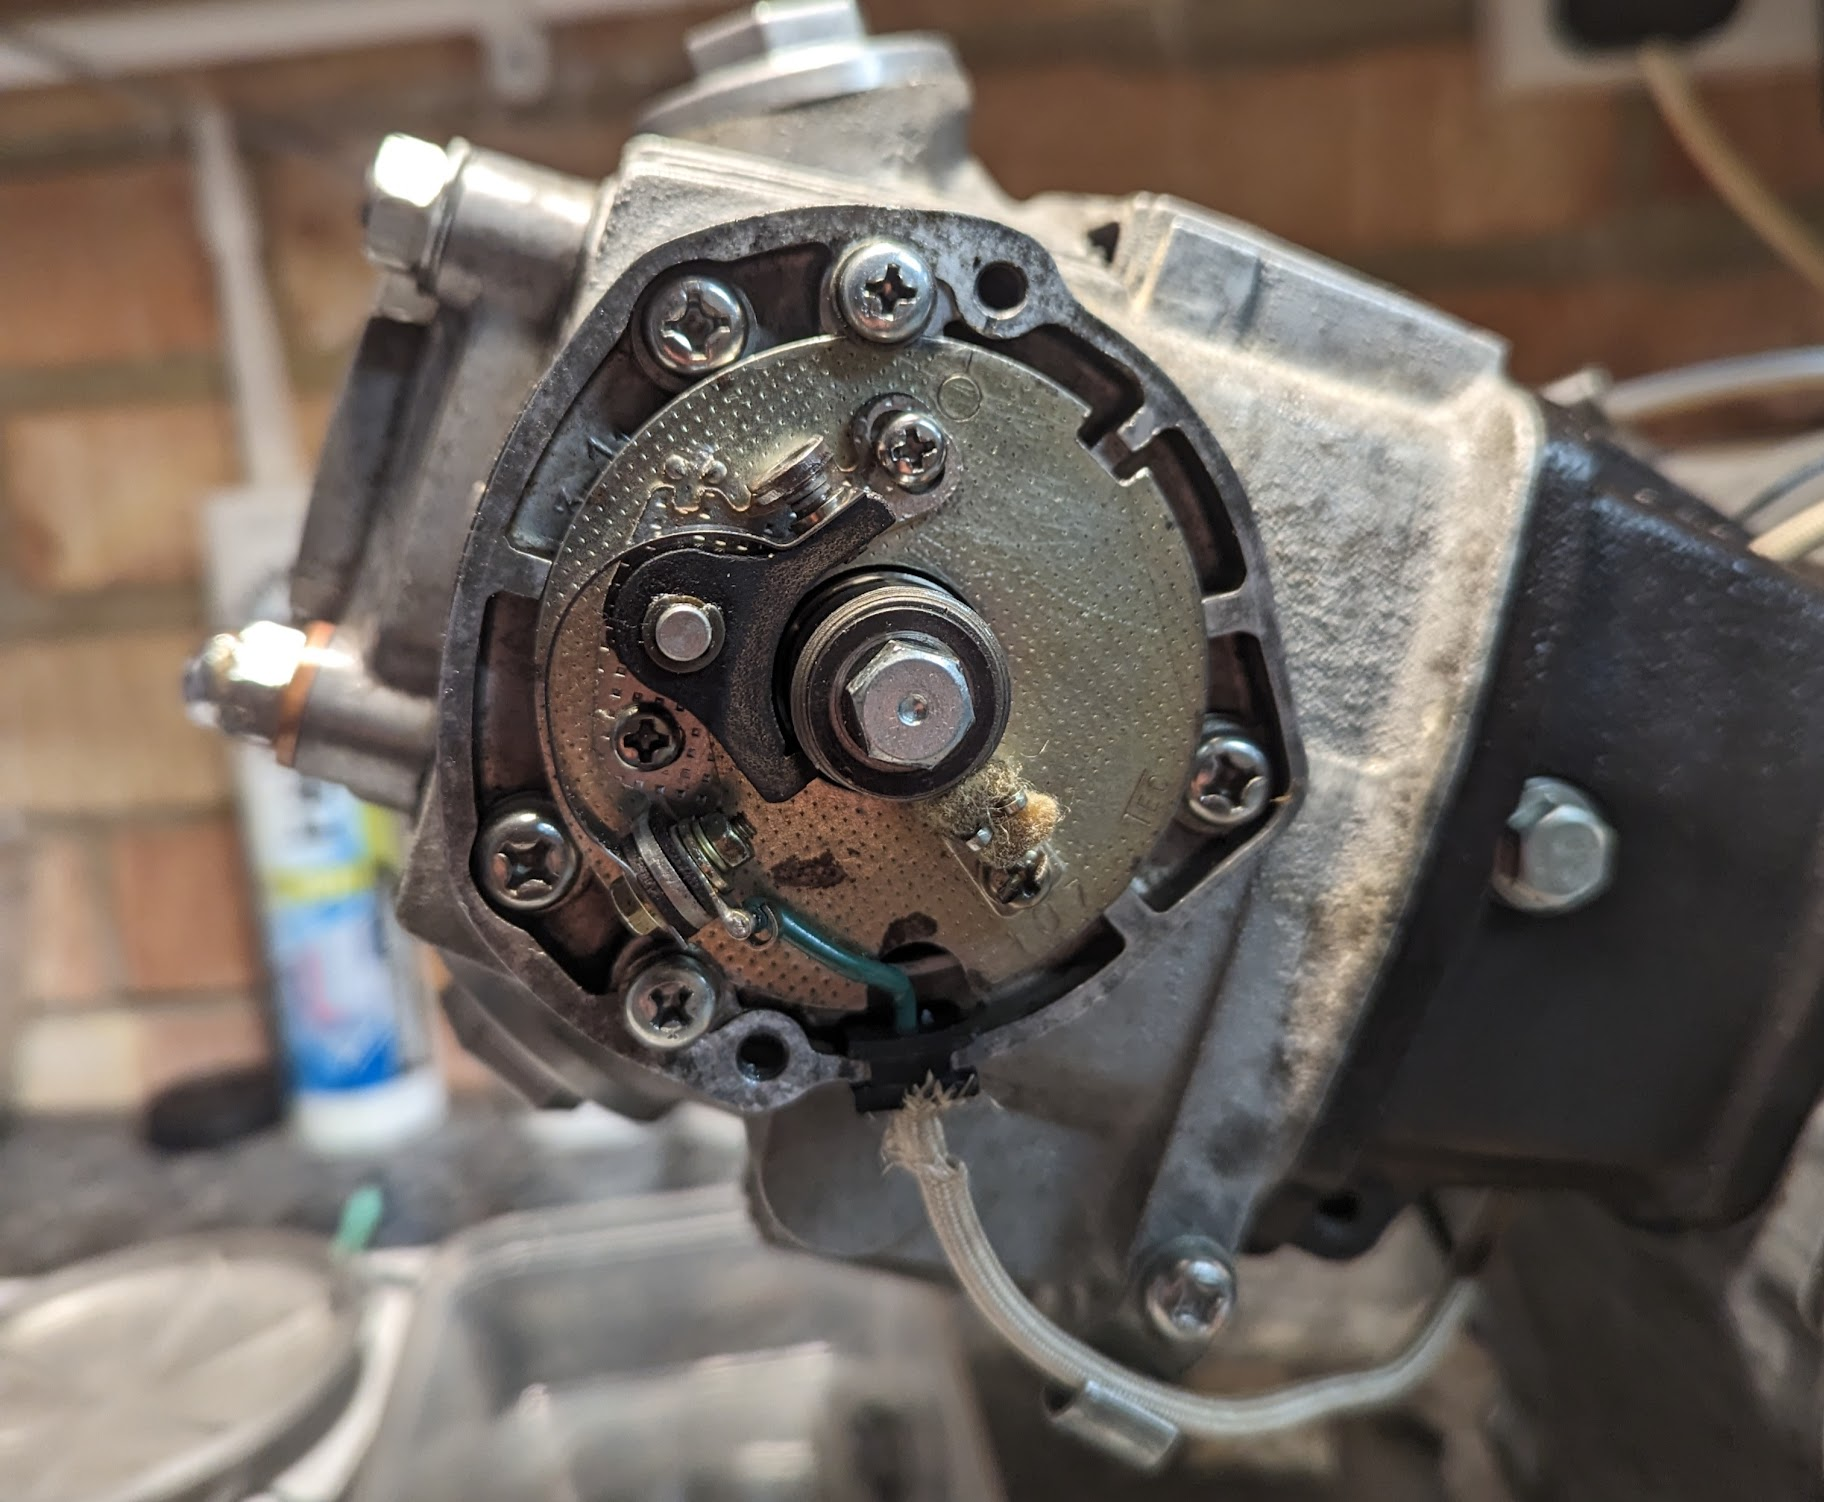
The duration that the points are closed is called the "dwell time". Dwell time is impacted by the size of the contact breaker gap at their maximum opening position because this determines how quickly the points close. Honda specify the correct setting for this gap (see Adjustment below).
This an important setting because the dwell time determines the duration the coil is charged and this influences the intensity of the spark: when the gap is too large the points are not closed long enough to allow a sufficient voltage to build up in the coil and the resulting poor spark can create difficulties starting the engine, misfires and contribute to engine overheating. Honda say that an insufficient gap causes the spark to "linger" which causes damage to the points and reduces power.
Spark Advancer
The advance mechanism is mounted behind the contact breaker plate.
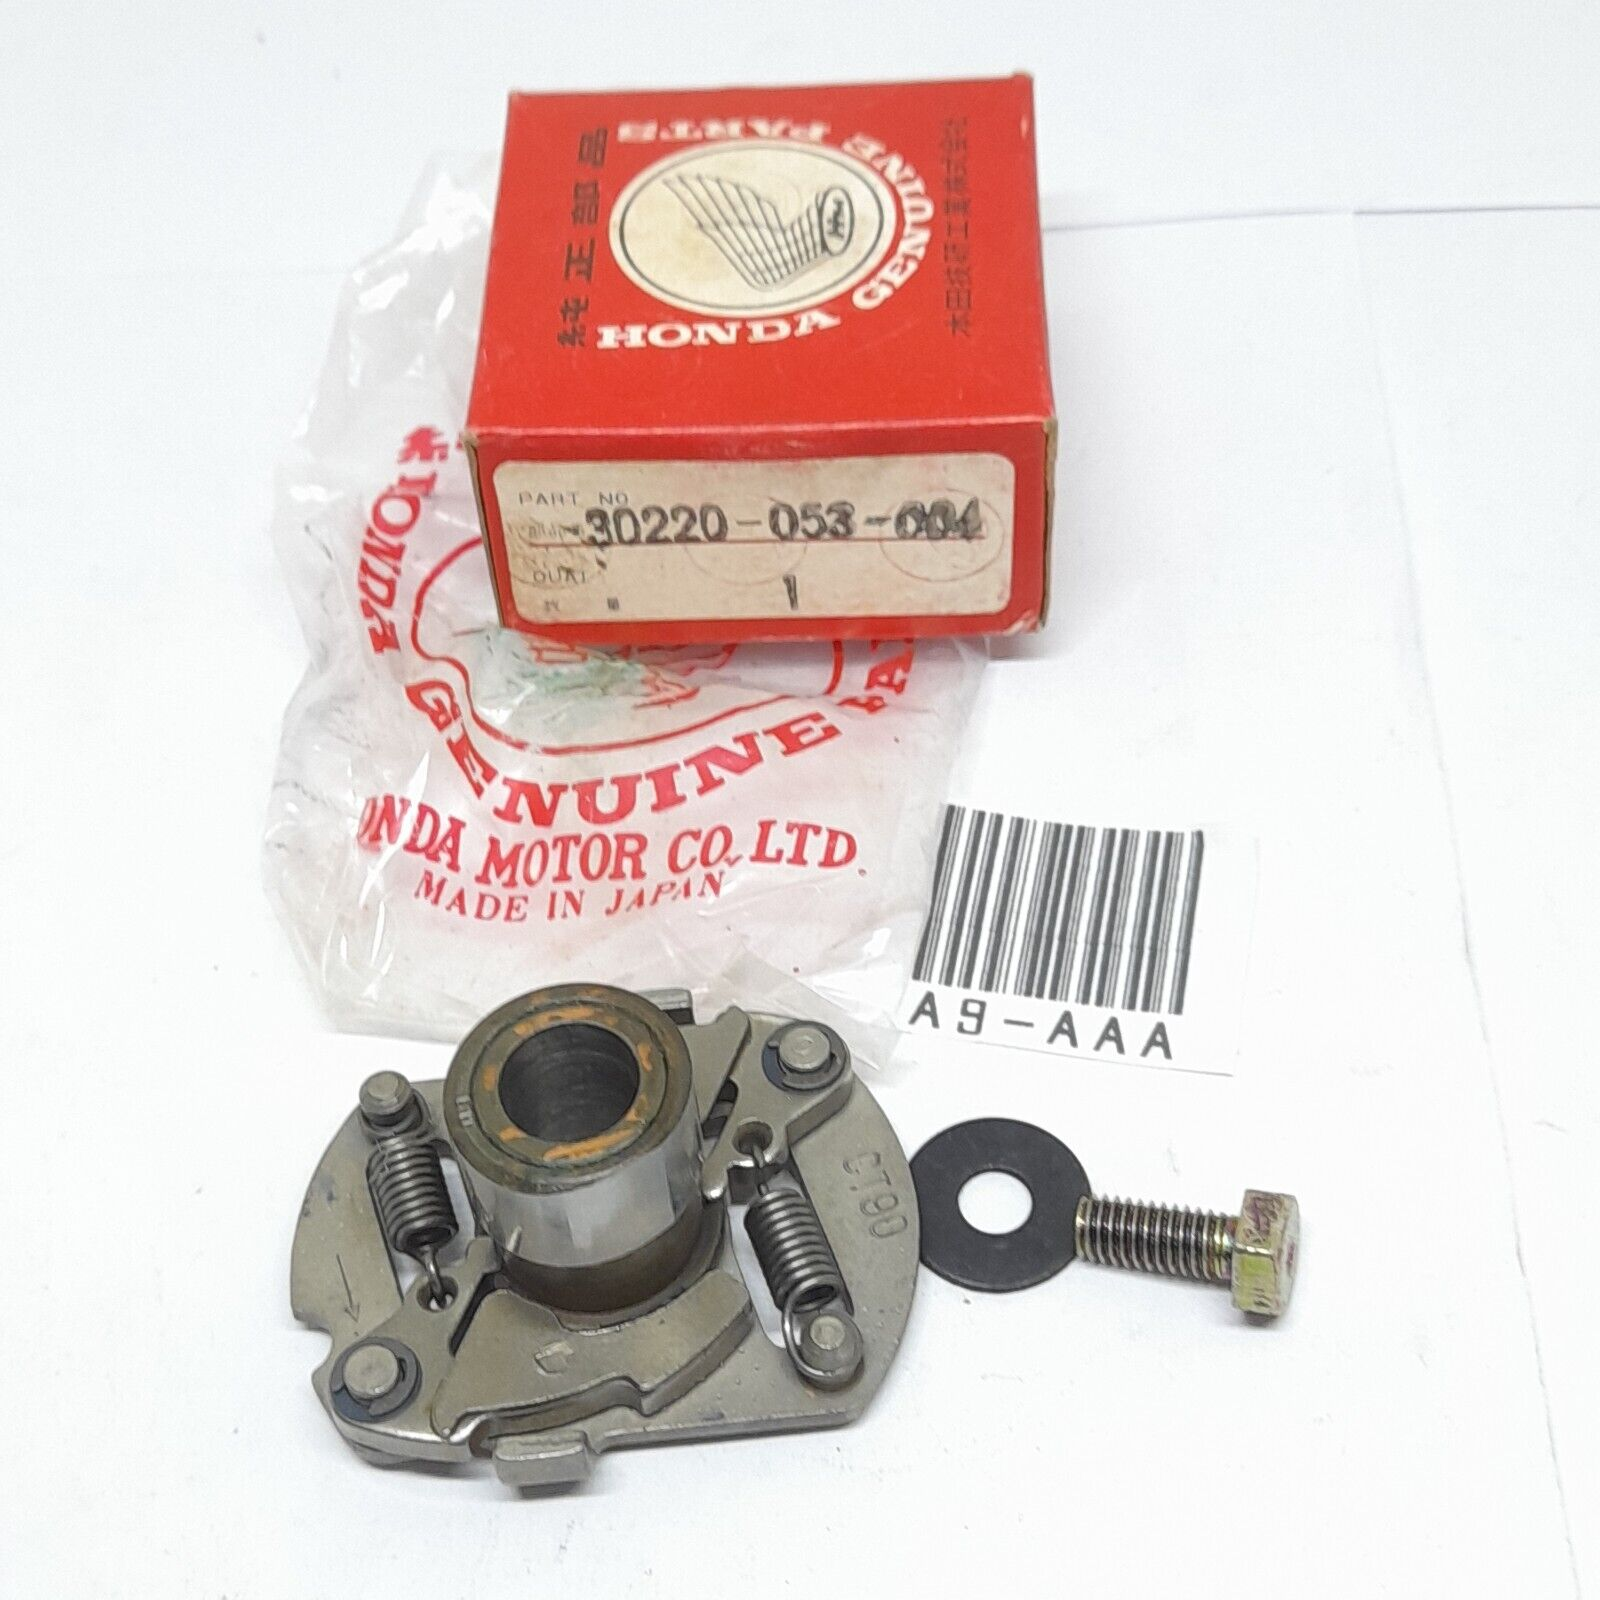
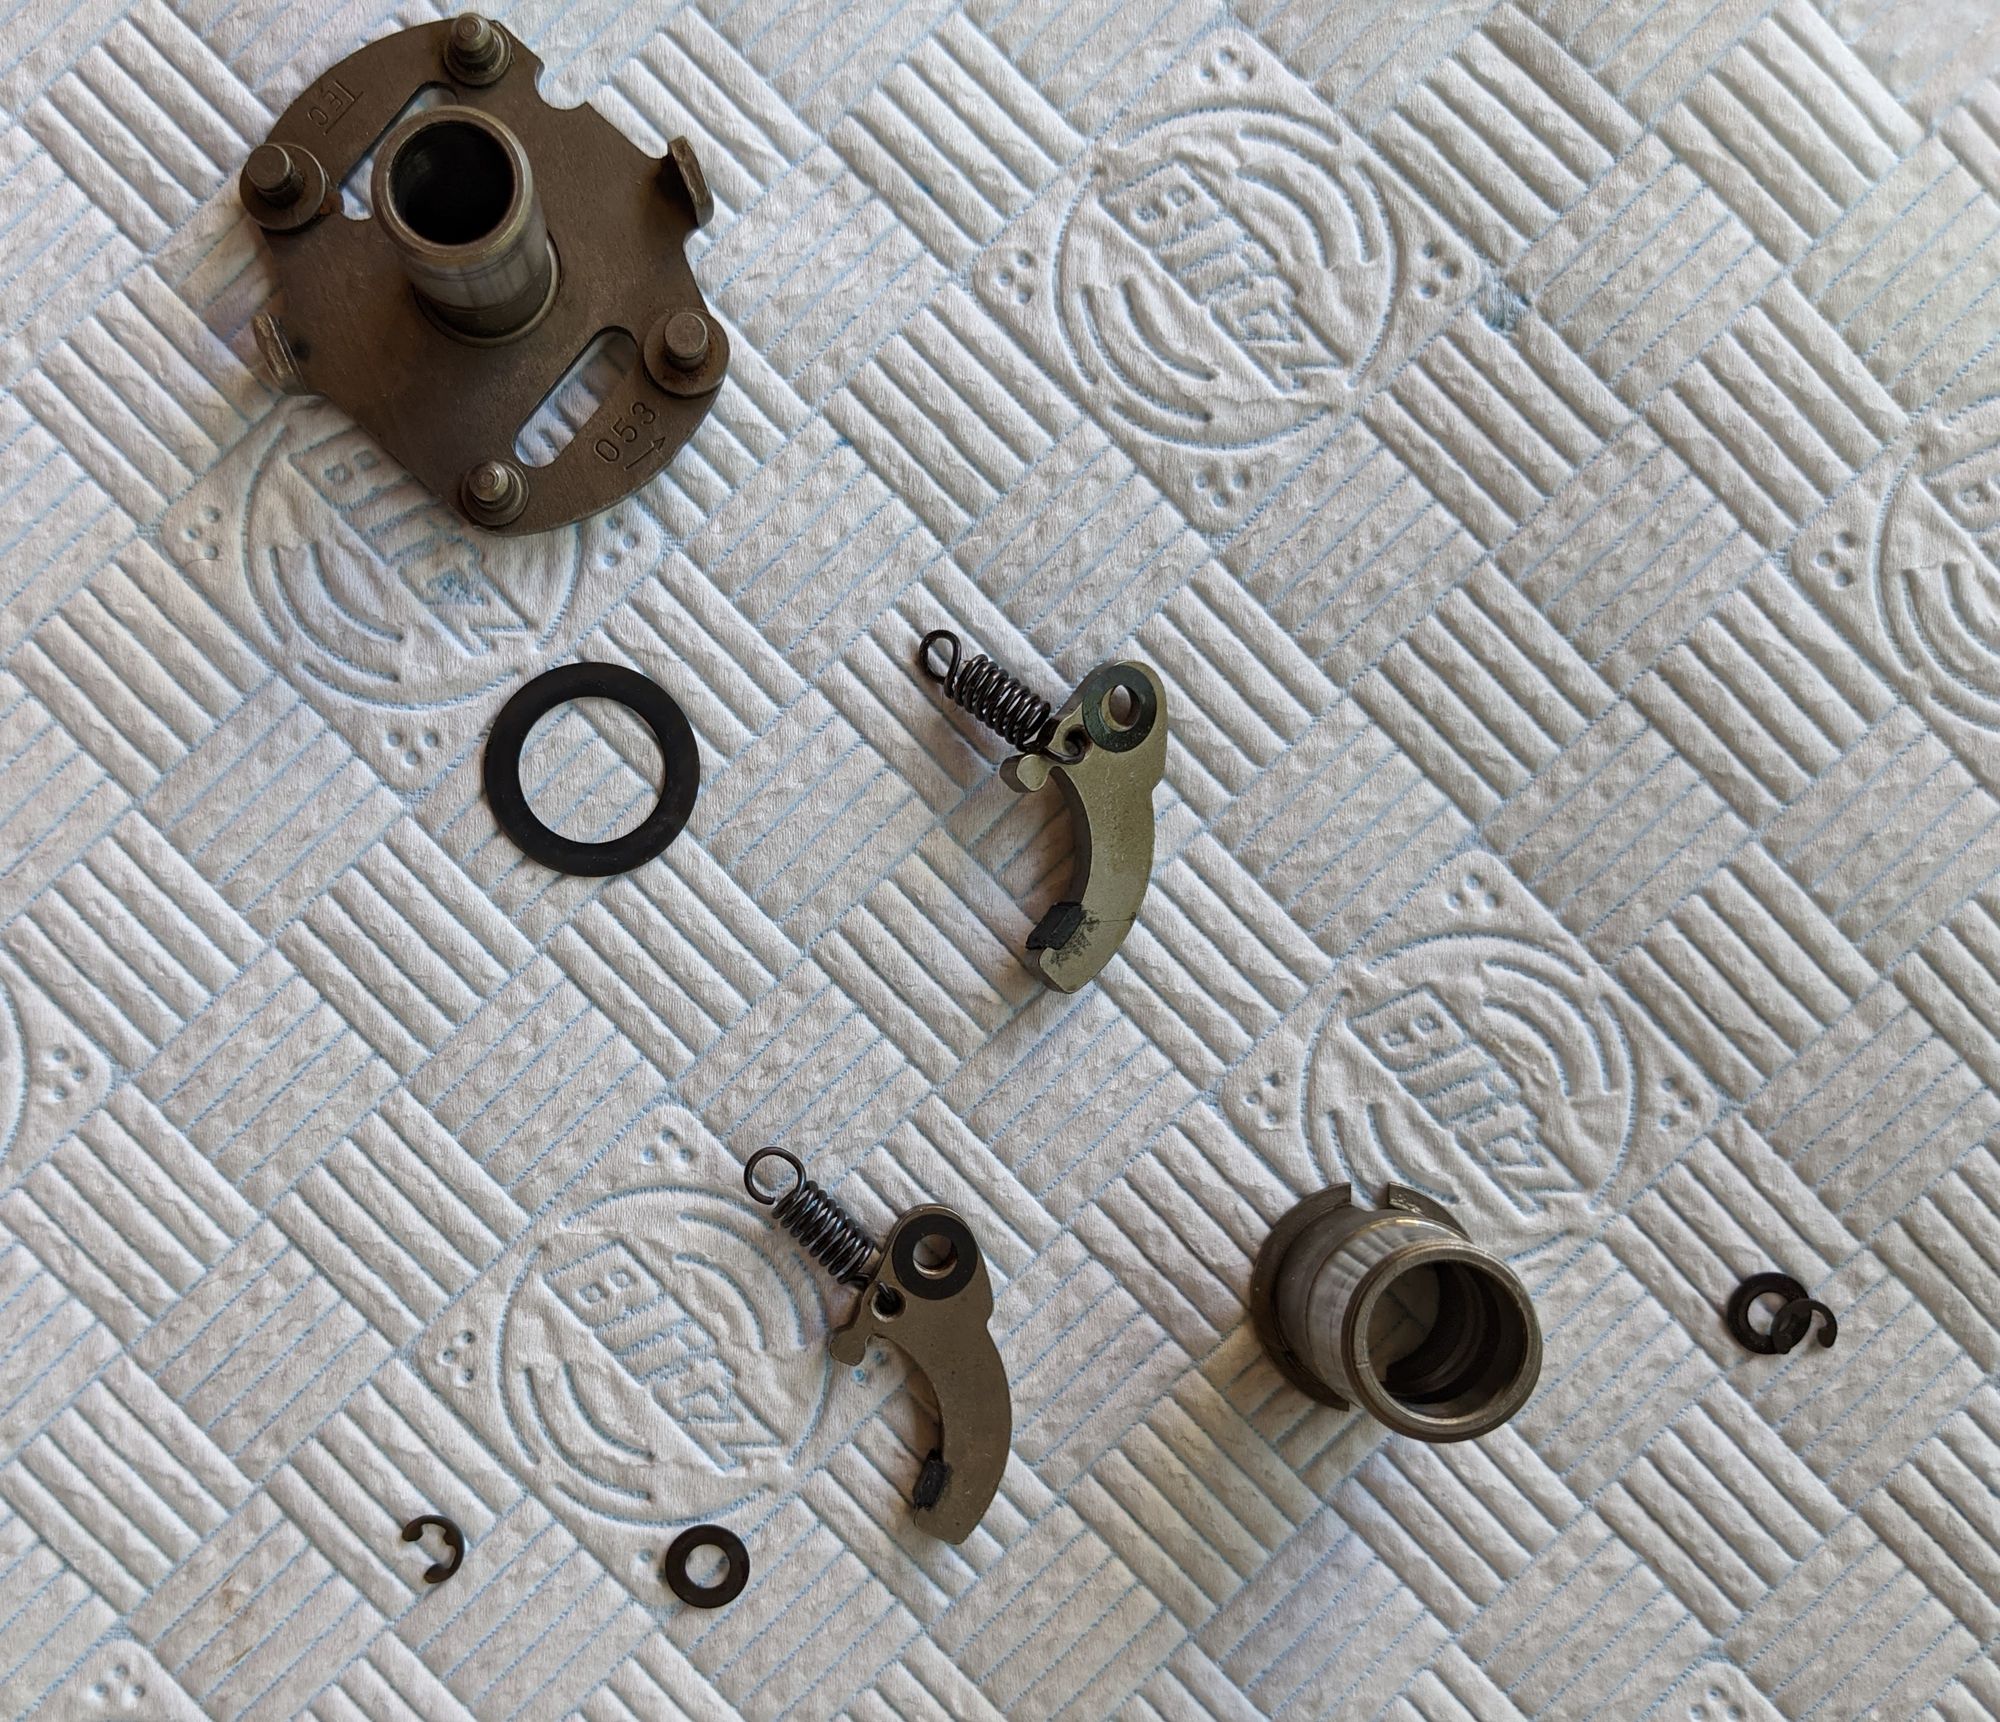
Spark advancer (left), dismantled (centre) and mounted on the camshaft (right)
The spark advancer is needed because fuel always burns at the same rate in the chamber regardless of engine speed. This means there is less time for the fuel to burn as the piston speeds up and - without a way to bring forward the ignition point - at higher engine speeds some of the fuel would still be burning after the compression stroke completes, wasting fuel and power. On the other hand, if the ignition timing point was fixed to create a spark earlier - so that it was optimised for higher engine speeds - then at low engine speed some of the fuel would burn before being compressed by the piston and the engine would be hard to start.
The automatic spark advancer compensates for this by bringing forward the ignition point in line with the speed of the piston so that the expansion of the burning fuel always imparts the maximum force on the piston no matter what the engine speed.
It is deceptively simple device and works with very few parts:
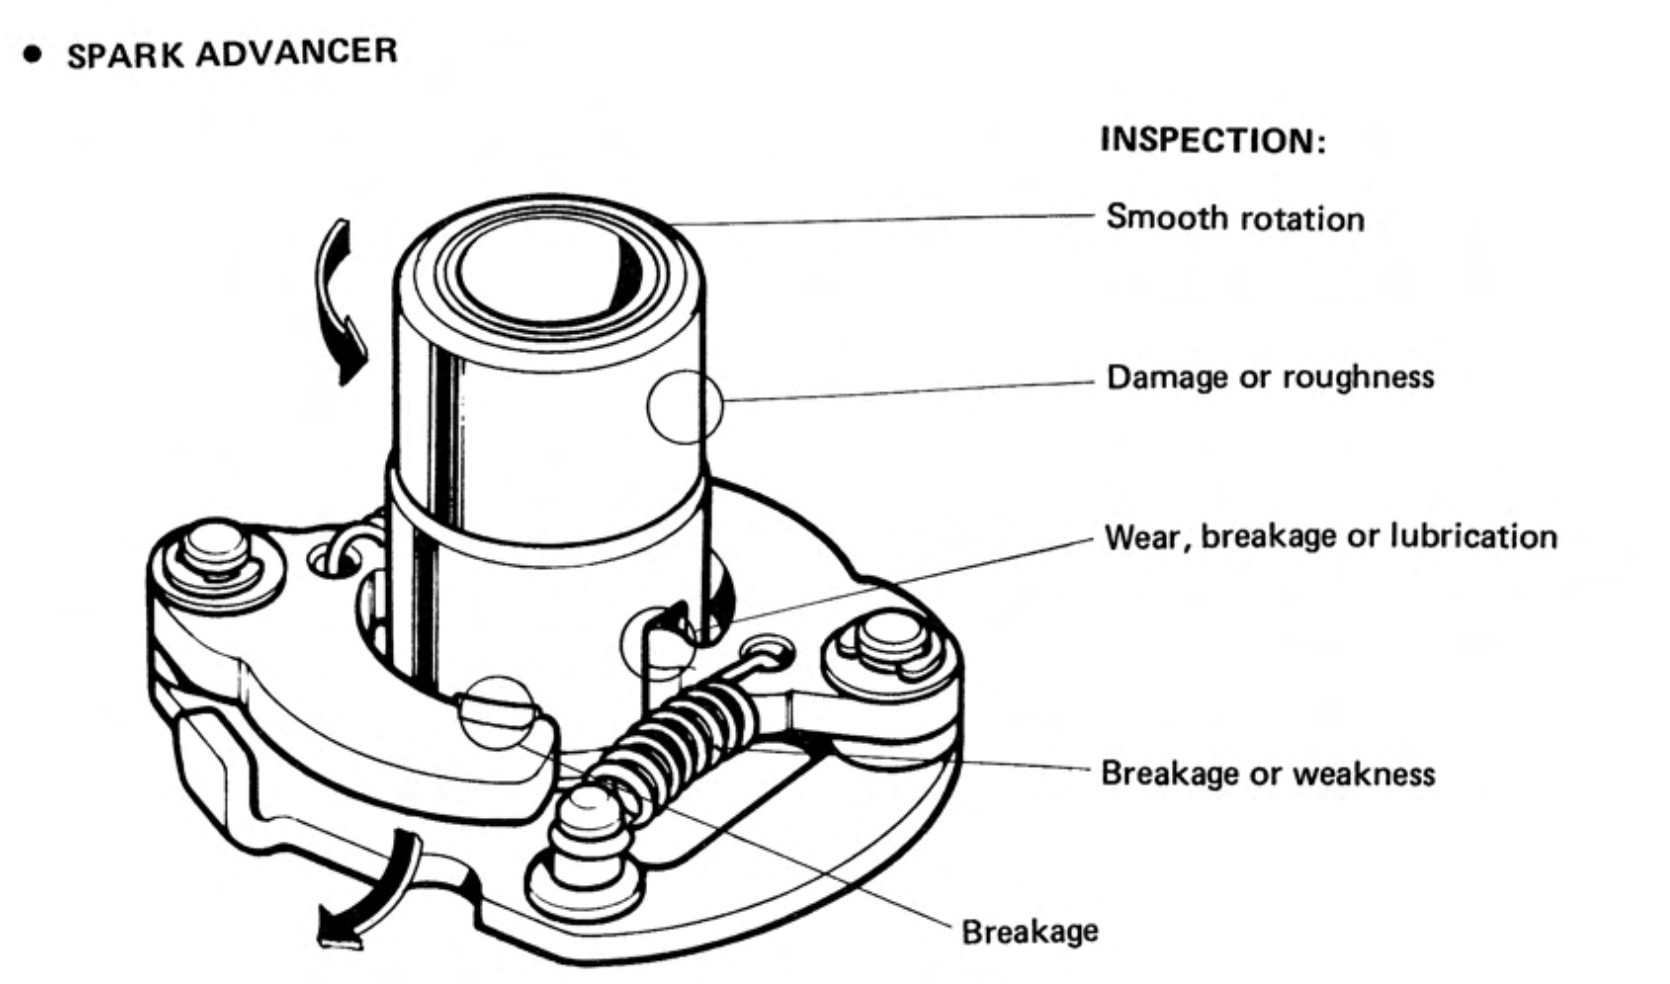
As described above the heel of the contact breaker arm rests against the central cam on the advancer and this causes the points to open and shut at as the motor turns.
Two weighted arms are held against the cam by springs and as the engine speeds up the weights are moved outwards by centrifugal force, rotating the the cam so that it brings forward the time at which the points open.
There is not much that can go wrong with the spark advancer, other than it can get gummed up with old grease or the springs become weakened compared to when they were new. No parts are available from Honda, so unless you can find springs of exactly the same length and weight you will have to replace the whole mechanism.
Note that if you disassemble the spark advancer it is possible to install the central cam 180° out of position, and doing so will mess up the ignition timing. There are usually alignment marks on the device to indicate the correct orientation, for instance a small dot or dash on the edge of the cam that should be aligned with a corresponding mark or notch on the backing plate. The marks vary according to the model of spark advancer installed:
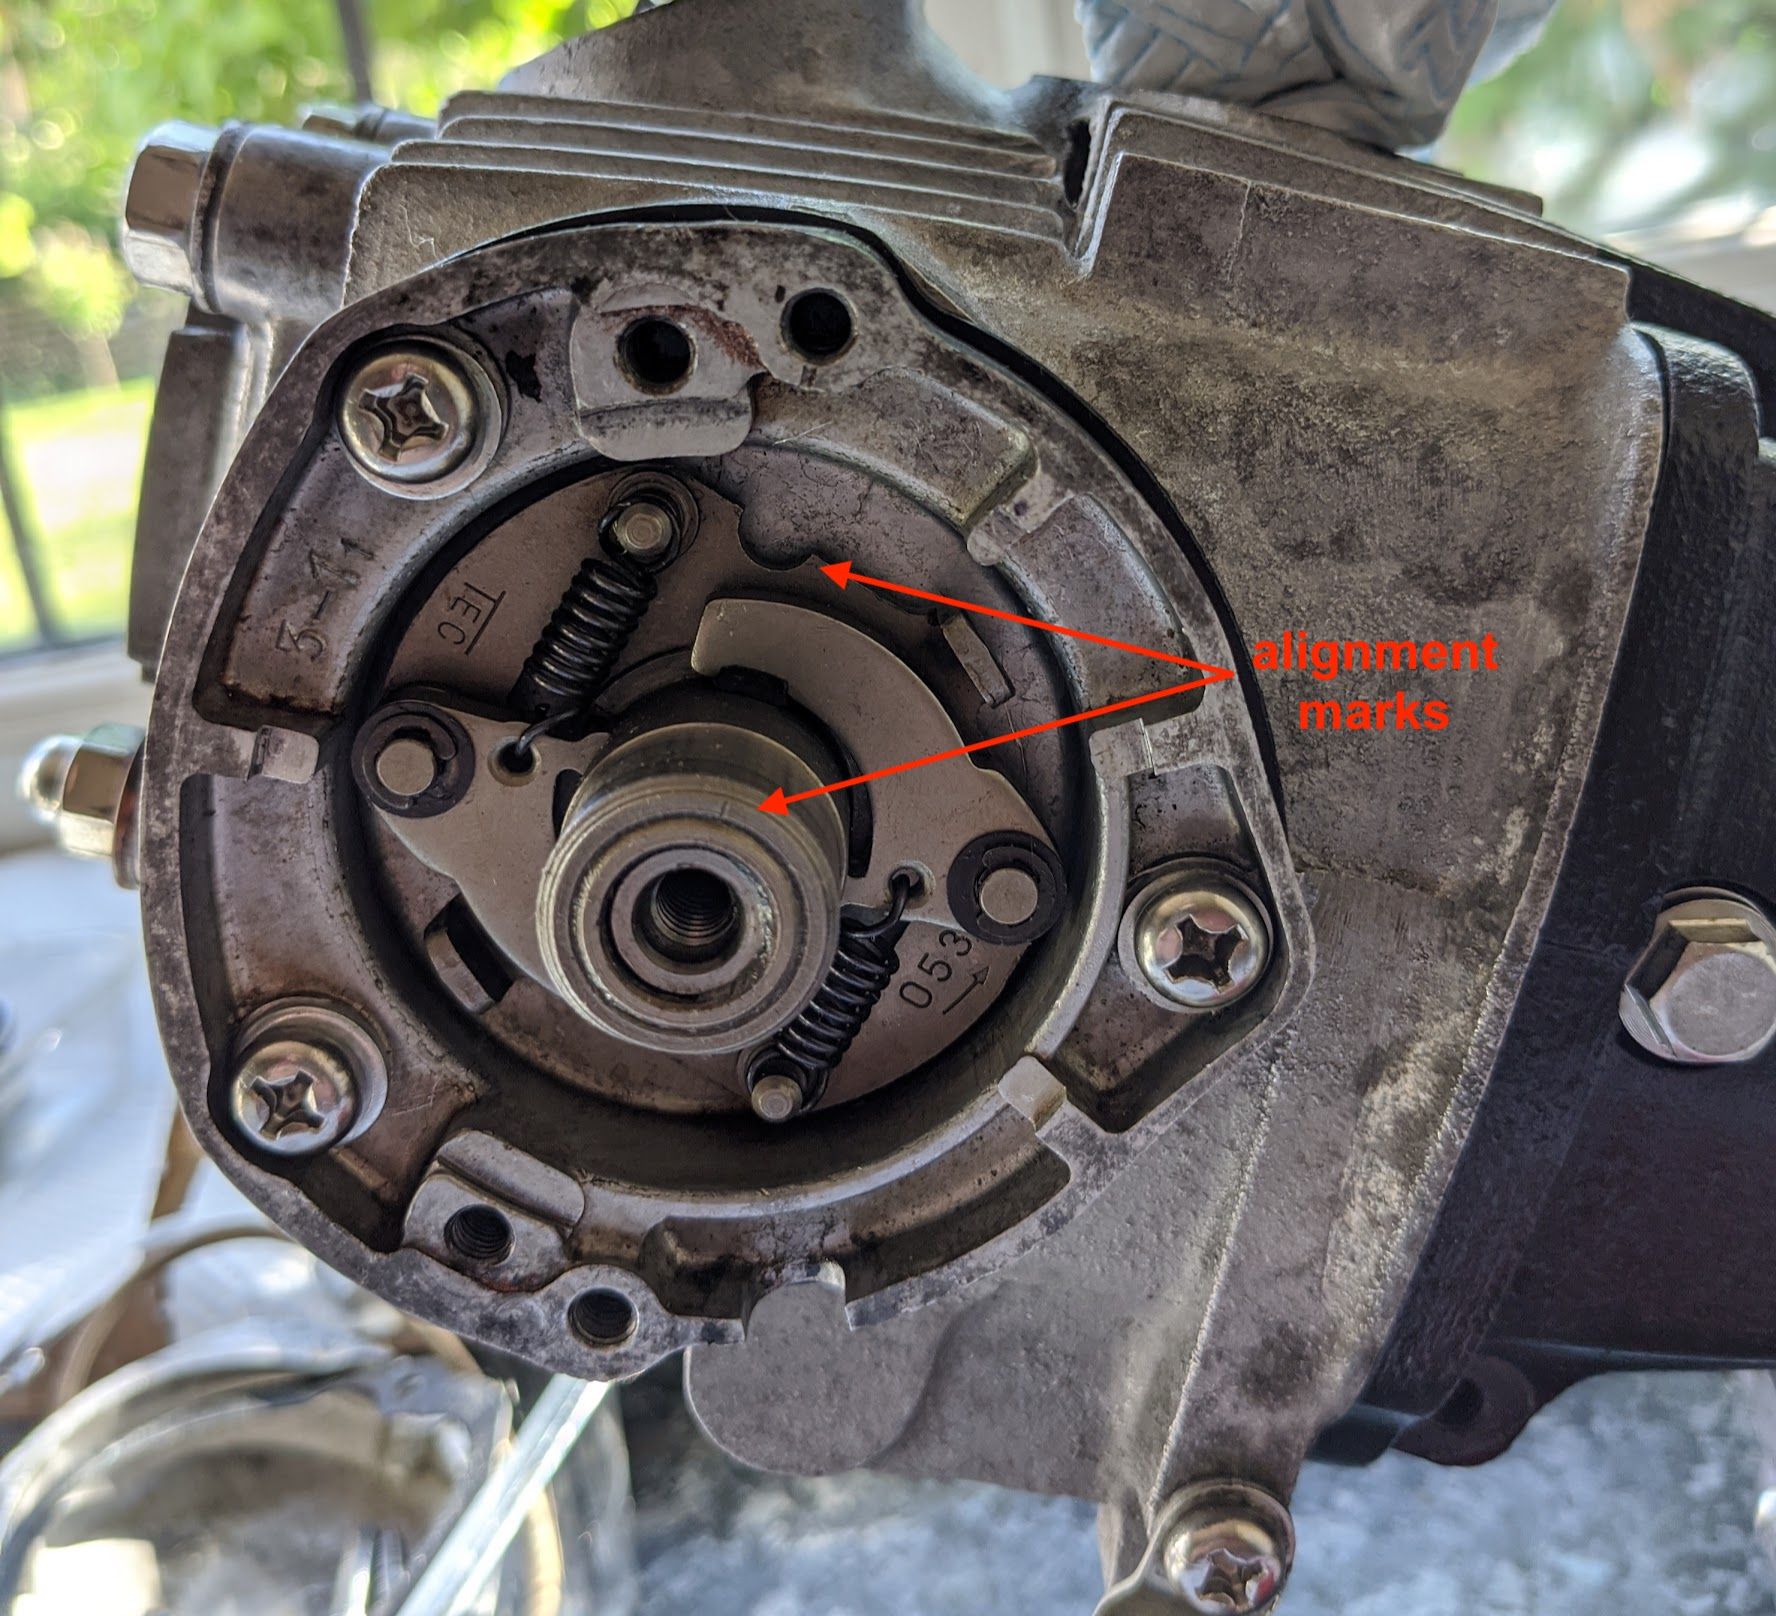
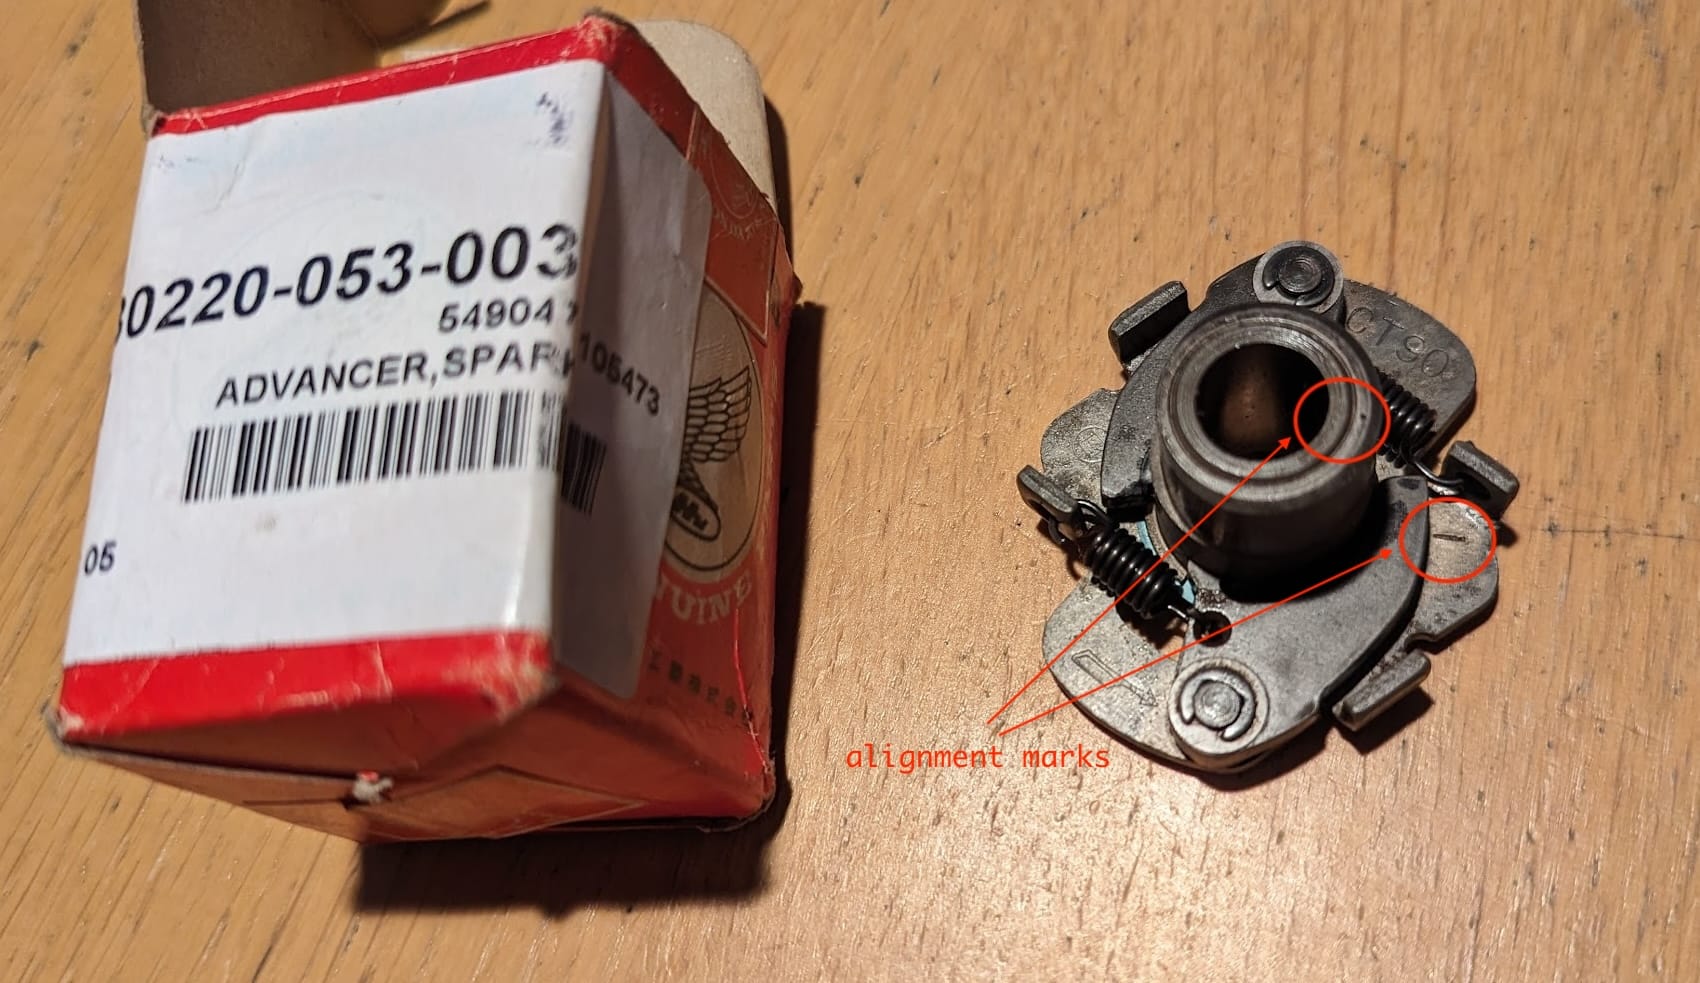
On the TEC version shown on the left the fine line etched in the rim of the central cam should point towards the half moon cut-out in the backing plate. / (right) An older version made by Kokusan Denki has different alignment marks
Adjustment
You must set the point gap before adjusting the timing, as explained in the manual page below.

The spark fires when the contact breaker points open, and setting the ignition timing involves making sure this happens when the piston reaches the "firing" position on the compression stroke.
This position is marked by a pointer on the stator - when the 'F' (firing) mark on the alternator rotor is aligned with the pointer, the piston is in the correct position.
Note Honda used a couple of different stator designs:
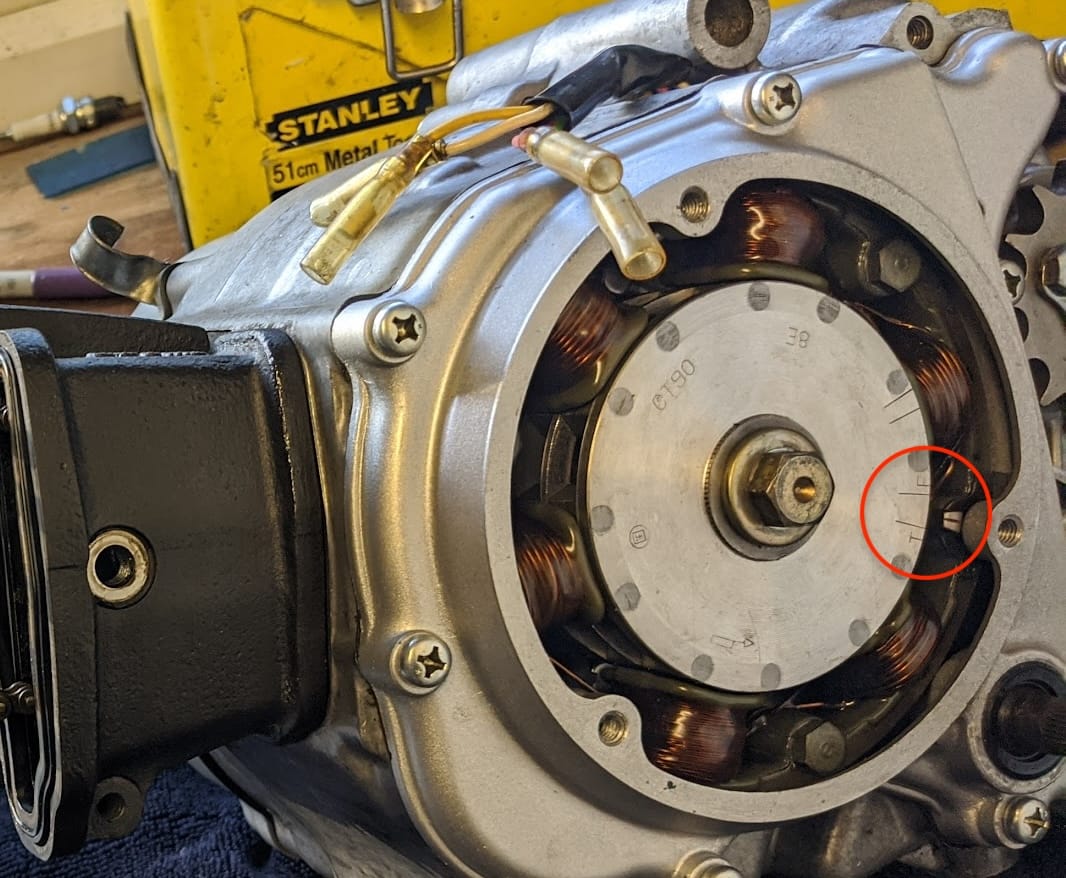
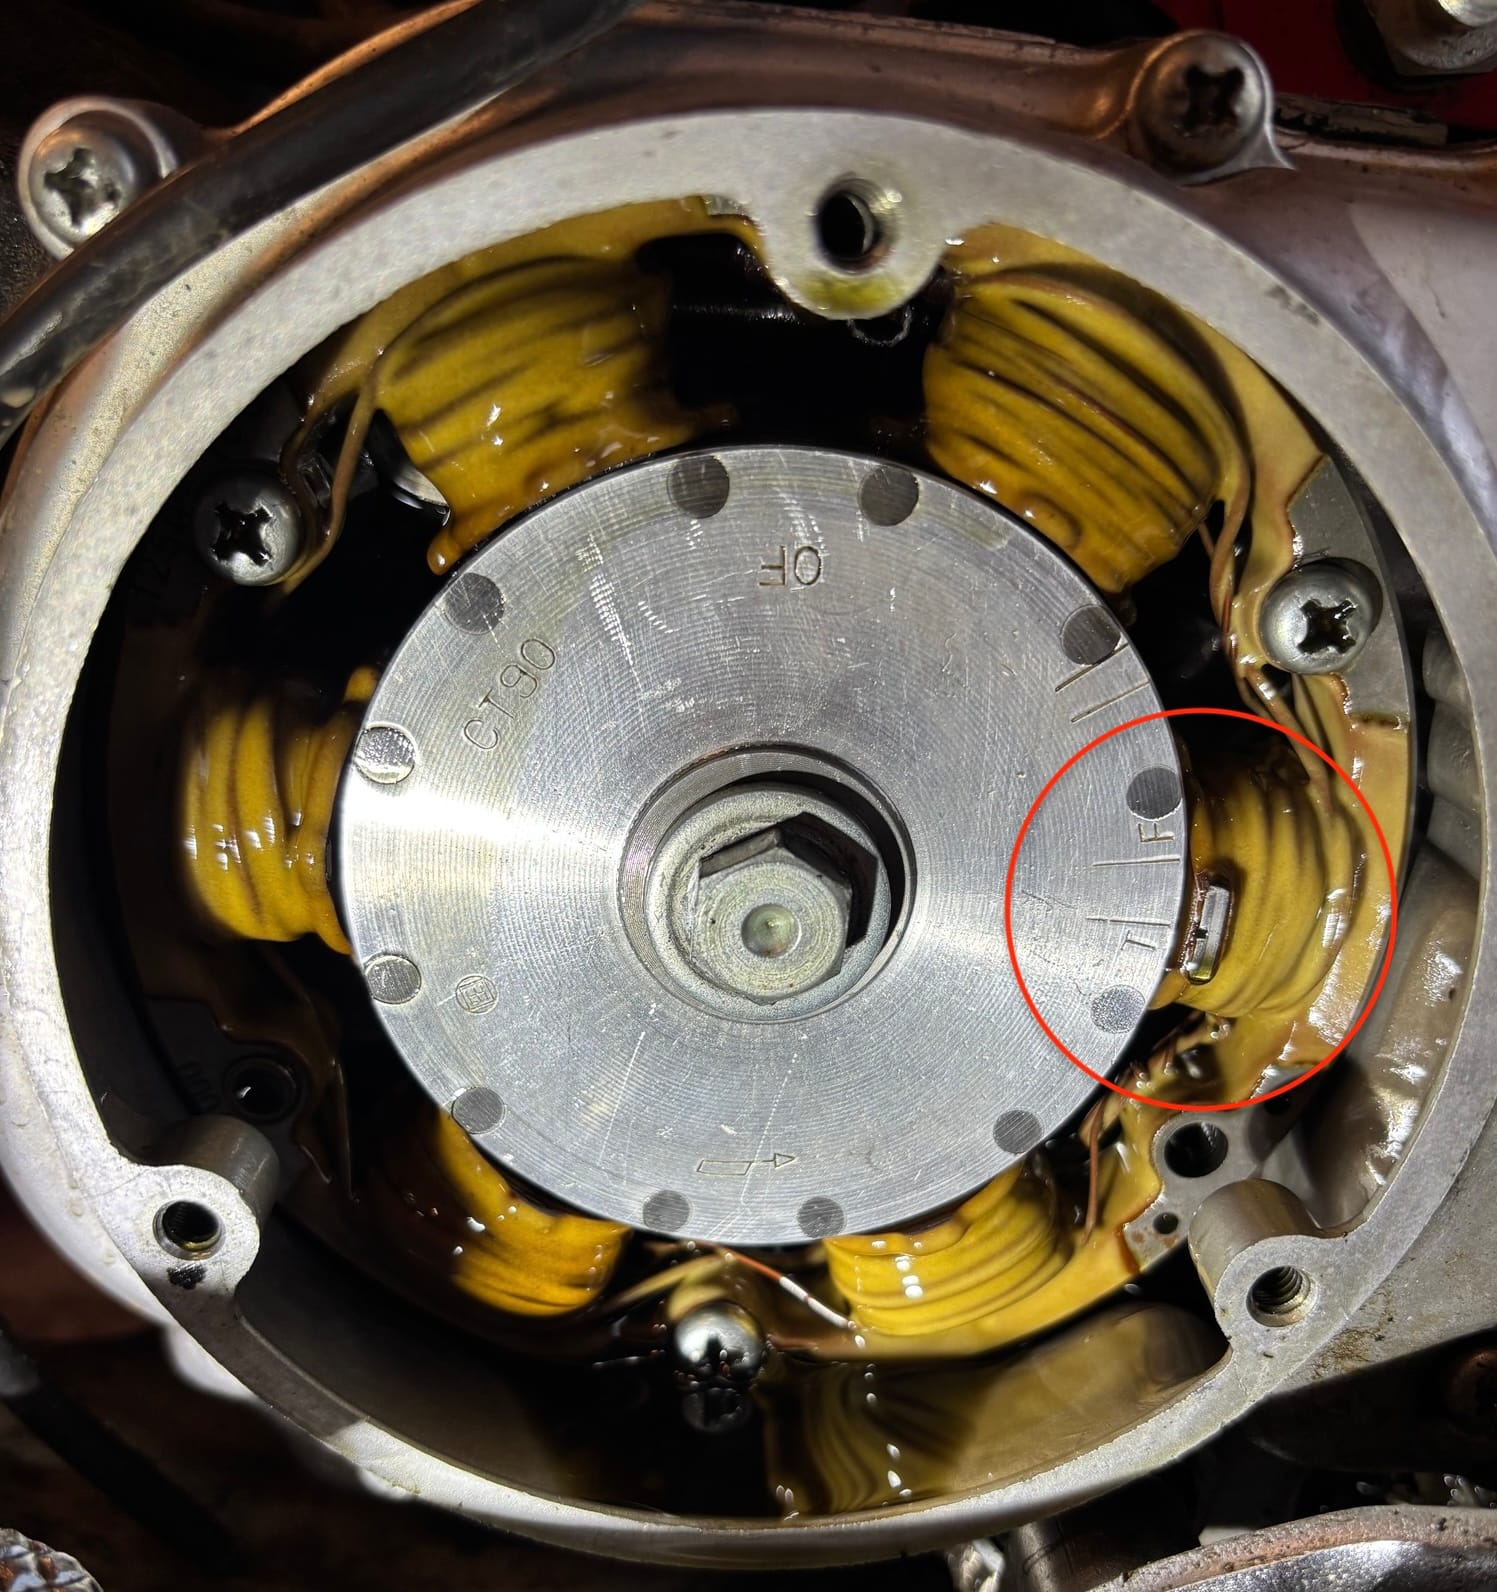
left: the stator used on earlier models / right: the other design, found on later CT90s has the index mark on top of the coil highlighted. NB, if you are swapping alternator components you must make sure to get the correct rotor for your stator design (the pointers are in different positions relative to the crank, so the corresponding timing marks on the two rotor designs differ)
There are several ways to check the timing. Here is the method outlined in the manual:
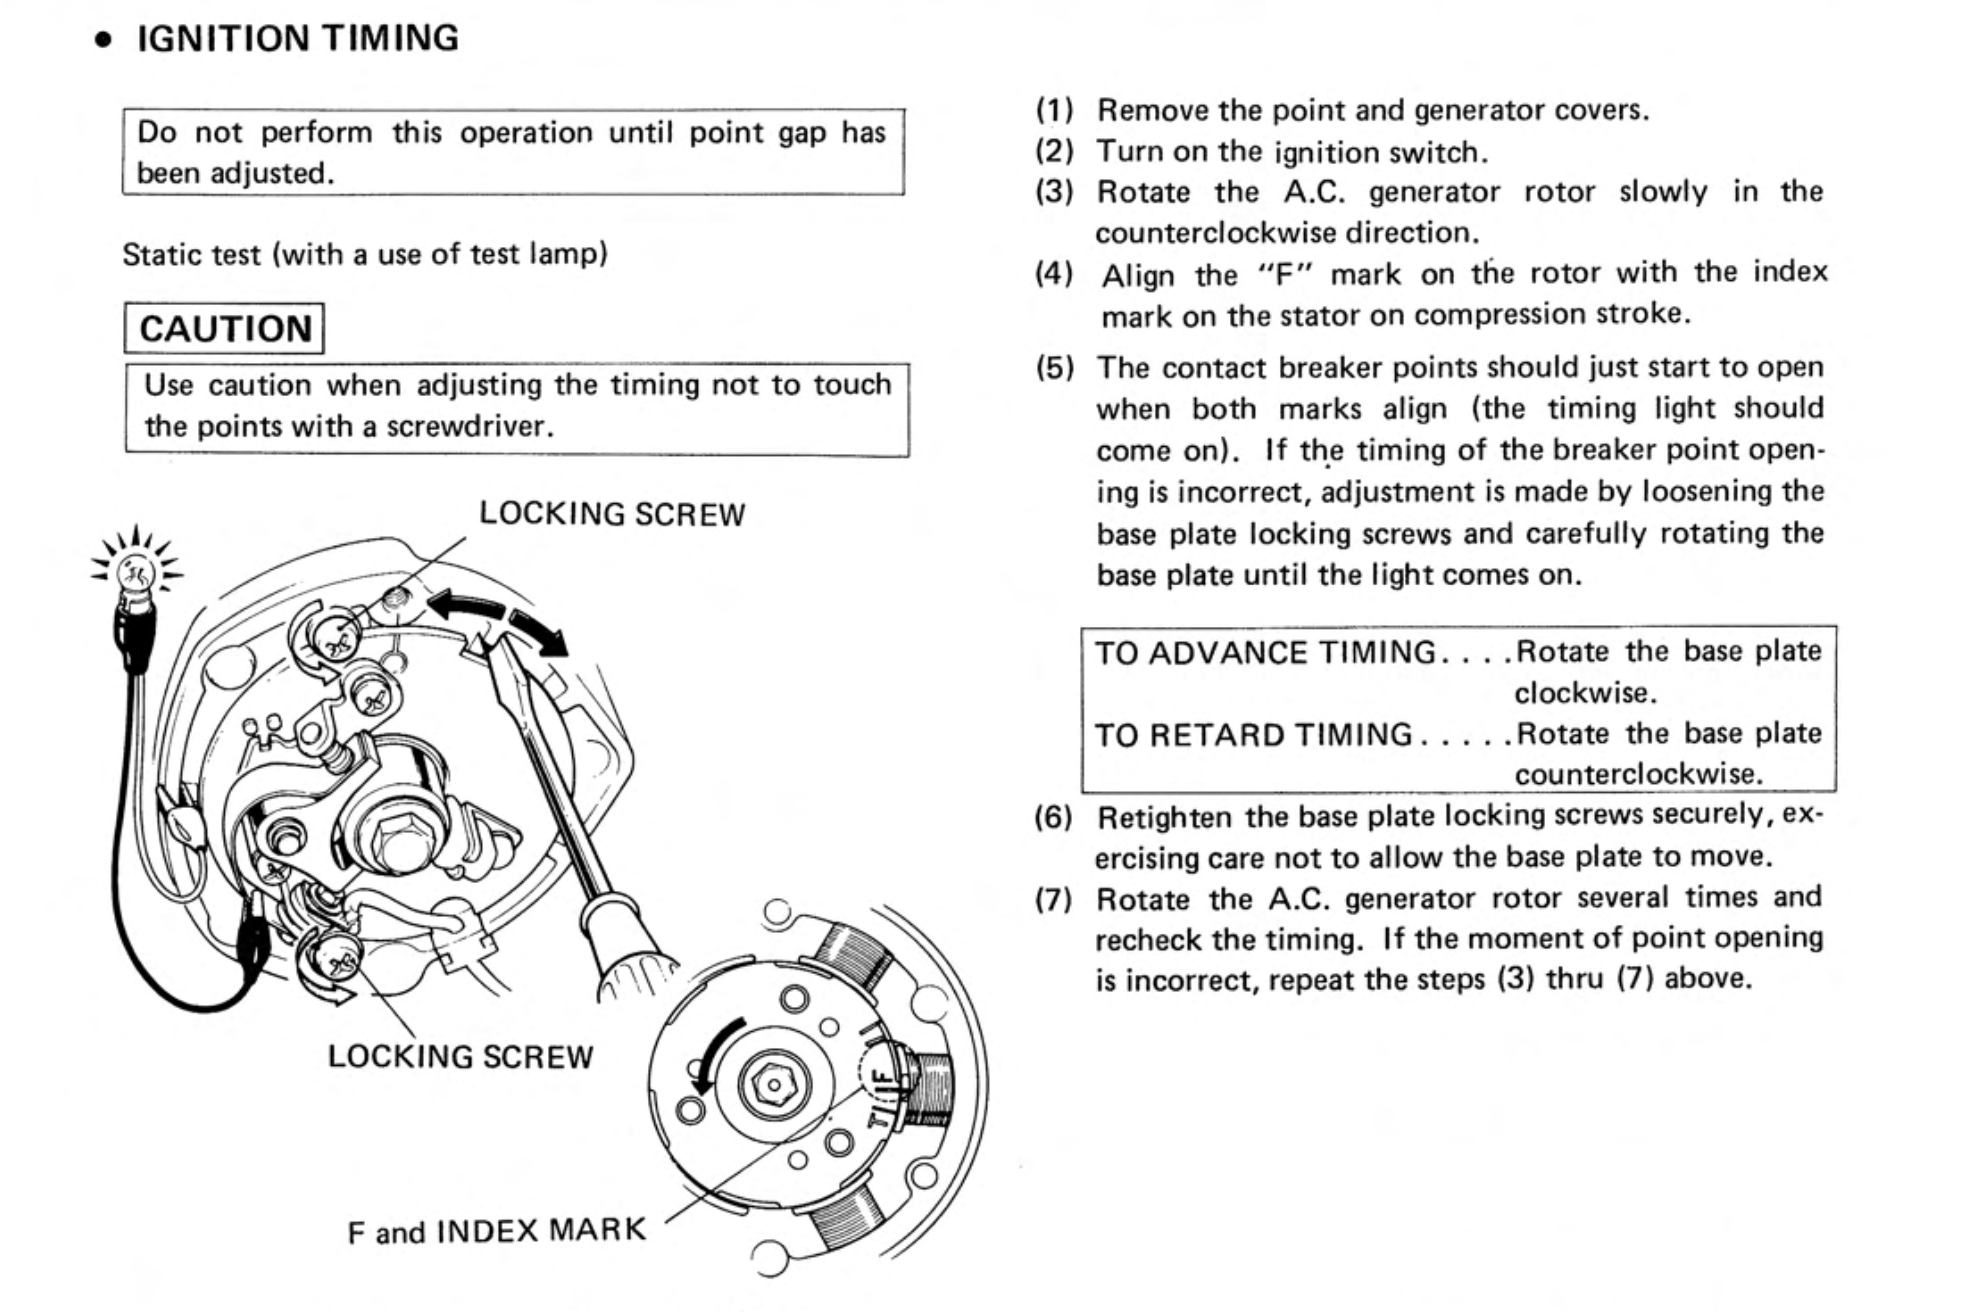
This test works because - when the points are closed - current from the bike's battery bypasses the light bulb, passing instead through through the ignition coil to the green contact breaker wire and then via the closed points/backing plate back to the battery negative. When the points open this circuit is broken and the current finds ground through the timing light instead, causing it to light up and giving you a visual indication of when the the spark plug fires.
You can do an alternative test with a multimeter that has been set to detect continuity (many multimeters will play a sound when continuity is detected):
First, unplug the green contact breaker wire from the harness and connect the contact breaker side of the wire to one of the multimeter leads (it is important to disconnect the harness, otherwise the multimeter will detect continuity via the condenser's connection to ground and the test won't work). Attach the other other multimeter lead to the engine case so that, when the points are closed they will close the circuit between the multimeter wires and it will play a sound. The sound will stop the moment the the points open.
You can do the same test with a bulb: connect one wire to the positive battery terminal and the other to the disconnected contact breaker cable - the bulb will go out when the points open. These two tests are arguably safer than the one in the manual as they can be done with the ignition turned off and there is no danger of overcharging the coil.
The contact breaker requires periodic adjustment because a combination of wear on the contact breaker 'heel' that rides on the cam and elongation of the cam chain - which, when the tensioner takes up the slack, causes the camshaft to rotate clockwise in relation to the points - causes ignition timing to become retarded over time.
Note, as explained in the spark advancer section, it is possible to reassemble the spark advancer 180 degrees out: if you find that, despite adjusting the timing correctly, the bike backfires and won't start then it is worth double checking you reassembled the spark advancer correctly
