Chains tend to 'stretch' in use because material wears away from the bushings and pins, increasing the clearance between the parts and causing the chain to elongate. As a result, when Honda replaced the Super Cub push-rod engines with a new chain-driven overhead cam model they needed to incorporate a chain tensioner to take up any slack in the chain.
Without something to take up the slack as the chain wears the chain can whip around inside the case causing damage and - because the time that the valves open in relation to the piston position is effected - poor running can result.
The diagrams below show the older piston-rod engine compared to the replacement OHC model:

the original 1958 Super Cub engine used push-rods to open and close the valves in the cylinder head, no cam chain required (left) / the new OHC mechanism introduced in 1964 (right).
Operation
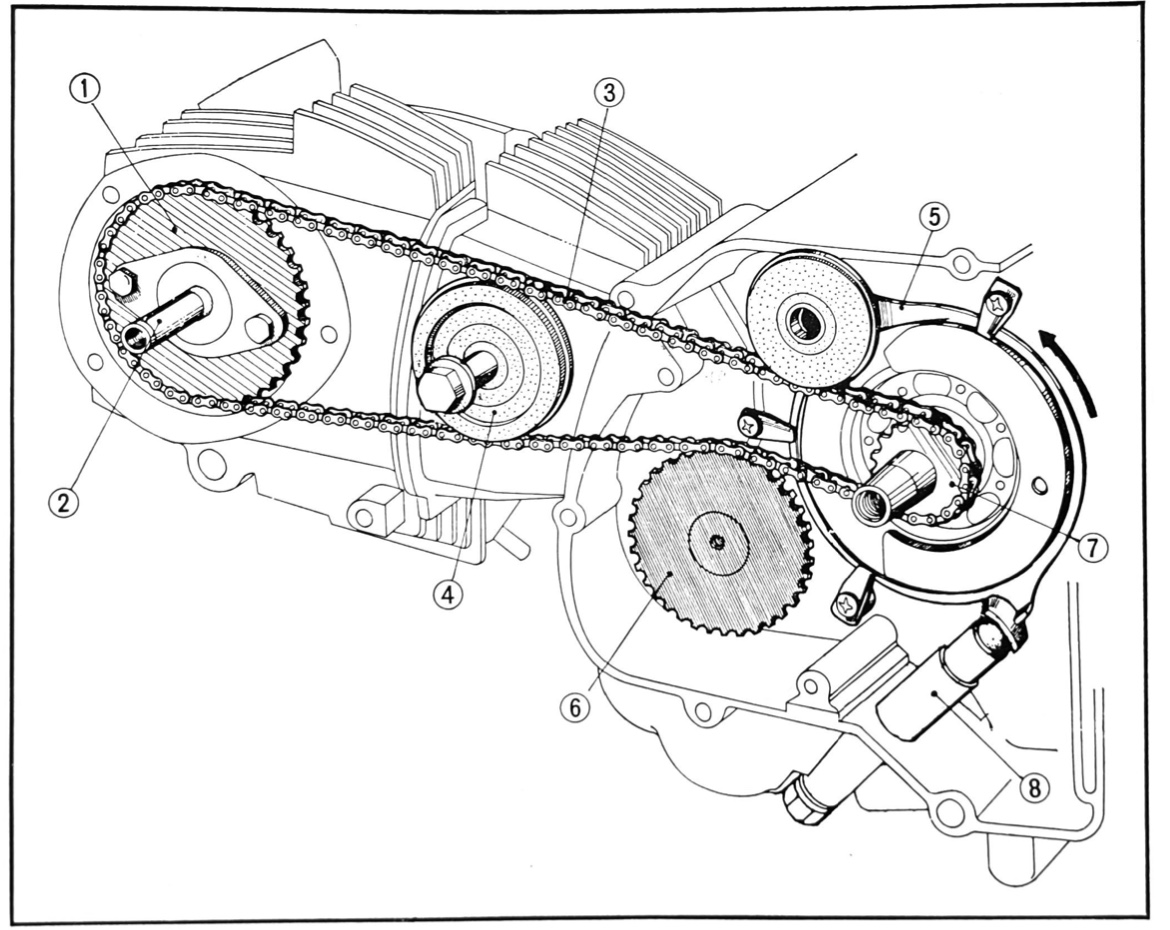
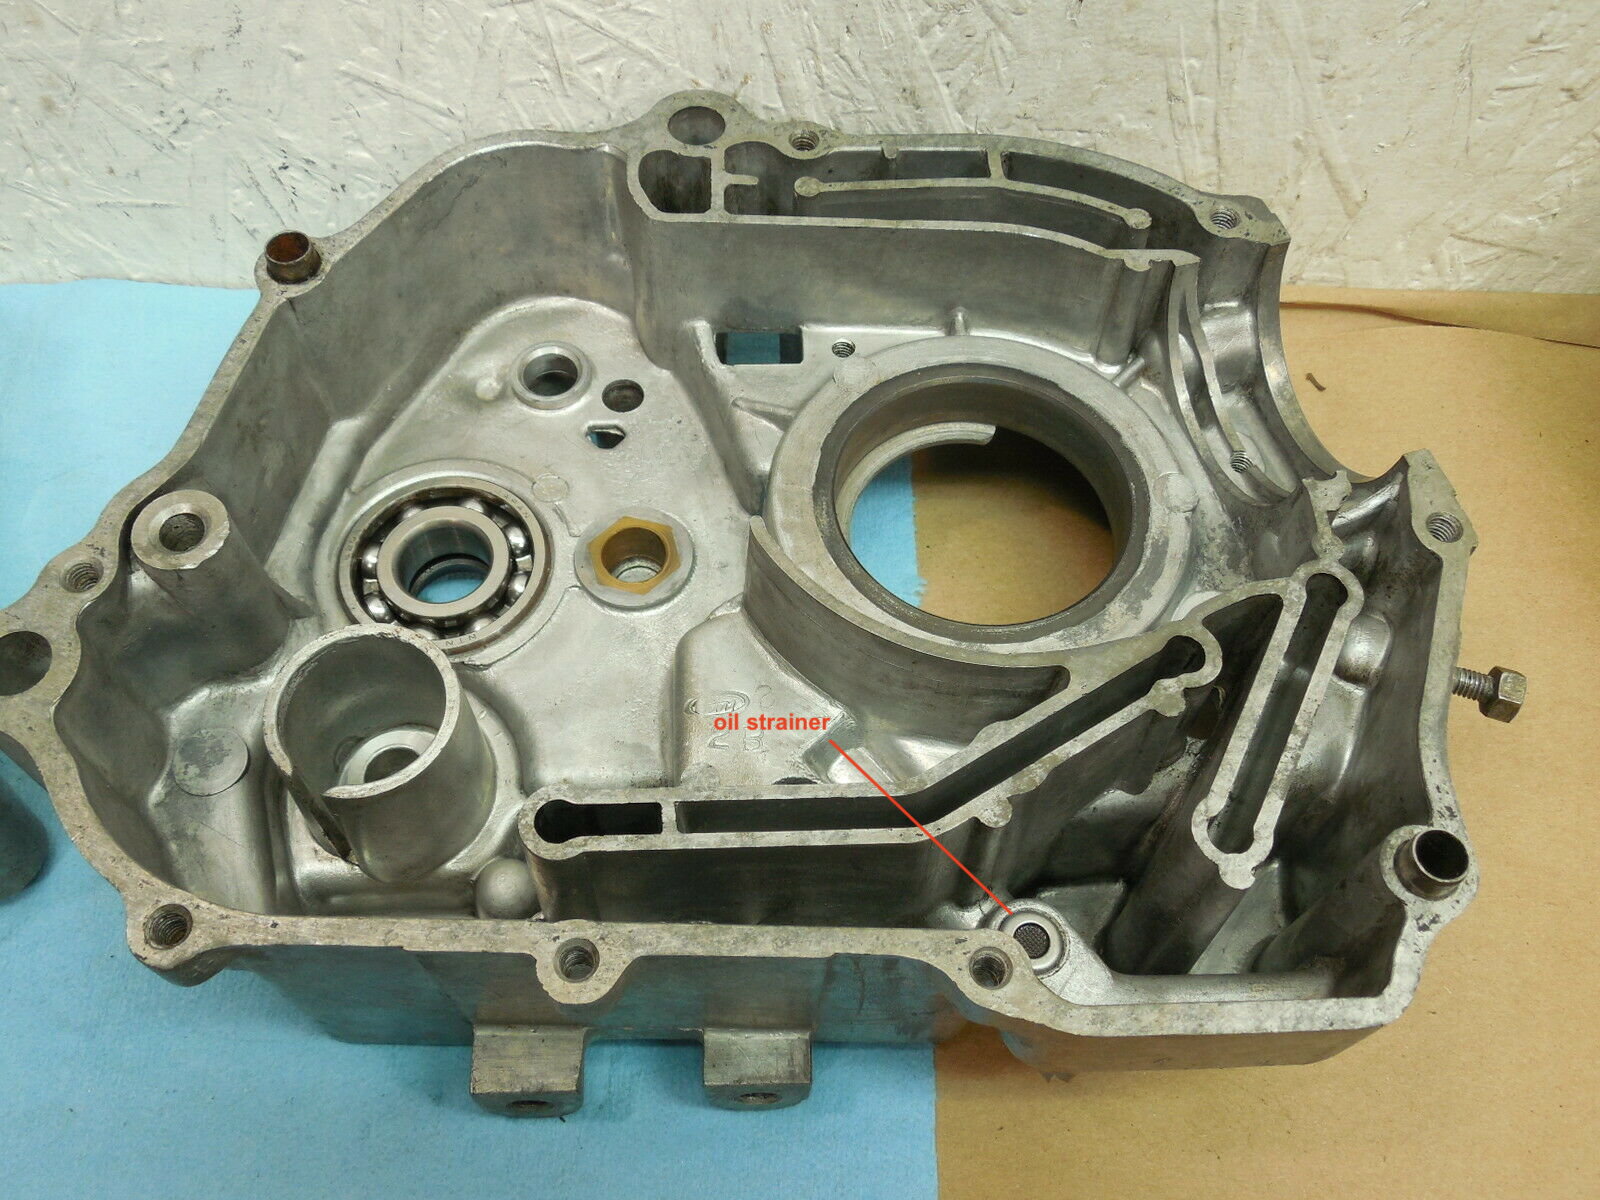
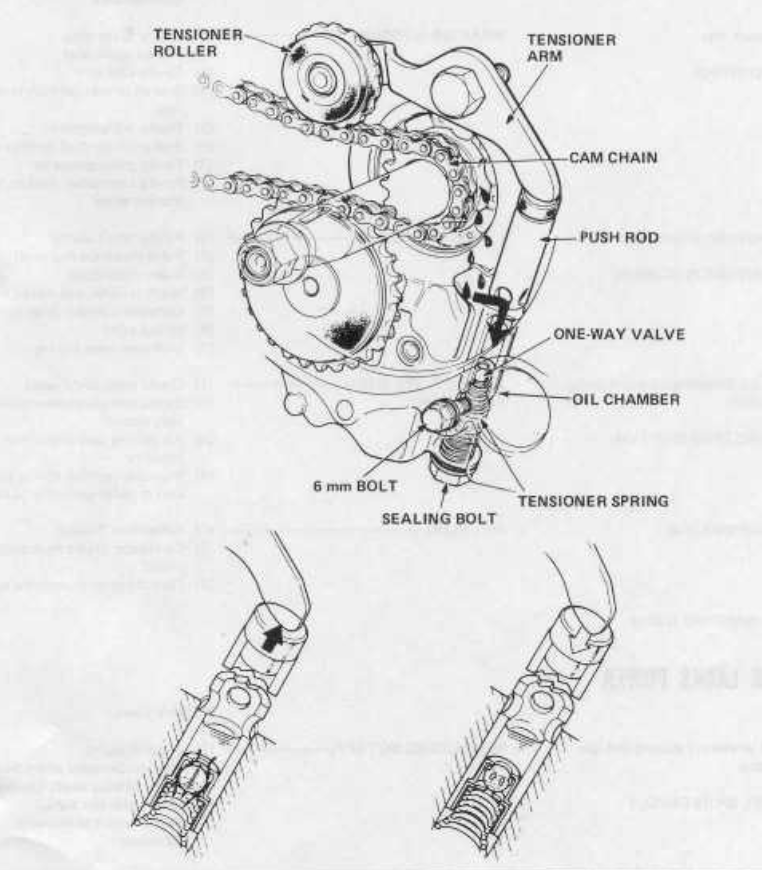
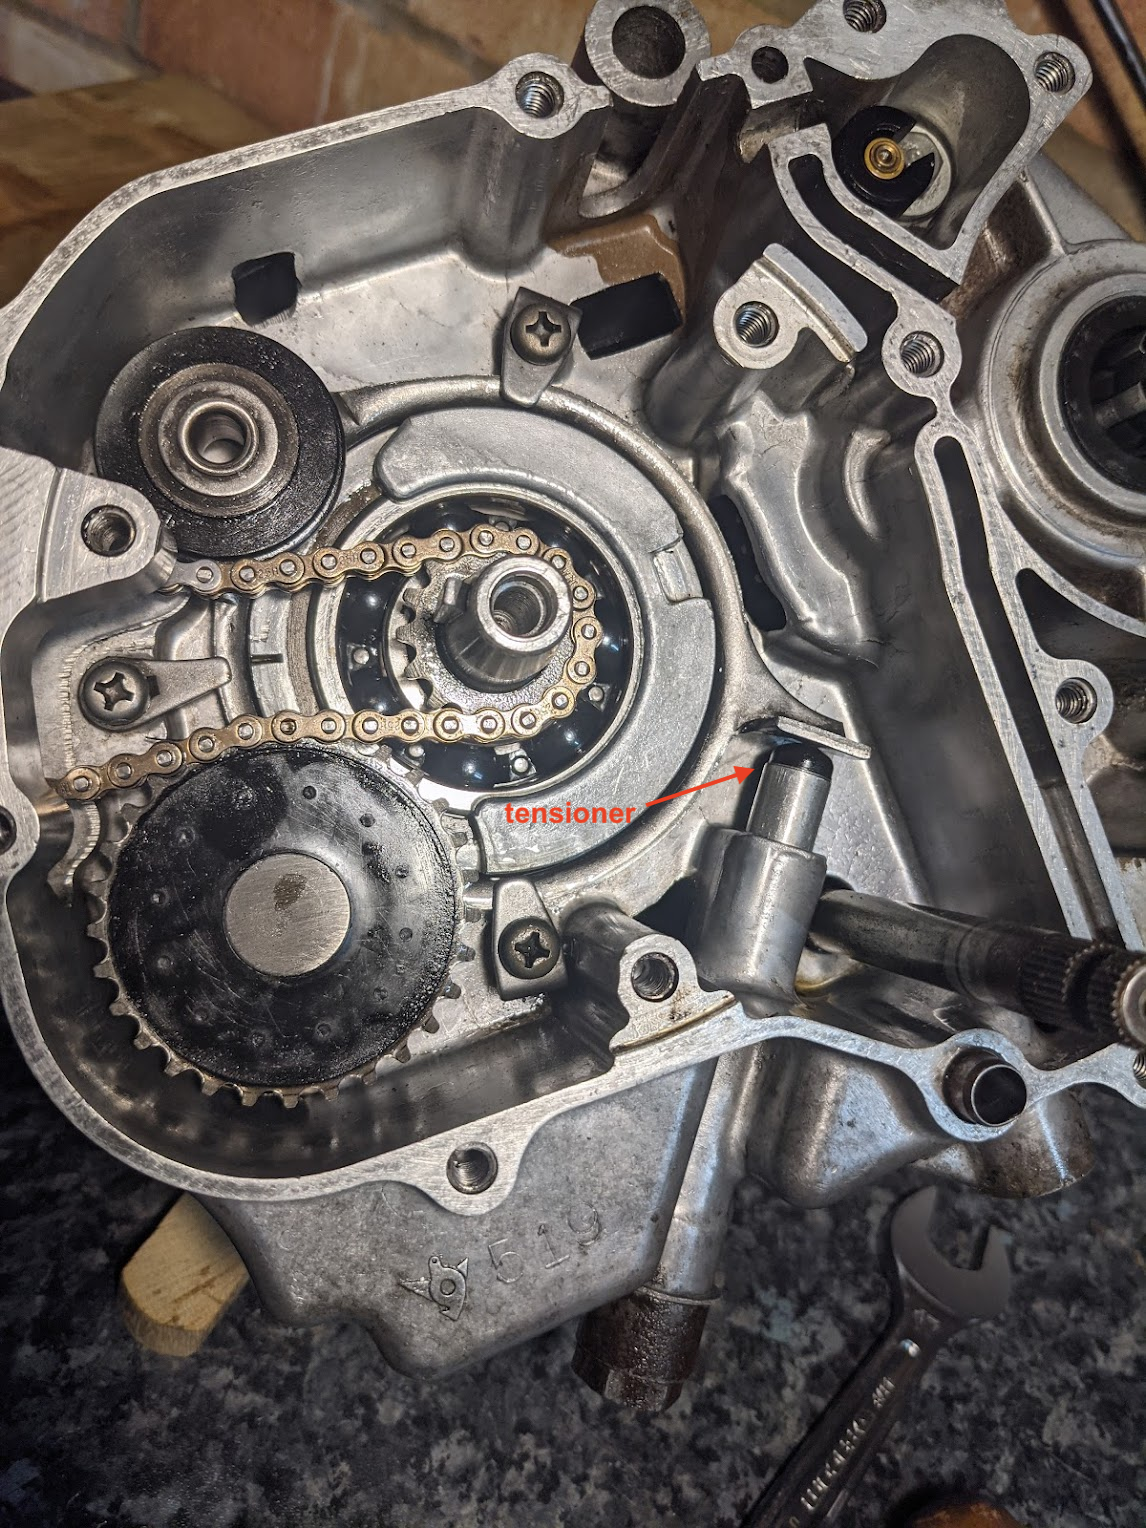
As shown in the diagram above on the right, the tensioner is made up of two parts, the tensioner push rod (8) and the chain tensioner (5). The rod pushes against a tab on the tensioner rotating it in the direction of the arrow so the roller mounted on the end of the tensioner takes the slack out of the chain.
Honda don't seem to have had much luck on this front and the cam chain tensioner department were kept busy for over 20 years trying to get a satisfactory design.
1964 - automatic tensioner
Honda started of with the best of intentions when they introduced their new overhead-cam engine in 1964, having installed a system that would automatically apply the correct tension on to the cam chain without the need for periodic adjustments.
Honda C65 (the first overhead cam super cub)
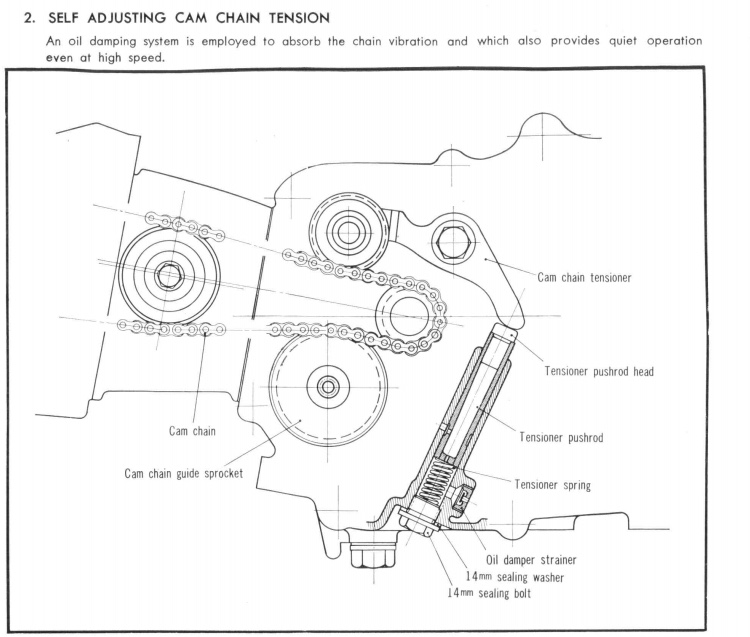
The idea was to create an oil damper that would suppress the vibration of the cam chain: before the engine starts oil enters through the filter screen shown in the diagram below and partially fills the chain tensioner spring compartment. After the engine starts any slack in the chain sets up a reciprocating motion in the pushrod and this forces any air left in the spring compartment through the small hole in the base of the pushrod where it exits the pushrod (hole A below) and out into the engine case through oil hole 'B'.
While the engine is running the oil returning from the cylinder head drains down through the cam chain tunnel and pools around the oil hole , eventually submerging it and sending oil back into the pushrod and on to the spring compartment below. In this way the spring compartment is constantly flooded with oil and functions as a damper.
the filter screen in the diagram on the left is highlighted in the second picture; the crankcase exit hole ('B') is in the third picture, and finally the pushrod and spring
The shop manual says the filter screen - which incorporates a mesh strainer - acts in conjunction the centrifugal filter and the filter screen under the oil pump to purify the oil. It's hard to believe this tiny device made much of a difference to oil purification but I suppose it at least prevented any bits in the oil jamming up the tensioner.
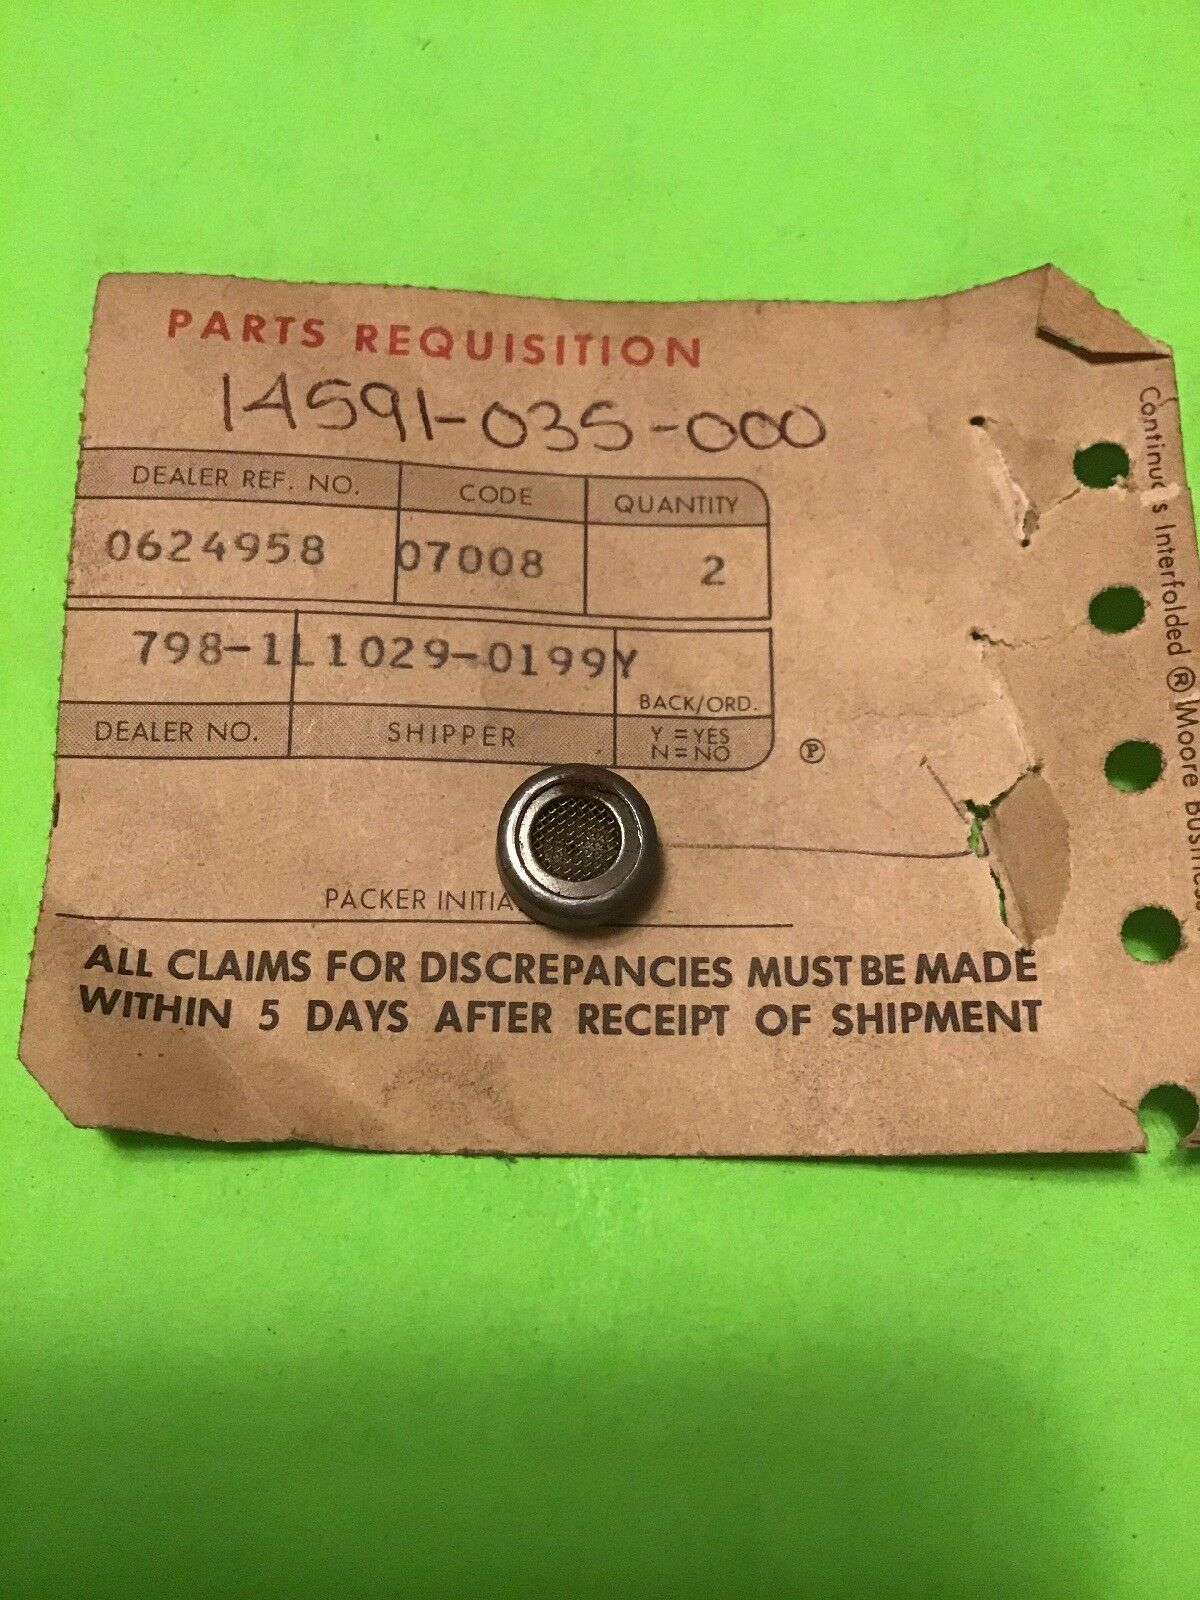
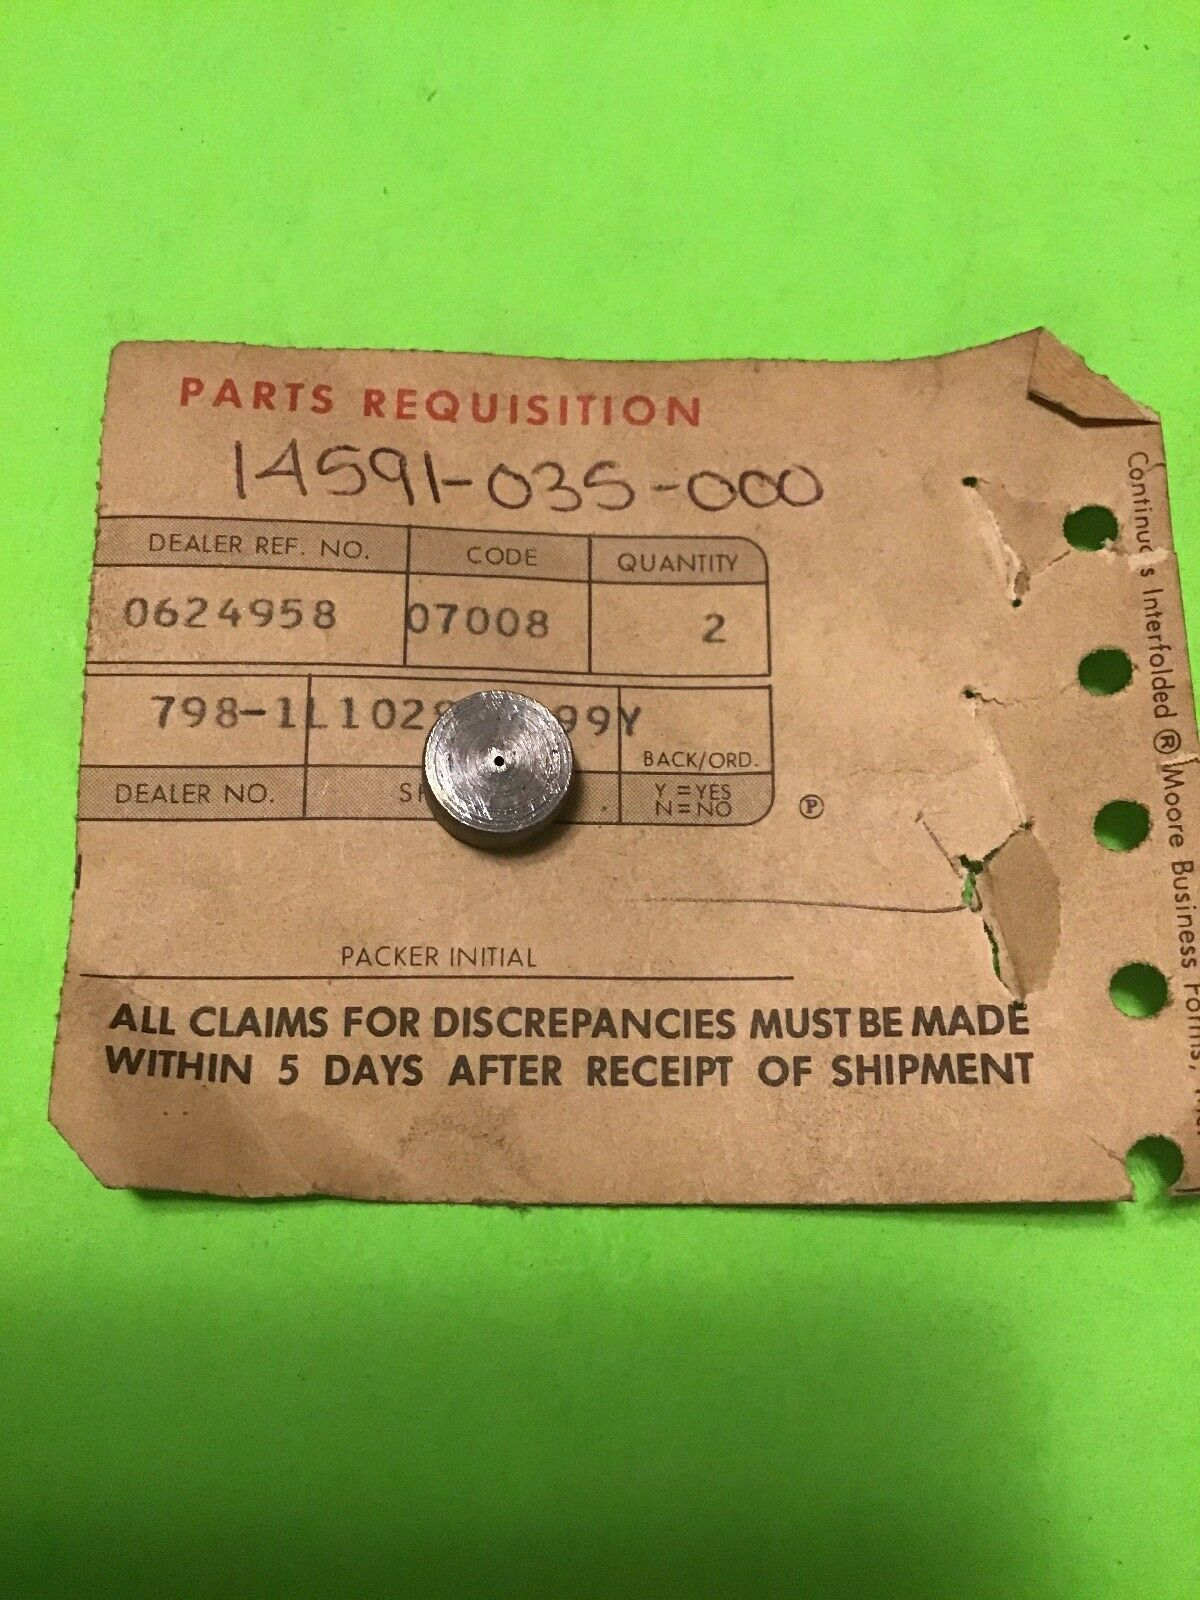
This type of filter screen was used in the CM91 from around 1966
Later on, Honda replaced the filter screen with a device that acts as a rudimentary check valve (shown below). Inside the device, a red phenolic disk moves freely back and forth. When downward pressure is applied to the tensioner rod, oil pressure pushes the disk against the engine side of the check valve, sealing off the hole and restricting oil flow out of the tensioner chamber. When the rod moves upward, the disk shifts to the opposite side of the check valve. Three stamped protrusions on the back of the device prevent the disk from sealing the orifice on the other side, allowing oil to be drawn into the spring compartment.

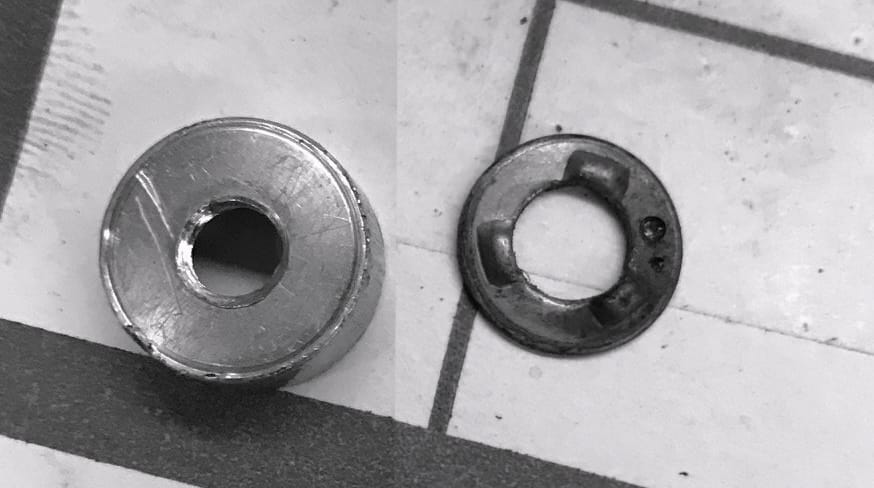
replacement check valve (left) and dismantled version (photo from lilhonda forum).
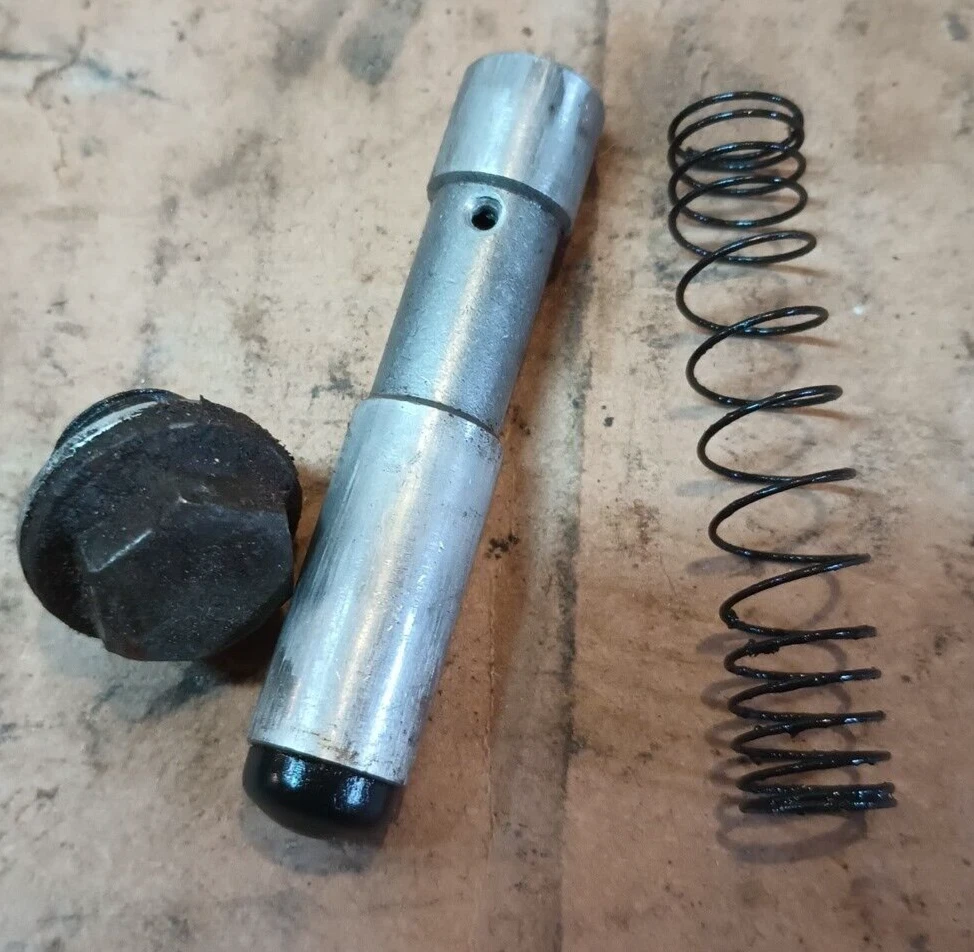
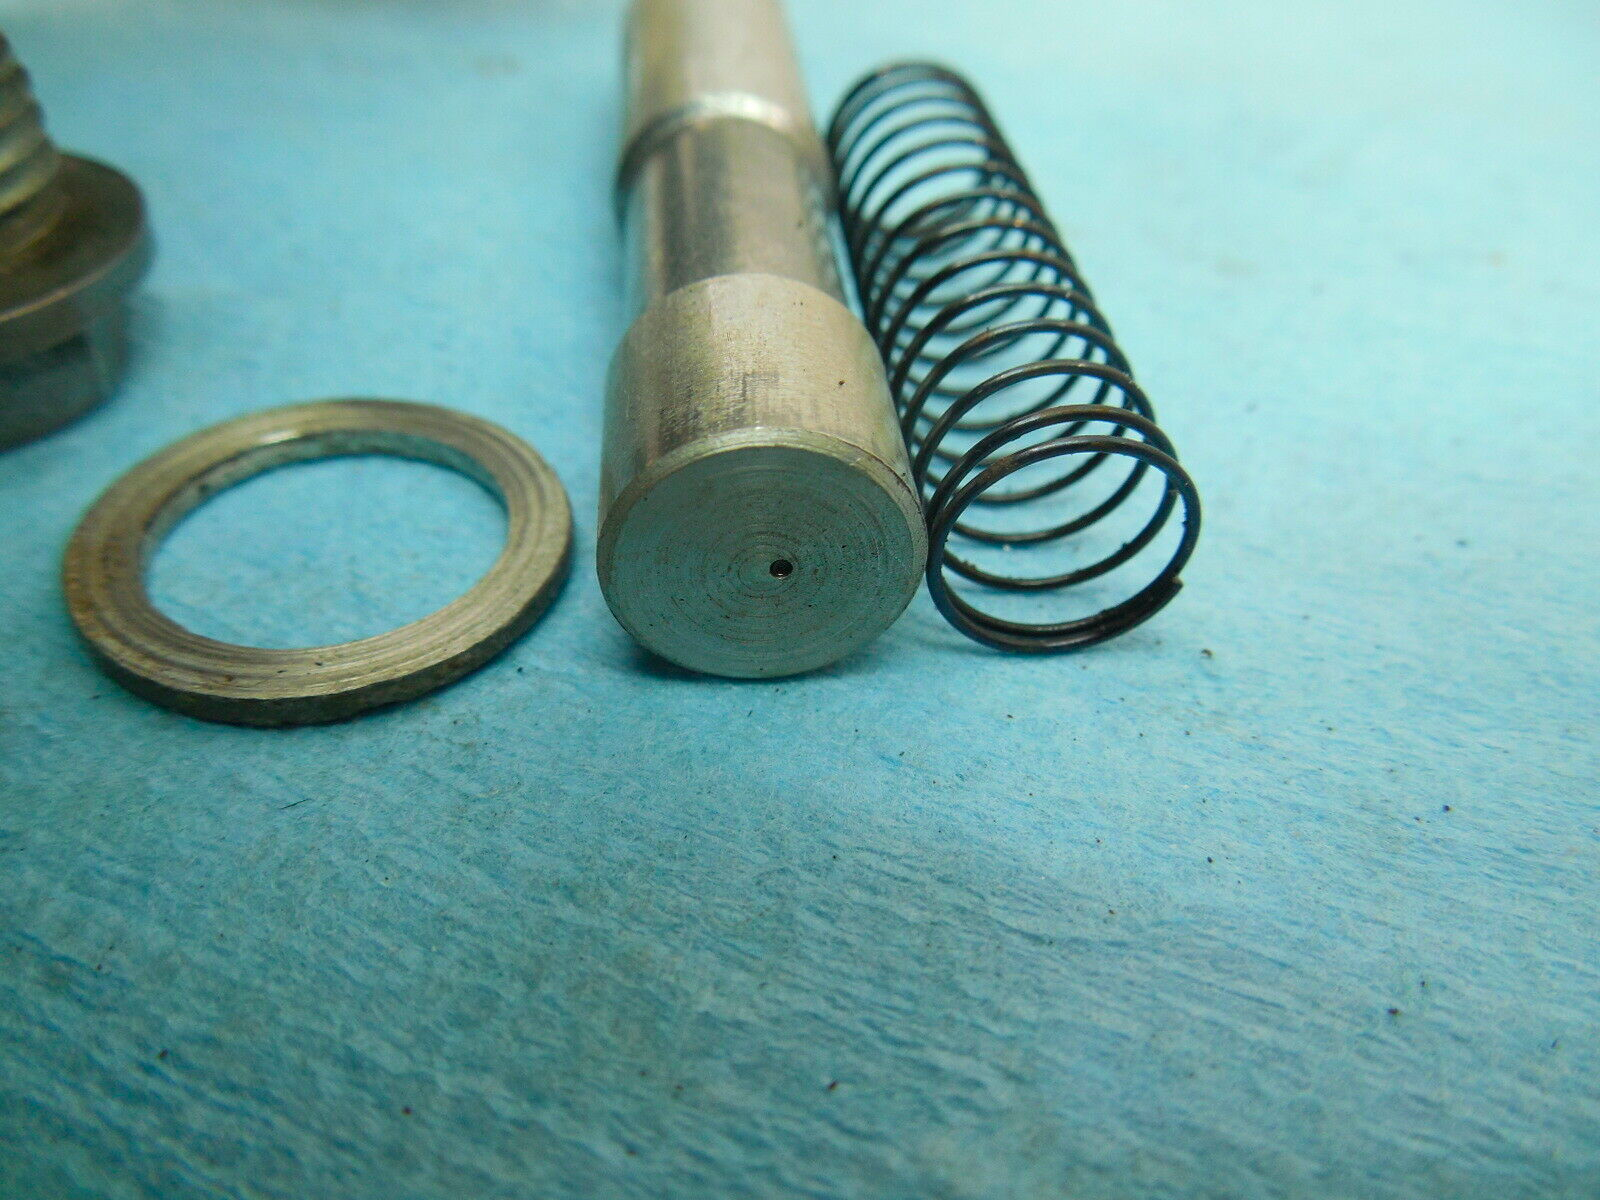
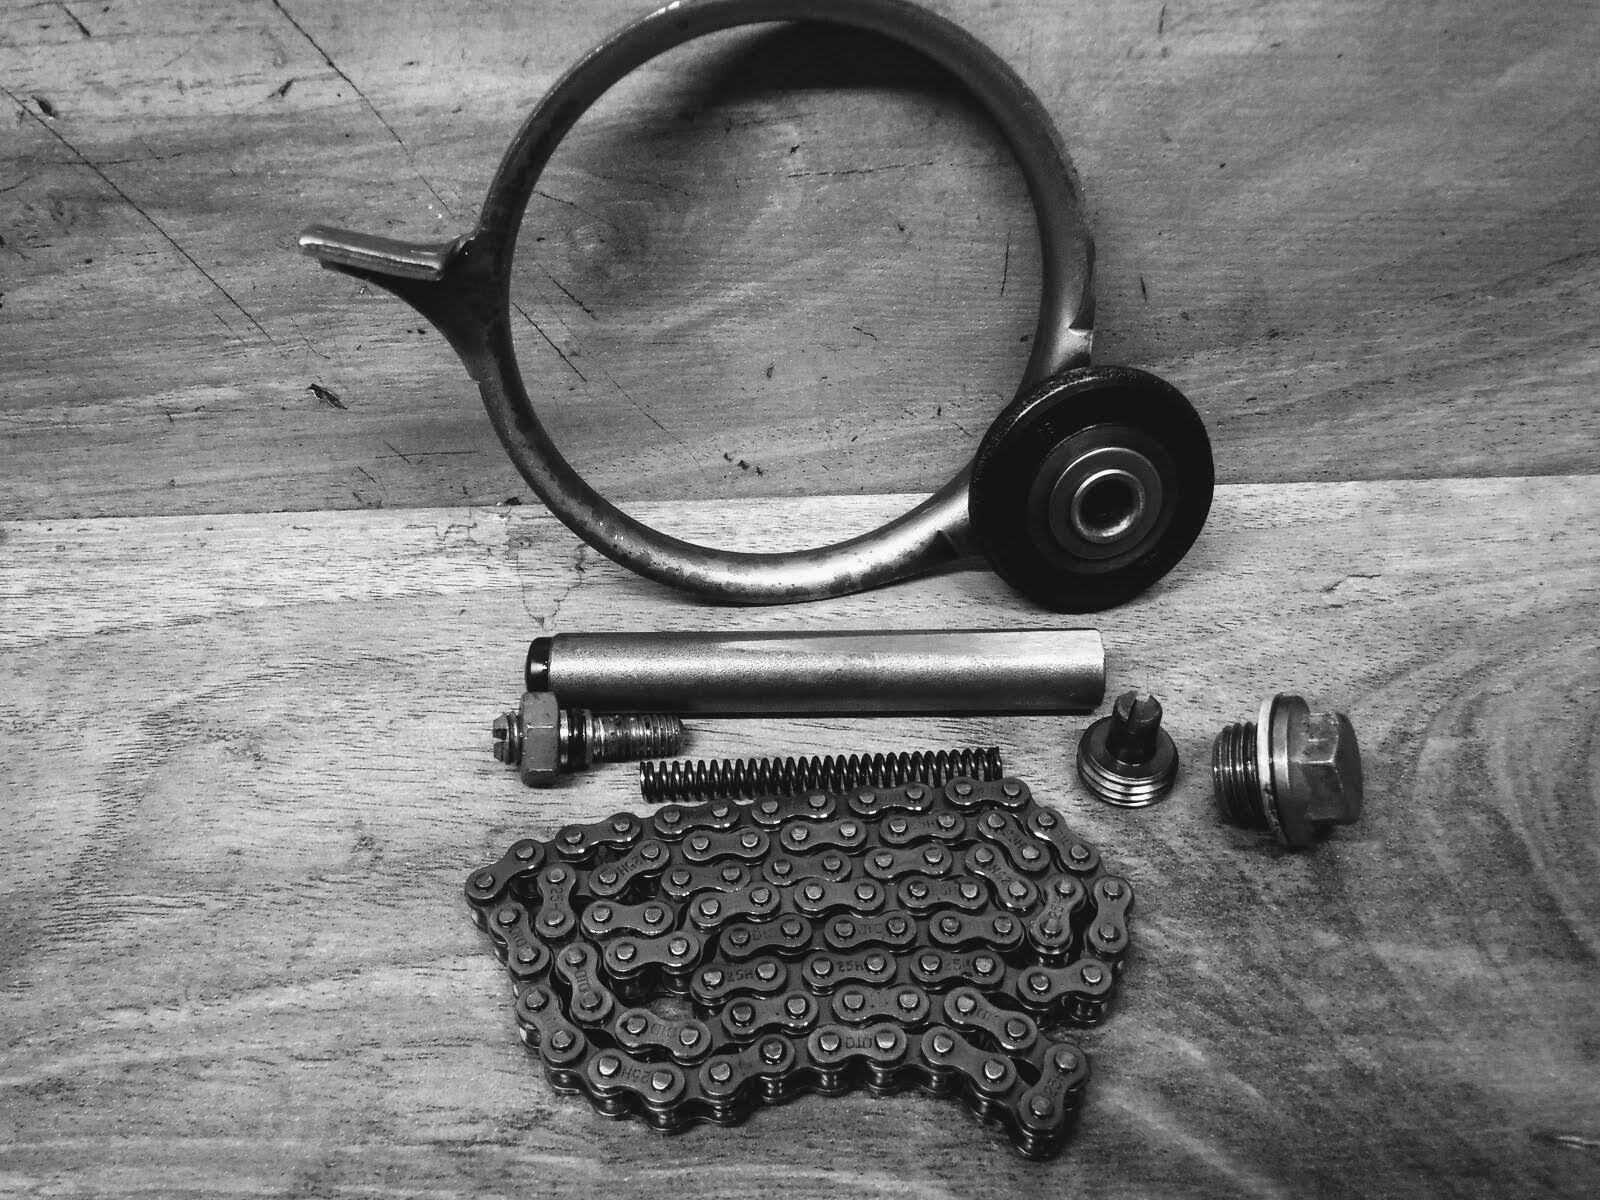
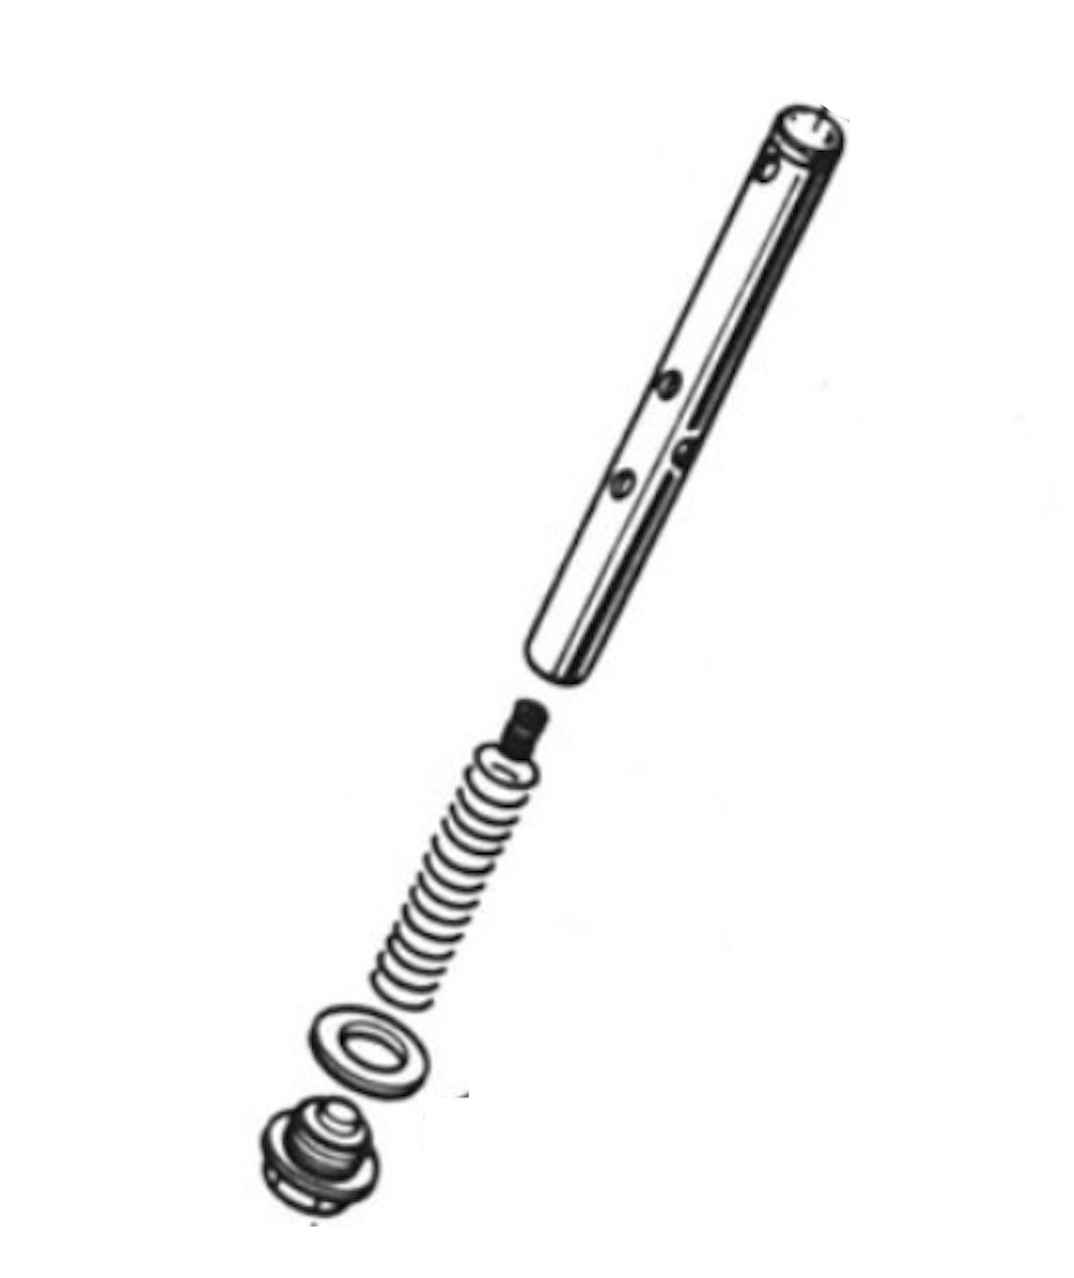
Here are the tensioner parts:
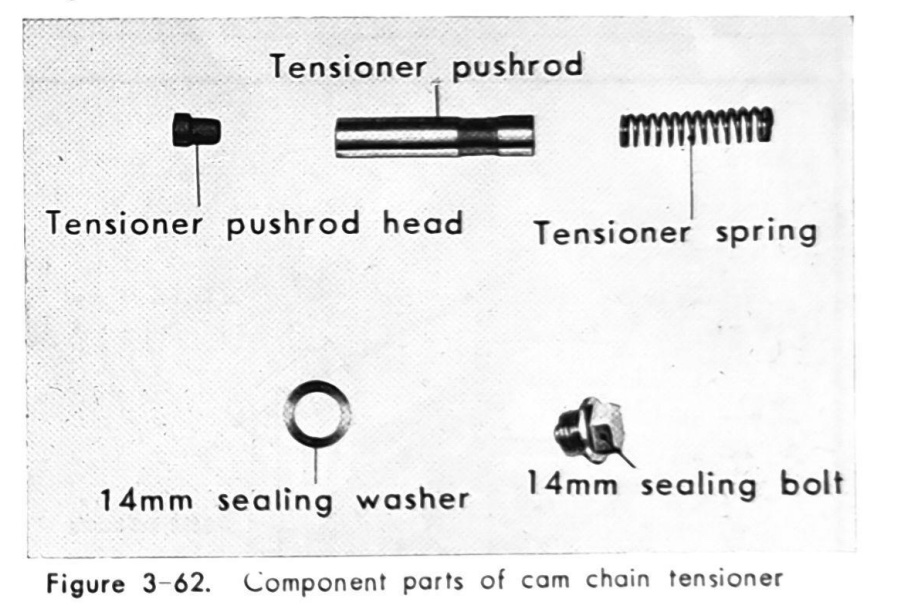
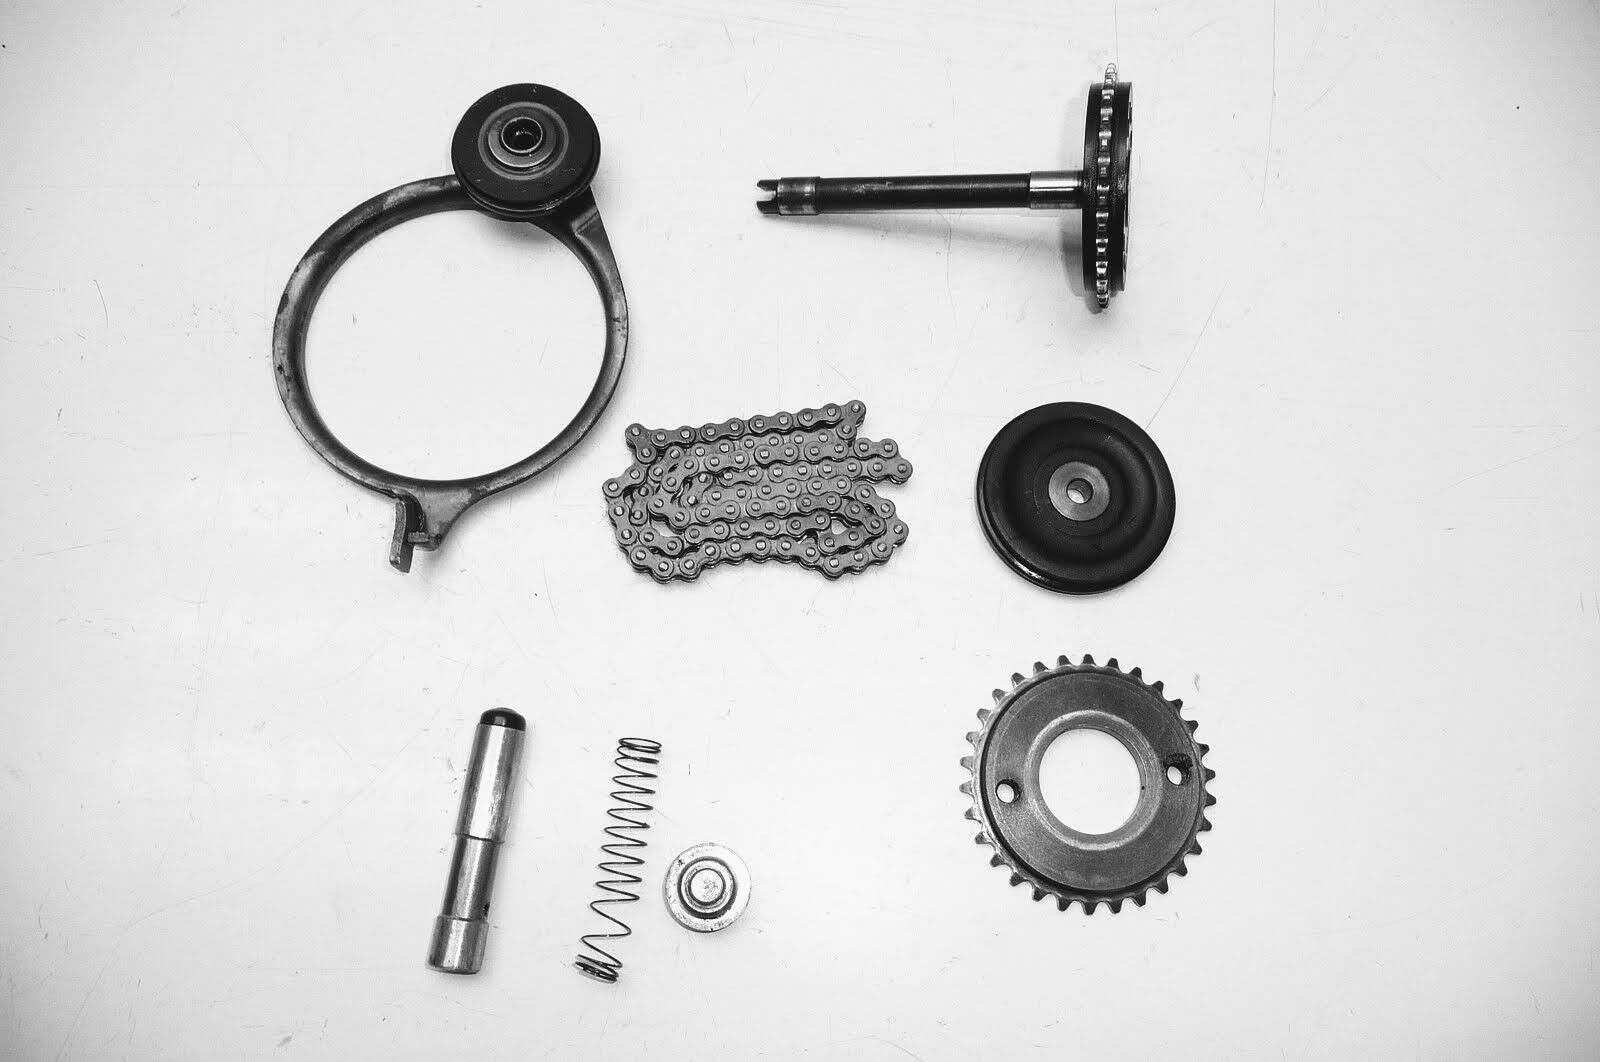
image from the CM91 shop manual (left), and pictures of the parts (middle and right)
It seems this solution did not work as well as intended and it after a couple of years it was replaced with the simpler device described in the next section.
1968 - automatic tensioner v2
Honda's second attempt still aimed to use a combination of oil pressure and spring power to maintain tension automatically, but the vented rod was replaced by a shorter unvented version and a substantially larger spring. In this version the oil hole (labeled 'B' above) is no longer drilled through to the tensioner chamber and - although the check valve is still present - without anywhere for trapped air to escape the spring compartment - the oil damping effect was presumably further reduced.
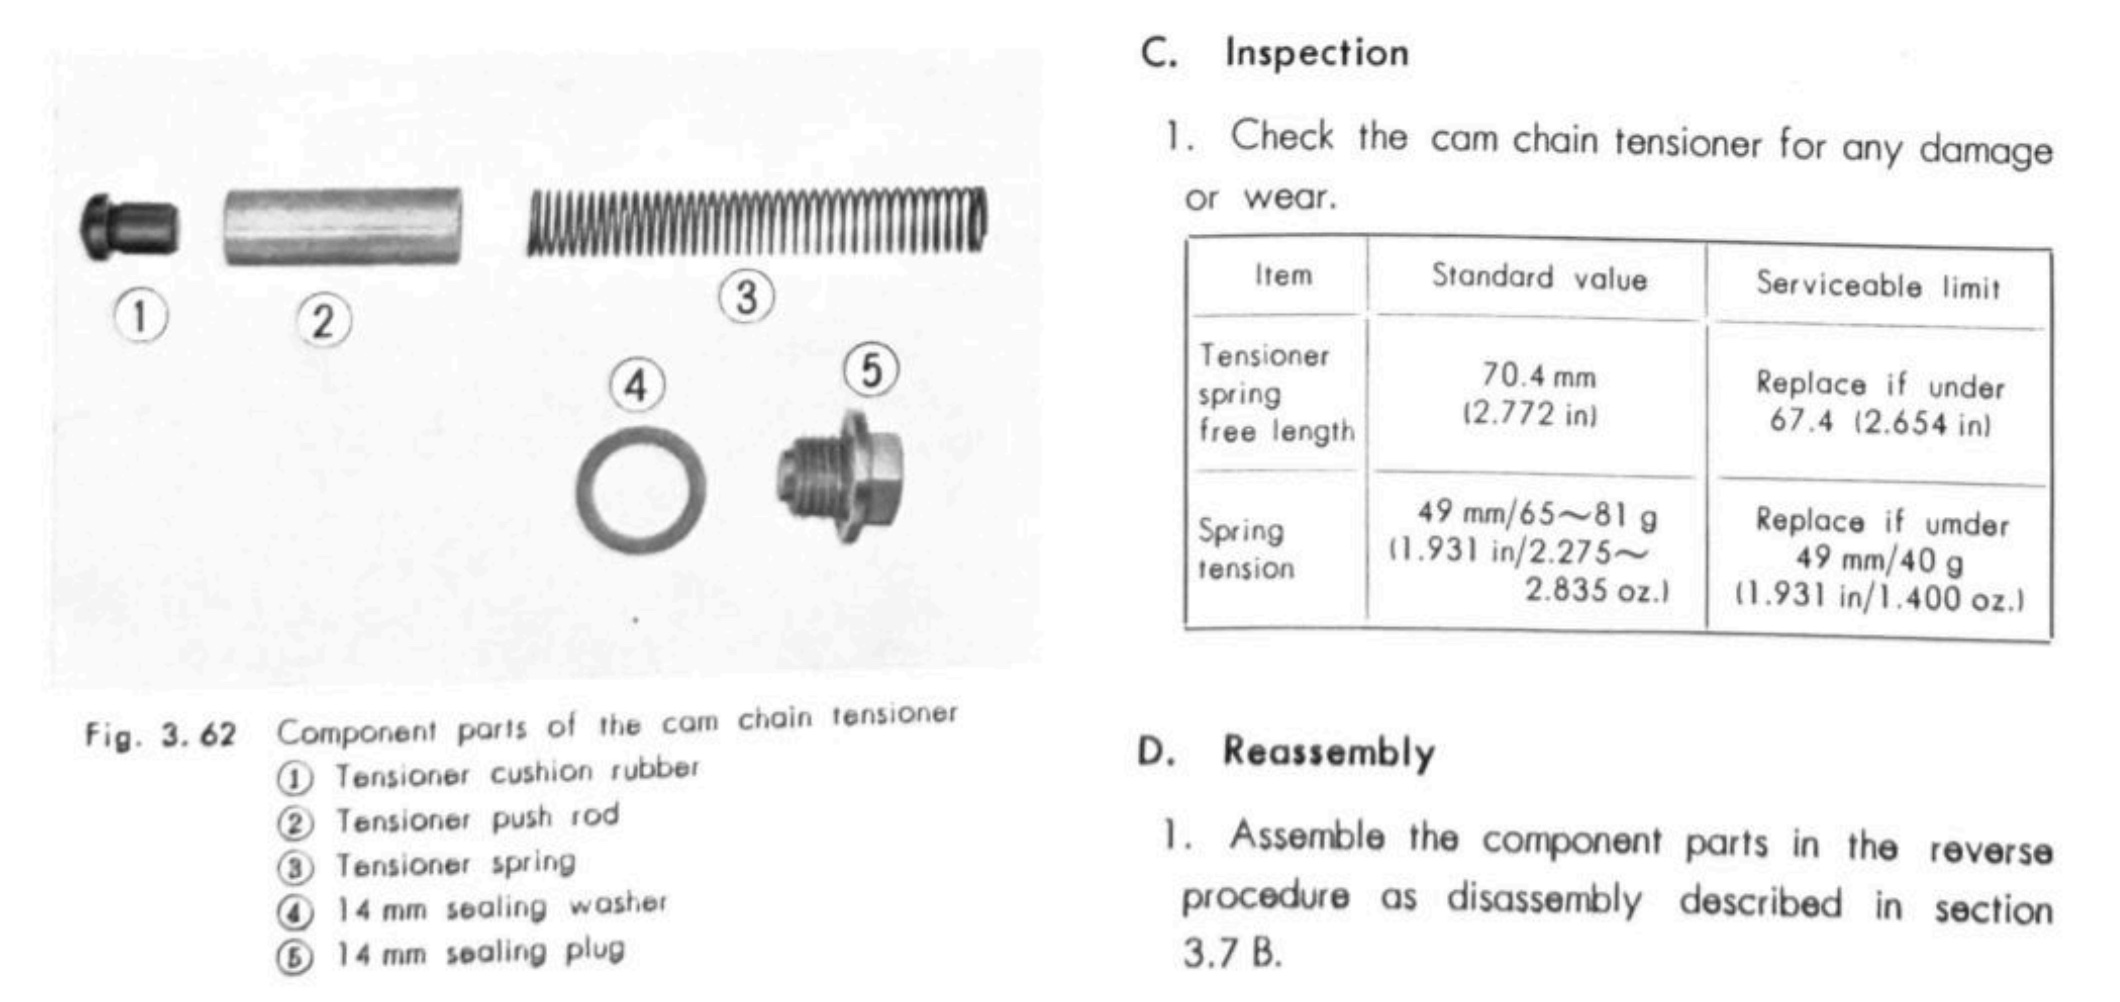
Entry describing the parts from the 1971 C90 shop manual
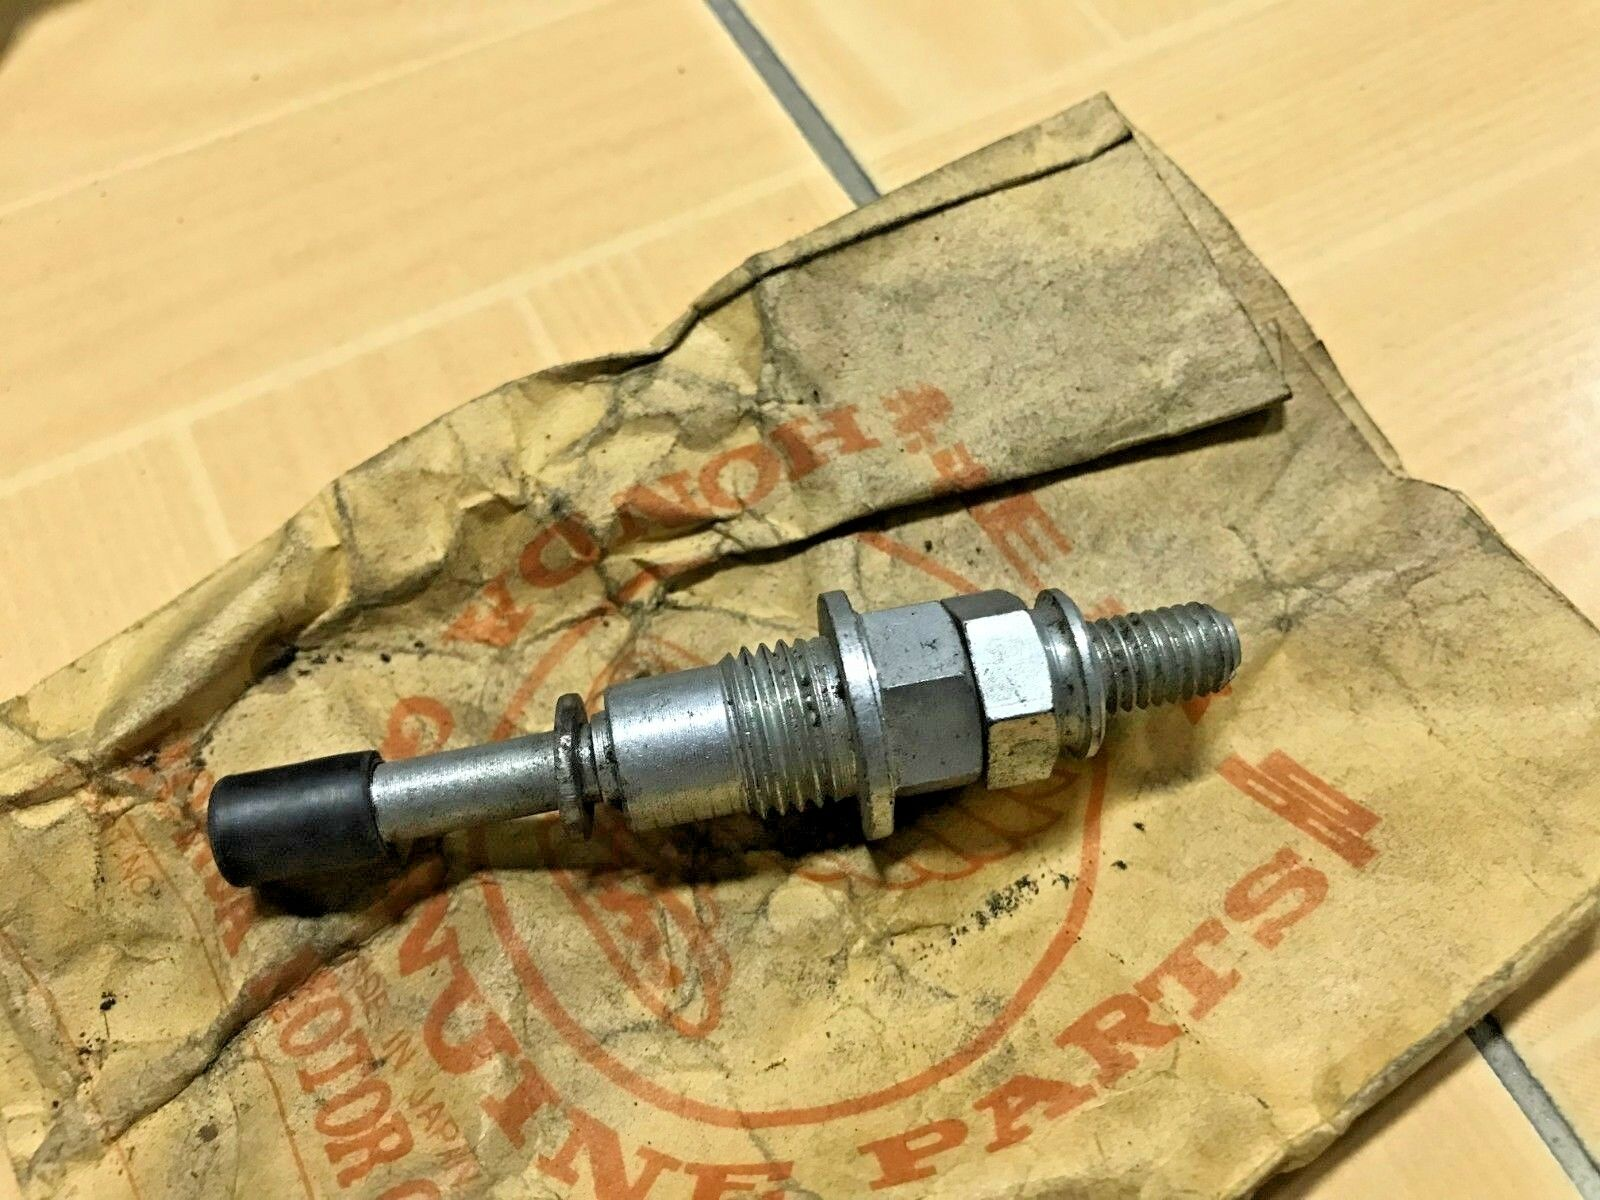
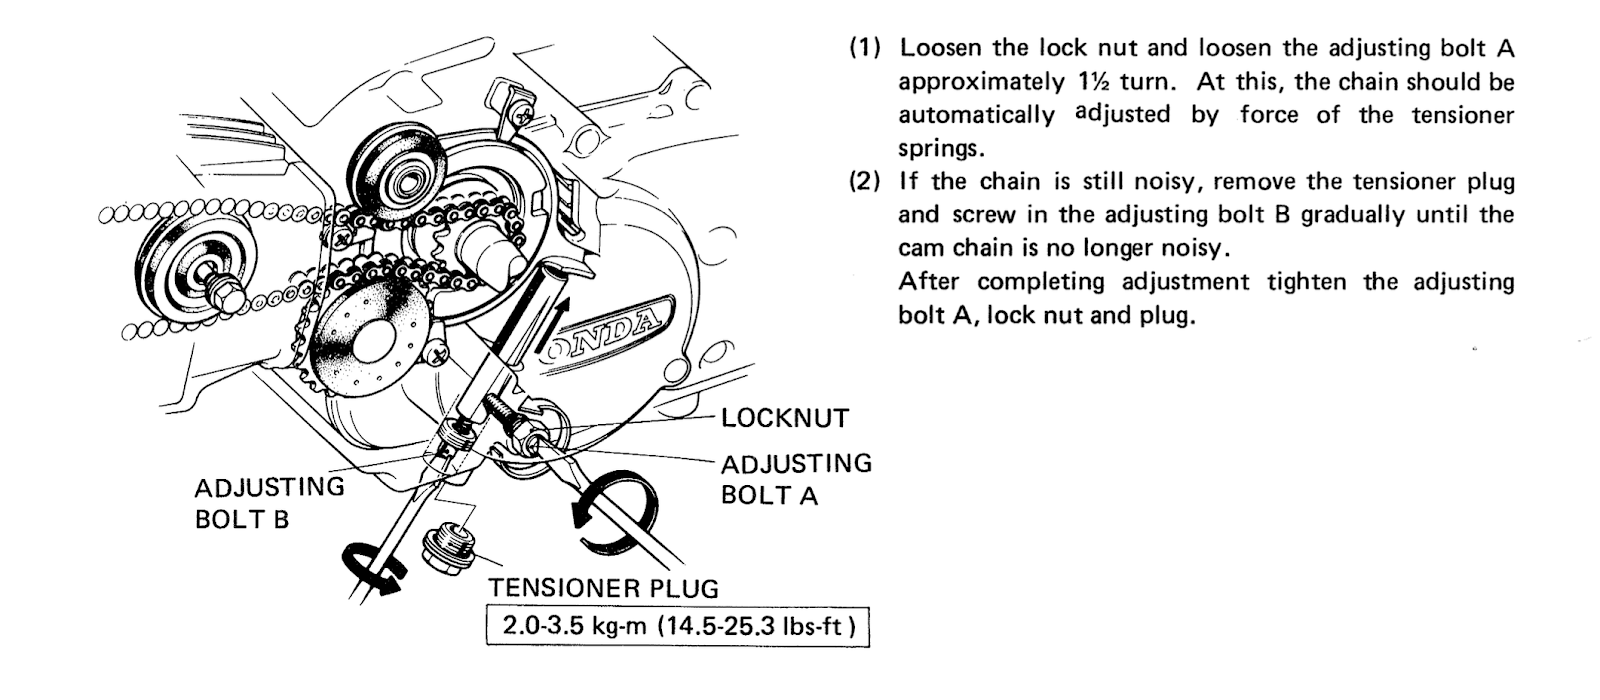
1969 - mechanical tensioner
These modifications appear not to have worked either and at some point in the early 1970s Honda introduced this contraption:
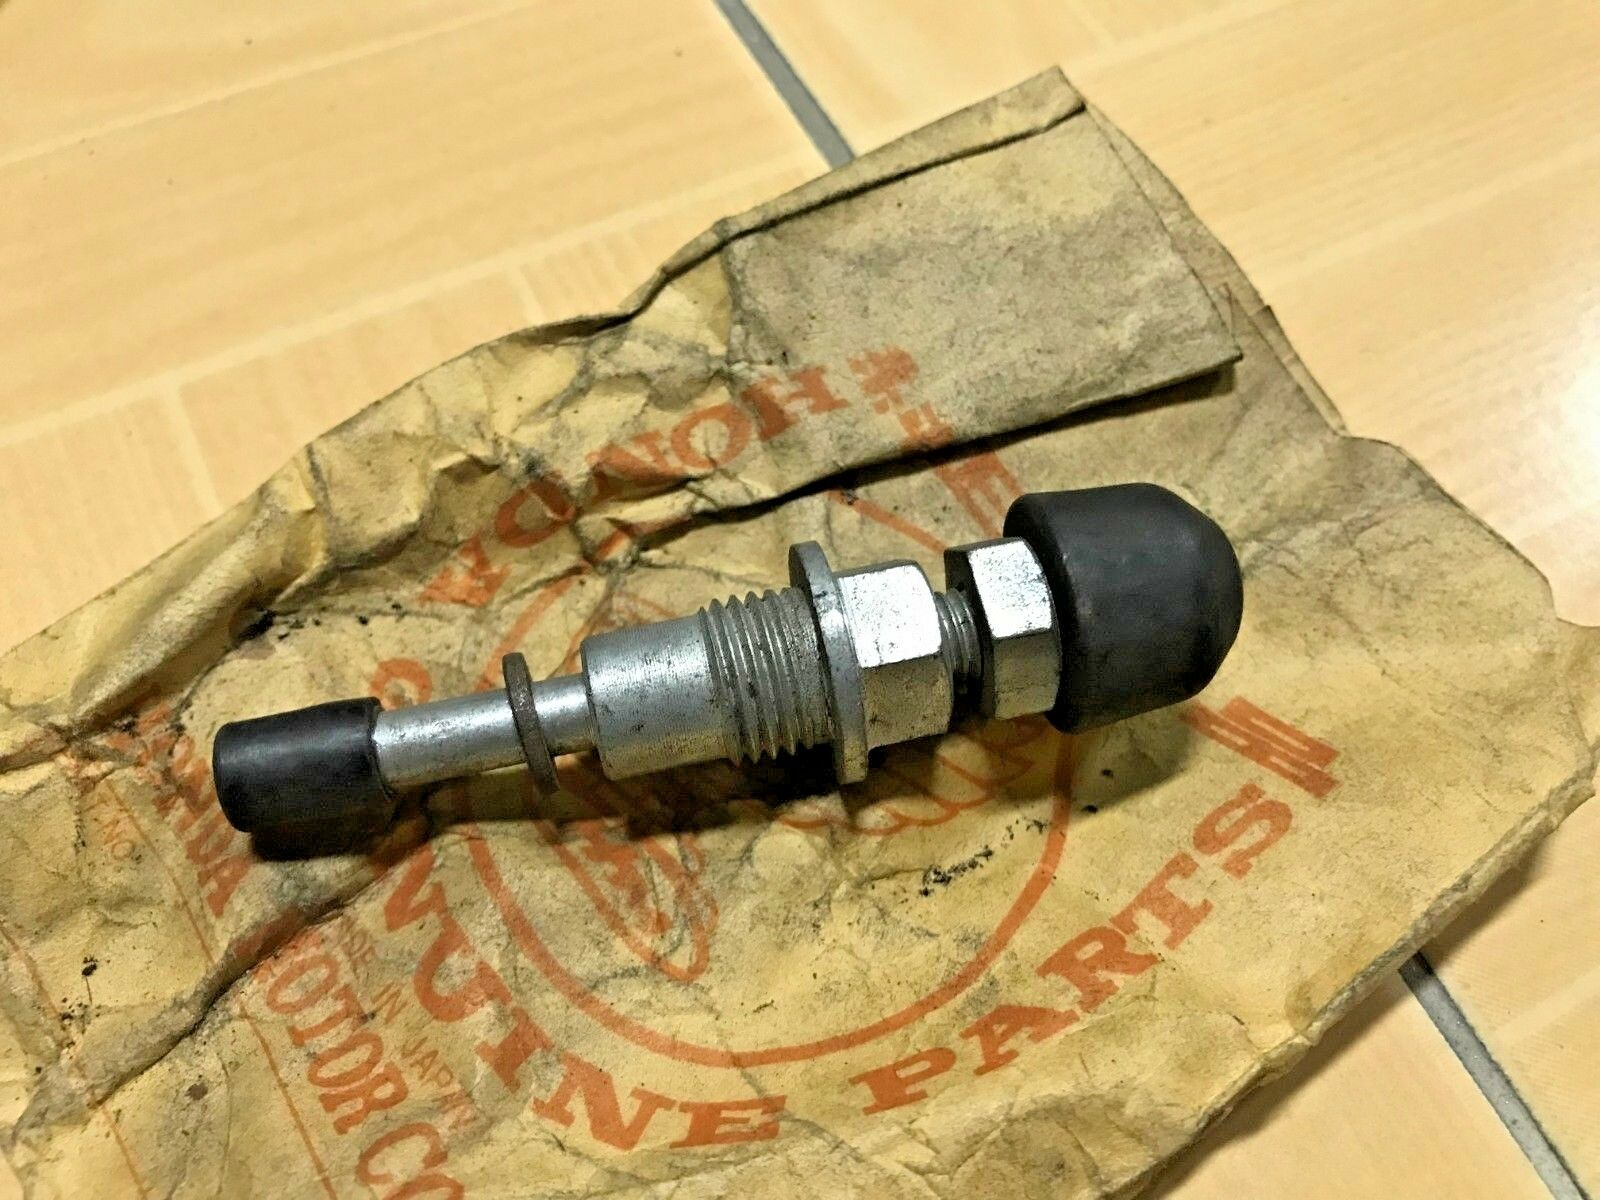
set screw exposed (left) and with the protective cover (right)
The mechanism is entirely mechanical—a rubber-tipped rod (shown above) screws inward to apply pressure to the cam chain tensioner. The user must adjust the set screw until sufficient tension is applied to eliminate cam chain noise.
1975 - manual tensioner v2
Honda treated those countries that got the "deluxe" C90K series (e.g Australia) with yet another version. This one - based on a design original introduced with the C70 in the early 1970s - is arguably the most byzantine of the lot.
The pushrod is still spring loaded but locked in place by a screw accessed from the side of the crankcase. The mechanism also allowed for secondary adjustment that could be used to increase the preload spring tension.
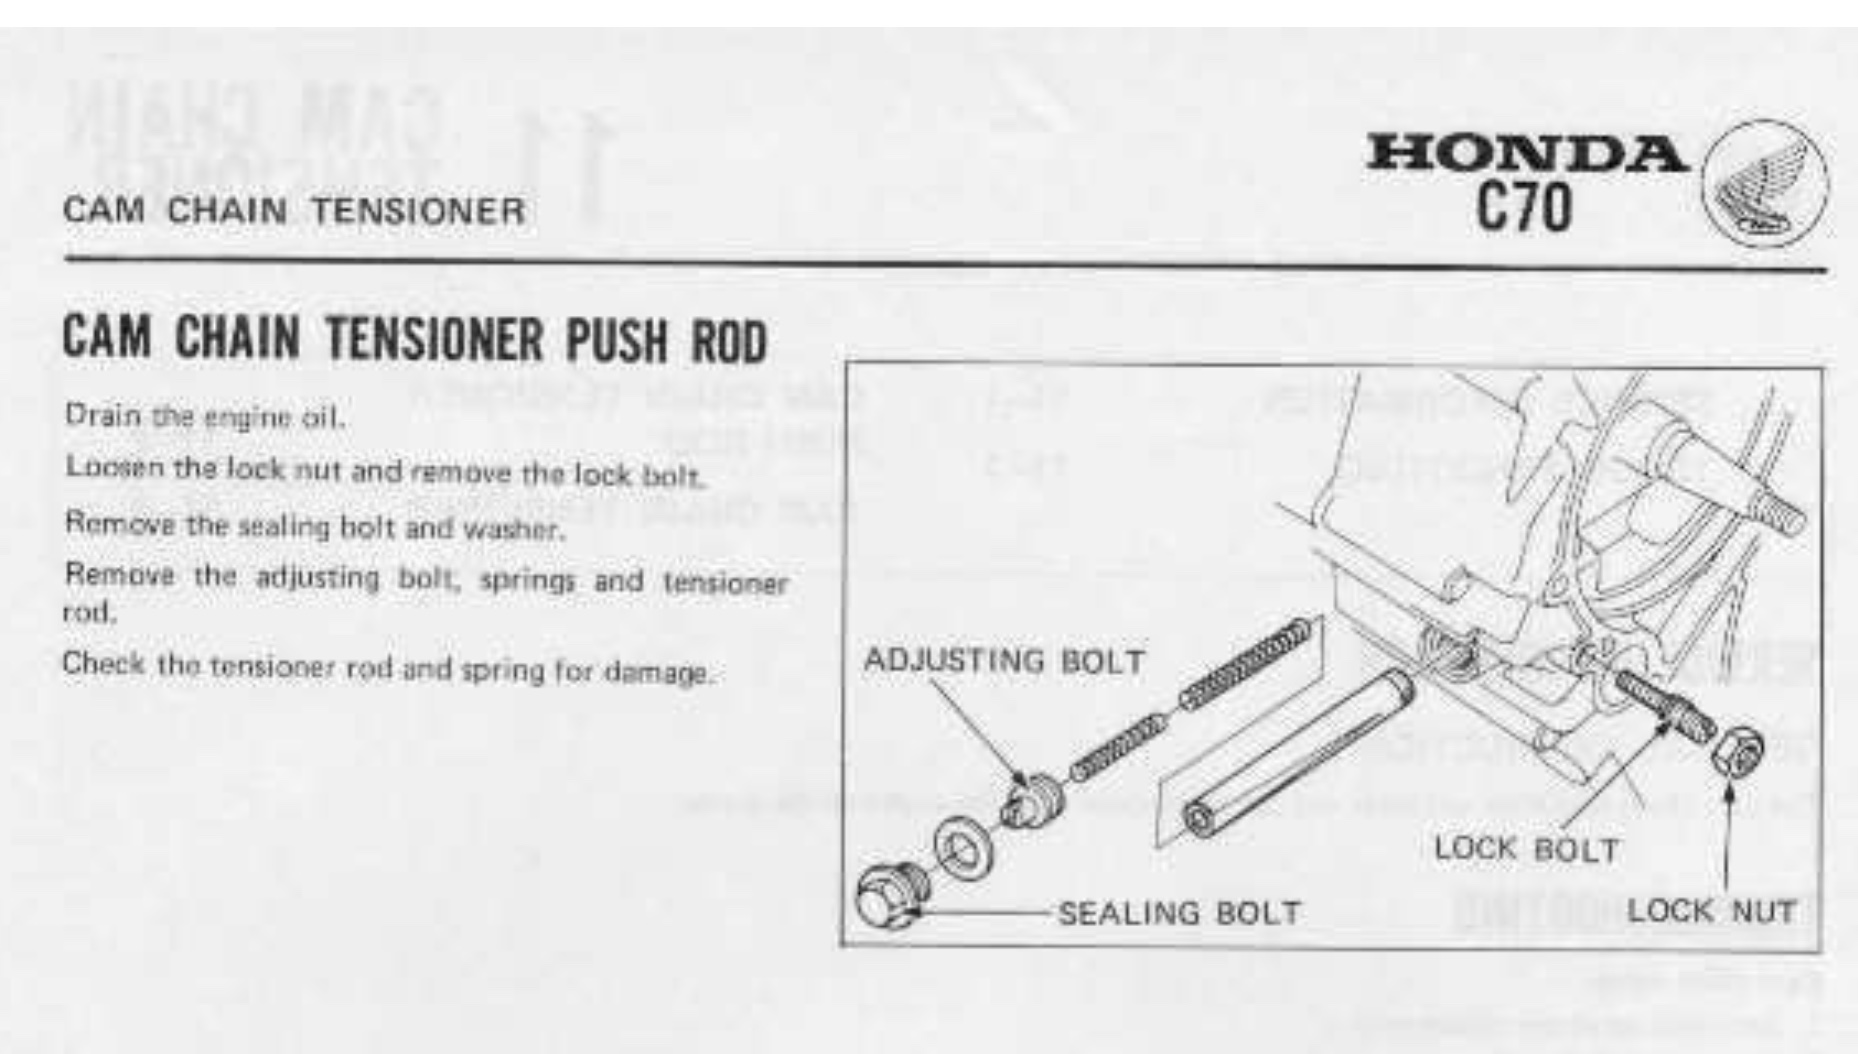
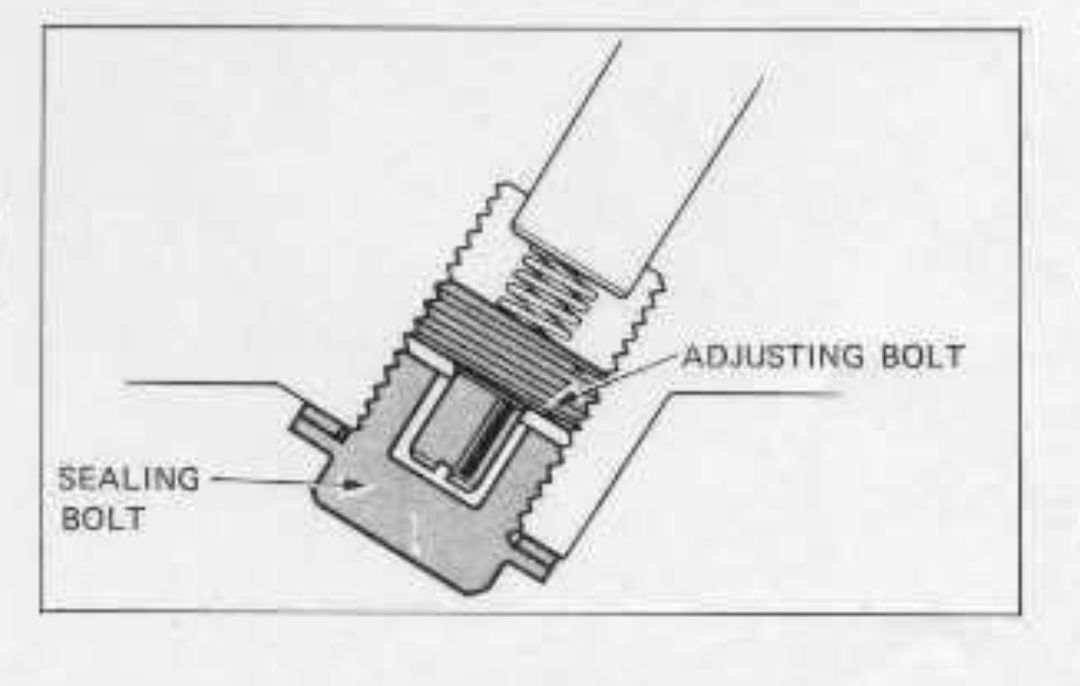
Removing the sealing bolt and turning the adjusting bolt increases the spring tension. This version was also used on certain CT90 models (right)
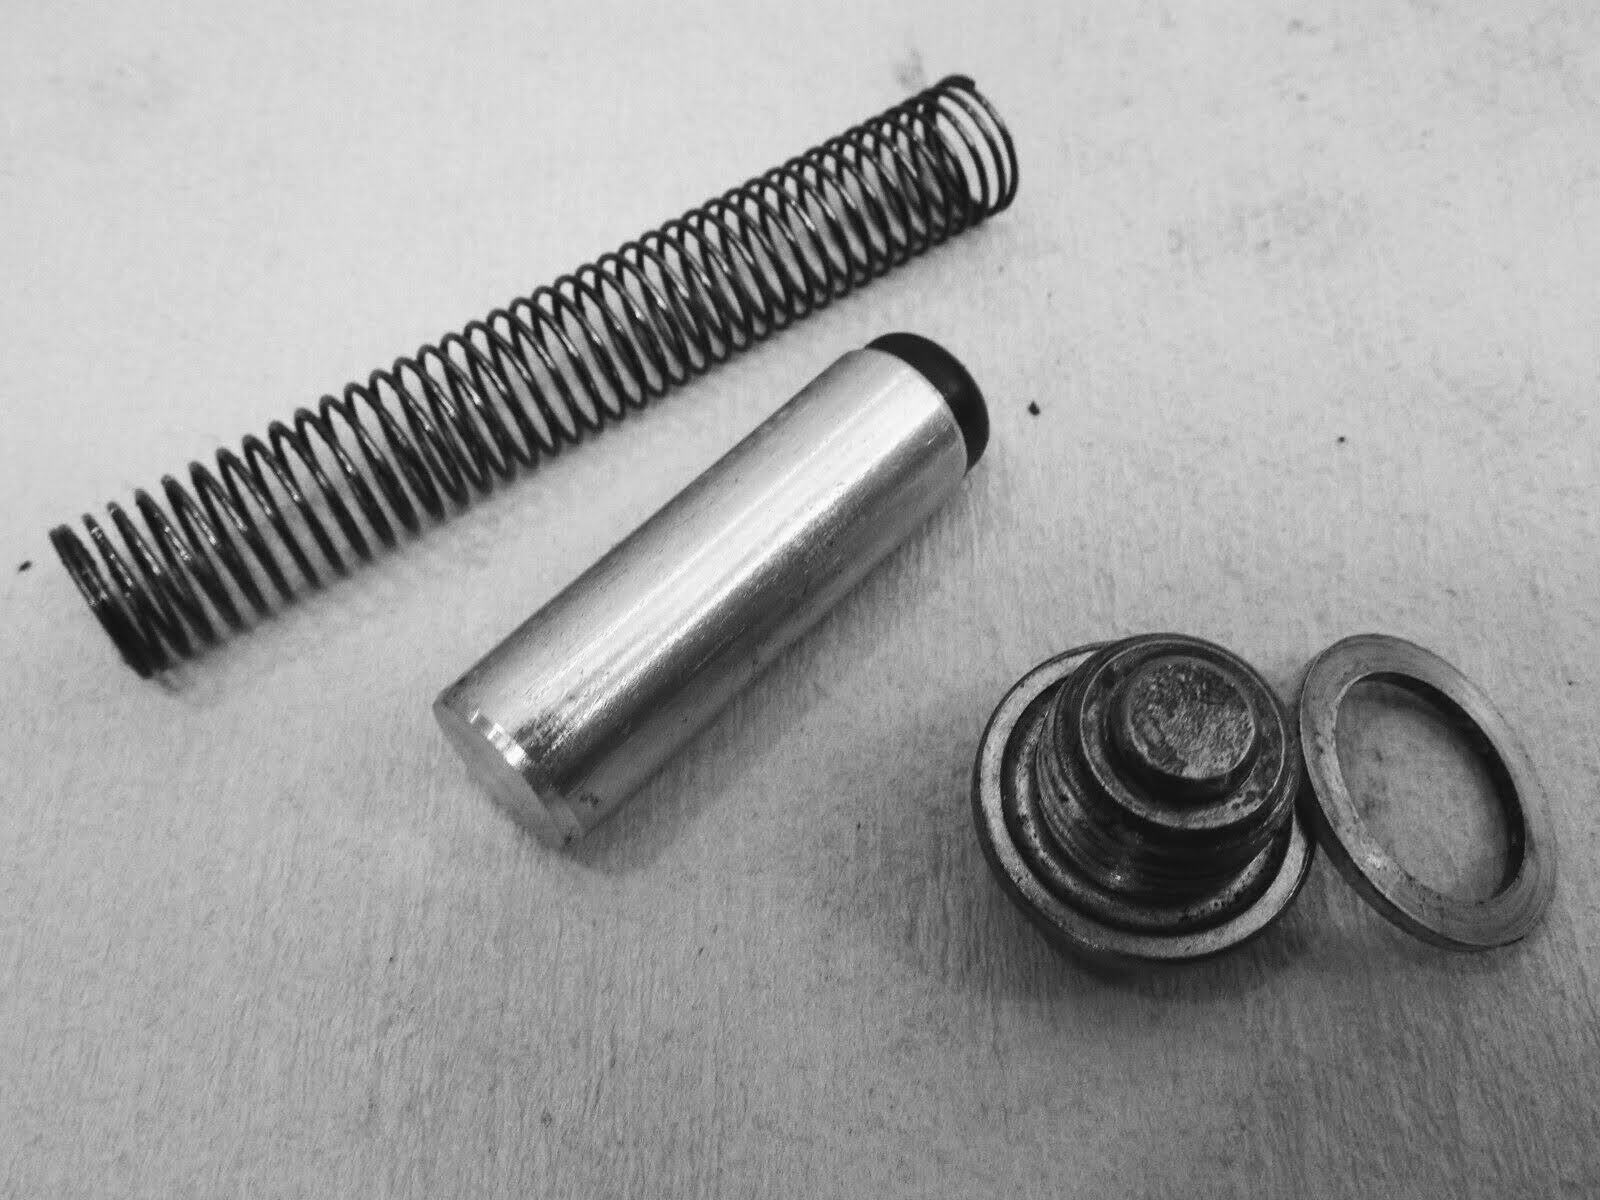
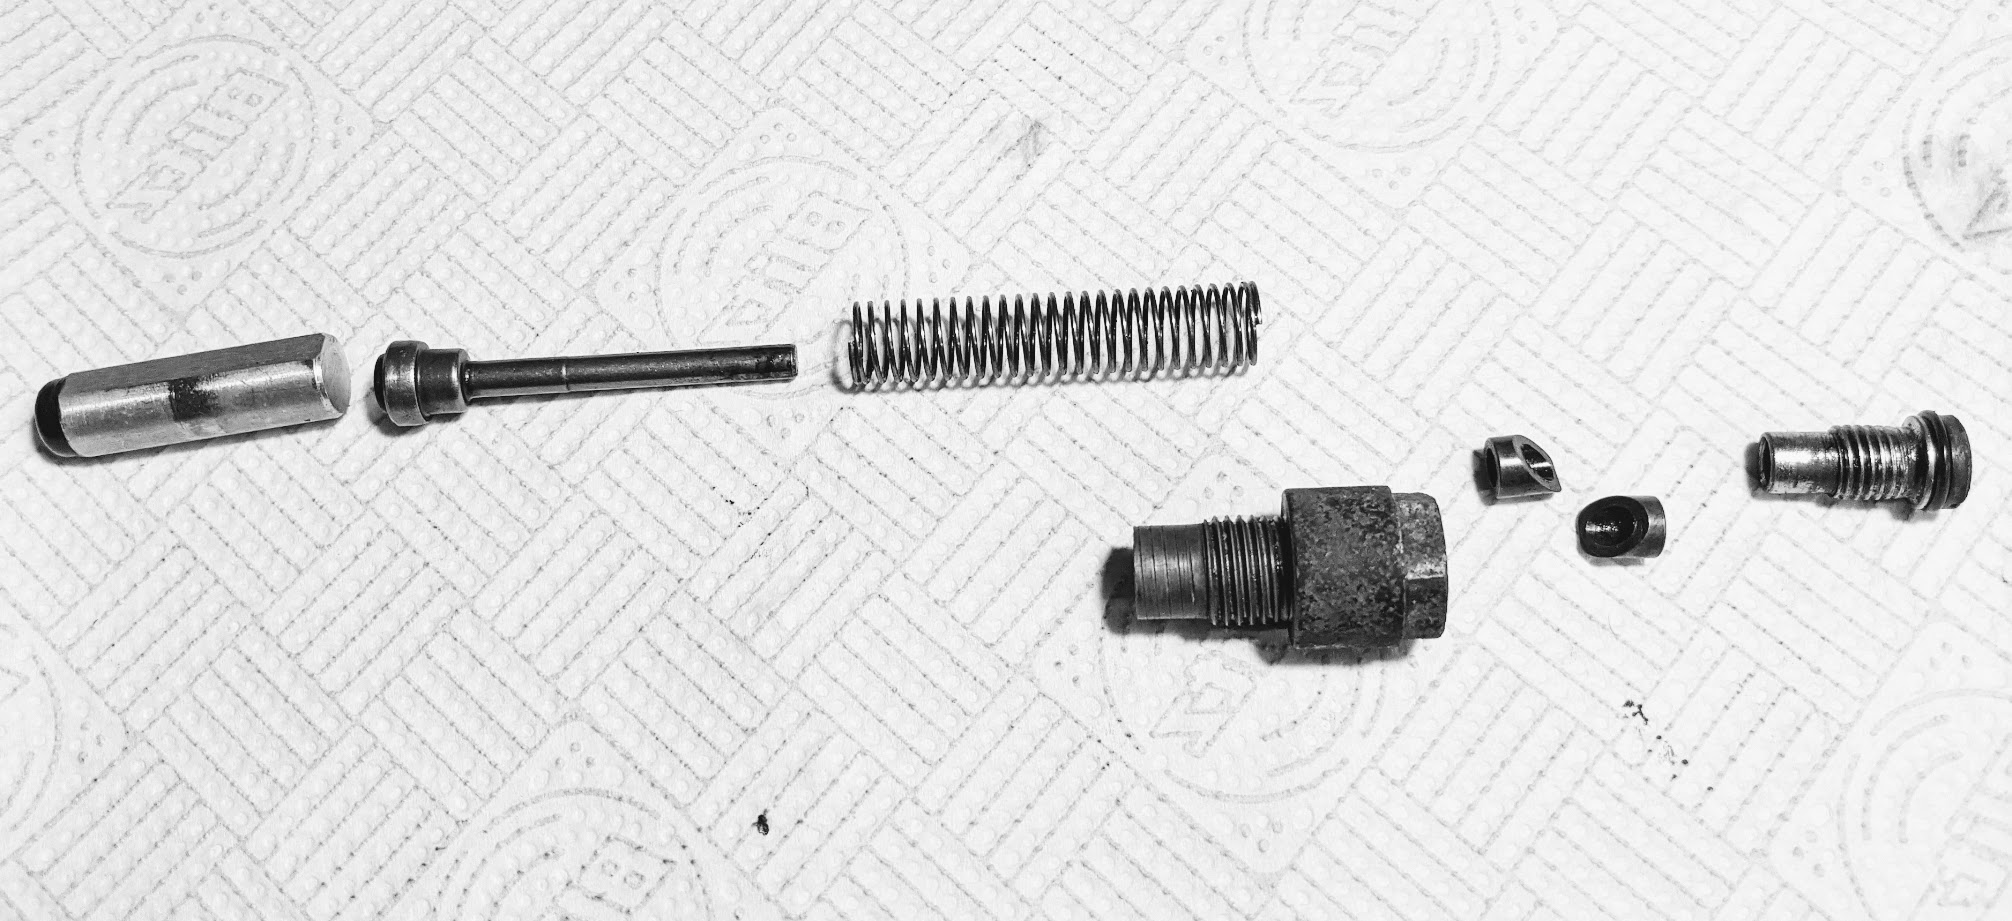
1976 - mechanical tensioner v3
At some point in the 1970s Honda got rid of this idea too and came up with a more elegant design (this is the version used on the C90z2 and C90zz cubs made between 1977 and 1982).
The two small collars (shown 2nd from the right in the picture below) slide past each other and lock the guide rod (second left) in position when pushed by the adjusting screw that fits in the sealing plug, and this holds the pushrod tight against the tensioner. Simply loosen the adjusting screw so it releases the guide rod and the spring will apply the correct tension, tighten the screw and the plunger is gripped in the correct place. A lovely simple solution!
1984 - automatic tensioner v3
In the early 1980s the Honda cam chain tensioner department had another brainwave and reverted back to their automatic adjustment/oil damped approach, but with a twist. This is the version used in the 12v cubs.
Apparently this design hit the spot as it has not been altered since it was introduced.
automatic tensioner (1980s)
The tensioner pushrod position is maintained by the presence of oil in the chamber beneath it. Oil splashed from the cam chain enters the ports in the side of the pushrod and fills the void on the underside of the rod.
When the tensioner spring pushes the rod up to remove the chain slack the one-way ball valve opens and allows oil collected in the push rod to flow into the chamber below. When excess tension starts to move the rod downwards, pressure from the oil in the chamber forces the valve closed so that the position of the rod is maintained.
Cam chains
Given that the cam chain impacts cam to crank timing - thereby preventing your piston and valves from colliding - they get very little attention in the Honda workshop manuals.
As explained above, cam chains tend to elongate as the bushings and pins wear with use and if not properly tensioned the chain can "whip" around in the engine causing noise and damaging valve train components. Valve timing can also become erratic and, in the case of many of the older C90 cubs - which use camshaft mounted contact breaker points - ignition timing can be impacted too. Finally the chain also drives the oil pump. As a result if your bike uses a mechanical cam chain tensioner, it is important that it is regularly adjusted.
How long do cam chains last? We are no doubt all familiar with people who cheerfully ride around on motorbikes without changing their drive chain for tens of thousands of miles, indeed some of us may well have done the same ourselves. In comparison cam chains have a comparatively rarified life, not being exposed to water and dirt and being continuously bathed in oil rather than relying on hapless owners to remember to lubricate them. So it's not unreasonable to think they might be good for a long time.
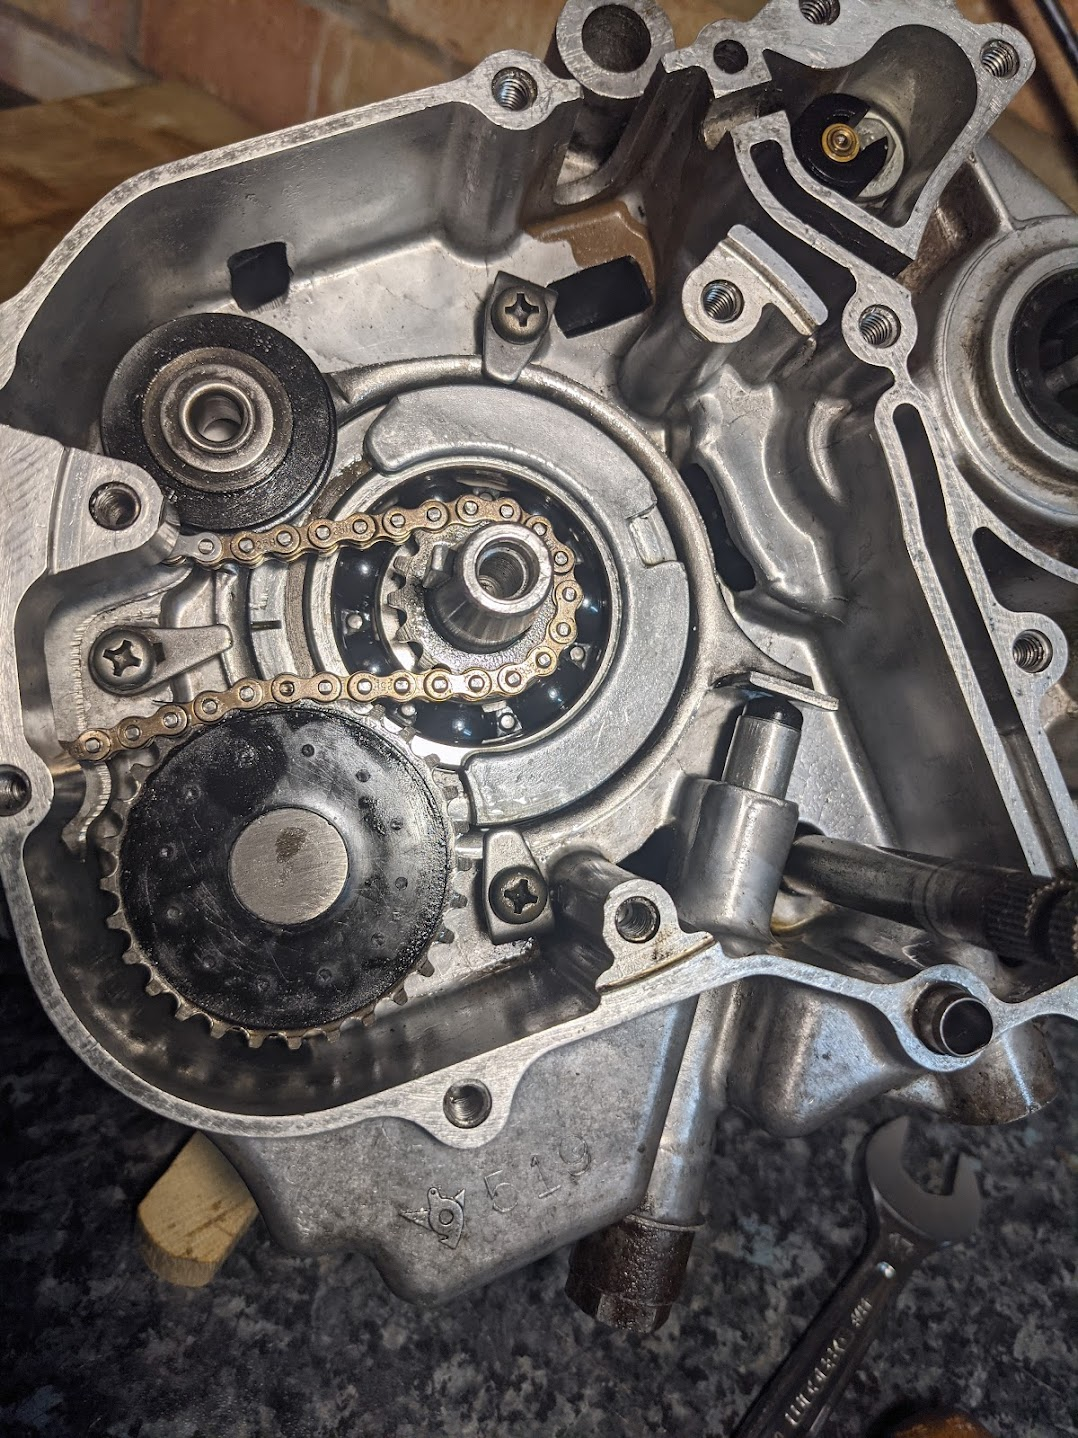
Running the engine with insufficient tension on the chain can be problematic of course, as the chain can whip around inside the case. Here is an example of the telltale wear in a 6v C90:
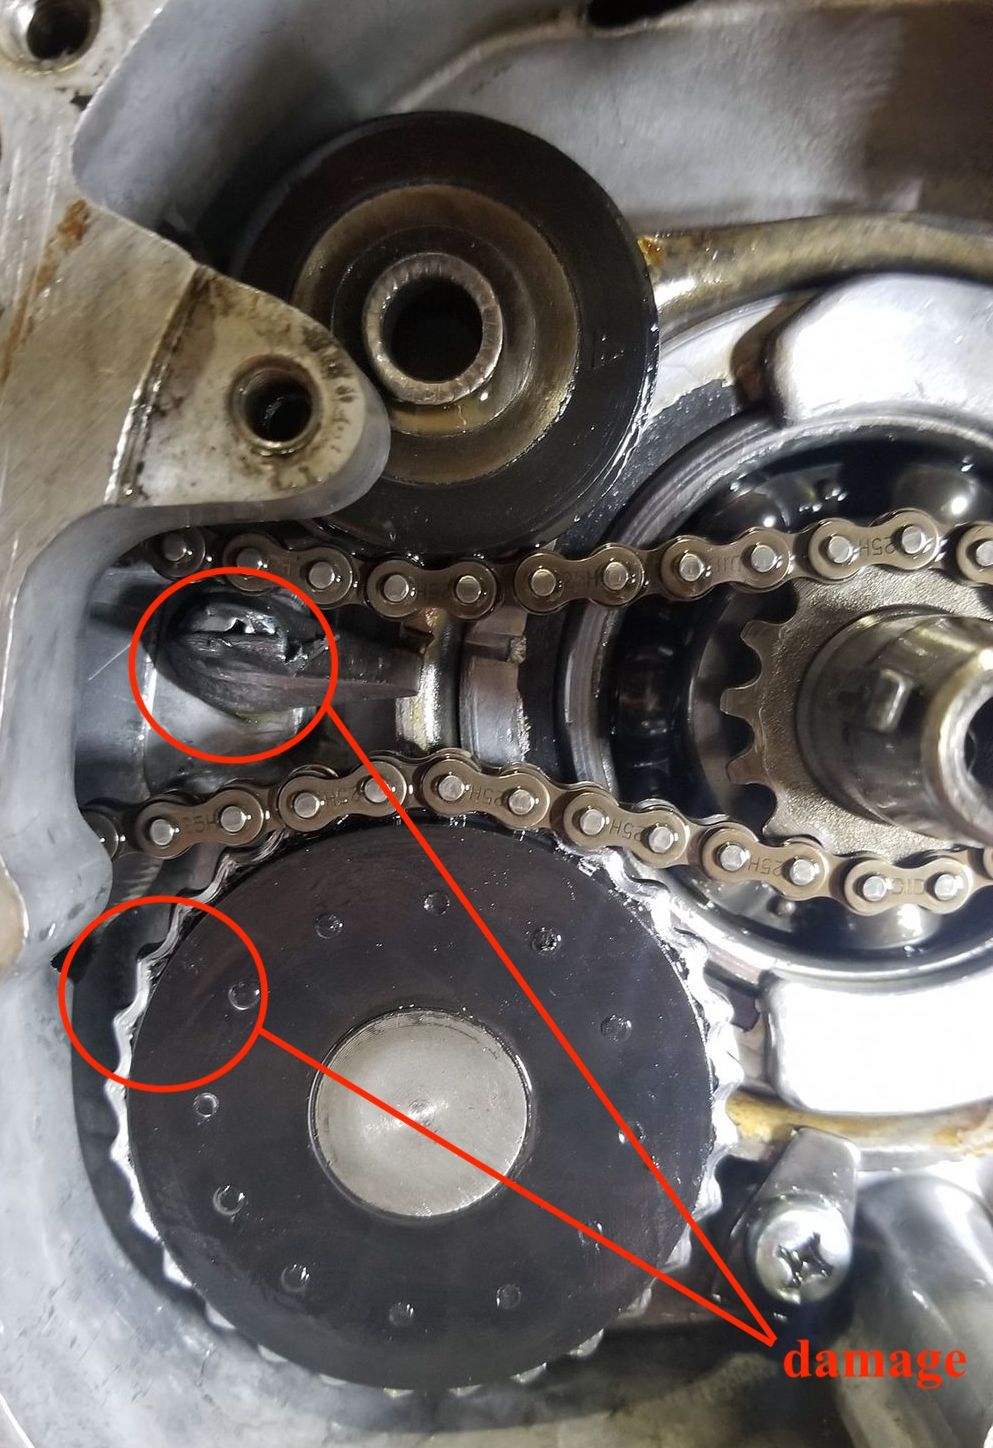

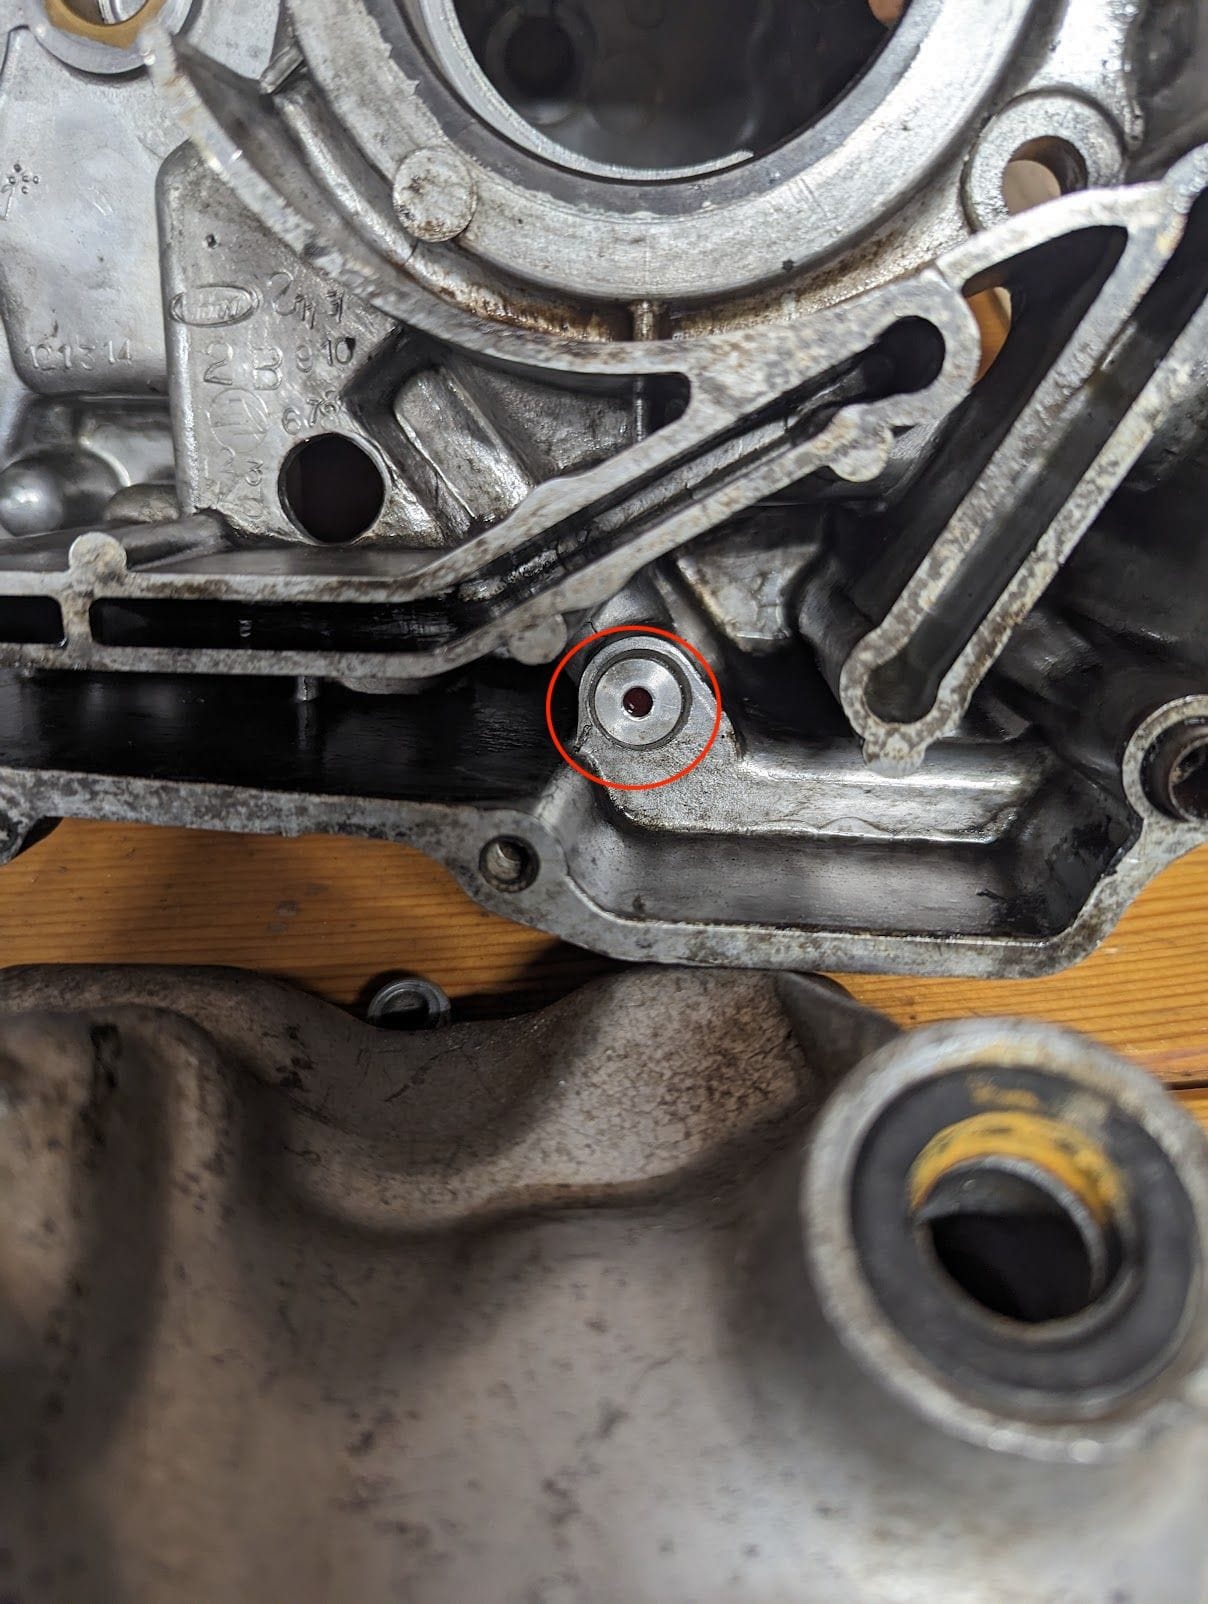
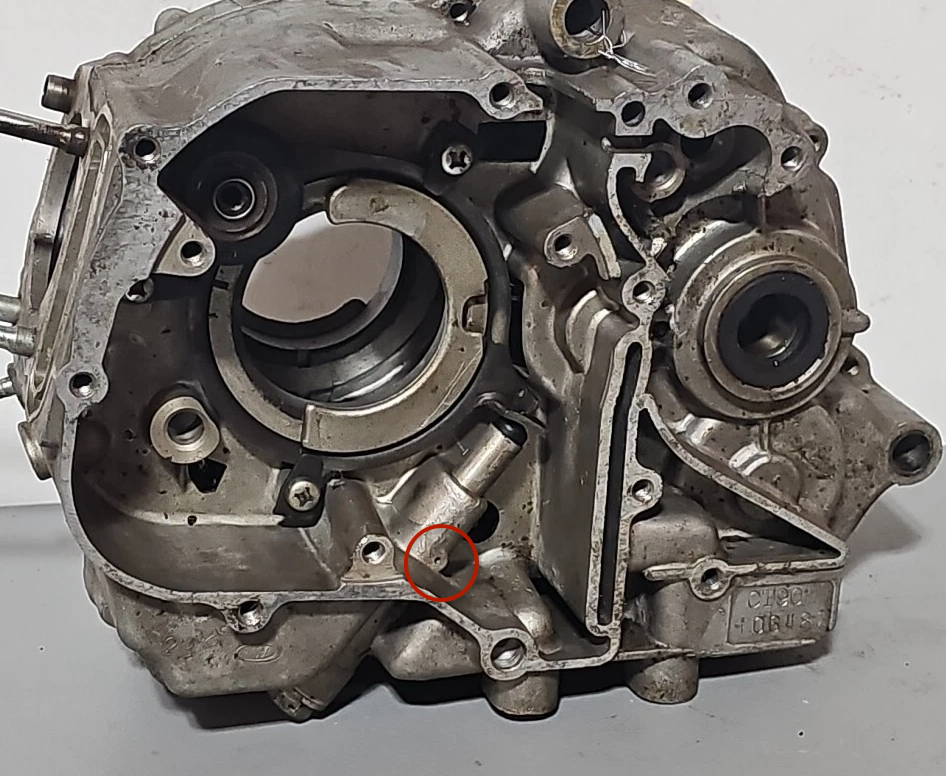
The photograph (left) shows that the the tensioner holding screw (circled in red in the diagram on the right) has been almost completely worn away by the loose chain. The teeth on the oil chain drive sprocket are also very worn, presumably because a loose chain can jump the teeth (this is far from ideal, since this sprocket drives the oil pump...)
Needless to say in the unlikely event that a chain fails entirely while under load the resulting damage can be catastrophic.
service limits
Honda don't specify service limits, at least for our little single cylinder bikes, and try as I might I could find very little information about the normal service limits for cam chains[1].
Eventually I came across this quote from a Kawasaki KLX650 shop manual:
Camshaft Chain Wear
Hold the chain taut with a force of about 49 N (5 kg, 11 lb) in some manner, and measure a 20-link length. Since the chain may wear unevenly, take measurement at several places.
Upper and Lower Camshaft Chain 20-Link Length Standard: 127.00 ~ 127.36 mm
Service Limit: 128.9 mm
So based on this rather limited sample of one manual, if the length of a cam chain increases by more than 1.5% it should be replaced.
The chain in the c90z2 is approx 540 mm long so on this basis it could grow a wapping 8mm and still be in spec. It is therefore perhaps not a coincidence that the amount of adjustment available via the tensioner on a new chain for this engine is slightly larger than that (around 10mm)

with a brand new chain there is just under 10mm of adjustment available using the tensioner. The image on the right is the original chain (~8000 miles) with about half of this gap already used up.
Cam chain wear and timing
Assuming you persist with a chain until it is at the end of its service life what does this do to the cam to crank timing? The tensioner will cause the cam sprocket to rotate clockwise towards the crank to take up the slack and, because the engine runs anticlockwise viewed from the cam chain side, this will retard the timing (which is to say, the intake valve and exhaust valves will open later).
By how much will the timing be retarded? I hear you cry. The 30 tooth camshaft sprocket in the 89cc z2 engine has a diameter of 60mm so - if I have done the maths right - each tooth occupies 6.3mm, and on an end-of-life chain the timing will be out by just over one tooth. I think.
For reasons I (still) fail to understand, retarding the cam to crank timing tends to improve power at higher rpm’s so, on paper at least, your c90 is being tuned for top end performance as the cam chain wears out. In this type of engine there will also be a corresponding impact on ignition timing, since the contact breaker points are driven by the cam shaft, however this can be adjusted for when doing the periodic maintenance required on the contact breaker points.
Note that many older c90 models were installed with a manual cam chain tensioner. If you aren't keeping on top of the regular adjustments that these tensioners require this can contribute to erratic timing: the tensioner will not take up the slack as the chain stretches and the loose chain will not keep the camshaft in the correct position relative to the crankshaft. Inaccurate ignition timing can contribute to engine overheating, in addition to the mechanical problems that a loose chain can cause, so it is important to remember to adjust your cam chain tensioner according to the maintenance schedule.
Jumping a tooth
Some people report poorly maintained chains jumping a tooth on either the cam or crank sprocket, and with a bit of imagination you can visualise the chain being so loose that it bunches up and disengages with one tooth on the sprocket and then is picked up by a different one, perhaps because the tensioner had failed or, as result of some other mechanical failure, like wear on the oil pump drive wheel that cause there to be much more slack in the system than under normal conditions.
Adjustment
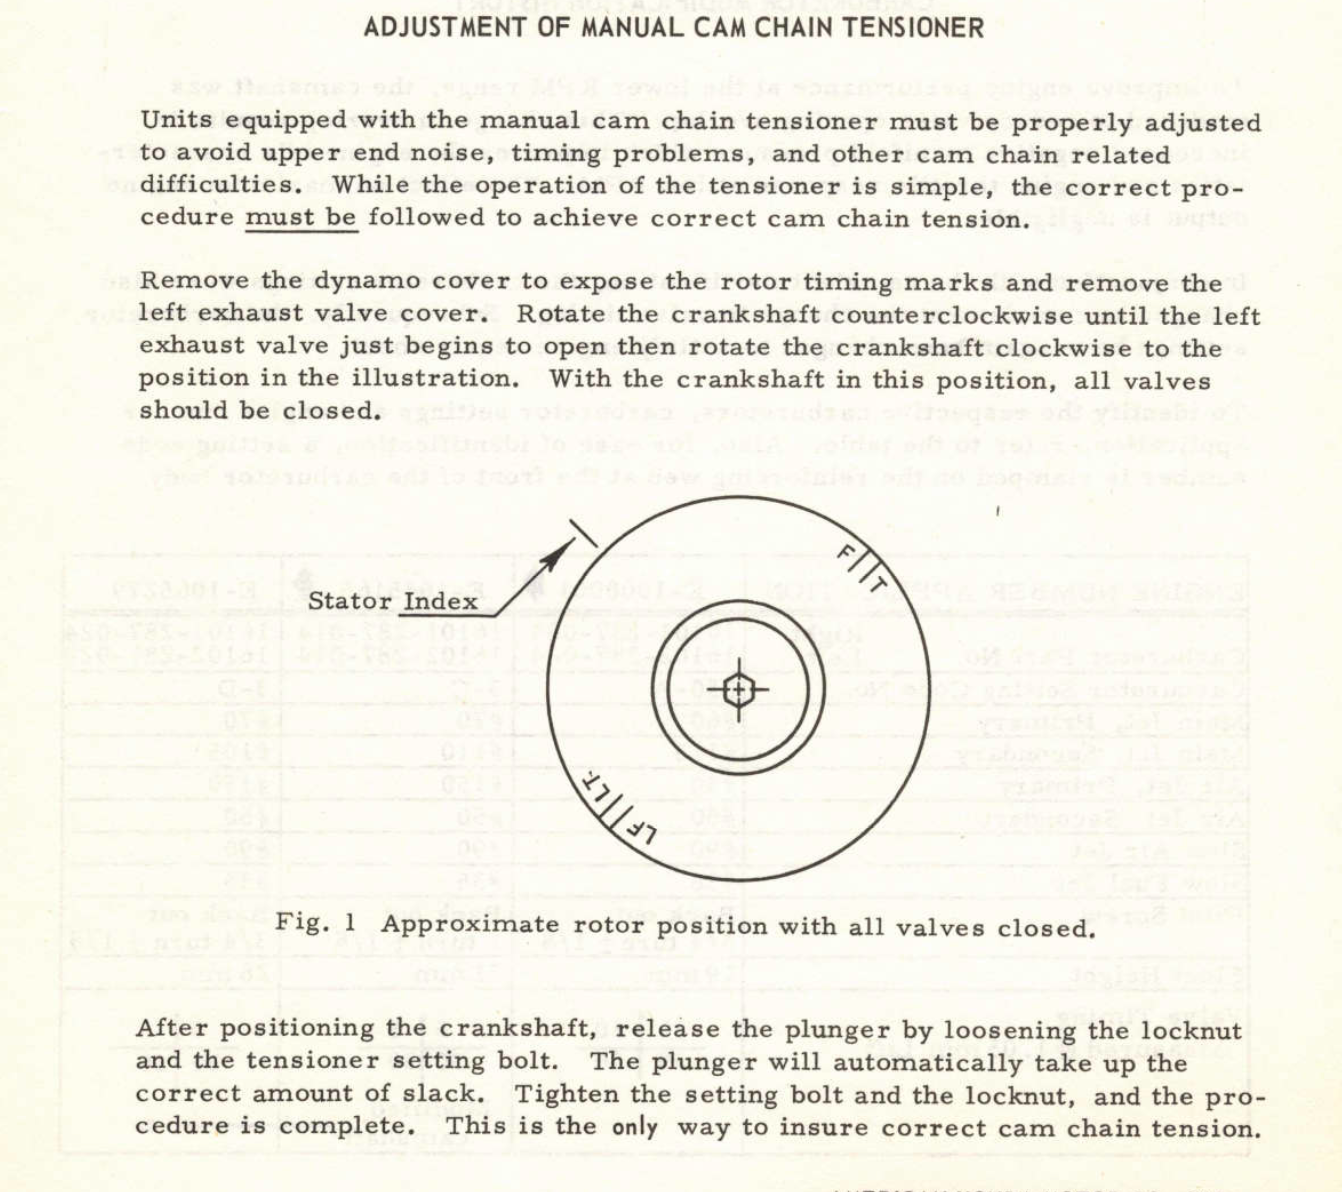
The CT90 shop manual and late 70s C90s owners manuals say that the mechanical tensioners should be adjusted while the engine idling, which I suppose is logical since when the engine is running the tension will be on the underside of the chain and the slack is on the trailing side that the tensioner pushes against.
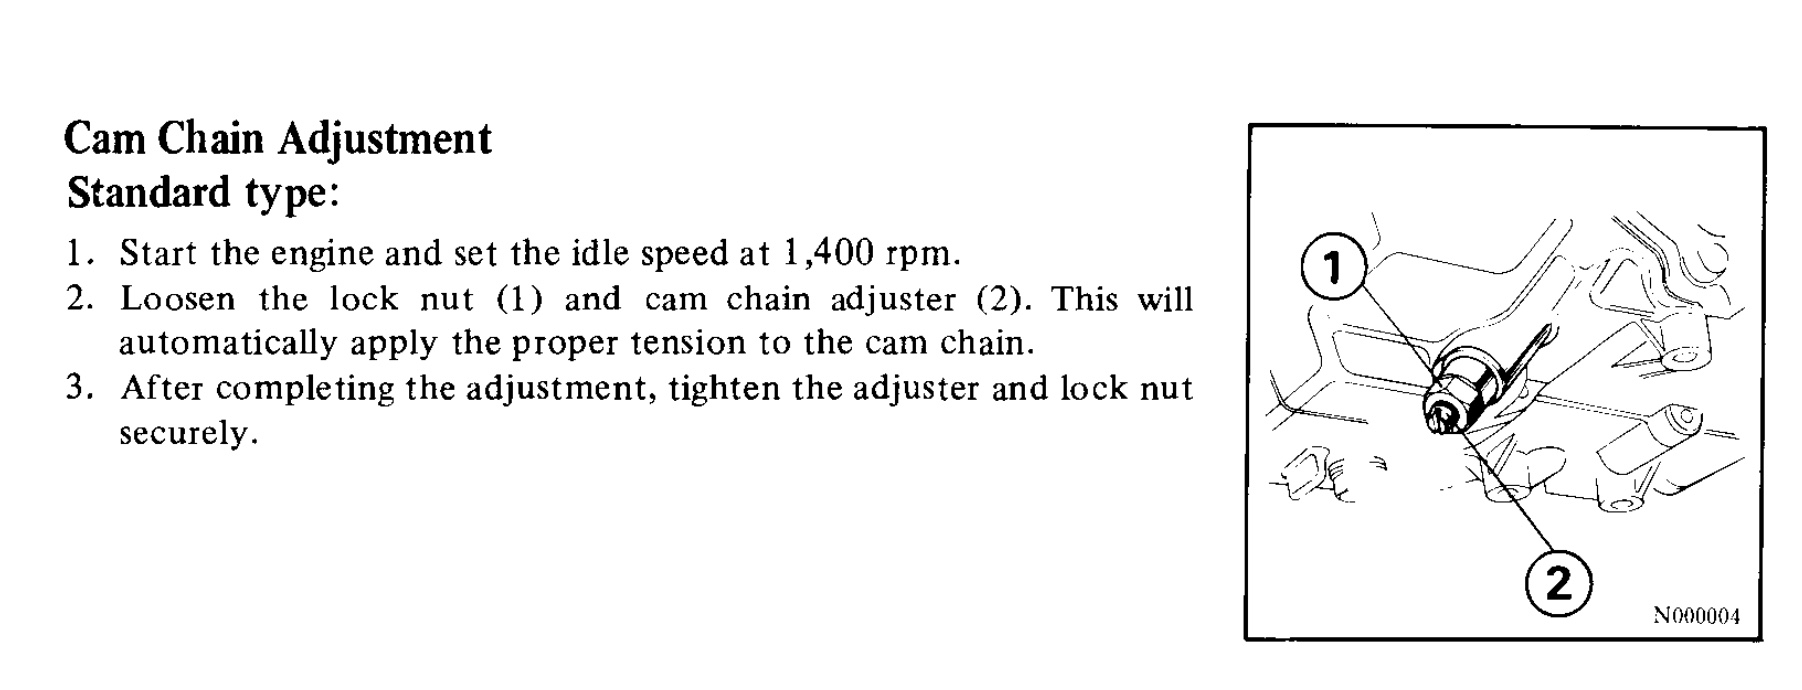
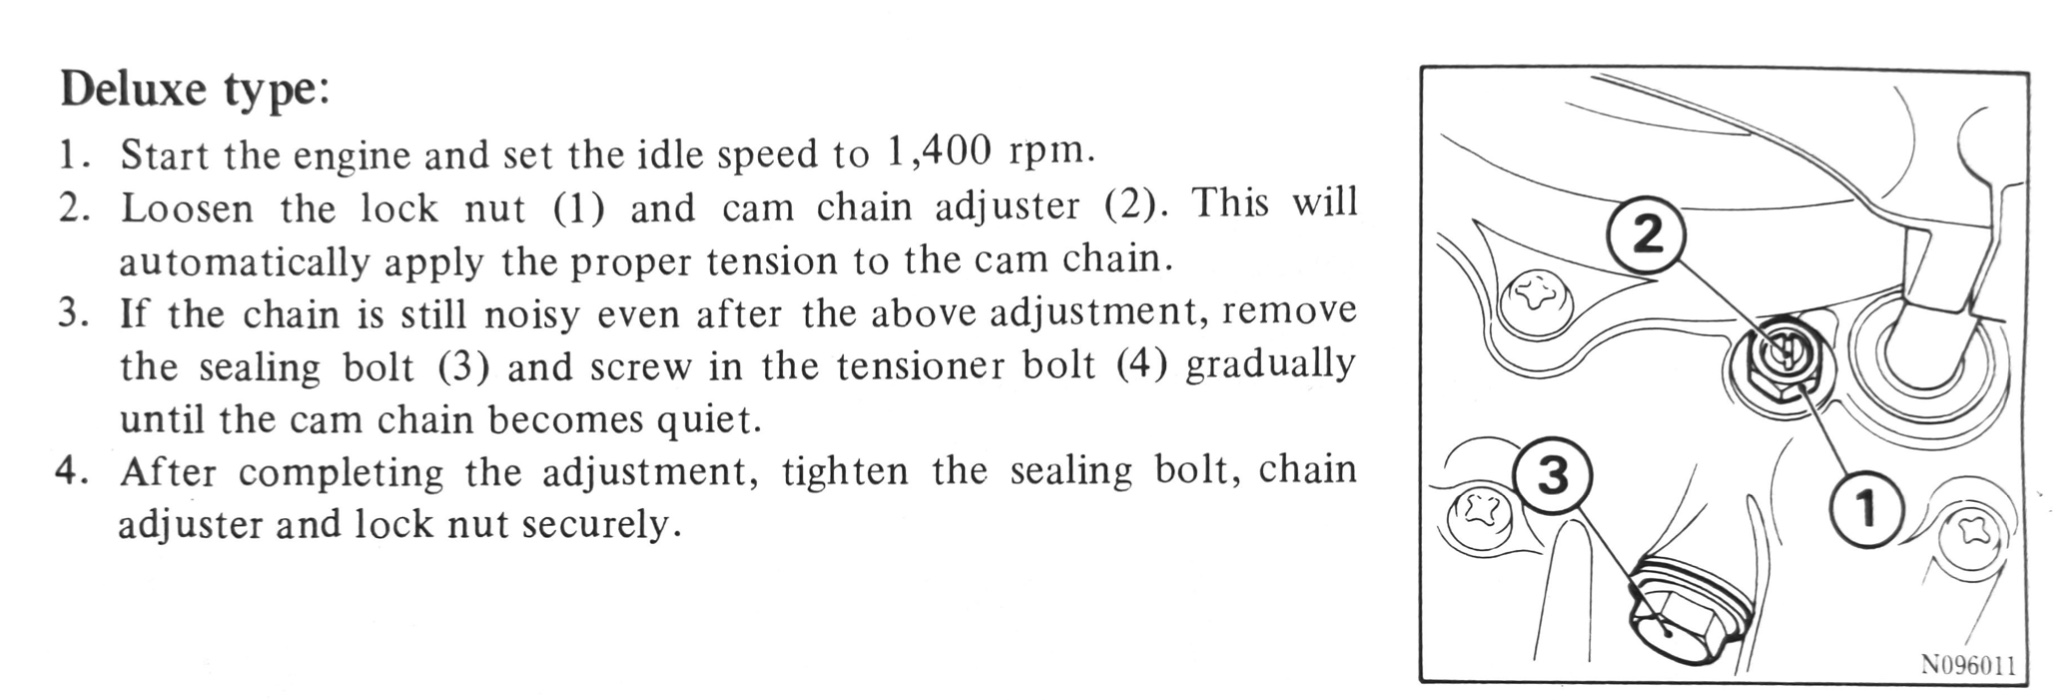
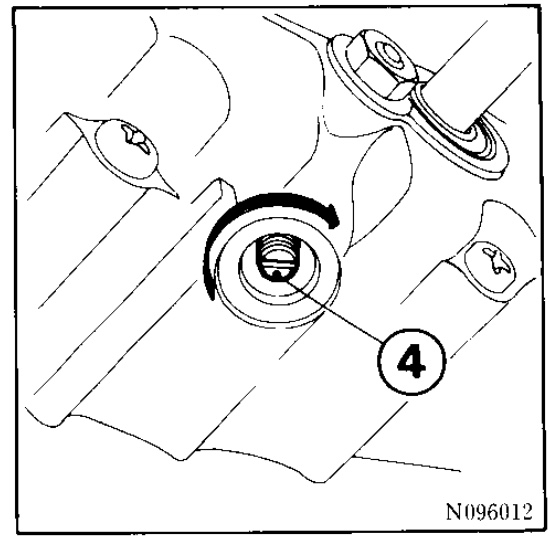
adjustment on the standard manual tensioner fitted to the C90Zs (left)/ "deluxe" adjustment (centre + right)
Although the method mentioned in the user manual is convenient, the most reliable method is to adjust the tension while the engine is at TDC on the compression stroke (you have to do this when setting the valve clearance, so this is a good opportunity to do the cam chain tension too). This works because you are turning the engine to a point where the camshaft is not trying to rotate the engine, allowing the adjuster spring to take up all the slack.
Replacement
Based on the limited amount of adjustment available on the tensioner for the 89cc engine hopefully you'll run out of adjustment long before this is a serious risk, and when you do that would be your cue to fit a new chain. Genuine DID replacements are around £20.
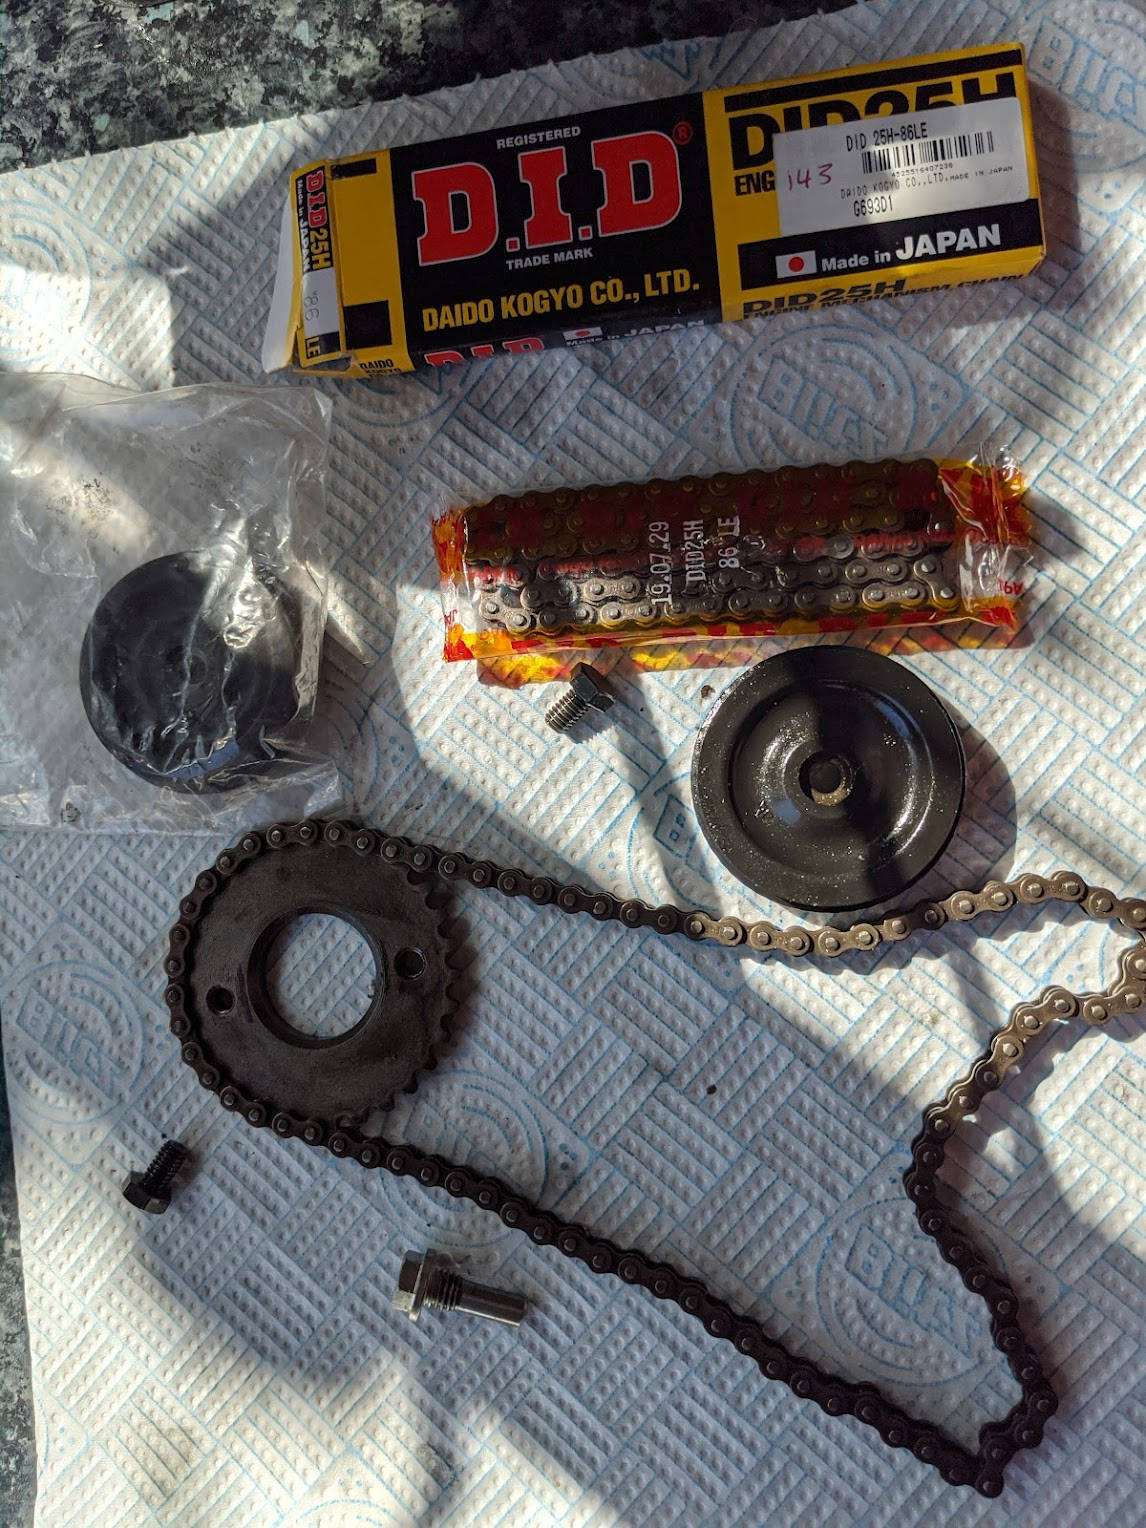
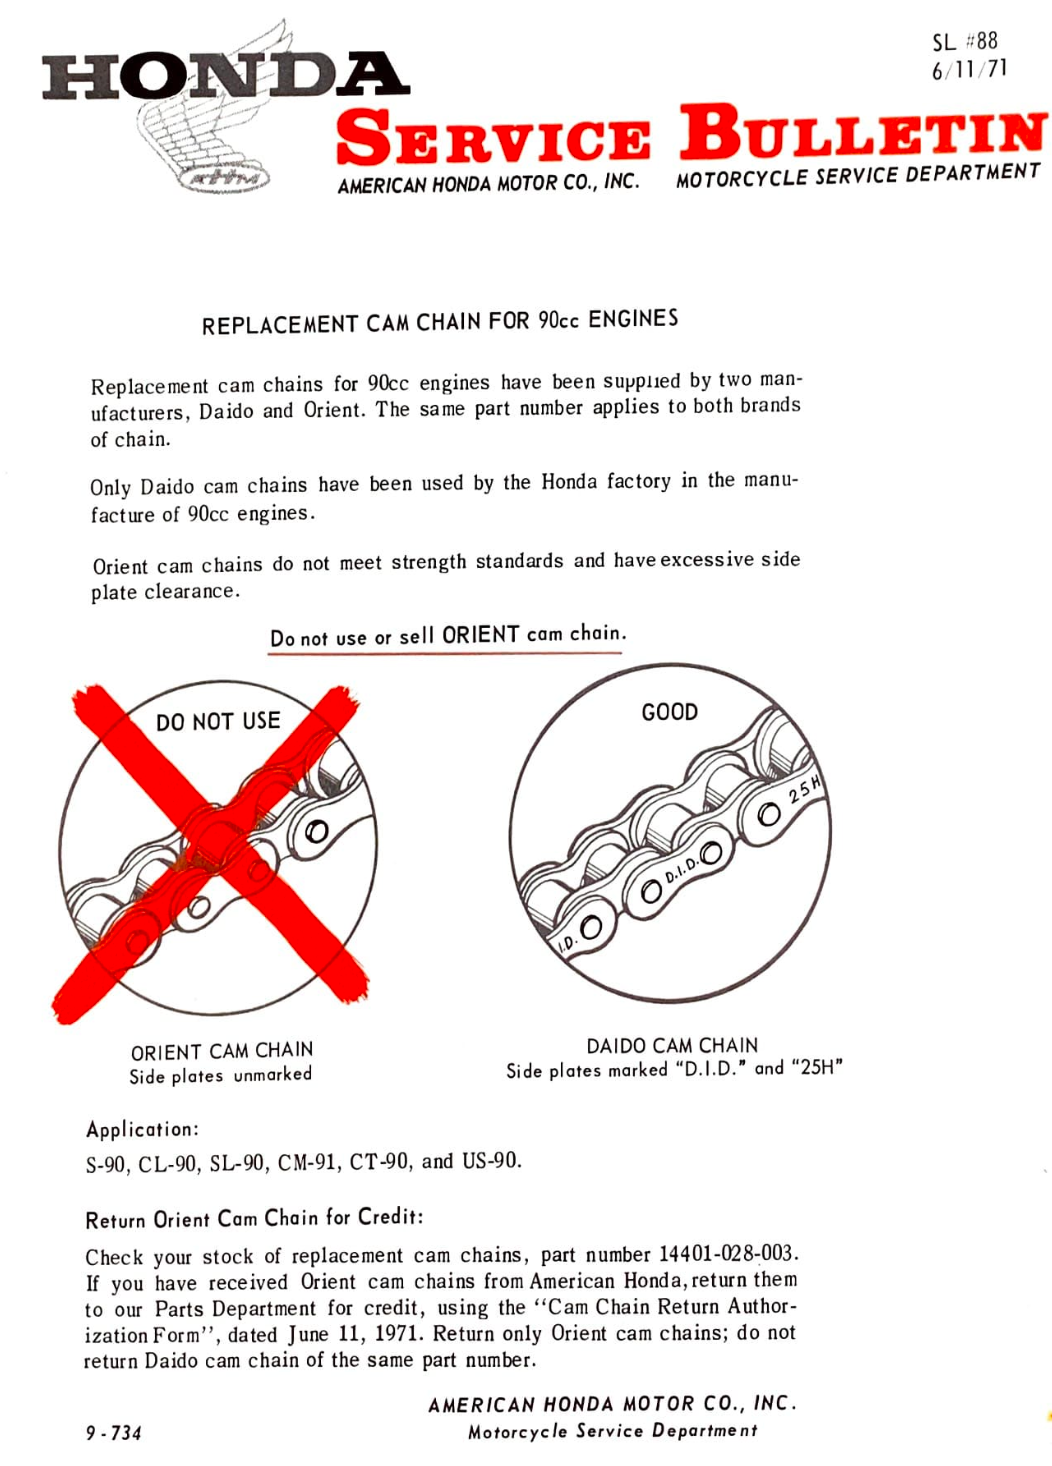
(left) DID cam chain 25H/86 links, available from David Silvers. (right) Honda dealers in the US had a short lived dalliance with another vendor - better safe than sorry and use the genuine Daido (DID) version
References
1⏎ The only information I could find from DID-Daido, who manufacture Honda's C90 cam chains, relates to power transmission chains. This gives a limit of 2% for chains used on small sprockets