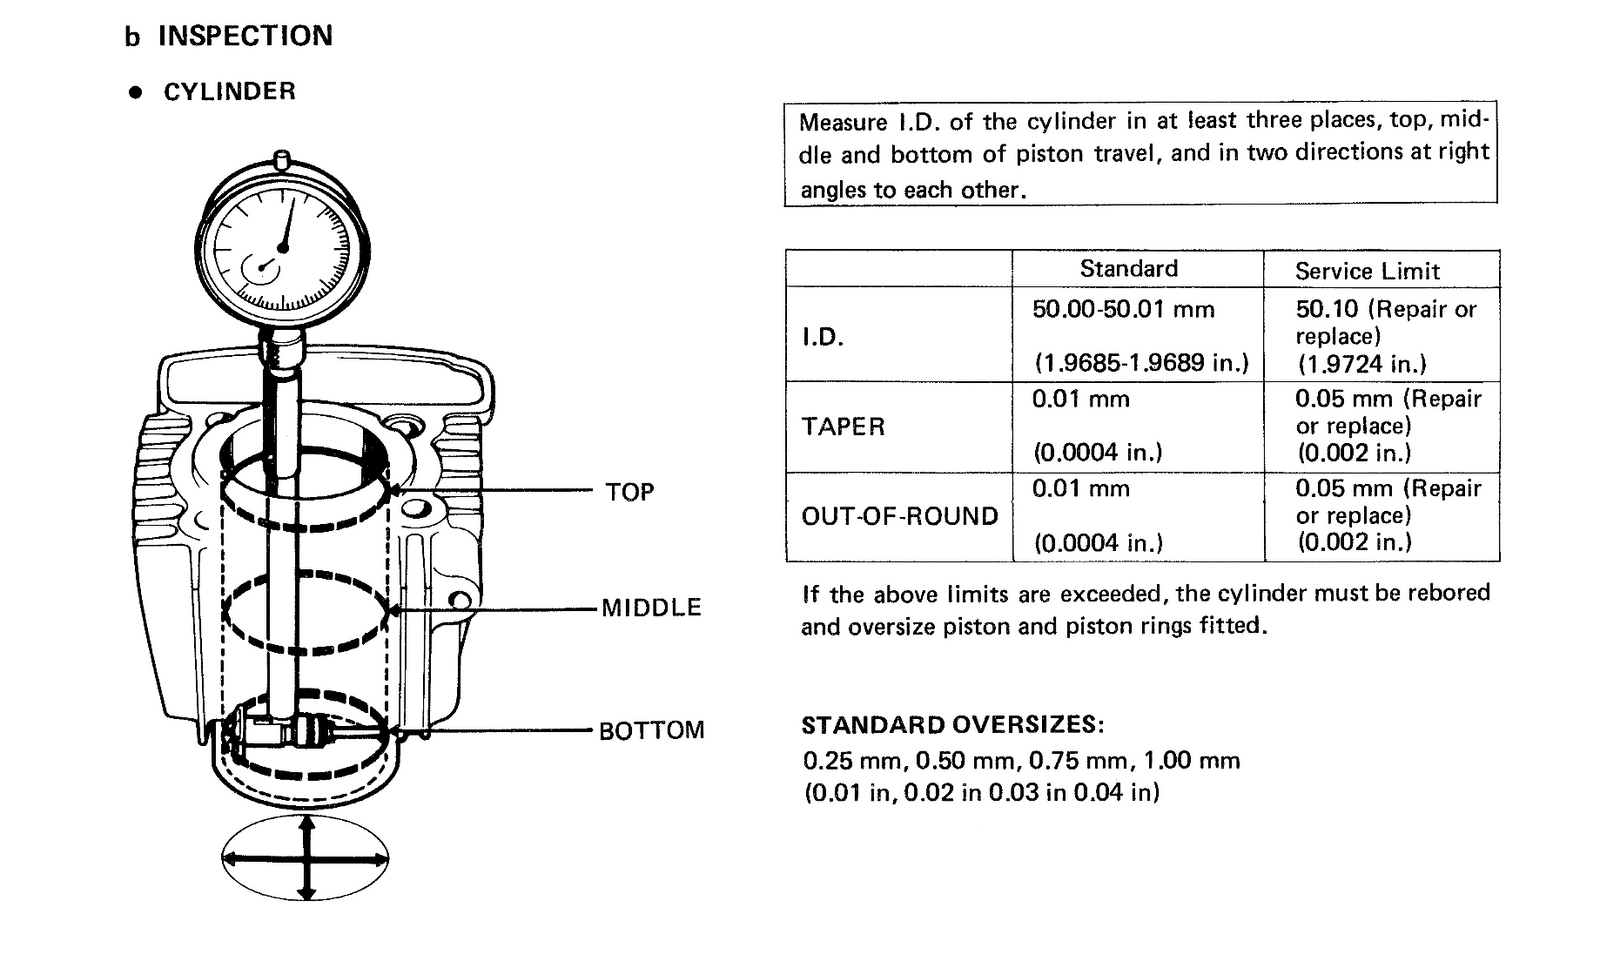
Checking your cylinder is within the service limit involves measuring the bore with a cylinder gauge as shown in the following diagram:
What follows is what I've found out about this process from research and experimentation, but please note that I'm not an engineer and I'm just doing this for fun. If you want to have a go yourself and don't mind a layman's explanation then read on but - if you want peace of mind - the safest thing to do is to take your cylinder and piston to an engineering firm where they can be measured using properly calibrated equipment.
Equipment
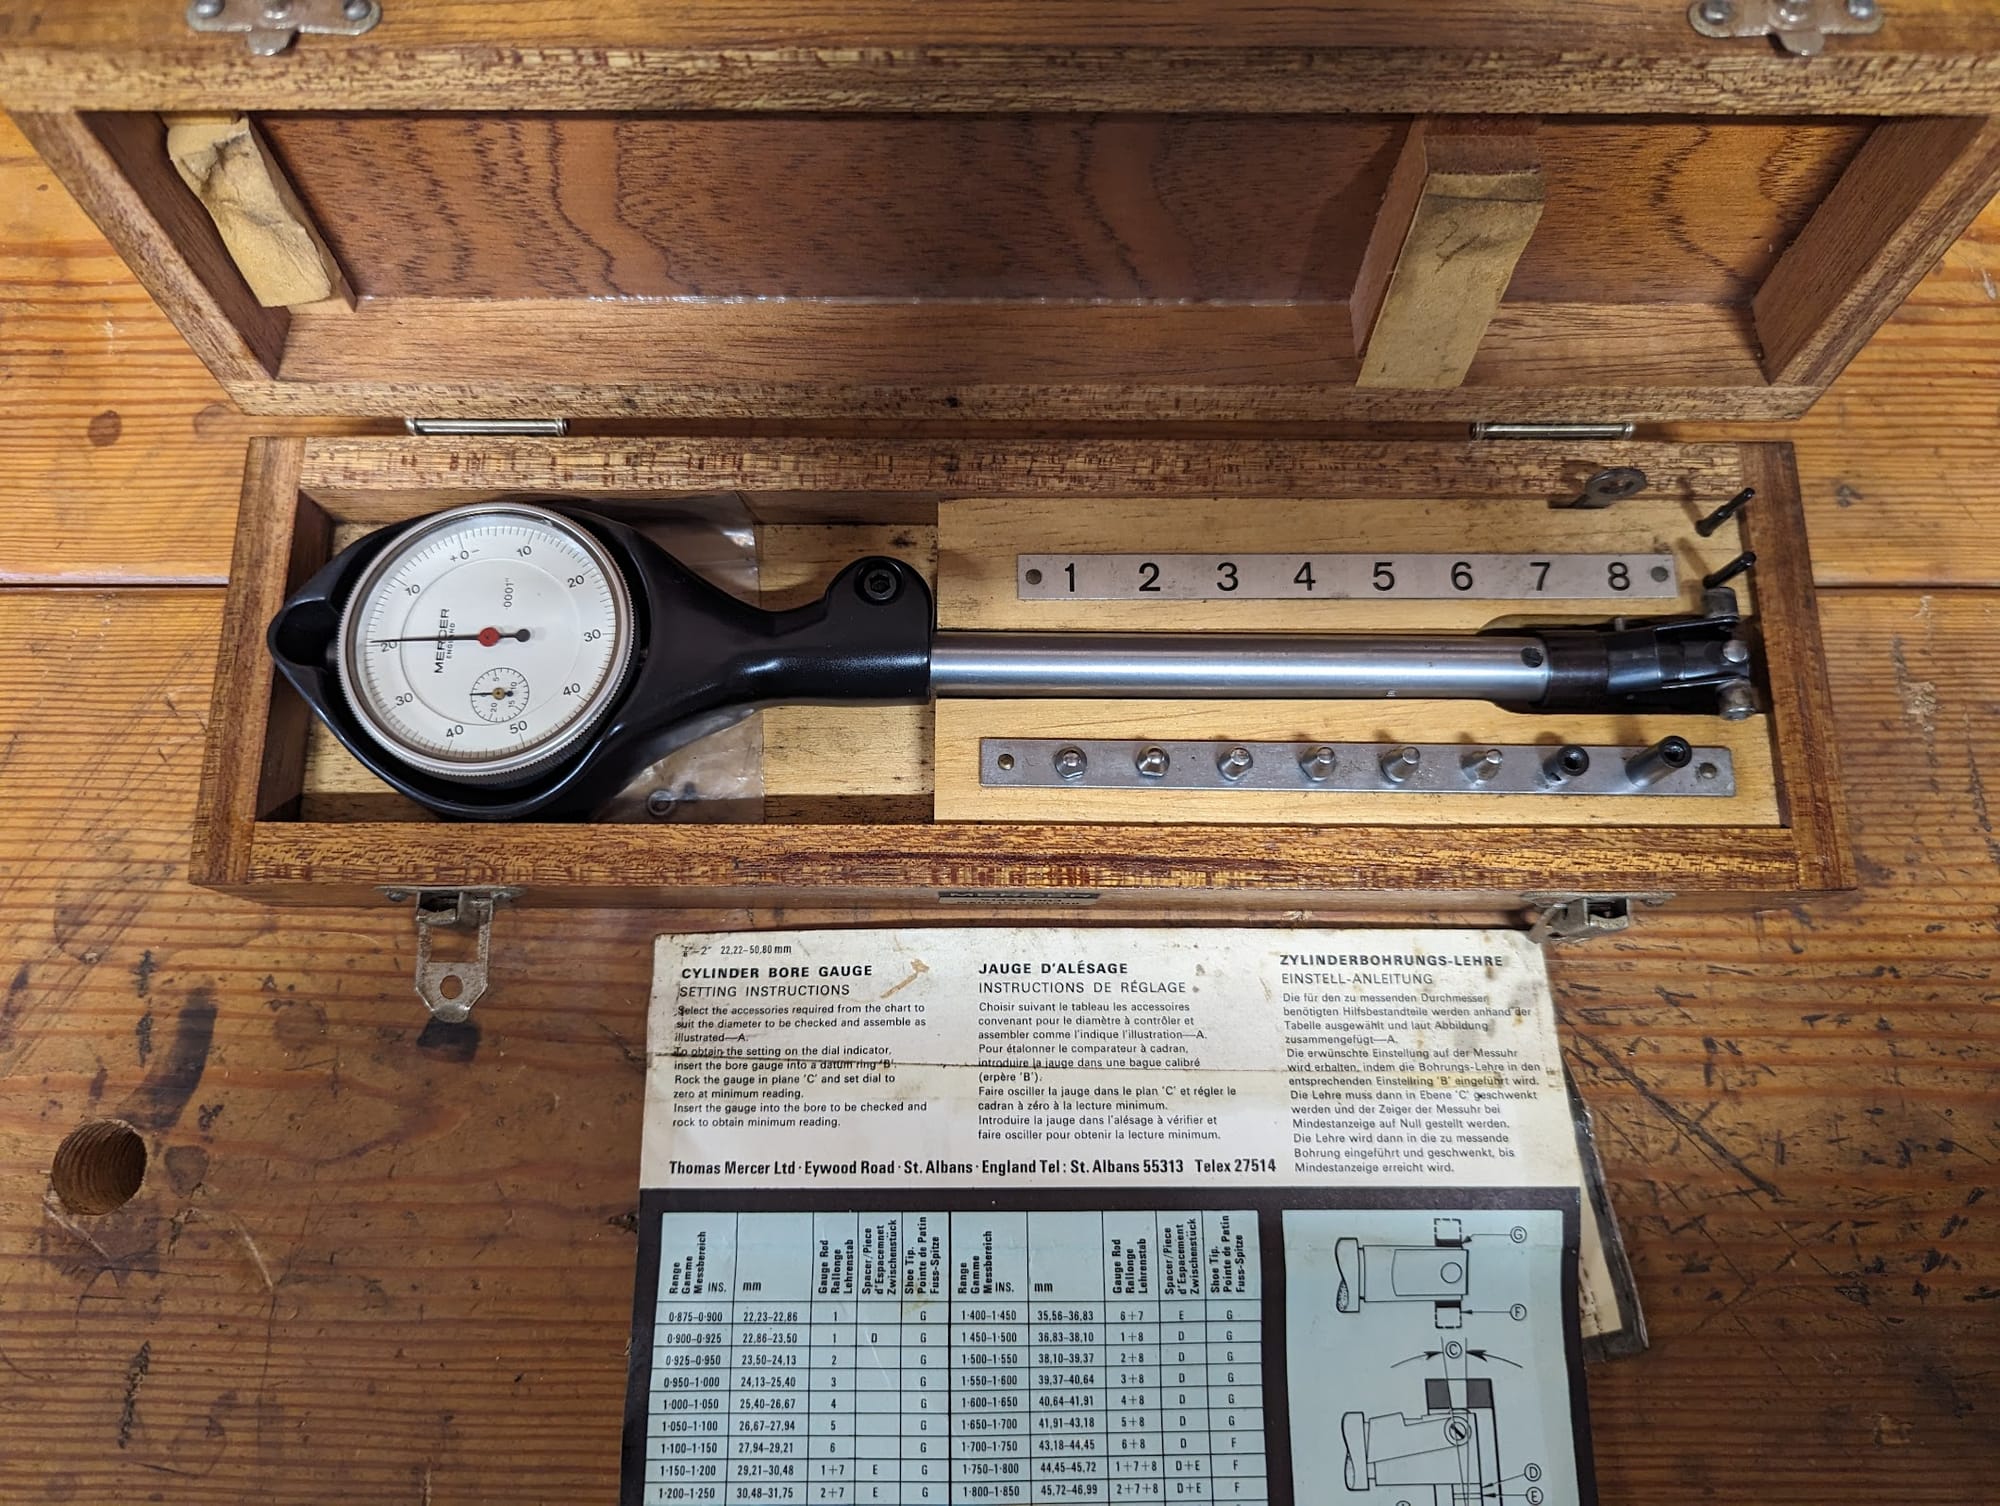
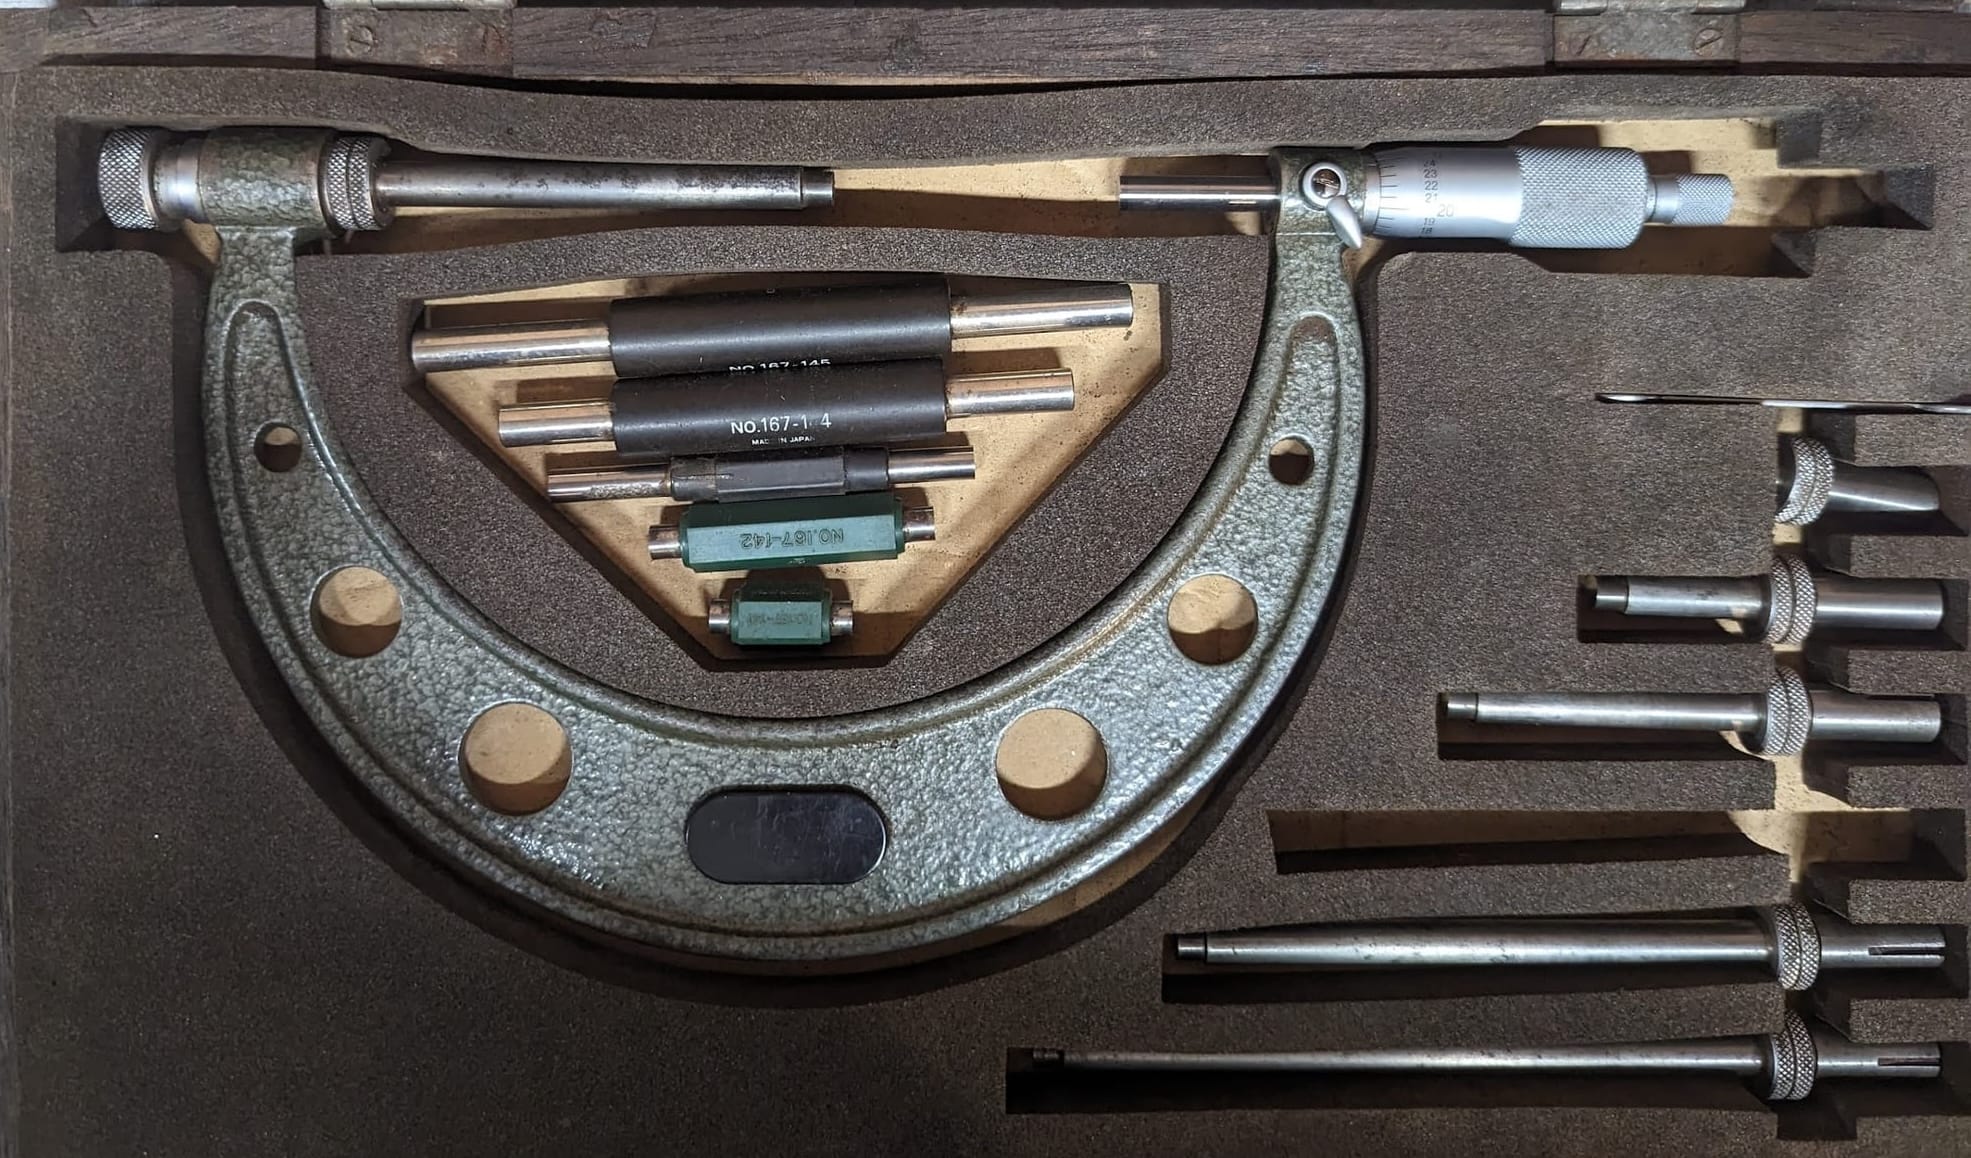
The most important bit of kit you will need is a cylinder gauge (sometimes called a "bore gauge"). In the UK, vintage cylinder gauges can be found for very fair prices. Mine was from eBay and cost £28 delivered:
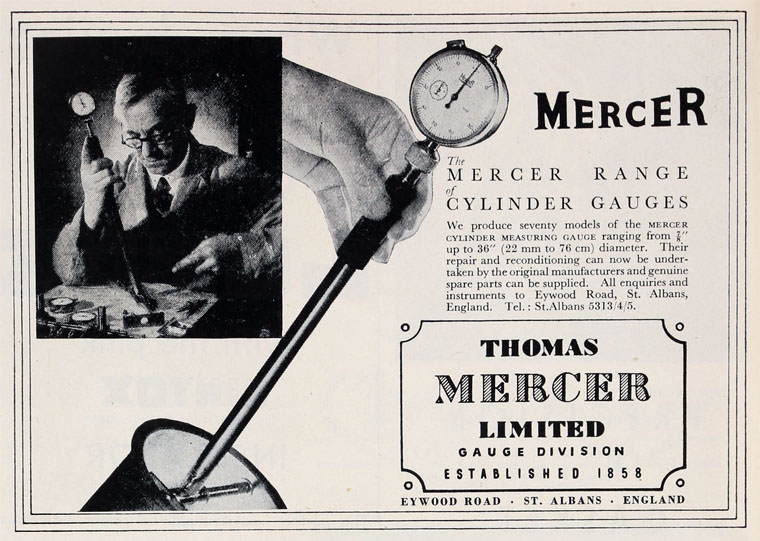
Mercer cylinder gauge / Mercer - along with Baty, Verdict and Moore and Wright - were well regarded British manufactures producing specialist gauges
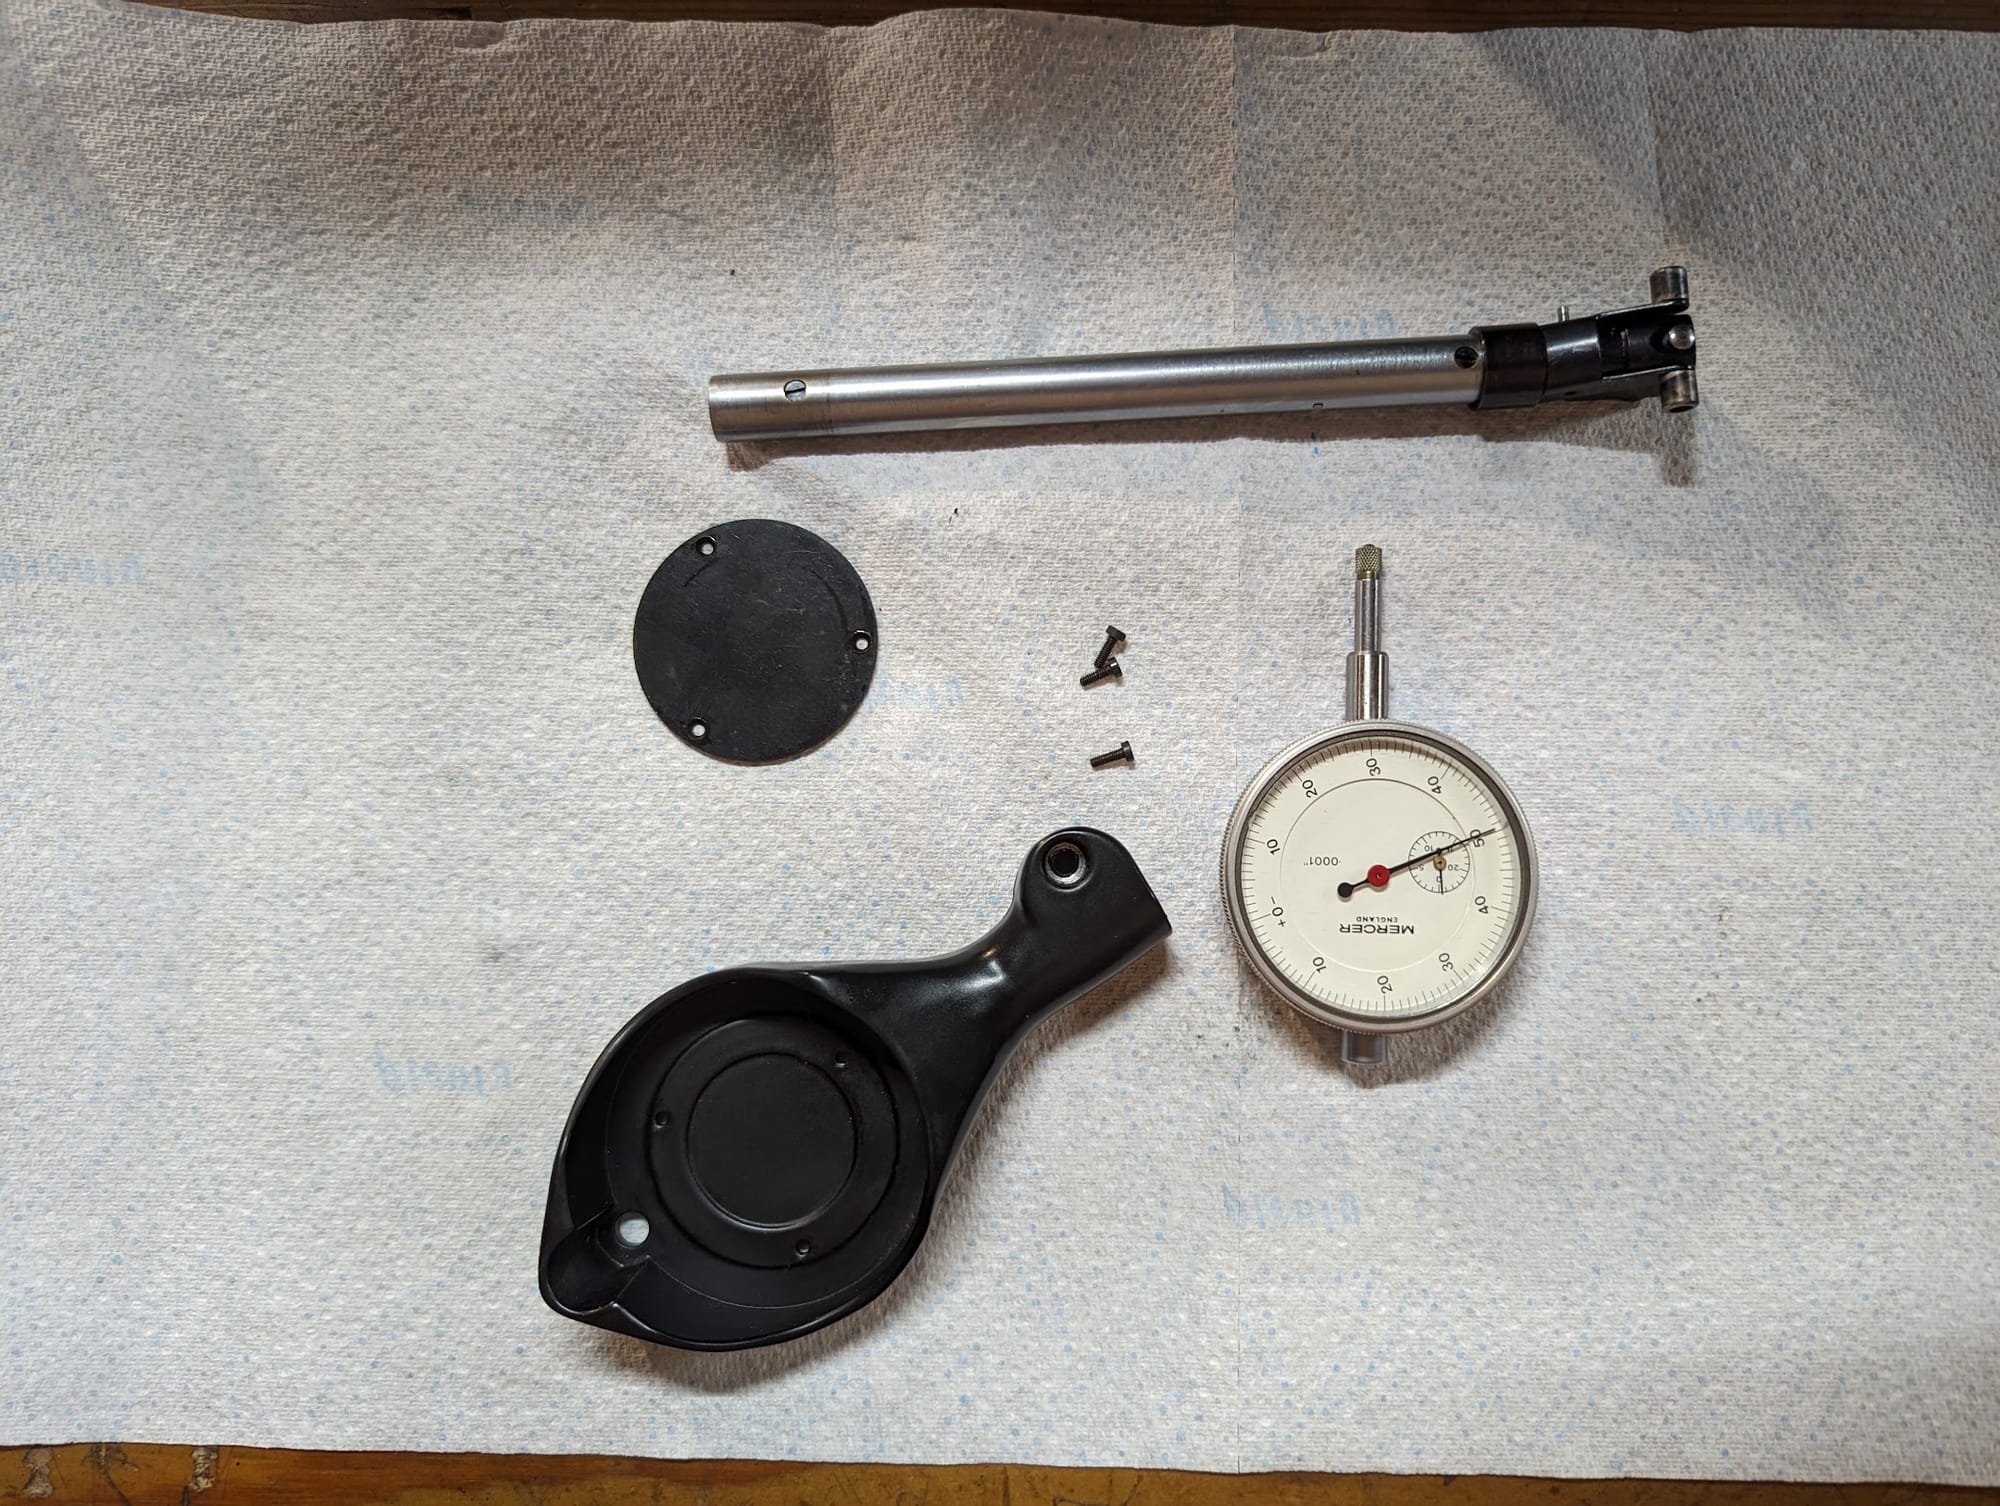
The gauge I bought was not working and sold for 'spares and repairs', however it was a straightforward fix (the plunger was stuck and just needed to be cleaned).
If you are on the look out for this type of gauge it's worth checking that the various anvils and spacers used to accommodate a range of bore sizes are all present (there are 8 in the model shown above, so the gauge can be set up for bores between 7/8'' and just over 2'').
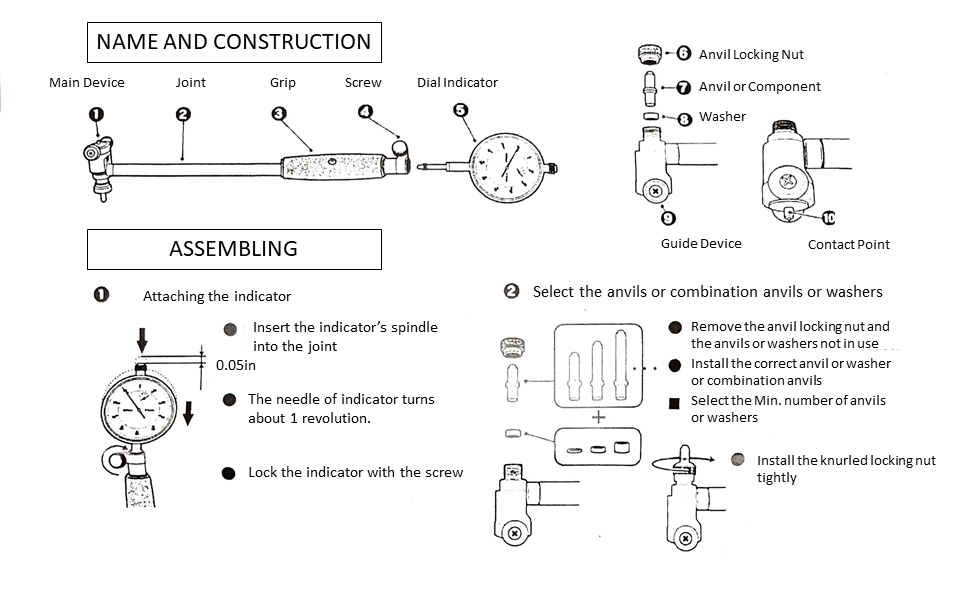
The black plastic protective cover can be removed and the dial indicator gauge unclamped from the shaft, meaning that you can replace it if necessary. It is just is a standard dial indicator gauge, and there are plenty of good examples to be found on eBay if yours is broken.
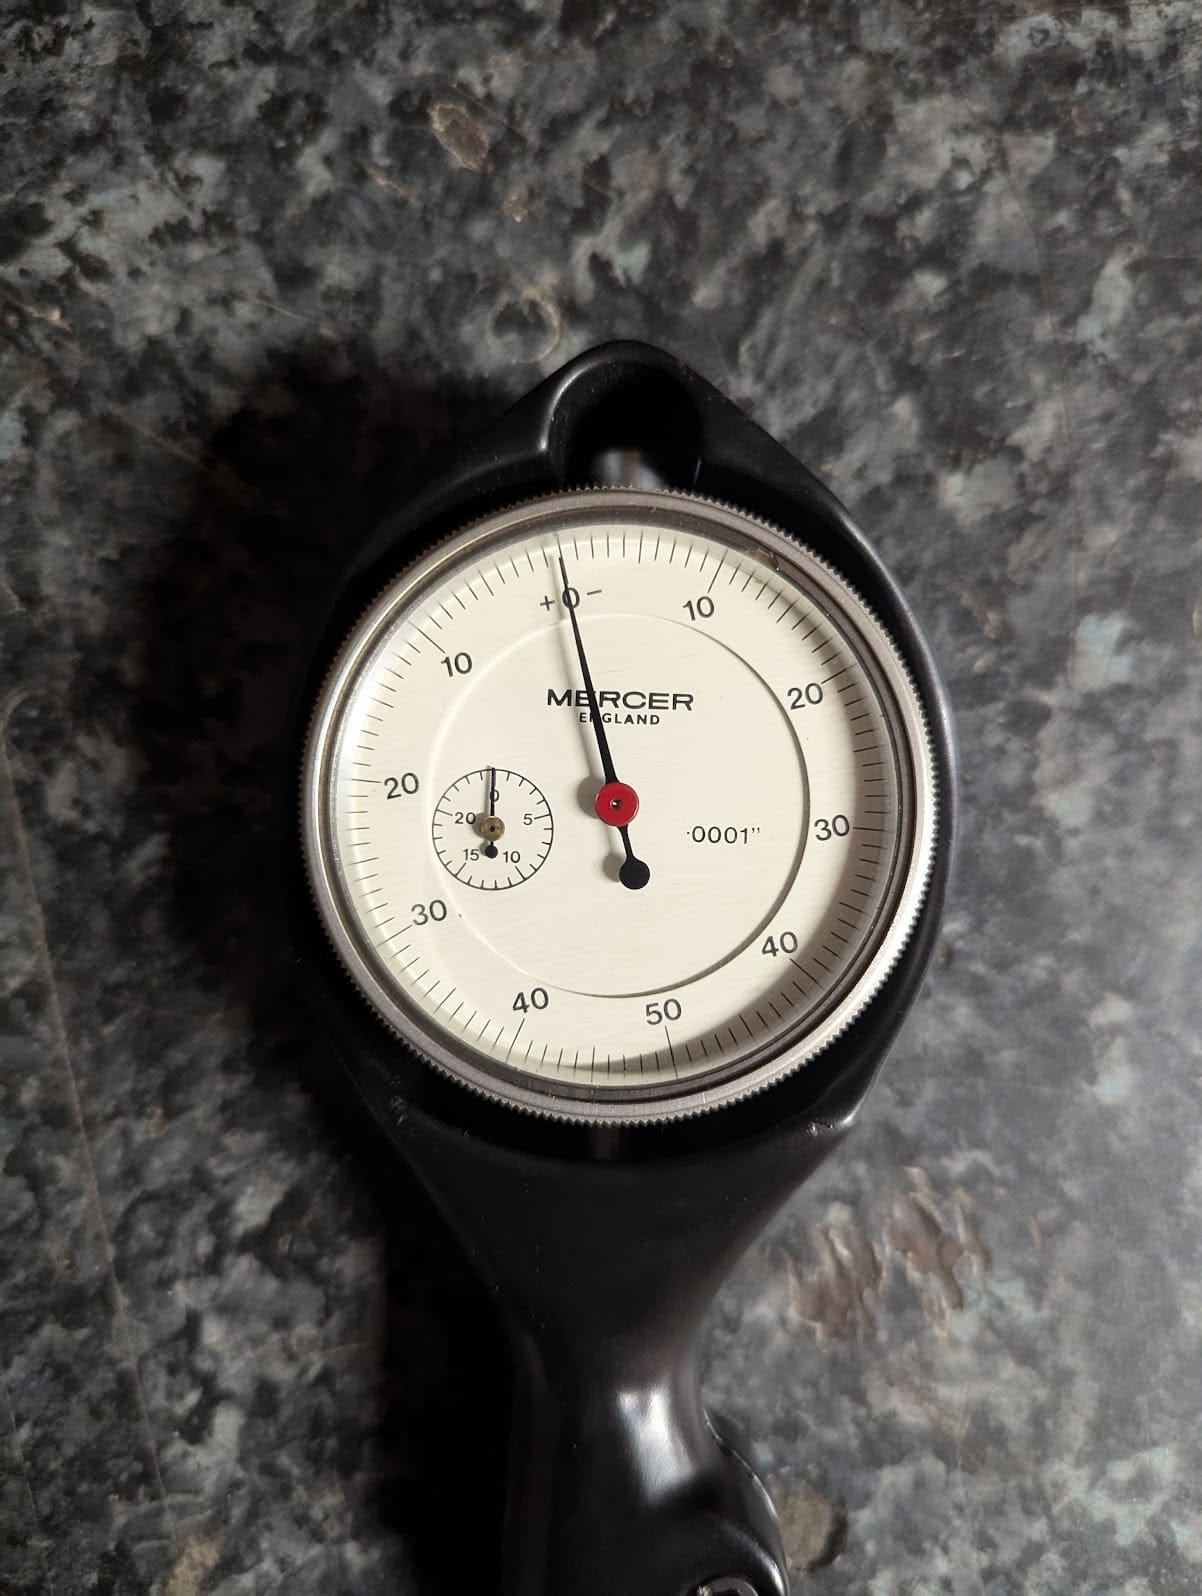
Dial indicators vary in resolution, and the one above can measure in increments of 0.0001'' (0.0025 mm). Other common graduations are 0.0005'' (0.0127 mm) and 0.001'' (0.0254 mm).
The graduations on the 0.001'' dial represent one thousandth of an inch (a "thou") and the graduations on the 0.0001'' indicator are known as "tenths" (short for "one tenth of a thousandth of an inch").
Everything else being equal in terms of quality and working order, the advantage of the higher resolution gauges is legibility. For instance, consider trying to measure a small distance like the maximum wear allowed on a standard C90 cylinder (which - per the spec above - is 0.0039'', or just under 1/10th of a mm): When measuring this distance with a 0.001'' indicator the needle will move a short distance, only having to travel to just under the 4th graduation on the dial (indicating approximately 4 thou) - and this makes it difficult to tell exactly what measurement you are getting - whereas on the 0.0001'' dial the needle will move to the 39th graduation, indicating 39 tenths (3.9 thou).
As explained below, you will also need an external micrometer capable of measuring at least 2 inches - another ebay bargain in my case:
Setting up the external micrometer
When using a cylinder gauge the idea is to zero it at the nominal value of the bore and then measure the variation of the bore diameter from the expected value.
A quick way to establish the nominal size (although not the most accurate - see the limitations section below) is to use a rod of a known length to calibrate a micrometer, and then - having adjusted the calibrated micrometer to the nominal bore size - to zero the cylinder gauge at the same size. You can see the instructions on setting up the micrometer in the video below:
Unfortunately, since all my measurement equipment is old and uses imperial we are going to have to do the measurements in inches. I set my micrometer using a 2'' setting rod, since this is closest setting rod I have to the expected size of the cylinder bore.
Setting up the bore gauge
As mentioned above, the dial indicator contained in the bore gauge needs a little pre-load so, when inserting the dial indicator's stem into the bore gage handle, it must be inserted deep enough to move the needle slightly. The instructions below are for a gauge designed to get a full revolution of preload, but the Mercer instructions say it is sufficient to insert the gauge until the needle is just registering.
The next step is to choose the appropriate anvil and spacer lengths to match the bore size to be measured. This will be explained in the cylinder bore instructions, if you still have them.
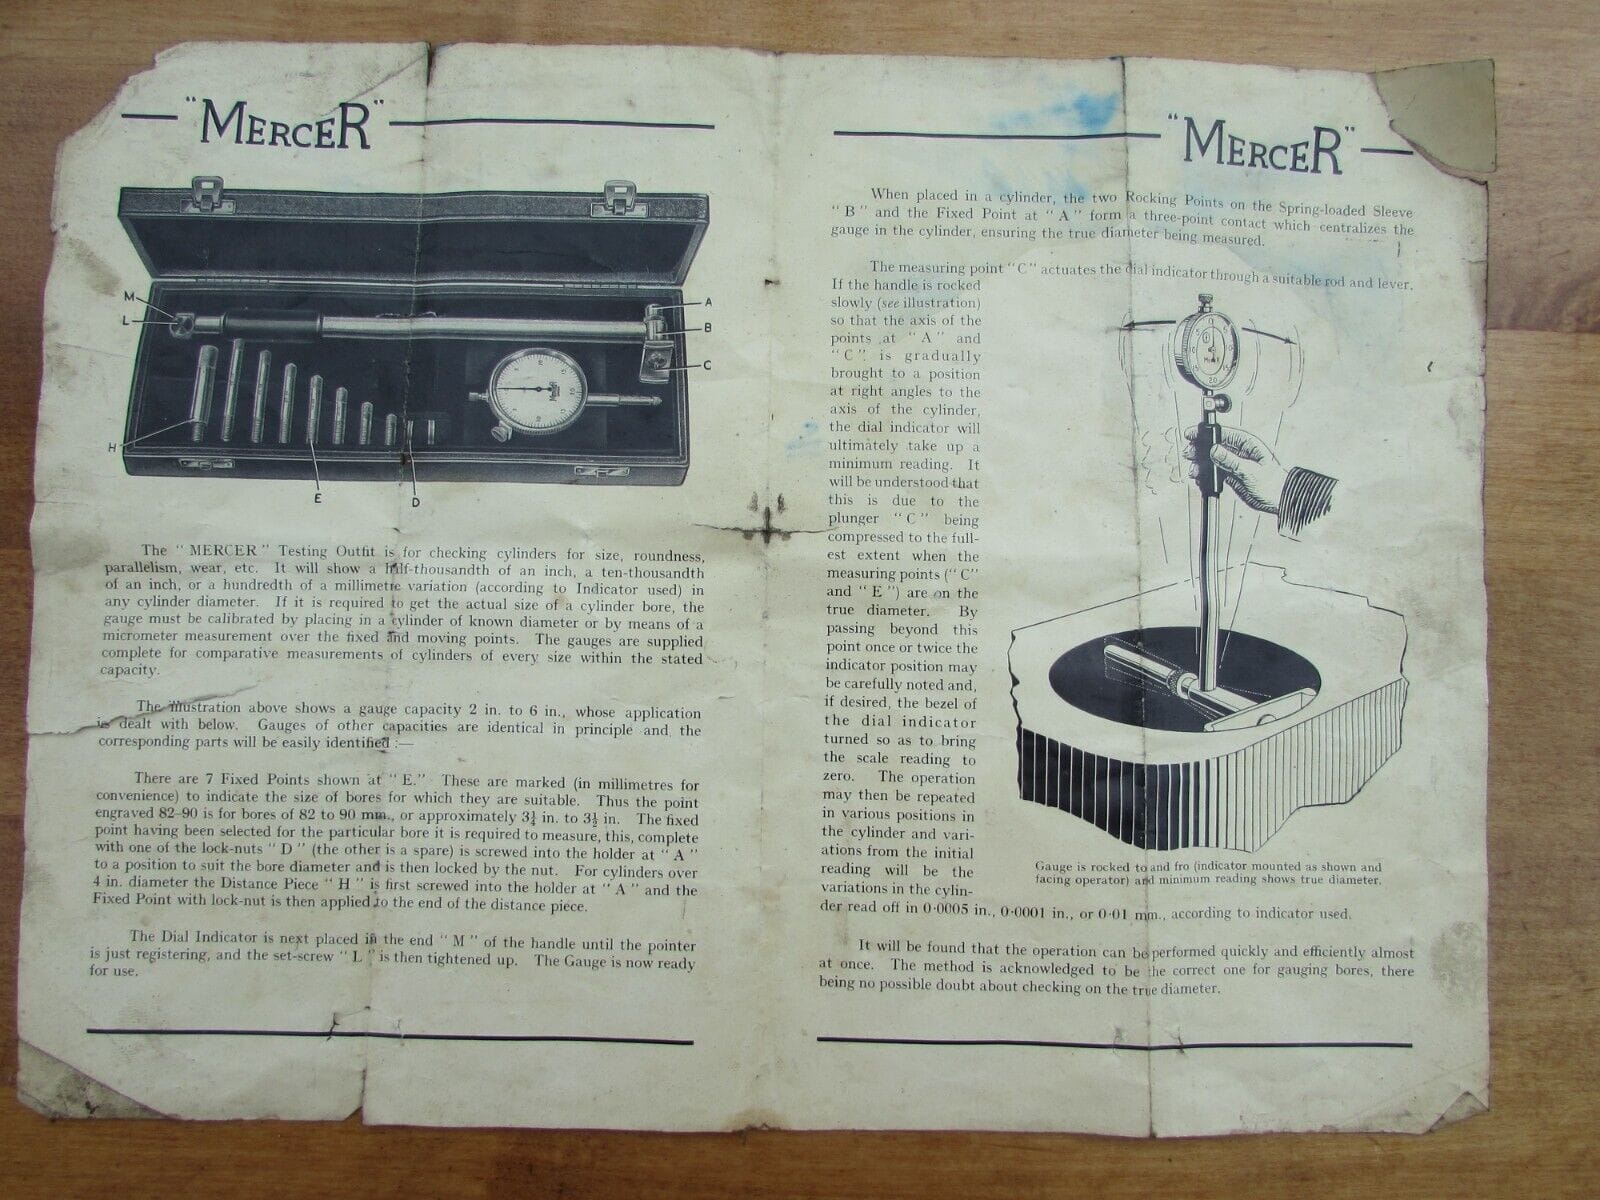
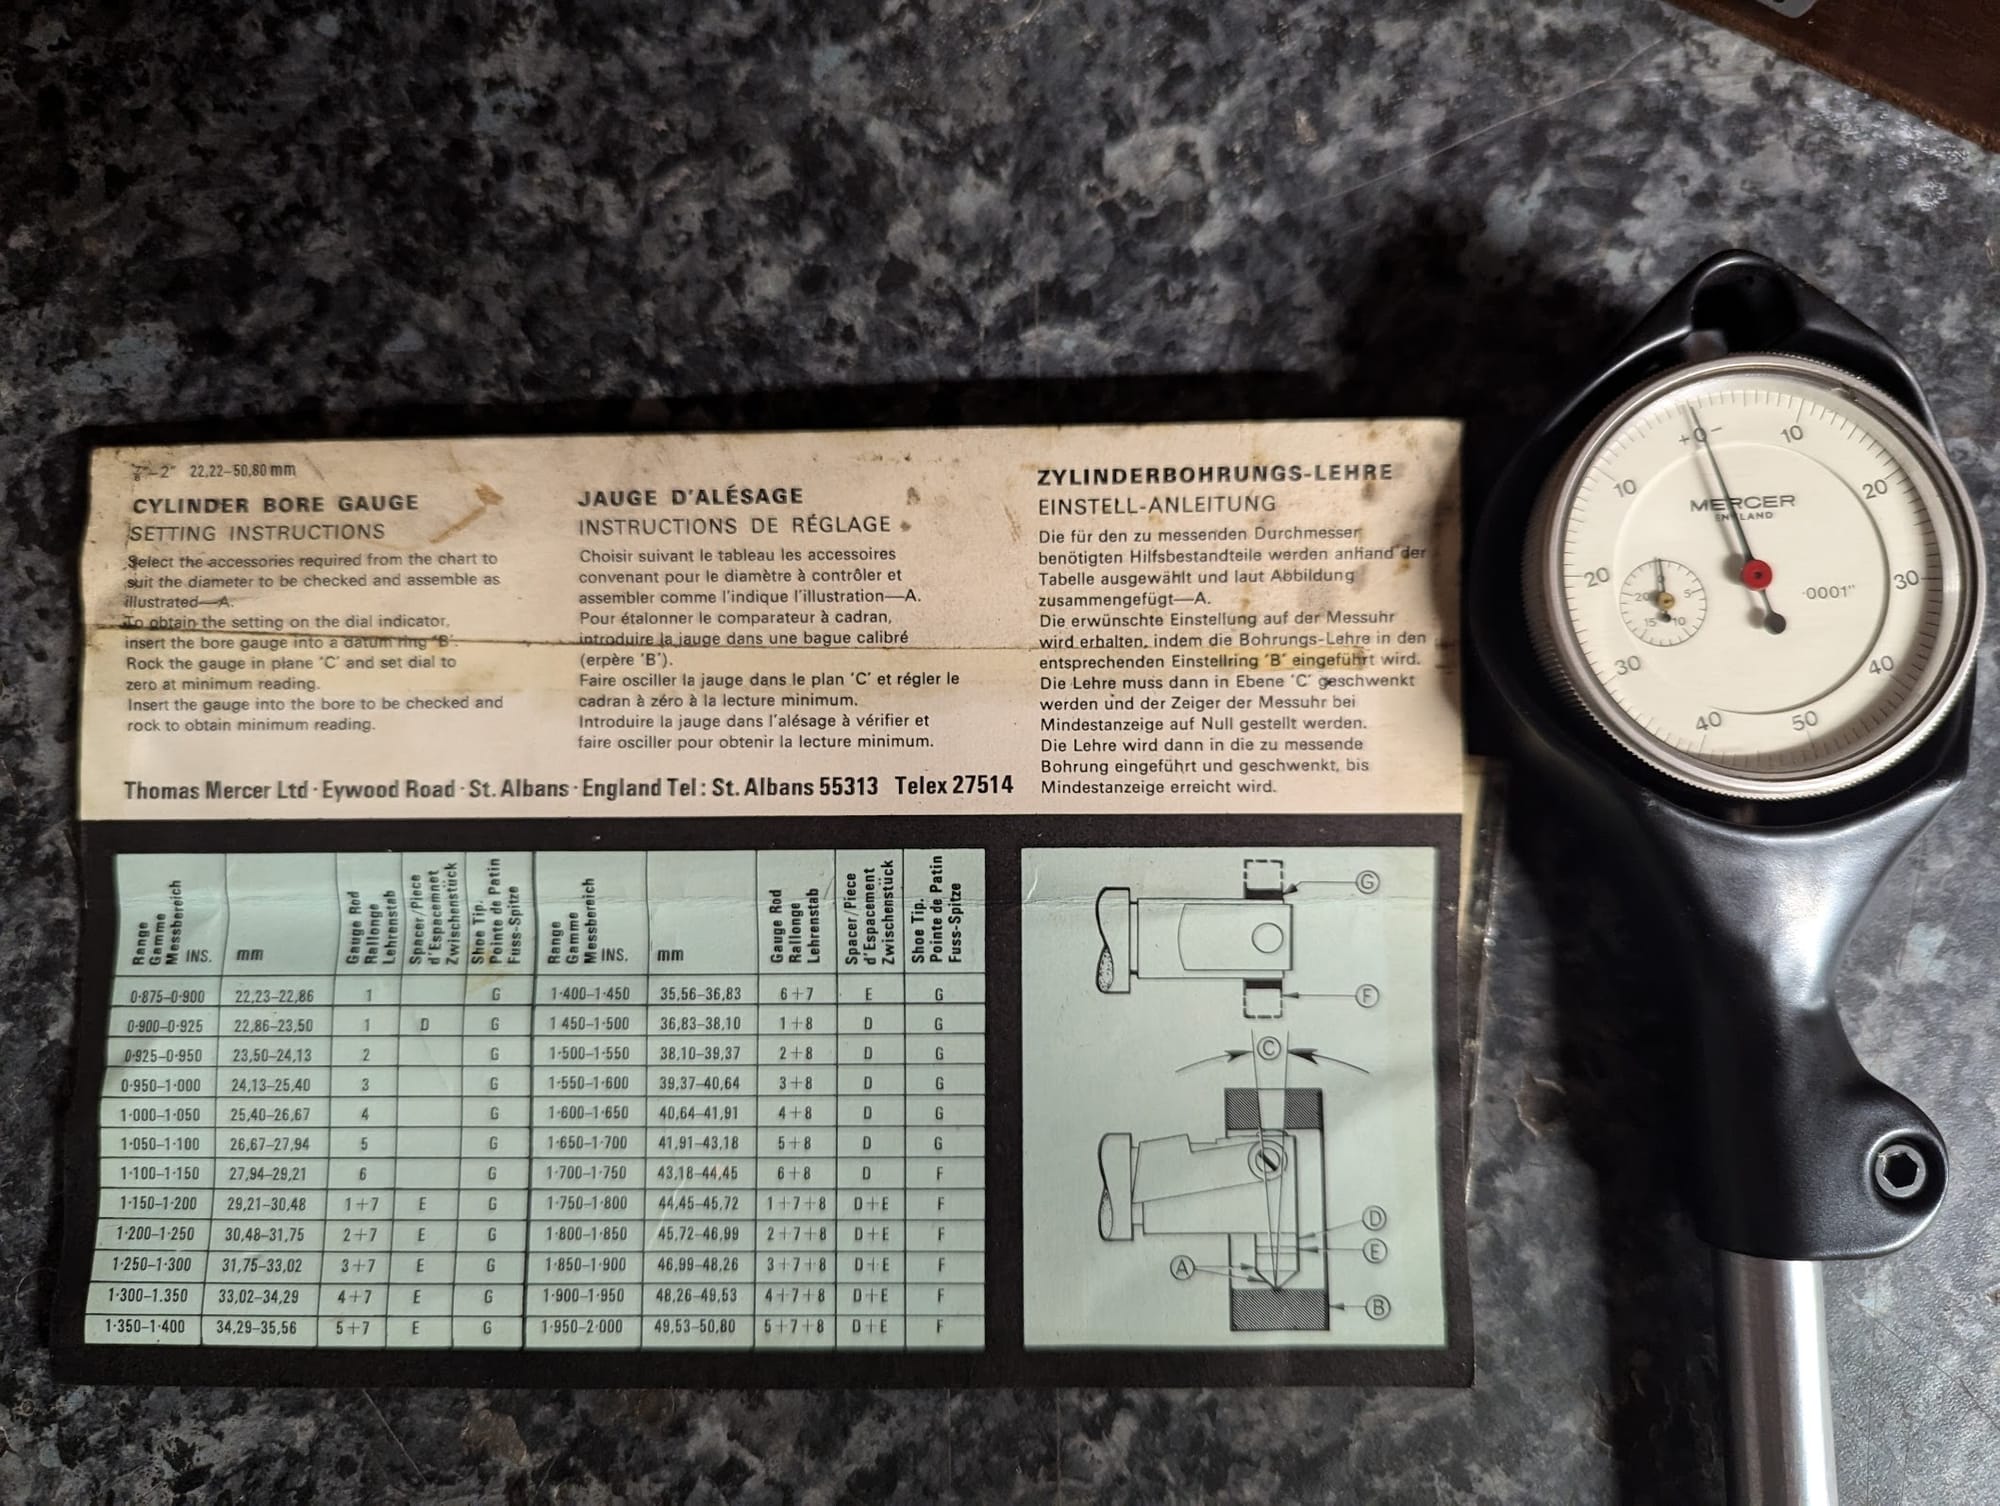
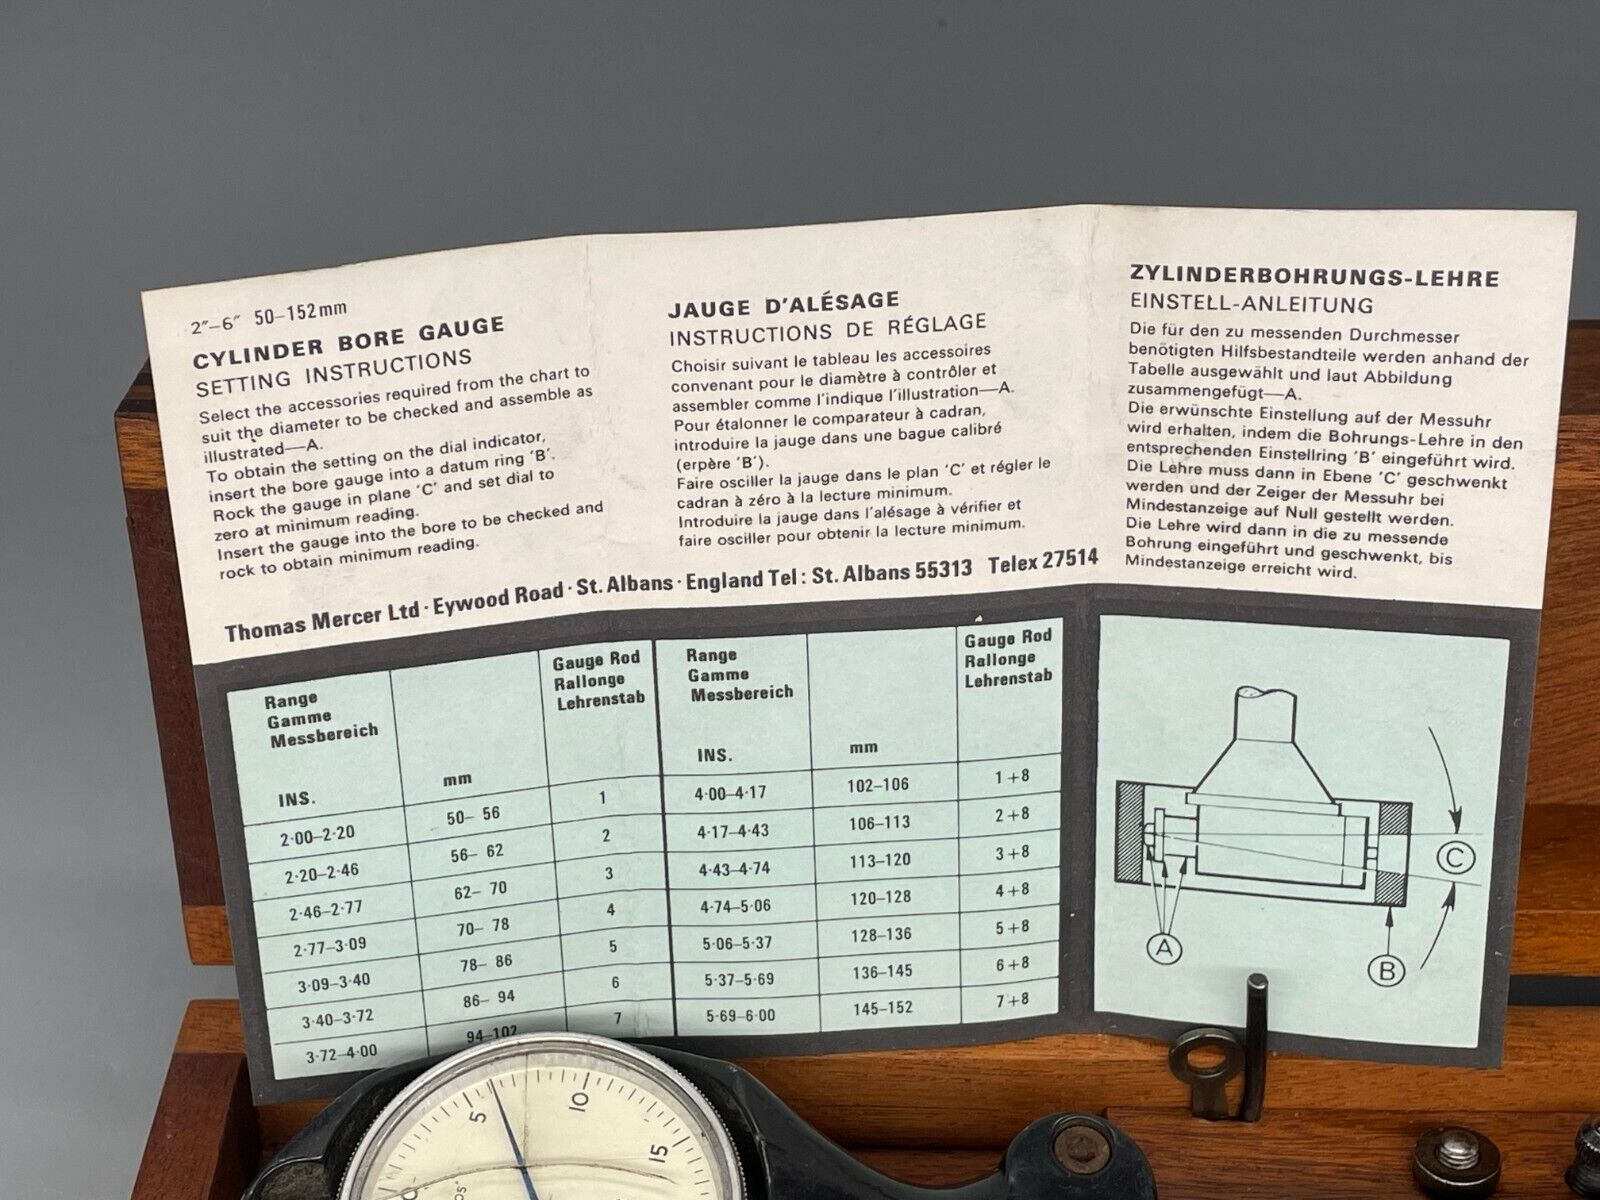
Mercer instructions (left) / spacer & anvil combinations (centre & right)
... and finally you place the cylinder gauge between the anvils of the micrometer and set it to zero. Thus, when placed in the cylinder bore you can see how much the cylinder deviates from the distance established with the micrometer.
Taking measurements
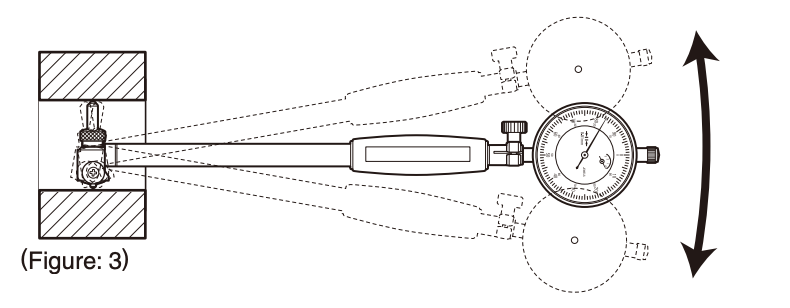
Place the bore gage into the cylinder and gently rock the gage from side to side to find the lowest reading.
Reading the indicator gauge
In the case of the 6v C90/CT90 cylinder we need the bore to be no wider than the service limit of 1.9724'', so we need to check the indicator shows a movement of no more than 0.0039'' compared to the 1.9685 the cylinder gauge was set to.
To get the most accurate representation of the bore diameter, measurements should be take at several positions, as shown in the diagram from the Honda manual at the start of this article.
The bore can also be measured for taper and out-of-round:
- Taper is the difference in the diameter between the top and bottom of the piston ring travel.
- Out of round is a measure of the ovality of the cylinder: subtract the smallest diameter reading from the largest at each depth to find the out-of-round value for that section.
Out of spec cylinders need replacing or should be rebored.
Limitations
Although quite possibly 'good enough' for checking out the cylinder of a small Honda motorcycle, the above is not really correct practice. There is a whole discipline (metrology) dedicated to the science of measurement, so it is not really surprising that fiddling around in your garage is going to gloss over some important details, and itt seems the main problems with the approach above are:
- second hand equipment may not have been calibrated recently
- using a micrometer can introduce human error (the more reliable way, apparently, is to use - expensive - ring gauges).
If you are really serious, you also have to consider the impact of the impact of ambient temperature on your tools and materials. You get the idea.
From what I've read, assuming that your dial bore and micrometer work and are calibrated correctly, the variability of the micrometer set up could impact accuracy by between +/- 2 thou. Since the difference between a brand new cylinder and an unserviceable one is only 4 thou, probably any measurements we take should to be treated with a pinch of salt. I suppose the proof of the pudding is in the eating though and, if you are satisfied with the measurements and the bike has good compression and does not smoke you must have been in the neighbourhood of accuracy.
Unscientific method
What can you do if you don't have any measuring equipment and are too stingy to pay someone to inspect your cylinder? A rough and ready test for a cylinder that is too far gone is to see if a ridge has developed at the the highest point the piston reaches towards the top of the cylinder. If you can feel a ridge when running your fingernail over this area it would be prudent to consider getting the cylinder checked out professionally.