Doing an overhaul of the engine involves dismantling the cylinder head and inspecting the valves. They will need to be cleaned of any accumulated oil and carbon, but do they also need lapping?
Lapping
If the valves are worn or pitted due to wear or because they have been poorly adjusted in the past it may be possible to improve the seal by gently lapping the valves. This involves applying lapping compound (a fine abrasive) on the valve faces and then twisting them them back and forward until the valve and valve seat surfaces mate together exactly.
Honda does describe this procedure in their manuals, but it is only specified as the final stage in the process after the valve seats have been re-ground. Instead they recommend that ...
Burned, warped or worn valves which are unserviceable must be replaced.
Honda Common Service Manual
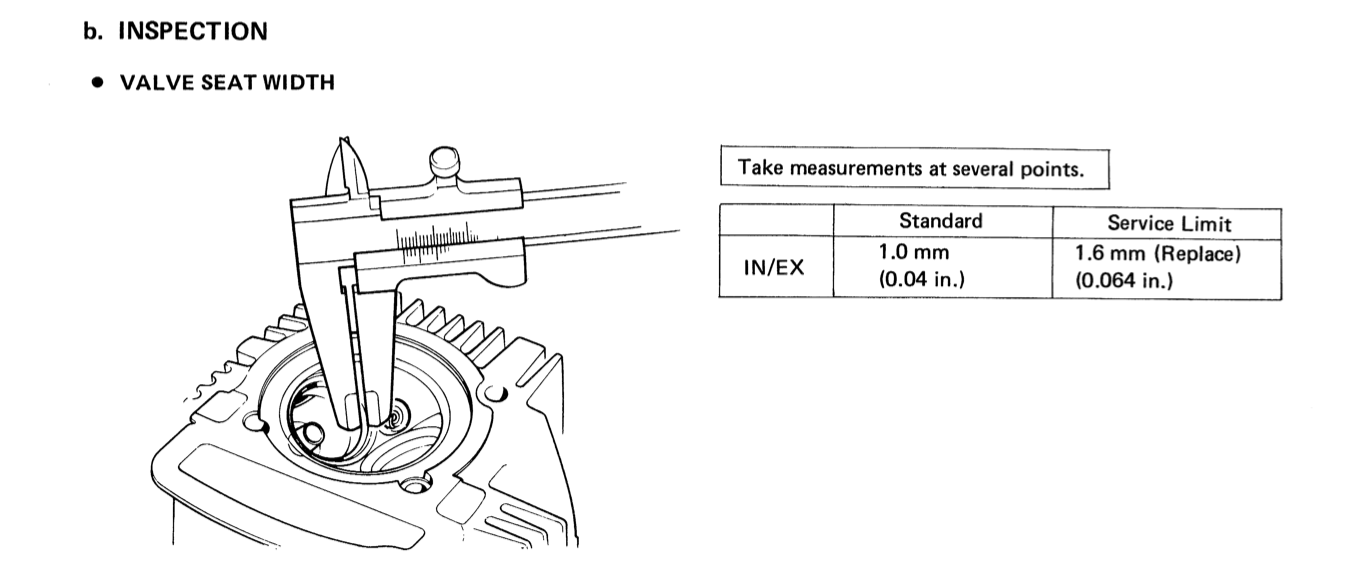
The service limits are described below:
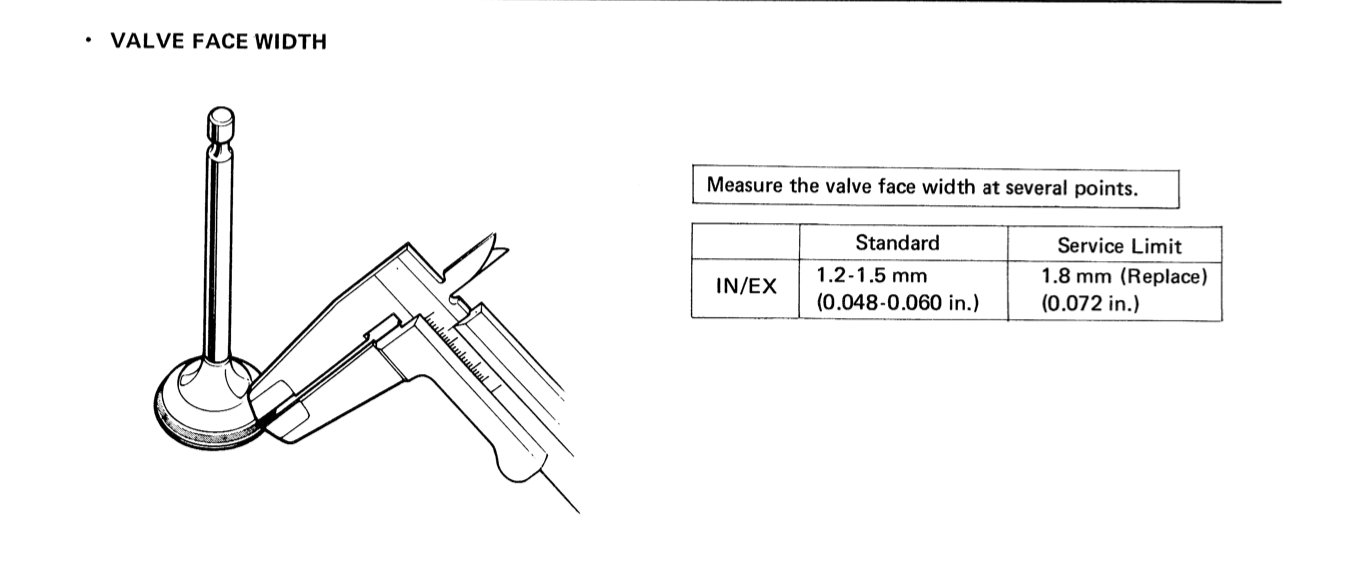
So the correct procedure is to treat valves as essentially single-use items that should be replaced when damaged or worn.
Valve Seats
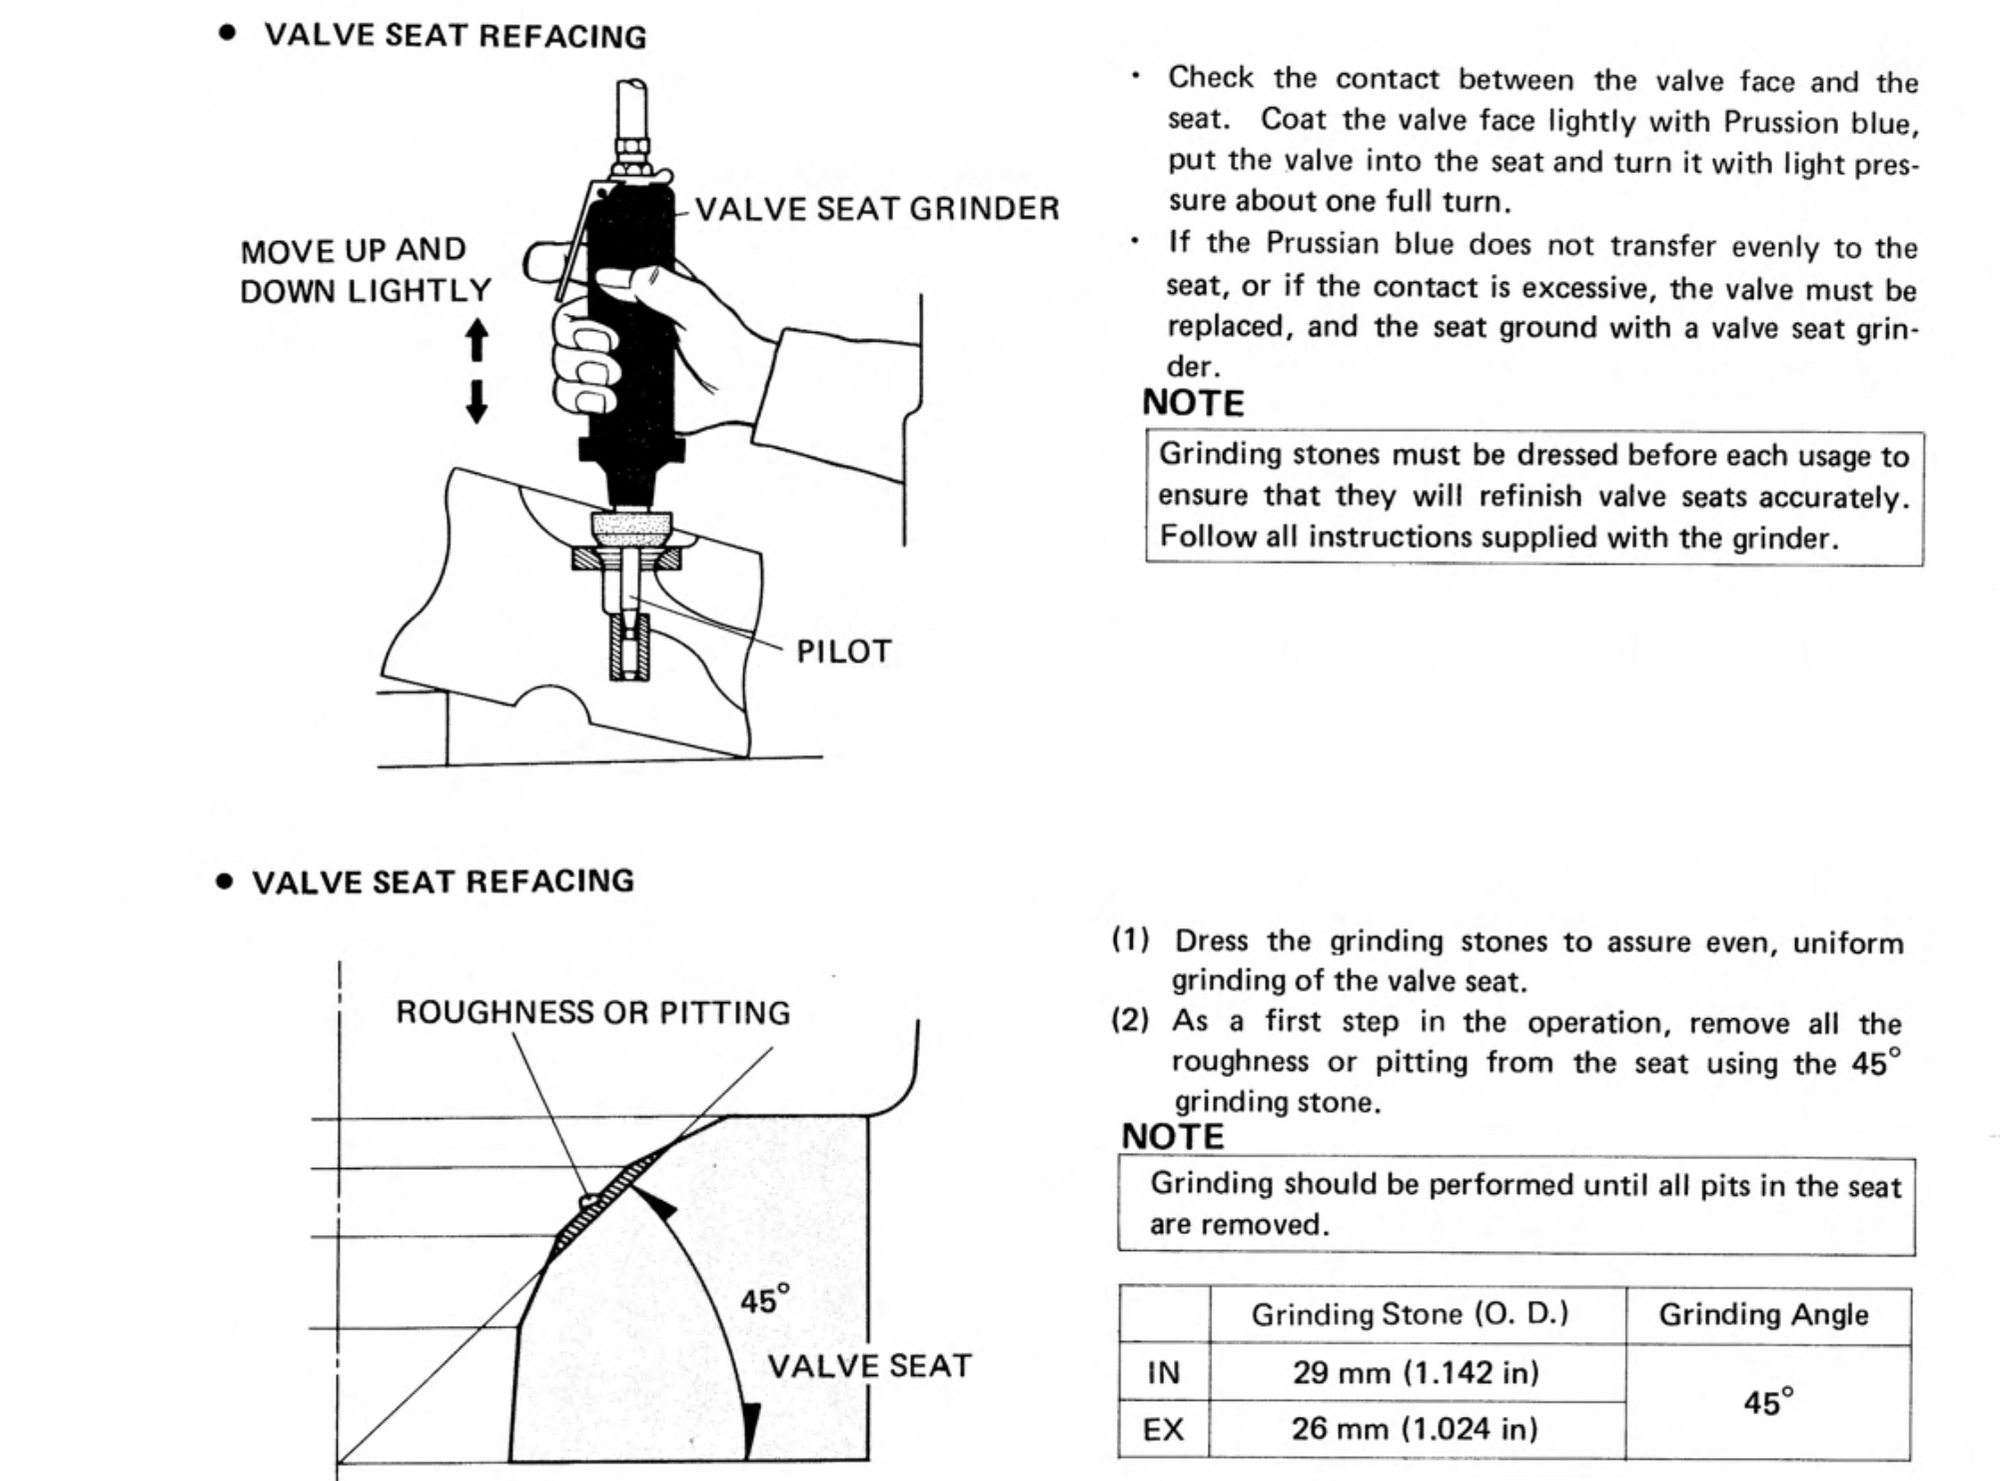
The seats can be reground if they are pitted, out of round or because the valve seat width exceeds the service limit, however this requires special equipment:
Back in the 50s and 60s it was apparently common practice to regrind the valves and valve seats used in car engines on a regular basis to ensure the maintained a good seal, so why would Honda not recommend this (cheaper) approach? The explanation appears to be twofold.
Stellite faced valves
Firstly, some of the valves used by Honda in the 70s and 80s were made with a coating of stellite (a very hard alloy). Since this layer was thin, while it might be safe to perform an initial lapping on brand new valves to ensure a perfect fit with the valve seats, subsequent attempts to remove damage could rub through the hard layer altogether:
It is not clear exactly which models this type of valve were fitted to. The C90 workshop manual from the 70s has this to say:
The exhaust valve is constantly exposed to extremely high temperature; therefore, it is made of special high heat resisting material to withstand the high temperature as well as the wear
... and the Honda Common Service manual produced in the early 1980s says "most" valves they fitted used stellite.
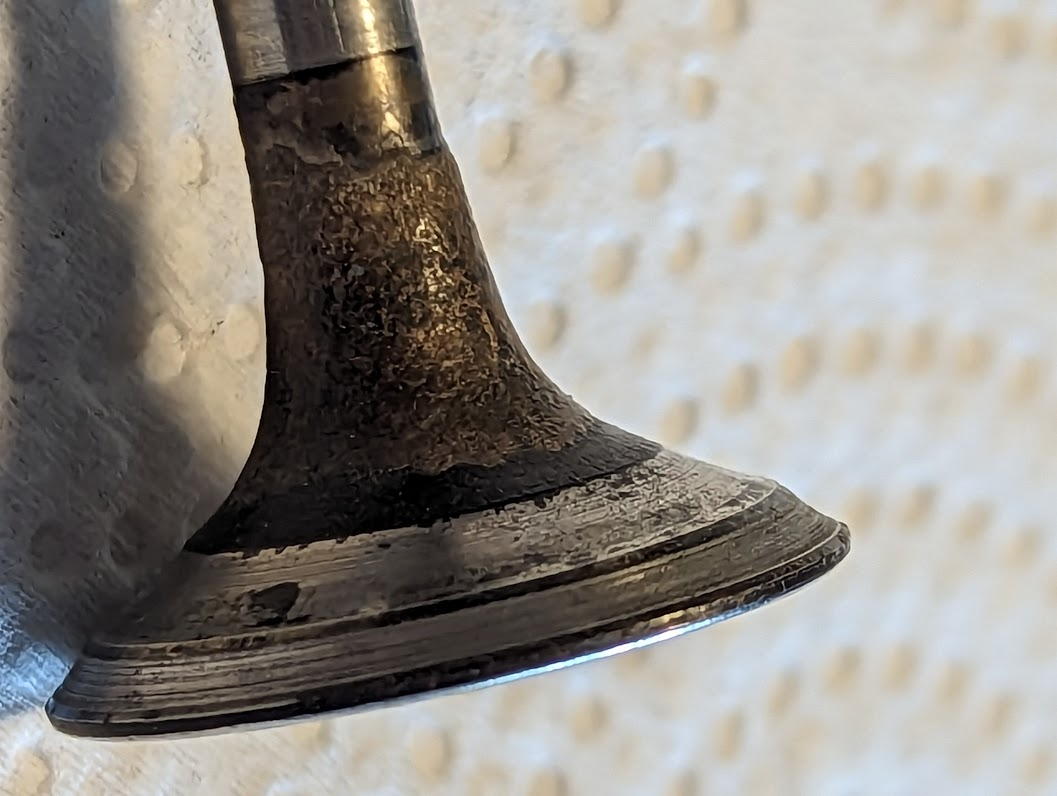
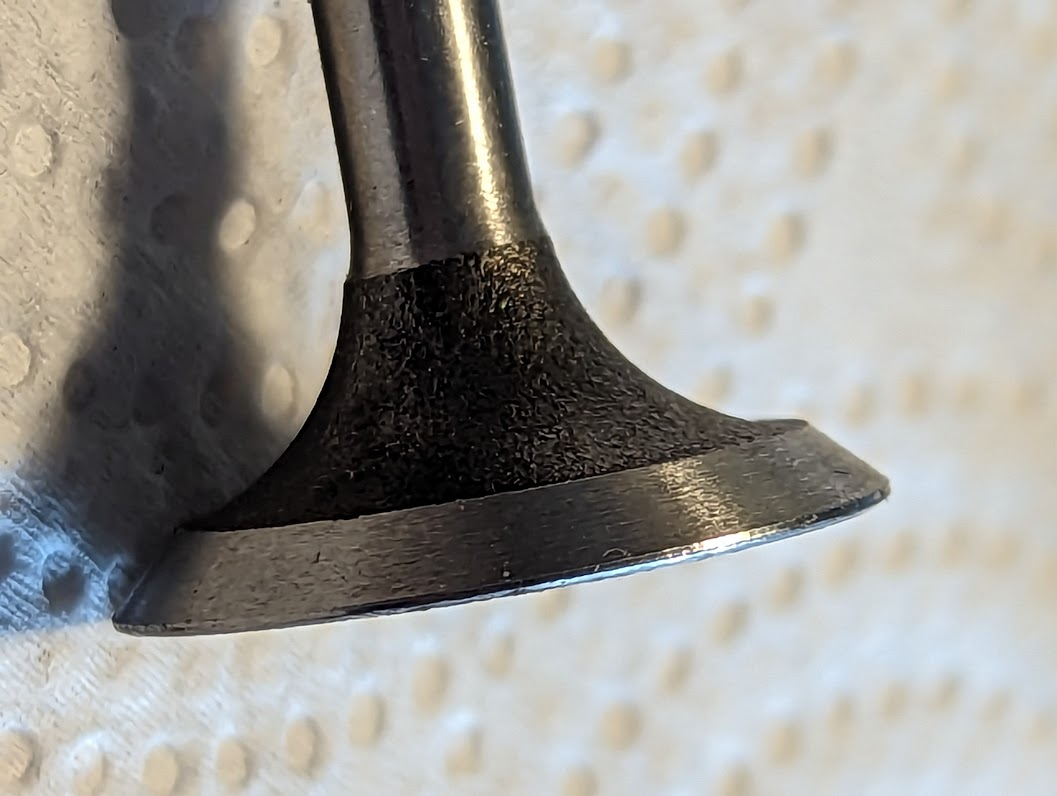
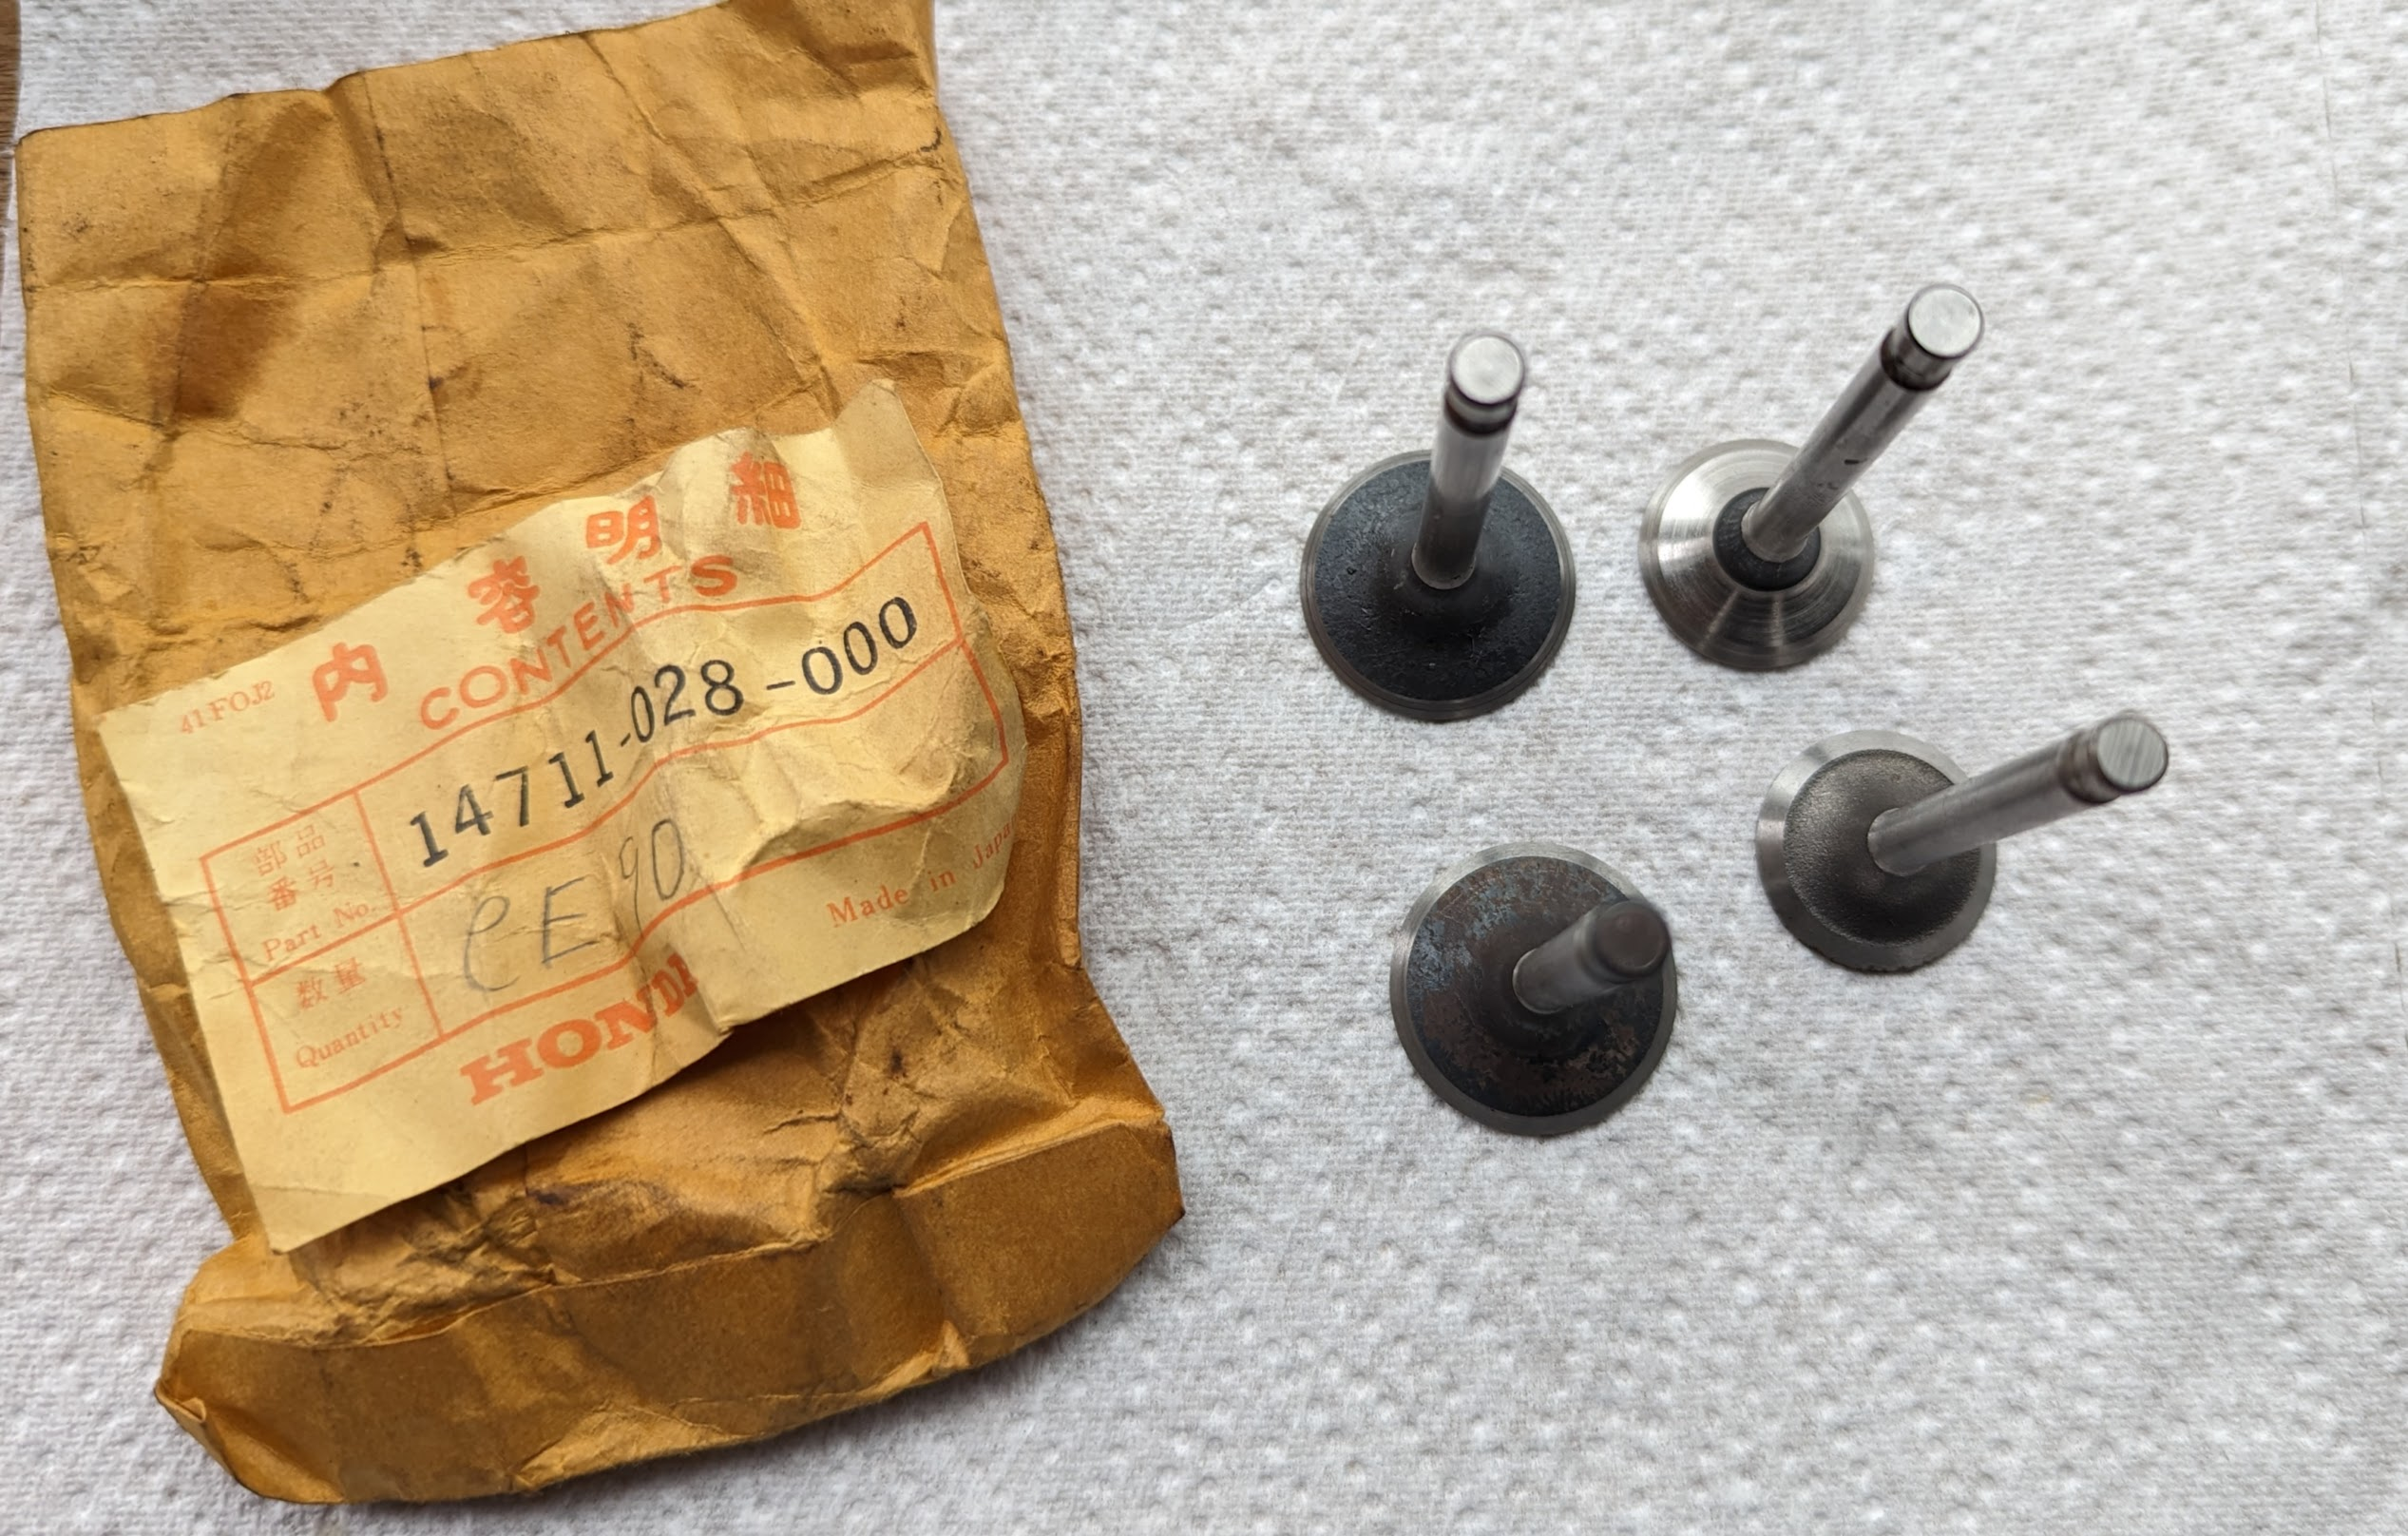
used exhaust valve from my C90 (left) and a new valve for comparison (right). Note how a ridge has started to develop on the old valve due to wear (this engine had done 8000 miles). When the valves wear like this the quality of the seal is reduced and the valves sit higher in the cylinder, impacting valve clearances
Perhaps the non-stellite coated valves respond differently to lapping, but it isn't clear if they were ever fitted to the Super Cubs and, based on the c90 manuals from the time at least, Honda’s advice to replace, rather than lap, worn valves still applies.
The second reason for caution is that while lapping the valves you are also removing material from the valve seat which reduces its service life. Of course the seats will wear anyway as the miles roll on but the use of abrasives will accelerate the process.
So there is a trade off and unfortunately doing the job properly and paying for replacement valves (if you can find them) and getting the valve seats reground can be expensive, in which case lapping might be an attractive option. If you decide this is the route to go down then it is well to note that Honda's instructions advise lightly lapping the valve and valve seat:
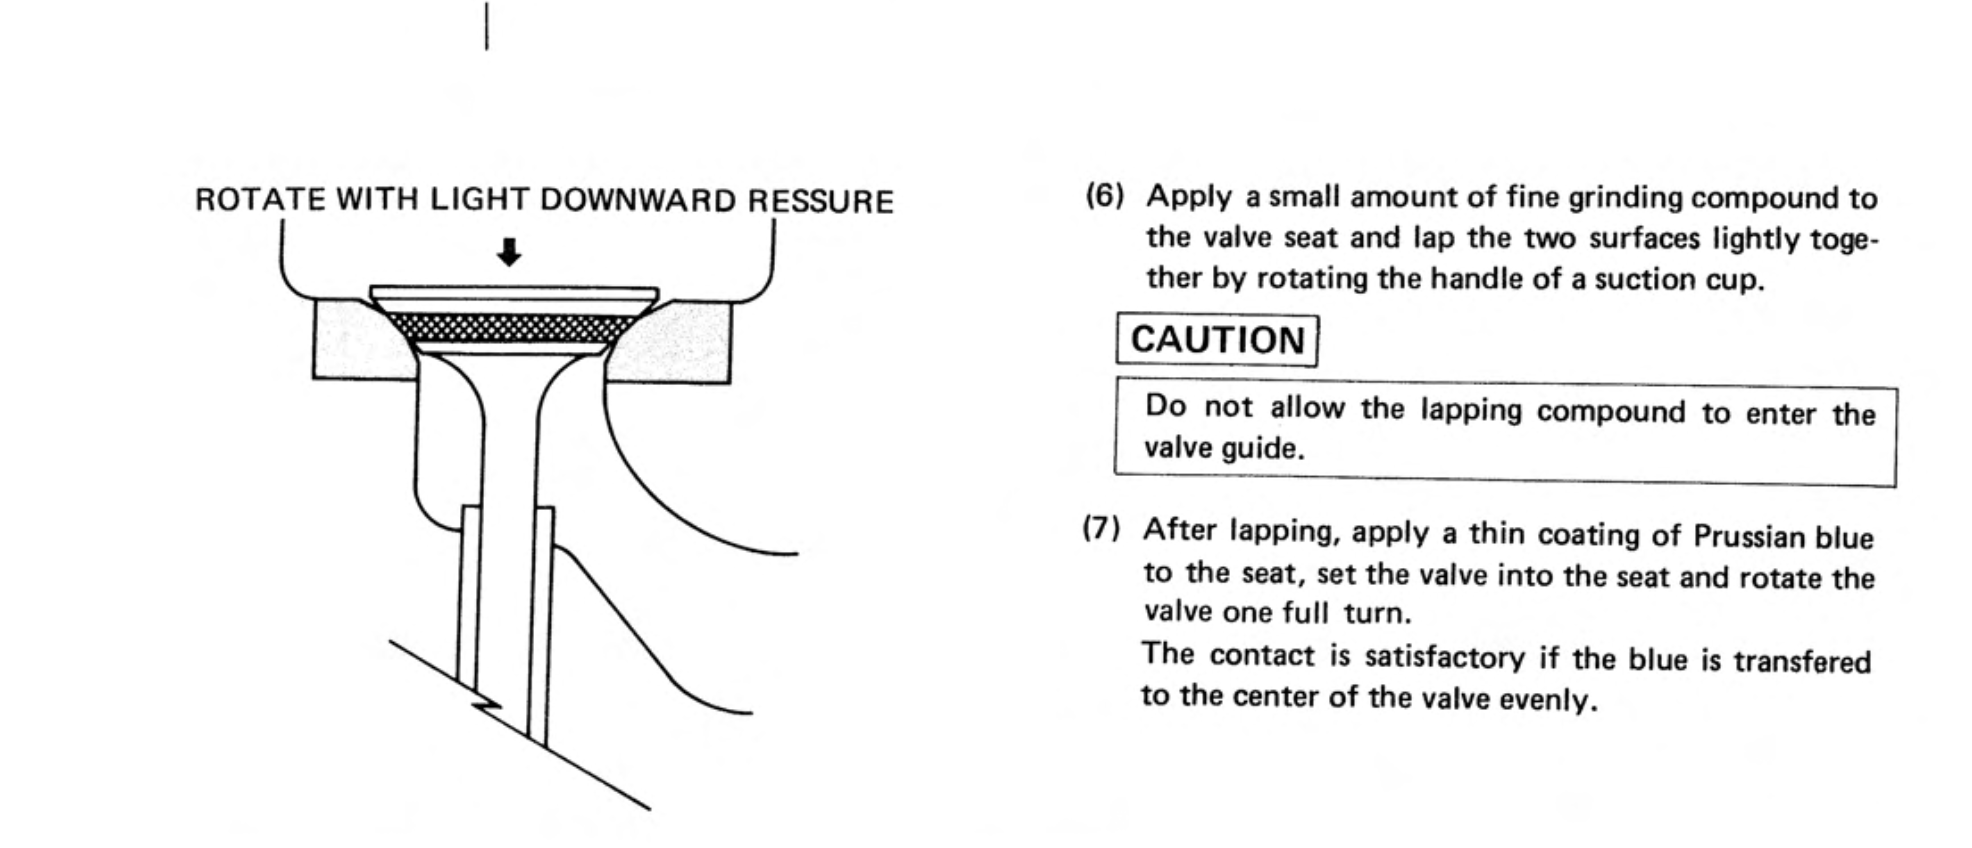
My first ham-fisted attempt at this involved attaching a bit of fuel hose to the end of the valves and using a drill to spin them back and forth as I had seen done on the internet. I have subsequently found out that this is frowned upon by proper mechanics as it can cause far too much uncontrolled wear. In my case, I could not get sufficient pressure between the valve and the seat without the valve starting to spin inside the rubber tube, so, luckily for me, no harm was done. For my second attempt I used a 2 pence coin in the slots on the valve face to gently work the valve back and forth a few times and the seal improved (per the manual, the correct process is to use a suction cup but I didn't have one at the time). Although the manual suggests applying light downwards pressure it takes very little pressure to start removing material from the valve seat.
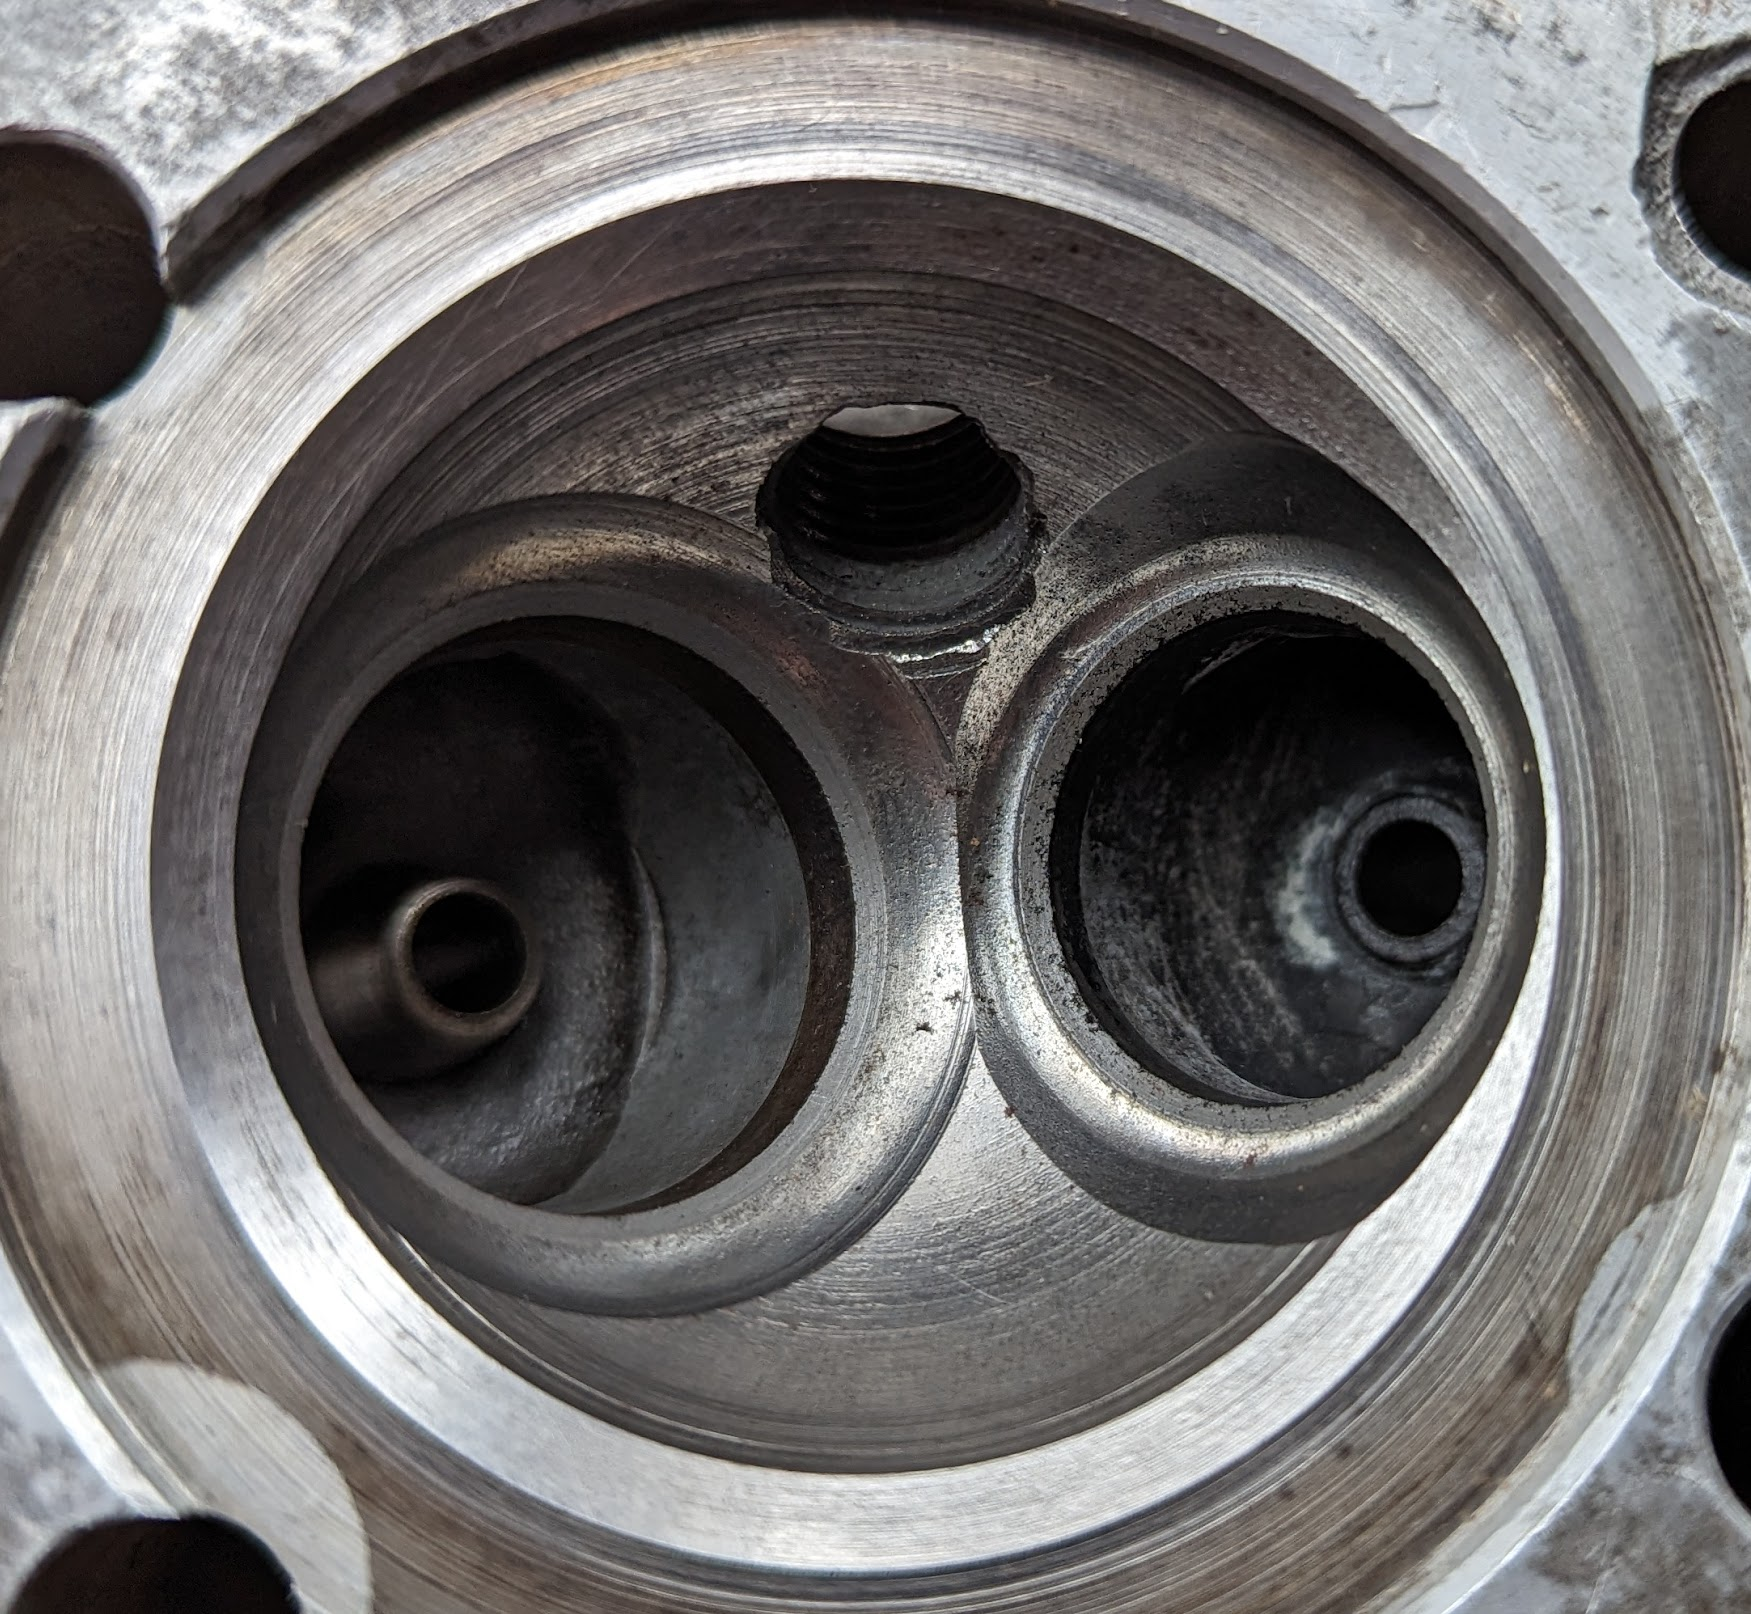
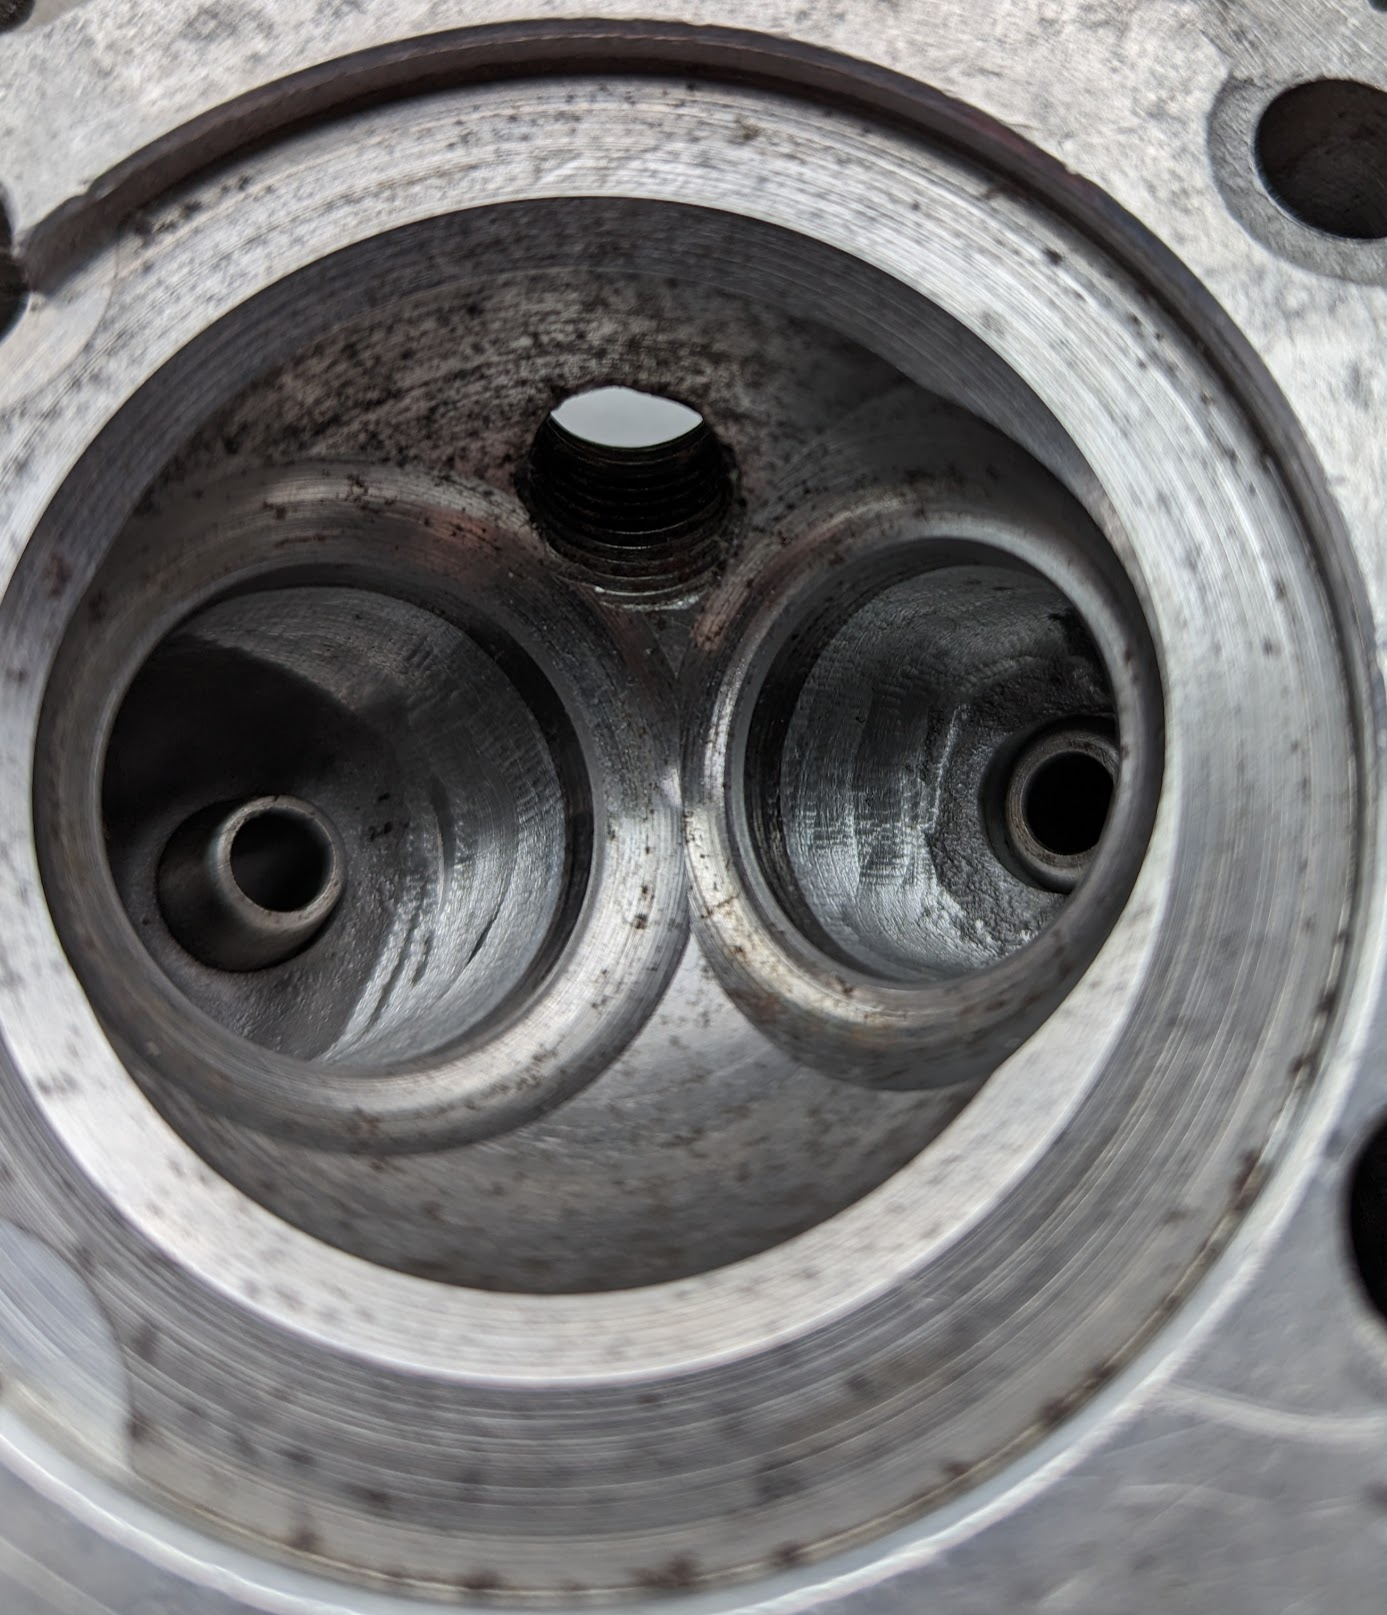
the exhaust valve seat on the cylinder head shown on the left was pitted and the damage is still visible even after lapping the seat until the valve seat width was at the service limit. Compare the much narrower seat widths in the unused head on the right.
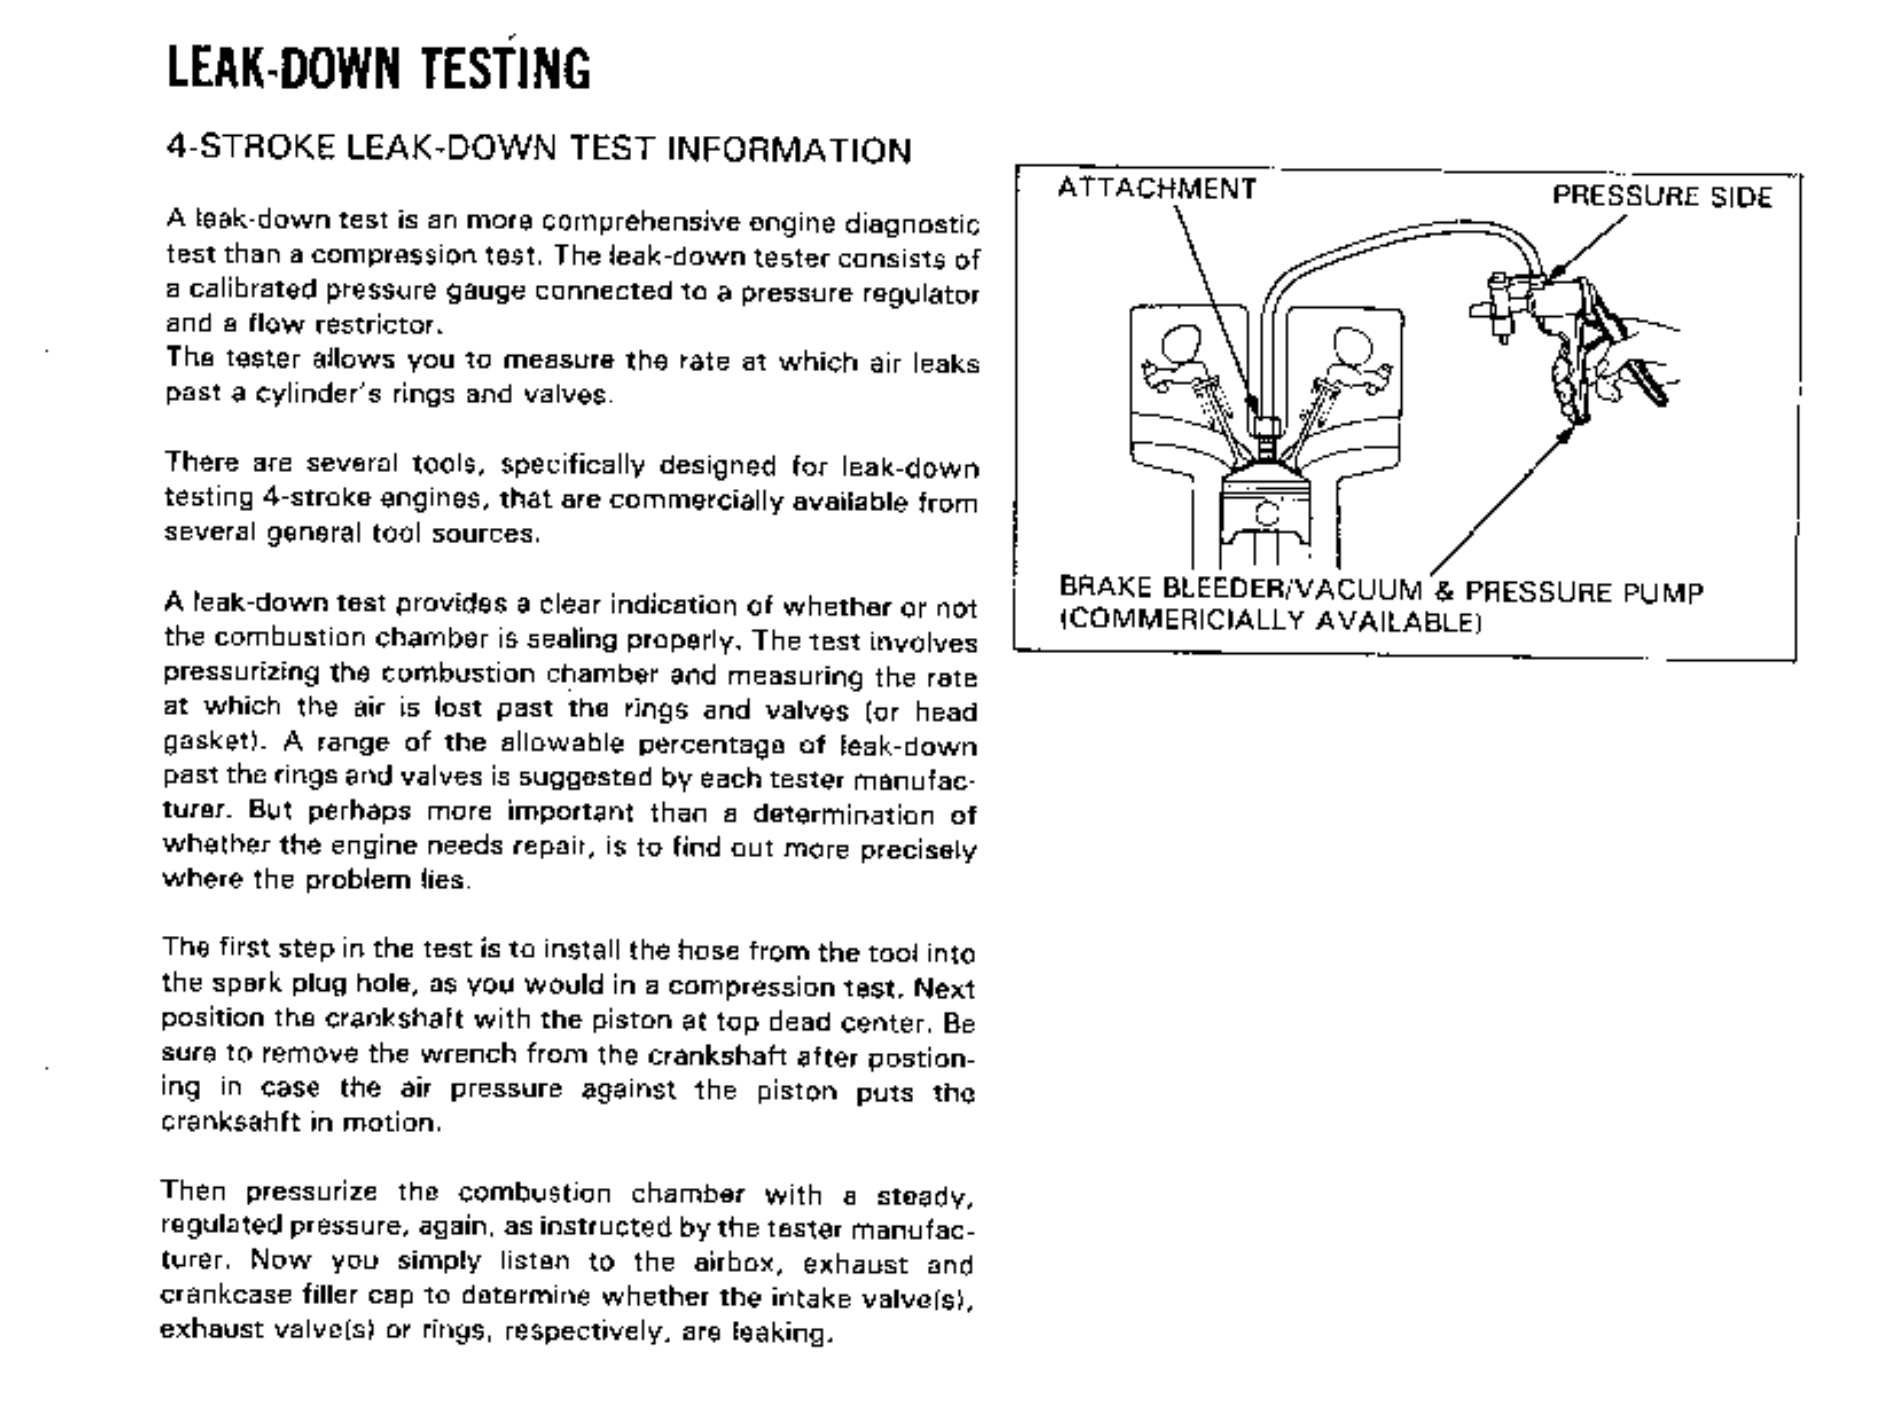
Testing for a good seal
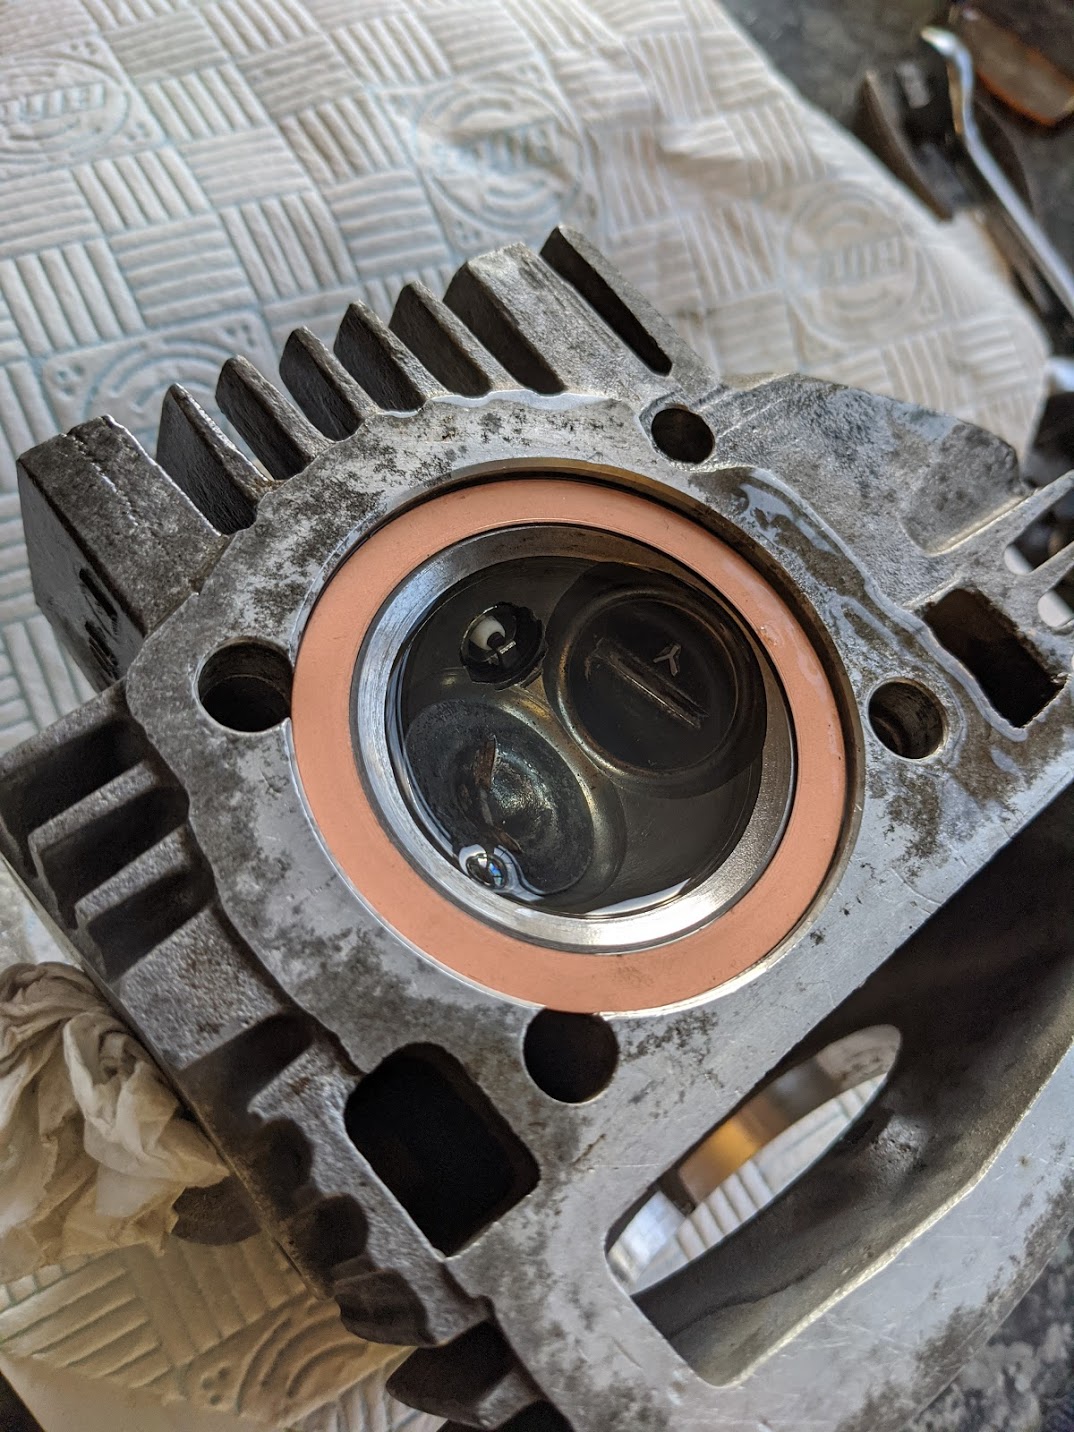
The proper way to test that the combustion chamber is sealed properly after working on the cylinder head is to do a leak-down test (see below), but if you lack the right tools or want to do a sanity check before reassembling the engine then you might try pouring some fuel into the upturned head and looking for fuel seeping underneath or, if you have a compressor, you can blow air through the inlet and exhaust ports and look for air bubbles:
testing for leaks with fuel/acetone:
leak-down testing: