Here are a few posts on the topic of valve adjustment. Happily, since the c90 is such a simple engine, it is a good place to learn about these automotive fundamentals. Here goes!
Disassembly
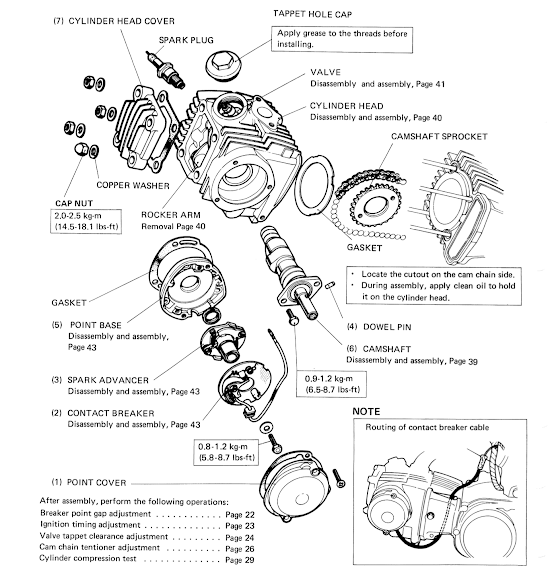
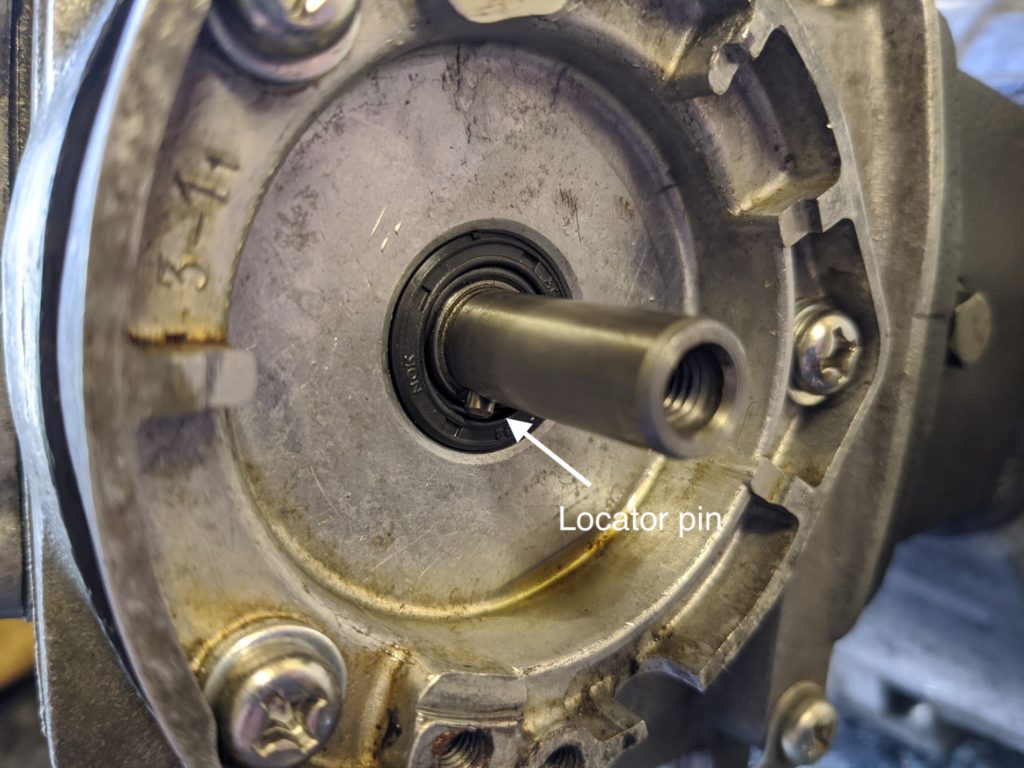
Here are the cylinder head parts for the c90 z2. As you can see the z2 has contact breaker points and a spark advancer installed on the end of the camshaft (in other models the points were installed on the crankshaft):
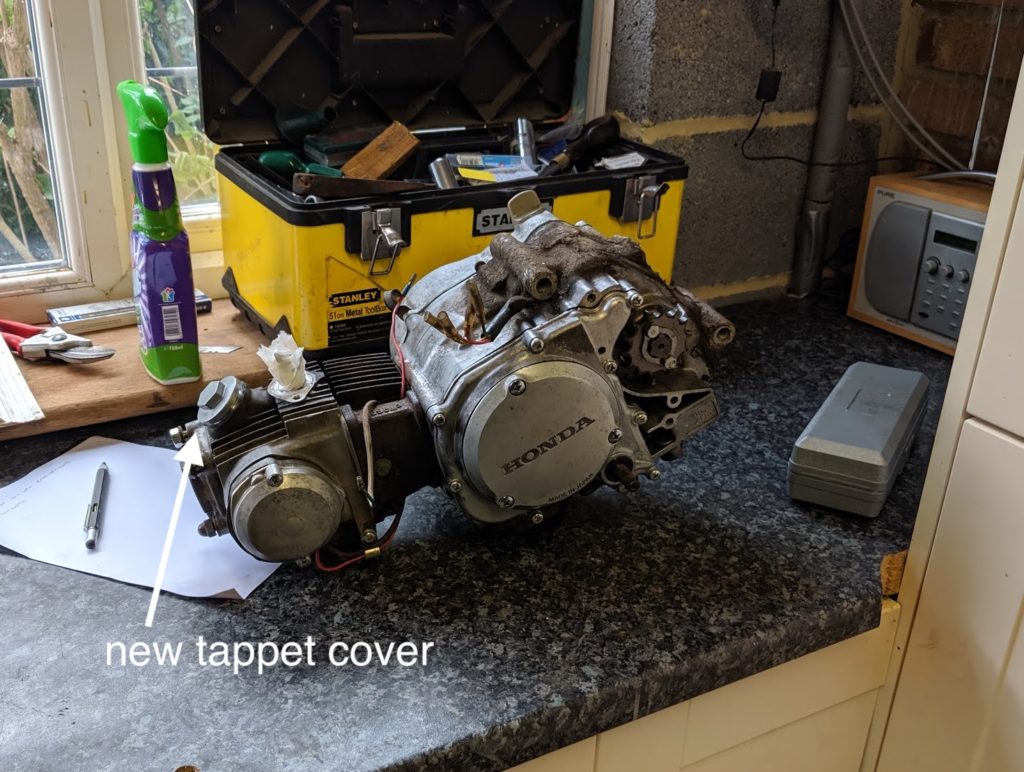
It is easier to remove the tappet caps when the engine is installed in the bike, as they can seize tight and you might need to apply a bit of force to get them off. They are made of a soft aluminium alloy and can easily be damaged during removal.
My covers were no exception and were already rounded off, so I had to use a metal file to get two vaguely flat edges on the caps before I could get a good purchase with a pair of monkey grips. Once I had a tight hold it was just a matter of tapping the grips with a hammer to free the covers. New caps they are still readily available.
If you still have the original toolkit supplied with the bike then the 6 sided 23mm ring spanner included is a good fit when you refit the covers (don’t over tighten them!). Honda recommend applying a little grease to threads to stop them binding in the future.
The detailed steps to remove the cylinder head are described in this c90 manual from the late 1970s, and there is a helpful pictorial guide in this CT90 manual (The CT90 and C90 models made in the late 70s shared a nearly identical engine, although the CT90 had additional gears on account of its intended off-road use).
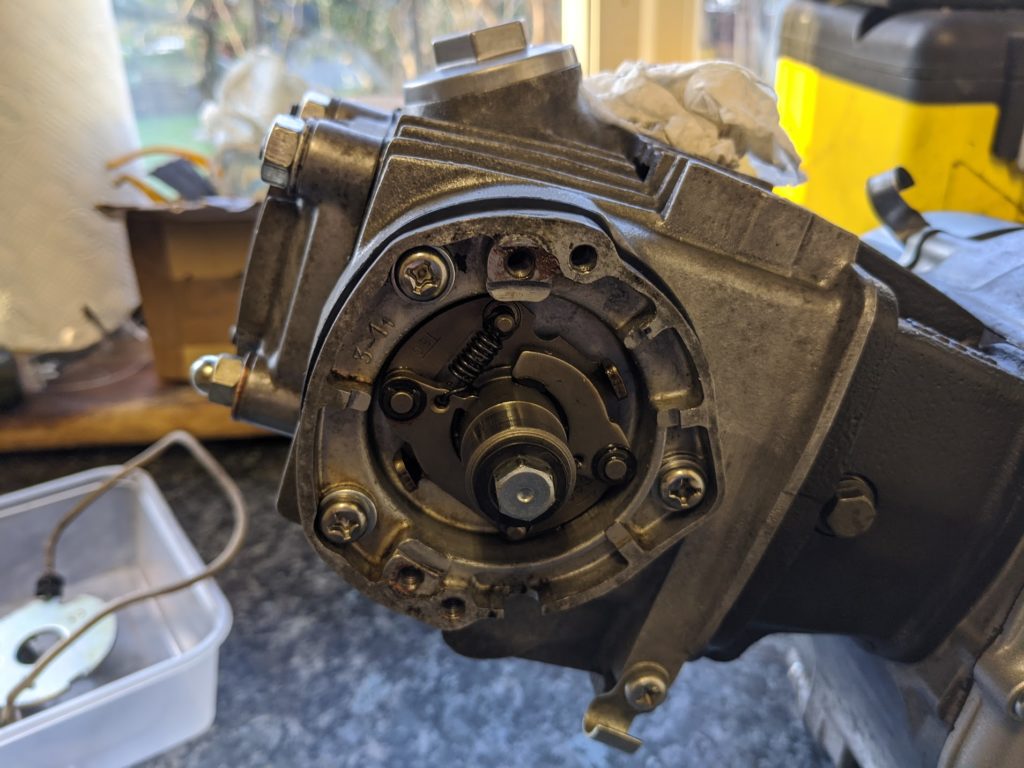
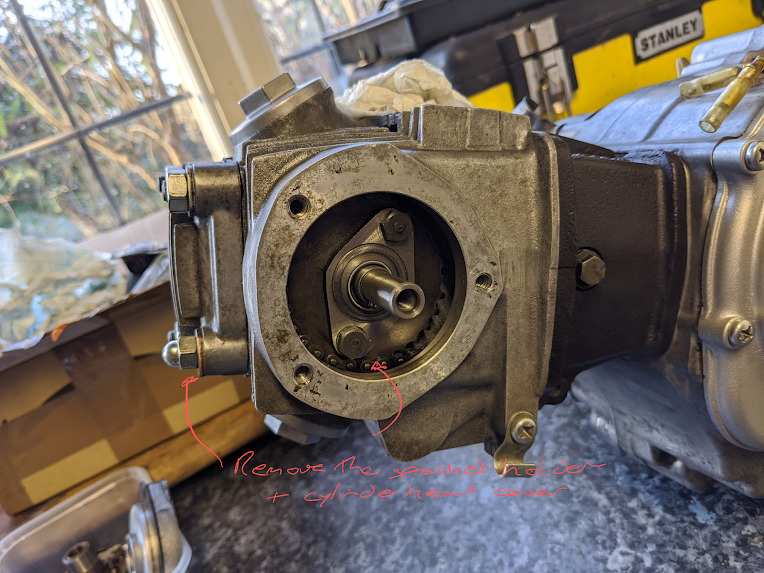
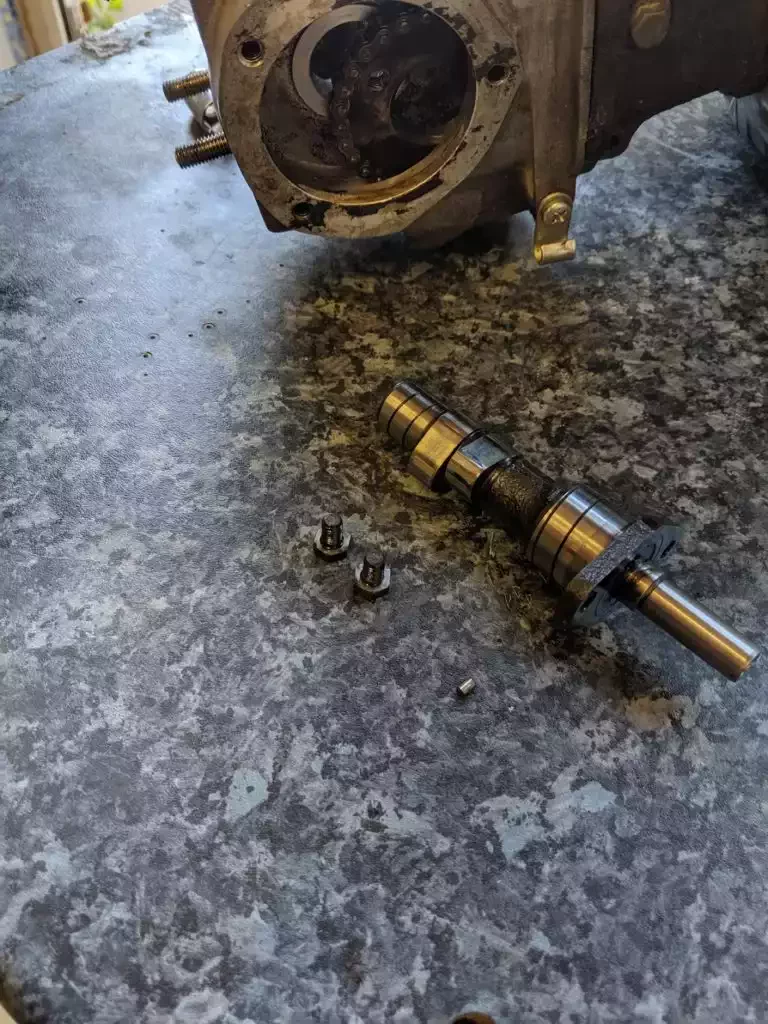
To remove the cylinder head you first remove the contact breaker assembly and the spark advance mechanism that sits behind it so that you can get at the camshaft sprocket. This is held on by two bolts and once it is is removed you can extract the camshaft. Finally you remove the cylinder head cover and can then lift the head off the engine:
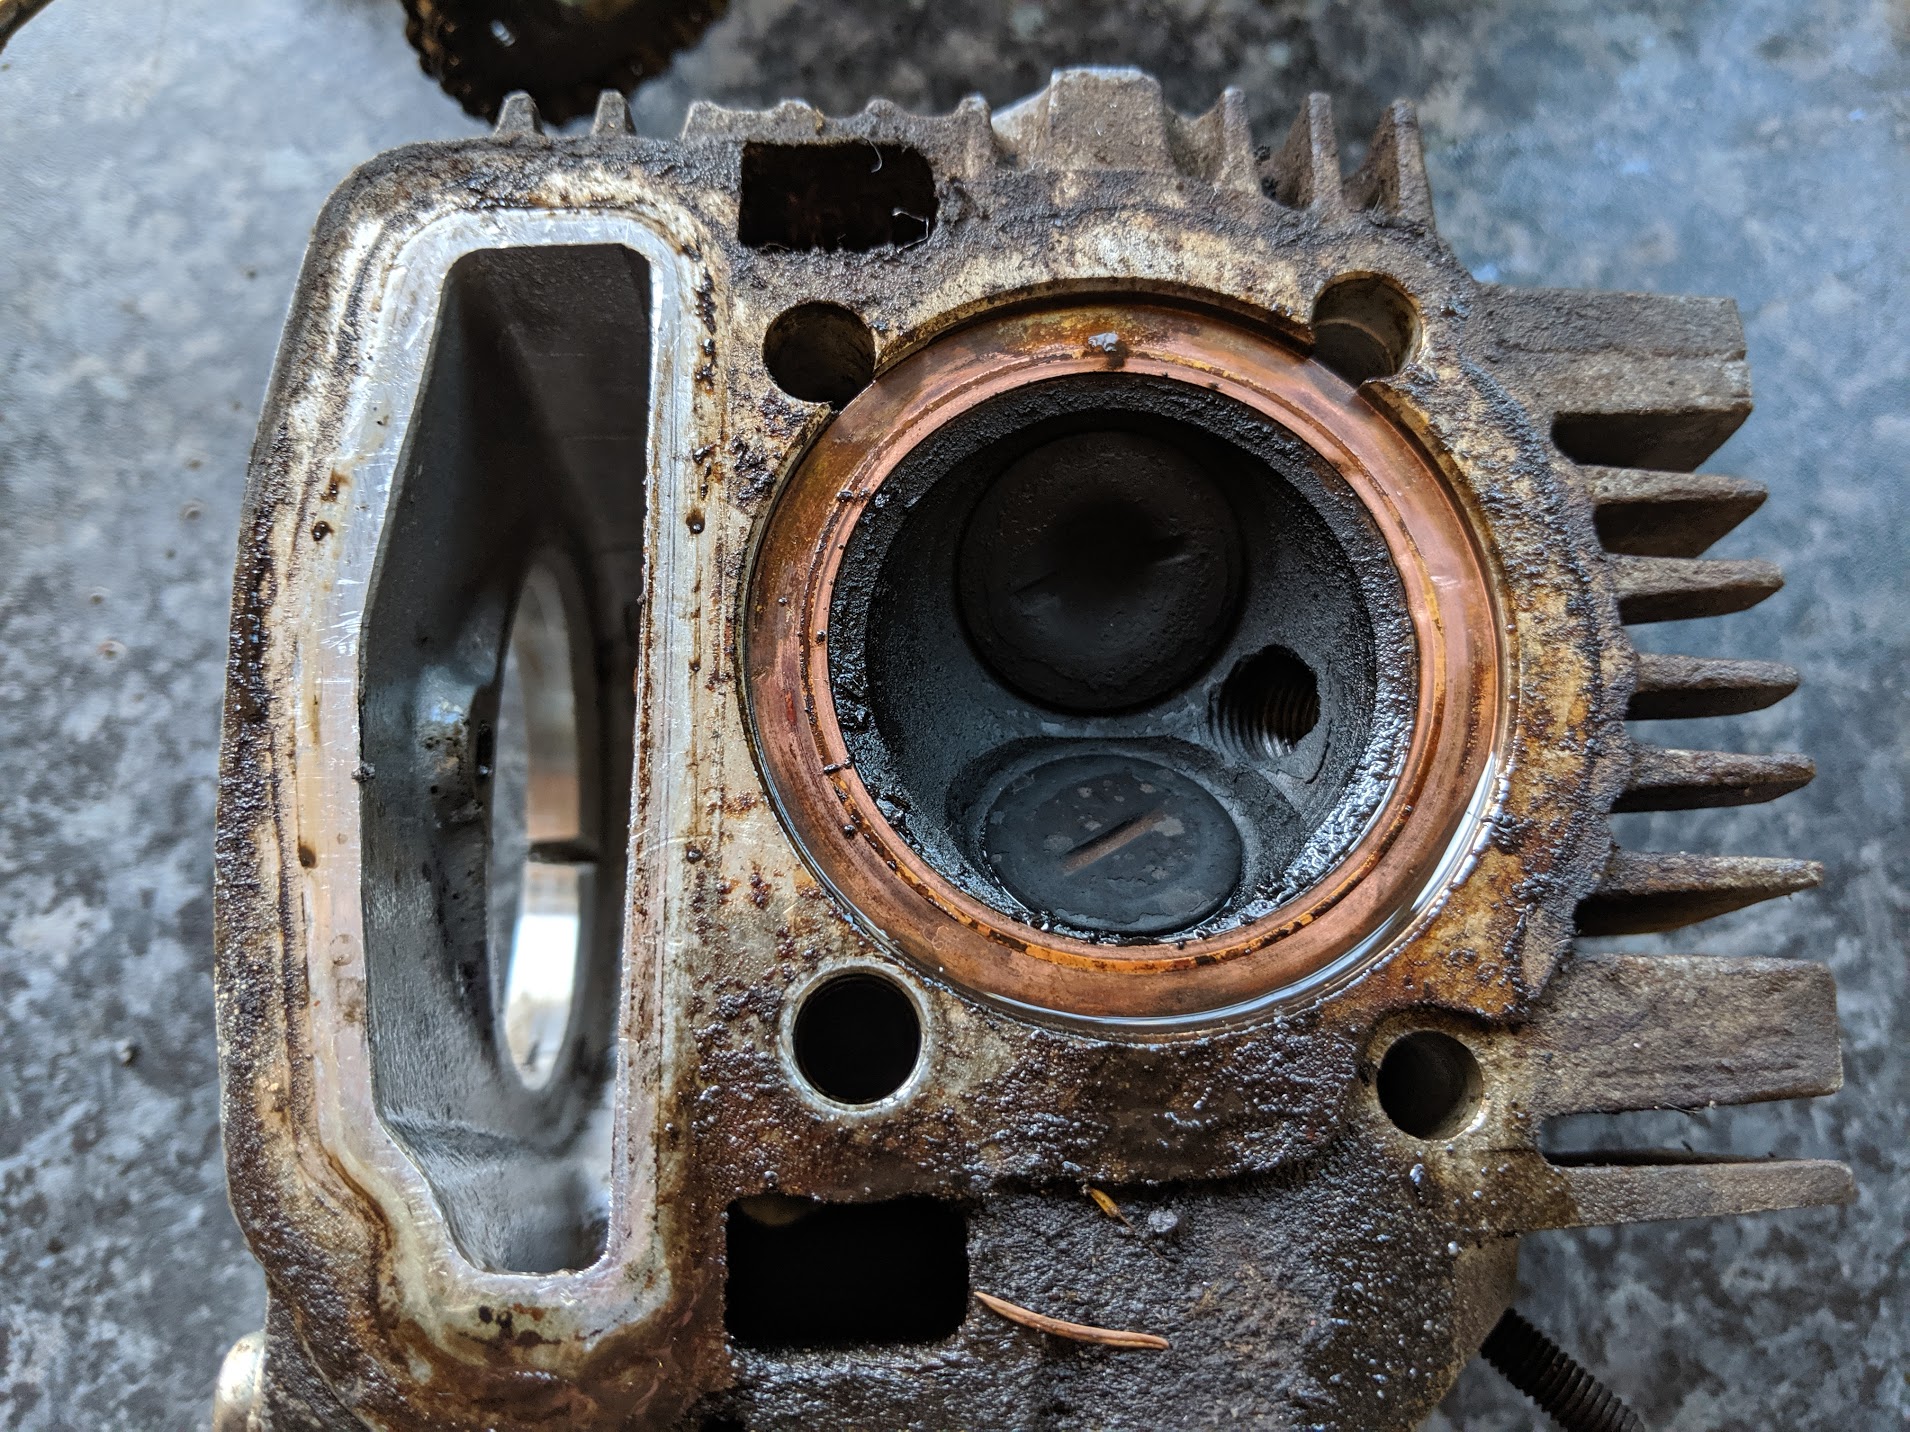
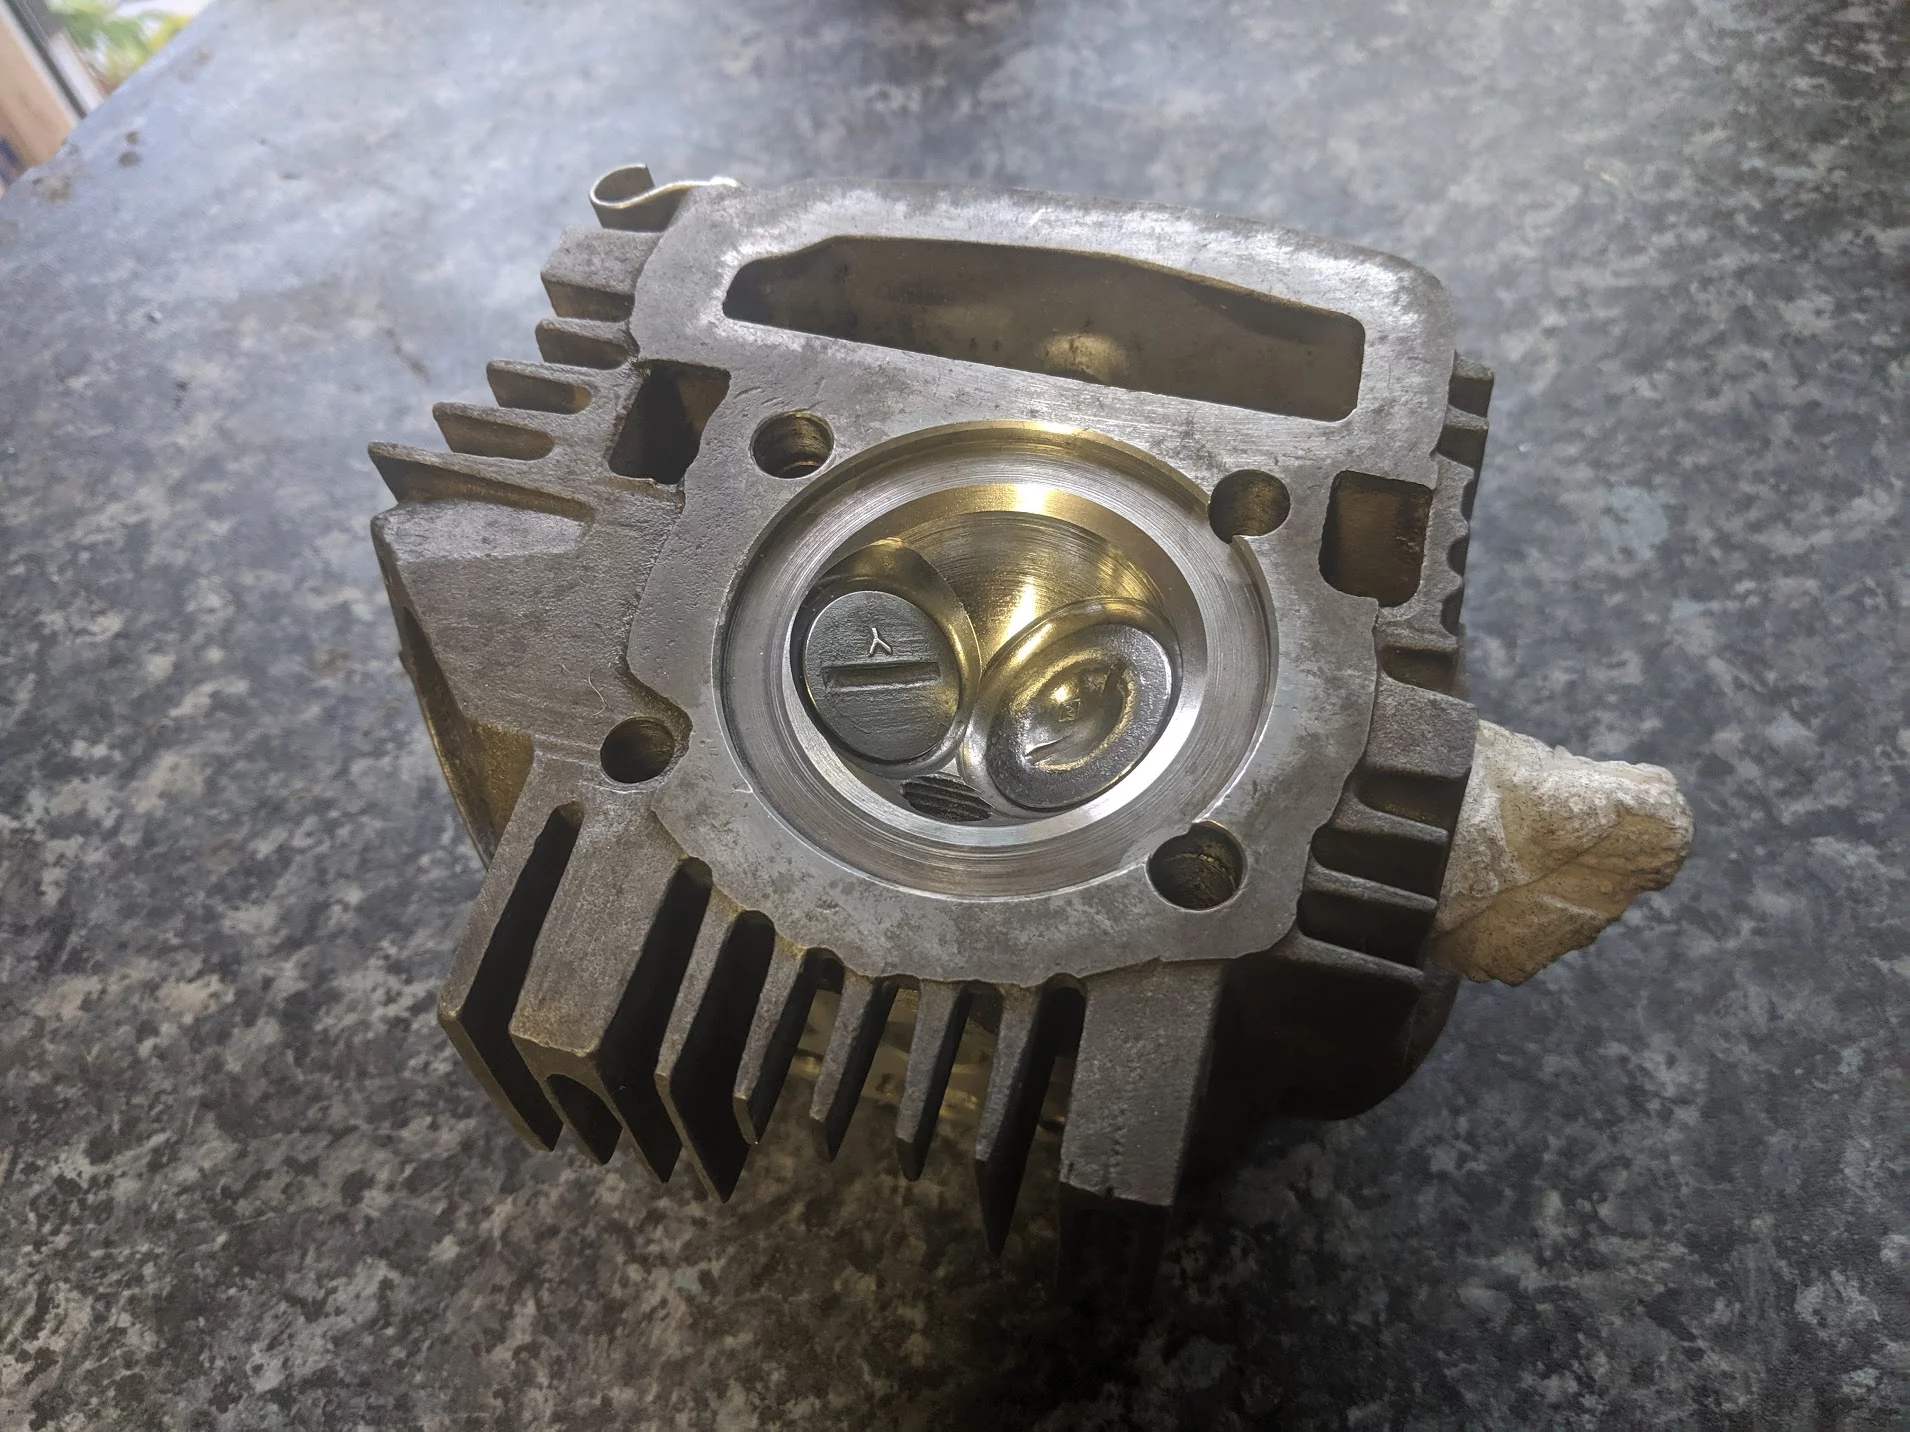
The cylinder head can now be removed, here is mine, pre-clean up:
Spring compressor
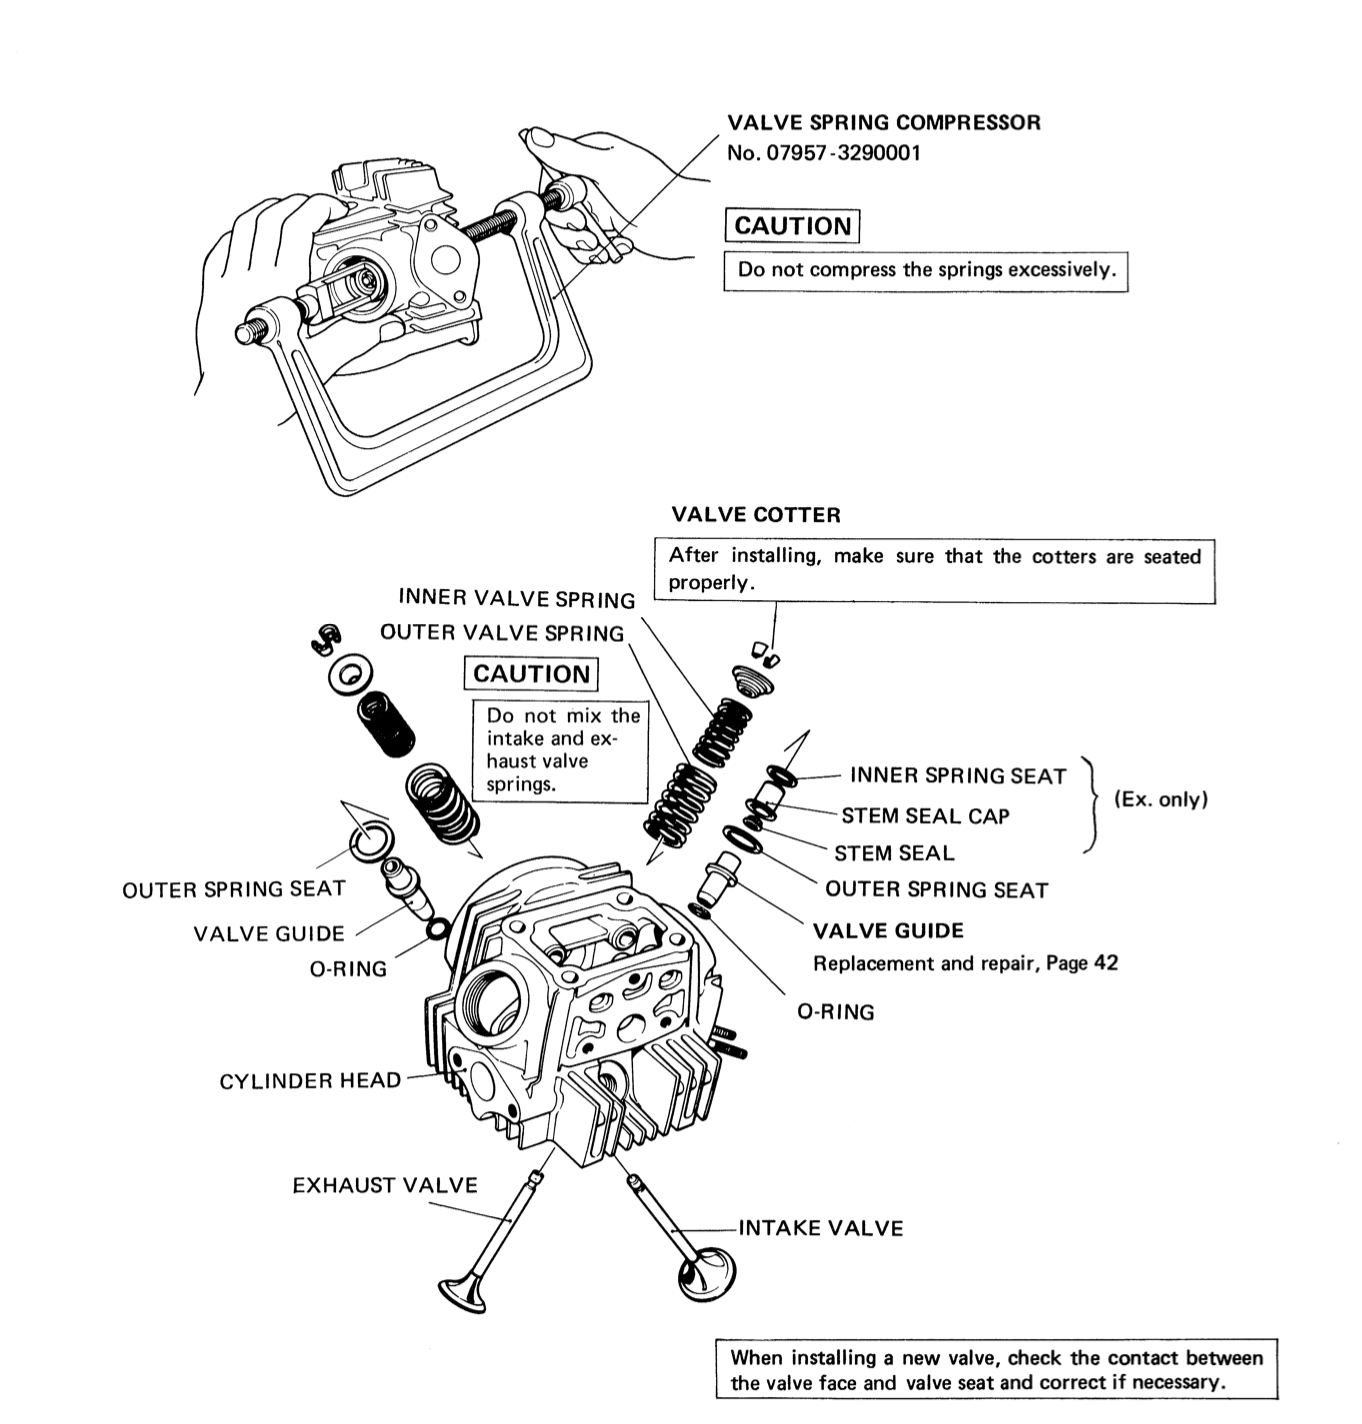
The valves are held closed by springs that are awkward to compress but are easy to remove with the correct sized valve spring compressor. There are ways of doing it without this special tool, but a compressor set can be bought new for under £15. All the valve spring compressor does is to press down on the spring cover which releases the pressure on the two collets that hold the cover in place. Once the collets are removed the springs and valves can be extracted:
Inspection & cleaning
Over time carbon deposits build up on the valves, piston and inside the combustion chamber. A bit of elbow grease will remove it. If you are going to the trouble of removing the head you may as well get it spotlessly clean. The edge of a small bit of copper pipe can be used as a scraper, and a bit of metal polish will give the valves and chamber a nice shine which might help slow down the accumulation of carbon in future.
It is important that the valves form a tight seal with the valve seats otherwise hot gases can be forced through the gaps reducing power and possibly damaging the valve face. Honda recommend replacing damaged valves, but in a scrape you may get away with lapping them to remove minor damage.