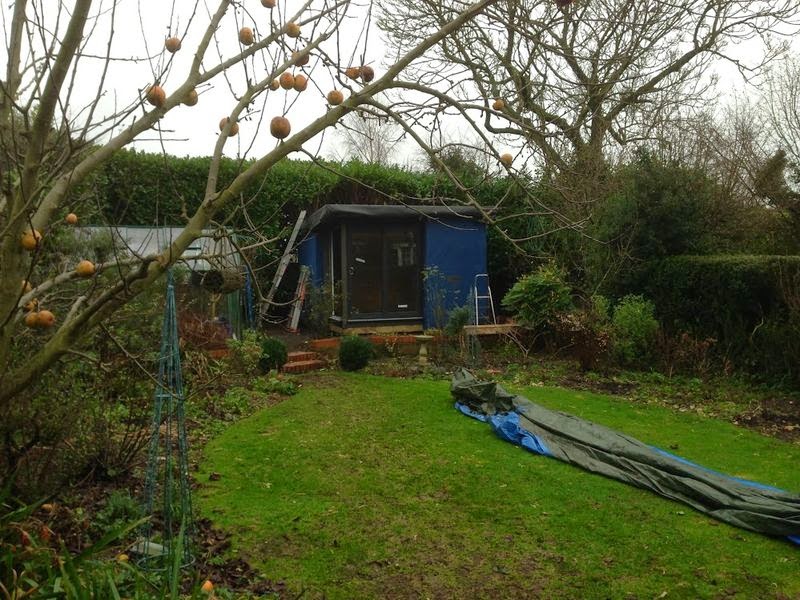
I have turned what should have been a simple job into a bit of a palaver. Things started off fairly comically when I did a trial fit of the window frame and found out it was 25mm too short. Panic!
I had just about come to terms with the fact that I had somehow failed to do the “height of opening minus 10 mm” calculation properly and would now have to bodge in a bit of timber to fill the gap when I remembered I had not fitted the cills (which are, of course, 25mm high).
So that was an easy fix at least.
I then proceeded on to make a amateurish and costly mistake while carrying the largest glazing unit to the garden: having diligently checked the route for trip obstacles before setting off down the garden, I neglected to take note of the overhanging apple tree. One of the branches caught the top of the unit causing me to knock a lower corner on the patio. This light tap was enough to cause one of the panes to disintegrate.
Grrr. I was wearing gloves and safety specs and the units are toughened glass so no real harm other than to my already battered bank account. I’ll order a replacement on Tuesday and until it arrives I will have to continue to faff around with the tarpaulin to keep the rain out. Double grrr.
fitting
Fitting the frames was straight forward – place the frame in the opening and add packers around the outside. These have two purposes:
a) prevent the frame flexing when putting in the fixings (always pack next to the screws)
b) to make it harder for any ne’er do wells to jimmy the frame (pay attention to the areas opposite hinges, locks etc)
Finally, screw through the sides and top of the frames into the timber surrounds.
glazing
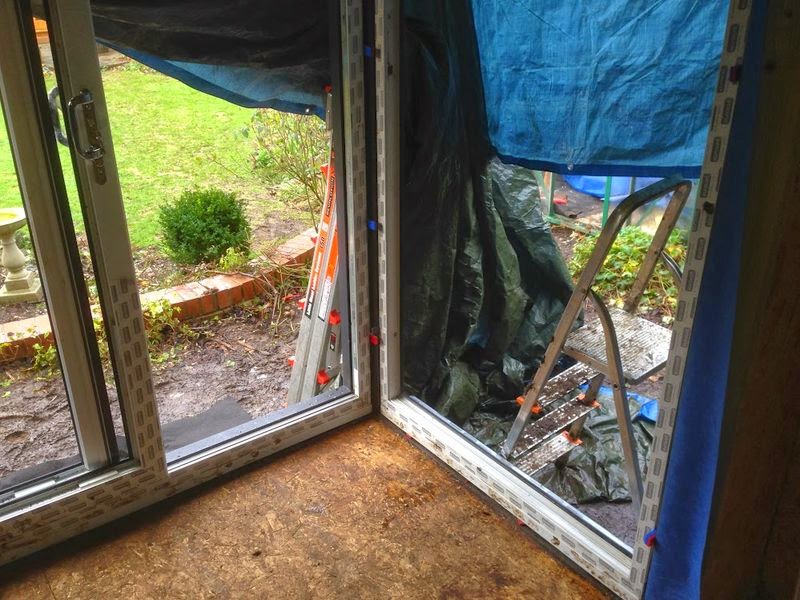
You need to remove the glazing panes to fit the frames. if like me you are using el-cheapo upvc windows and doors you will probably find that the glazing panes are held in by the plastic glazing beads that clip into the frame on the inside. The knack to removing them is to use a paint scraper to get into the gap between the bead and the frame – ideally on a long run of beading as they are more flexible – and then to edge it up and down until the bead starts to work loose. Then work along in the same manner until the end and it will pull off easily. You can then screw through the frames into the timber surround to keep them in place.
toe and tail
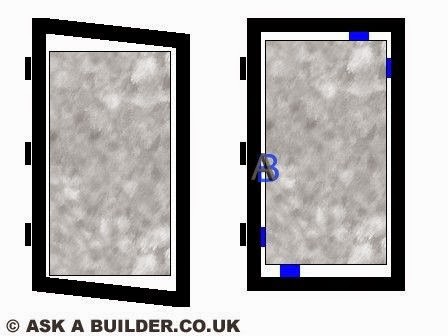
Assuming you have not smashed your insulated glazing unit (IGU) into a million bits you can now sit it in the frame. Apparently the trick to avoid doors dropping and sticking is to ‘toe and heel’ them. The IGU has to be braced diagonally corner to corner by the insertion of plastic packers slipped in the gap between the glass and frame. On the hinge side the packers go at the bottom corner, whilst on the lock side, the packers go at the opposite corner at the top.
The principle is the same as where gates are braced diagonally from the top corner to the bottom on the hinge side – the triangle formed pushes the weight of the hanging edge on to the bottom hinge and stops the gate dropping on the handle side.
Having fitted the doors I now regret being so miserly about the size – on paper the door opening was ample (850mm) but I had forgotten that sliding doors will not open fully because the handle is in the way – this means the opening is just a little bit claustrophobic. At some point I will see if I can get a straight handle which will allow the door to open another 5 or 6 cms.