This post describes how to refurbish a bench plane.
To show what can be done with even the most unpromising looking specimen, here is the worst example I purchased:
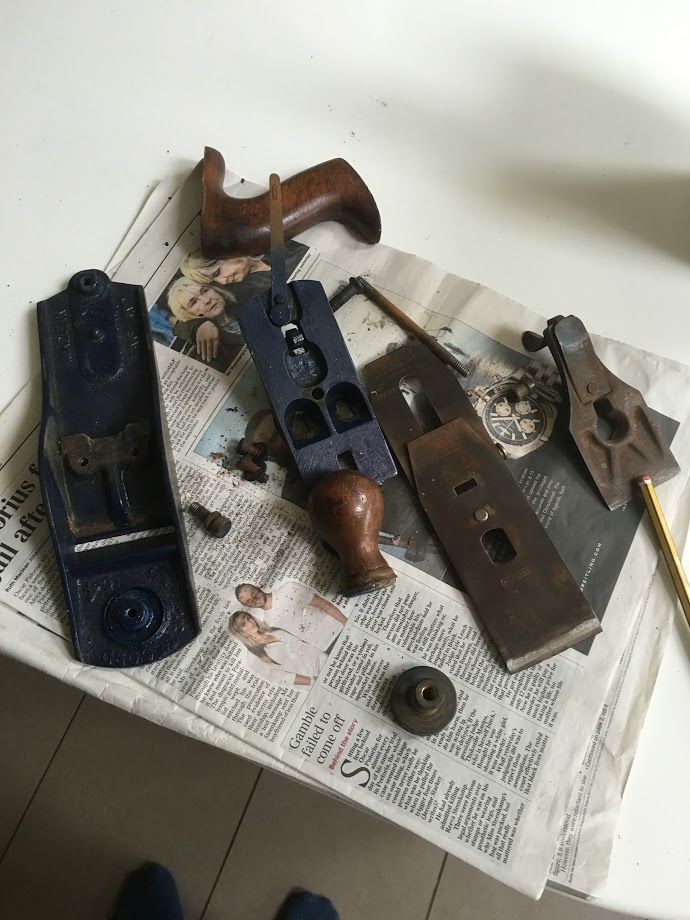
…it was made at some point between WWII and the mid-1950s and, as you can see from the photo of it dismantled, it has been painted (badly) and is rather rusty, but not damaged. Still it only cost £8.50 so you can’t really complain. Here is what it looks like after a few hours work:
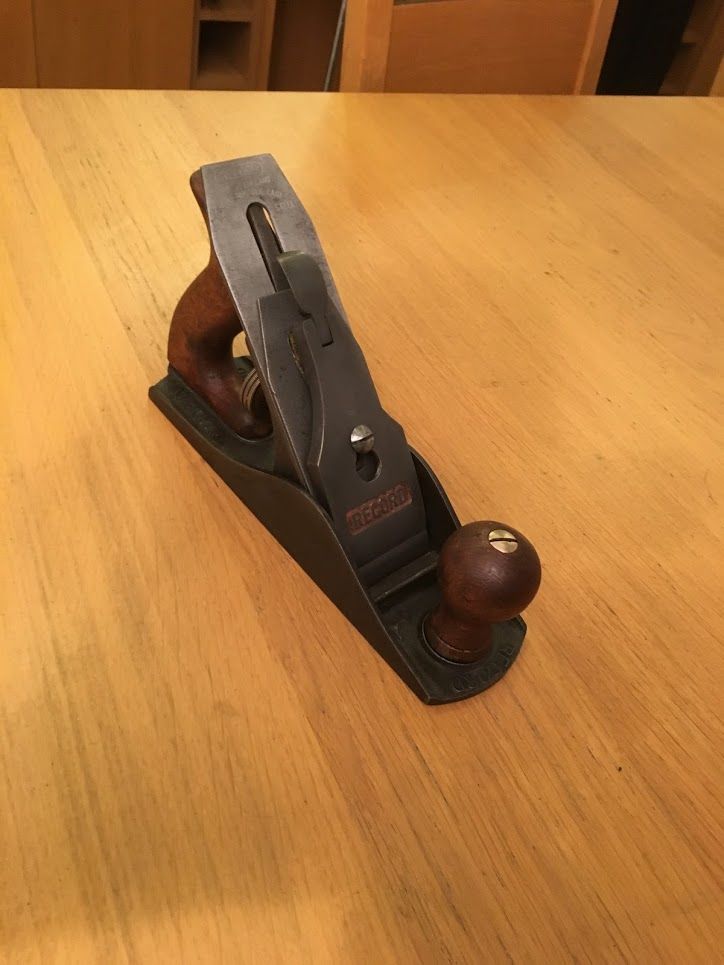
Cosmetically it is not quite as good as when it left the factory, but I hope it performs as well as when the original owner set it up. The blade had once been sharpened and polished, so I think someone cared for it in the past, presumably before the amateur painter got hold of it.
I am by no means an expert on this type of work, but here is what I learned having performed some degree of renovation on each of the five old bench planes I now own.
A note on conservation
I realize that there is a school of thought that says old objects are only original once and that any kind of renewal work removes history forever and should be avoided. This is a view I have some sympathy for, but frankly since many 20th century tools are so plentiful – including these planes – I think we can be forgiven for doing whatever we please with them. So, onwards and upwards…
Degreasing
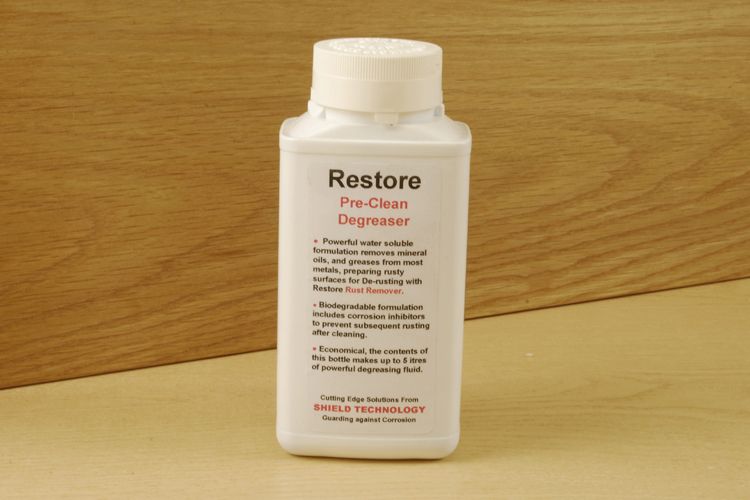
You can assume your 50+ year old plane will be gunked up with dry oil and grease, and the first step is to remove this. Apparently caustic soda is a very powerful de-greaser; although it is nasty stuff. Instead I have been using Shield Restore degreaser, which works very well and lasts a long time (the diluted solution can be reused multiple times):
Rust Removal
Many people say that a mixture of sugar and white vinegar works, but I plumped for the rust removal product from Shield, which does the job perfectly without the smell. Just dismantle the plane, immerse the parts in the diluted solution and give a quick scrub with an old toothbrush. The black tarnish left behind can be removed with wire wool, or sandpaper for deeper pitting. Like the degreaser, the solution can be used several times.
Paint
I will spare you a lot of warbling about the patina of history and the like, but all of my planes have lost some of their original japanning through use and I have made no attempt to correct this, other than cleaning them up and removing any flaking paint. Although I do get some satisfaction from being reminded of the original owners by the various worn patches and scratches, my main motivation for leaving the original paint is laziness.
In the case of the plane being discussed here there was not really an option other than to do something – not only the original finish but many of the machined surfaces had been obliterated by the blue paint that had be liberally slopped on by the previous owner.
Paint Removal
I decided to simply remove the new layer of paint and leave whatever was left behind. If you want to do a proper repaint job then by far the best (and easiest) way to remove paint completely is to use some form of media blasting, however, in the event you haven’t got convenient access to a sandblaster then you will have to look at paint stripper.
I dutifully bought a leading UK-brand paint stripper and after following the instructions and repeating several times there was no discernible difference in the paint coating.
This was annoying and triggered a bit of research on the topic. It turns out that recent changes to European legislation has resulted in paint stripper that – while no longer completely ruining the environment or killing the end-user – renders it unable to remove paint. Disappointing.
The alternatives seemed to be a home made sandblaster (expensive but fun) and Fairy Power Clean (and if you are really on a budget, Tesco Value All Purpose Cleaner).
I am a little sceptical about the latter suggestions, but they arose from the slightly odd world of model making where there is general agreement that it does work.
… and if you continue to read around the topic, it is claimed to work for hard enamels and japanning too. I am afraid I did not give it a try, since before ordering a bottle from Tescos, I discovered that the now banned paint-stripper ingredient is dichloromethane and that it is still available in some products but that they are only for “industrial use”. A bit of sleuthing and I uncovered a source of 2.5 litres of Strip Away Pro for a very reasonable price – enough to both ruin the planet and to provide several decades of happy paint stripping.
Unsurprisingly, this deadly poisonous version worked.
Cleaning up the bolts and nuts
I found the best techique here was to insert the various screws and bolts (wrapped in cloth) into a battery powered hand drill. Spin the item against some wire wool with a dab of autosol and bingo, good as new. For heavily encrusted items you can use sand paper – 220 grit is fine.
I find that a quick rub down with wire wool is adequate for the blade, cap iron and lever cap, so long as you are happy with a clean – as opposed to shiny – finish.
Sharpening and flattening
Well this is a topic that deserves another post of its own, which I will cover in another post. There is a vast amount of contradictory and confusing “advice” about sharpening and flattening the relevant parts of a plane to make it work well.
Suffice to say there are dozens of ways to achieve the same thing and they all appear to work, which doubtless explains the frequently ill humoured and never-ending debates about which is the “right” way.
For now you will have to trust me that it really is not as difficult as some make it sound.
As usual, Paul Sellers is worth a look for common sense and straight forward advise on this topic.
After a few hours, here is the end result. A very satisfying few hours too, and most gratifying to think that you have returned a small miracle of engineering genius back to use such that, with a bit of luck, it will be good for another 70 years.
