Design
In terms of the overall design my main regret is that I did not make it a bit bigger. No doubt I’d still be saying it was too small, even if I had, but making it a couple of feet wider would have made a big difference to the usability of the space inside.
Sliding Door
…this would also have allowed for a wider door, which is niggle number two: the opening for the sliding door, which looked ample on paper, is just a little bit narrower than a standard internal door, and this makes it feel rather cramped.
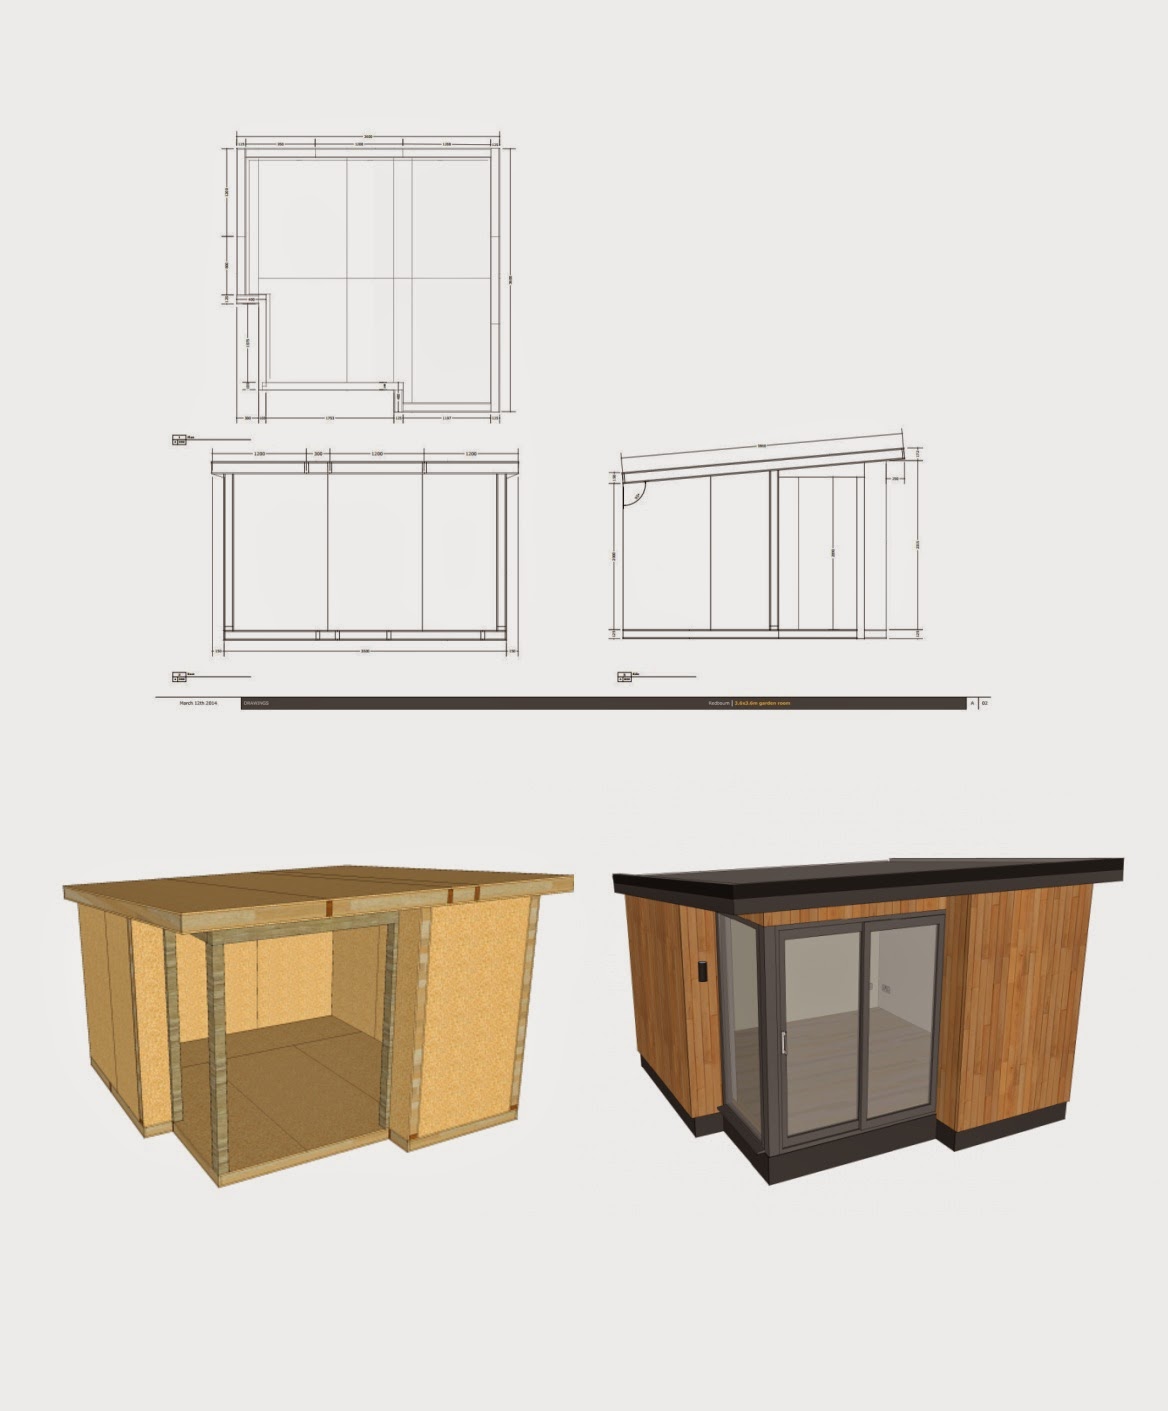
Ceiling Height
I slightly regret not having taken the time to work out how to suspend the SIP floor panels in the sub-frame – the result is that the entrance to the door is a good 30 cm off the ground (which I don’t really notice) but the back of the room is only 2m high on the inside, rising to 2.3m at the front. Restricted ceiling height is a common issue with buildings like this done under permitted development rules, and an extra 125mm headroom would have made a big difference.
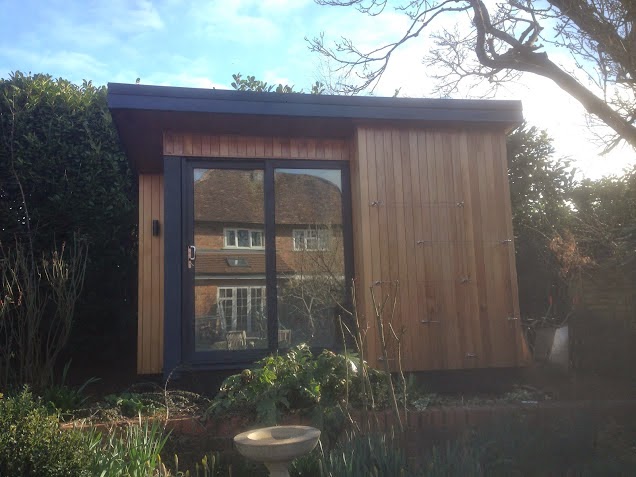
Exterior
With the wisdom of hindsight I wish I’d been more adventurous with the exterior. It was rational to copy the other garden room builders out there since they clearly have a successful formula and when you do not have a clue what you’re doing it is reassuring to know that you can work out some of the solutions by looking at what other people have done. The downside, of course, is that they all look the same – including mine. If I were doing it again I would be a lot more creative.
Building with Structural Insulated Panels
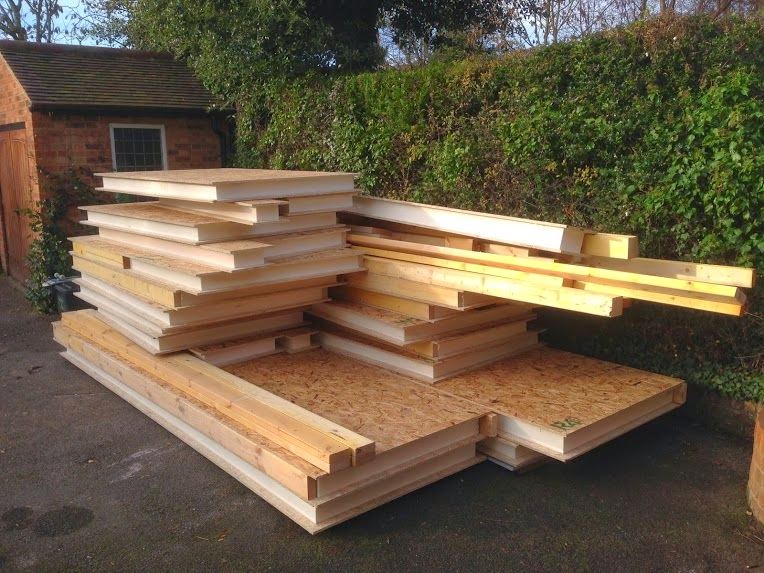
1. it is not really advisable to try and do all the SIP building on your own.
I found I could just about manhandle the medium sized panels (2.4m x 1.2m) with the help of a skateboard to push them around over hard and flat surfaces. This was no good on soft ground though, and although I could lift the panels off the floor, they were a bit too wide to carry for any distance, so much dragging and tipping was needed.
Although I had help, I think I could have (just about) managed to stand up the walls on my own, but the 5m roof panels are too much even with two people – you really need four people or, better still, hire a genie lift for the roof.
2. Do not let your panels get wet …. if you do, it will make it more difficult when you try to insert the connecting timbers (see below)
3. Do not own only one tarpaulin
As per the above, you do not want your panels to get wet.
Unless you build very quickly you will end up with panels in two locations at some point, so get two large good quality tarpaulins and then take the time to secure them properly.
4. Prefit and adjust the joining timbers
There are several ways to join SIPs together, and the firm that I used supply a combination of timber splines (structural for main joints in floors and roof) and mini-sips. The mini-sips in particular are a very tight fit, which lead to a lot of banging around to get them to go in.
You can make a panel basher (see building with sips) to help persuade the pieces together without doing too much damage to the OSB boards, and a ratchet strap is helpful to pull recalcitrant panels together, but if the OSB is swelled or the connecting timer a very tight fit no amount of ratcheting and bashing will help.
Instead, you need to reduce the depth of the splines by a couple of millimetres to get the panels to fit together satisfactorily. The same is true for the end and top plates that are used to finish the exposed SIP edges. Making sure the joining timbers fit easily is particularly important where they cross multiple panels, since you only need to be a fraction out to make a previously tight fit an impossible one.
You can use a plane to take a millimetre or two off each side of all the splines before you start work. A power-planer would be ideal if you have a lot to do, but you can get away with a hand plane on the timber (as I did, once I eventually worked out that it was necessary).
5. wear gloves
The panels are nailed and glued using a foaming glue, which is not at all tacky to touch, but goes off to form a hard and airtight bond between the touching surfaces. This includes your hands.
6. use enough glue
… to make an air tight seal – a 5mm bead was about right.
Cladding
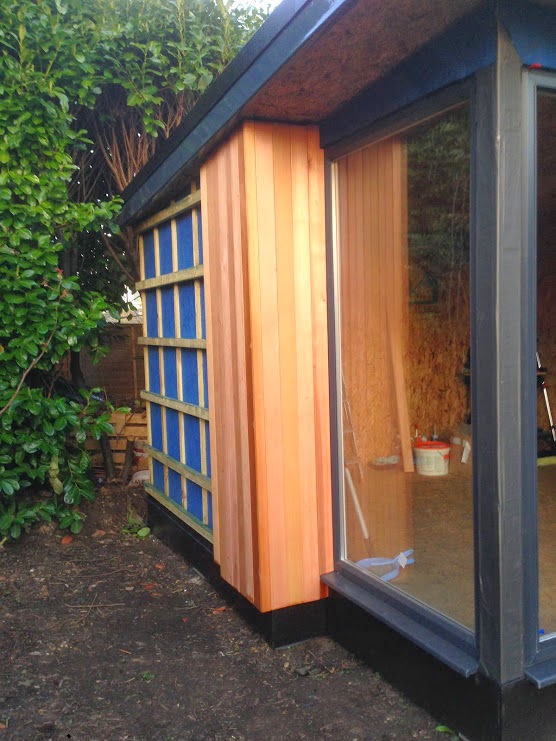
Fit the external corner pieces together before fixing the cladding to the stud work and make sure you brace the corners, else it is very hard to keep the corner closed when you nail the boards to the battens. I used the little white connecting blocks you use in kitchen units.
If you want to have a uniform finish, specify the lengths of cladding you need – the timber yard will deliver whatever they have available otherwise and you might be left with a lot of unusable (and expensive) off cuts.
Don’t forget to use the correct nails – stainless steel annular ring lost head – galvanized steel will stain the cladding.
Plasterboard
The basic rule here is to spend time planning and accurately marking the location of the battens so that the edges of the boards will align with their centres. You will save a lot of effort if you do this right first time.
Fermacell
They are heavy – use a panel lift for the ceiling if you can hire/borrow one, or else you will have to chop them into manageable pieces and use a variety of braces and props, as I did. It is (just about) doable on your own.
Take care when abutting the panels in the corners – I wish I had used spacers to get an exact 5mm gap. I did not do this and subsequently wasted a lot of time filling the 8-10mm gaps that I left.
The technique with FST (the filler that you apply to the boards to provide a smooth finish) that worked for me was to daub it on liberally and then to use a plaster’s finishing trowel to scrape of all bar a very thin layer, so the boards are just about visible through an almost translucent coat of FST.
I found it hard to avoid tram lines and ridges, particularly when doing the ceiling, but it sands easily . It is very dusty though, so best to take your time to minimise the amount of sanding needed.
some more tips on Fermacell here: Internal Plasterboard – Fermacell – top tips