The recommended web server for Ghost installations is Nginx. The software has a number of features in addition to its HTTP server capabilities - including caching, load balancing and more - but the bits we are most interested in when running a simple blog site are the web server and reverse proxy.

As the name suggests the web server component of Nginx delivers web pages, images and other files to client devices browsing the site. A "proxy" is an intermediary bit of software that forwards requests from multiple clients to different servers across the Internet. A so-called reverse proxy typically sits behind a firewall and directs client requests to a backend server. This is the set-up generally used for sites running content management systems like Wordpress, or as is the case of this site, Ghost.
Once you have installed nginx on your server you need to configure it.
The vanilla config installed by Ghost works fine, but if you would like to understand how it works and learn how to tweak the configuration, read on.
Configuration file locations
The main nginx configuration files are organised like this[1]:
/etc/nginx/
├── nginx.conf              # Main Nginx configuration file
├── conf.d/                 # additional configuration files
│   └── *.conf
├── sites-available/        # virtual server files (not yet enabled)
│   └── example.com.conf    # Config for example domain
├── sites-enabled/          # virtual server files (enabled)
│   └── example.com.conf    # Symlink to sites-available/example.com.conf
Setting up the Nginx for Ghost involves two of these configuration files:
/etc/nginx/nginx.conf# this is a standard part of the Nginx installation and includes configurations shared by all the sites running on the server./etc/nginx/sites-available/site-name.conf# this is a file we will create to define the configurations specific to the Ghost website.
Nginx can be used to manage traffic to multiple domains/subdomains hosted on a single sever. For instance, my server hosts two sites: the site you are viewing now and a demonstration site for the Ghost theme that I created. The demo site is available on the demo subdomain of my transmissionthemes.com domain, so I have the following site-specific configurations files:
/etc/nginx/sites-available/smallworkshop.co.uk.conf
/etc/nginx/sites-available/demo.transmissionthemes.com.conf
Files in the sites-avaialble directory are not enabled by default. Sites are enabled by creating symbolic links in the sites-enabled directory based on the configuration files in sites-available[2]. For example:
ln -s /etc/nginx/sites-available/smallworkshop.co.uk.conf /etc/nginx/sites-enabled/Basic Site configuration
Most of the configuration work is done in the site specific file. Here is a basic configuration similar to the one that the Ghost-CLI creates when you elect to use the "ssl" option. Each section is explained below.
server {
    listen 80;                       # IPv4
    listen [::]:80;                  # IPv6
    server_name www.smallworkshop.co,uk smallworkshop.co,uk;

    # Redirect all HTTP traffic to HTTPS
    return 301 https://smallworkshop.co.uk$request_uri;
}

# fix for IOS safari issue and the Ghost
comments UI (2024.07.19)
map $status $header_content_type_options {
    204 "";
    default "nosniff";
}

server {
    listen 443 ssl;                   # IPv4
    listen [::]:443 ssl;              # IPv6
    http2 on;

    server_name smallworkshop.co.uk;

    ssl_certificate /etc/letsencrypt/live/smallworkshop.co.uk/fullchain.pem; # managed by Certbot
    ssl_certificate_key /etc/letsencrypt/live/smallworkshop.co.uk/privkey.pem; # managed by Certbot
    include /etc/letsencrypt/options-ssl-nginx.conf; # managed by Certbot
    ssl_dhparam /etc/letsencrypt/ssl-dhparams.pem; # managed by Certbot

    # add security headers
    add_header Strict-Transport-Security "max-age=31536000";
    add_header Referrer-Policy "no-referrer";
    add_header Permissions-Policy "accelerometer=(), camera=(), geolocation=(), gyroscope=(), magnetometer=(), microphone=(), payment=(), usb=()";
    add_header X-Content-Type-Options $header_content_type_options;
    add_header X-Frame-Options "sameorigin";
    add_header X-Xss-Protection "1; mode=block";
    proxy_hide_header X-Powered-By;

    location / {
        proxy_set_header X-Forwarded-For $proxy_add_x_forwarded_for;
        proxy_set_header X-Forwarded-Proto $scheme;
        proxy_set_header X-Real-IP $remote_addr;
        proxy_set_header Host $http_host;
        proxy_pass http://127.0.0.1:2369;
    };

    client_max_body_size 5m;
}
Nginx configurations consists of directives and their parameters. Some directives act as containers that group together related directives, enclosing them in curly braces ({}). These containers are also referred to as blocks.
the /etc/etc/nginx.conf file holds the 'http' context, which contains all of the directives necessary to define how to handle HTTP and HTTPS connections. This configuration also ensures all enabled site-specific directives are loaded with this statement:
include /etc/nginx/sites-enabled/*;
The site specific configuration file defines the server context for each domain being hosted on the server. Each server block defines a virtual server within Nginx, allowing it to handle multiple domains or subdomains within the same Nginx instance.
A client request - for instance, to get a web page from the server - can only be handled by a single server context and Nginx decides which context is appropriate based on details contained in the request sent by the client. The selection is based on comparing the HTTP request header details with the following directives:
- listen: the
listendirective lists the IP addresses, ports, and protocols a server block will respond to. Nginx will match the ip address & port combination contained in the client request with the information specified in this server block - server_name: The
server_namedirective defines which domains or subdomains a particular server block will handle. Nginx will parse the “Host” header of the request and match it against this directive.
This is explained below, using this site's configuration to illustrate the ideas.
Redirecting HTTP to HTTPS
Modern websites should use the secure HTTPS protocol rather than HTTP, and it is good practice to serve up all your content using HTTPS even when requests are made to an HTTP address. You will need an SSL certificate to enable HTTPS - if you haven't already got one for your site you can read about them here:
 Nick
Nick
The first server block ensures that requests made to the site using HTTP are automatically served via HTTPS:
server {
    listen 80;                       # IPv4
    listen [::]:80;                  # IPv6
    server_name www.smallworkshop.co,uk smallworkshop.co,uk;

    # Redirect all HTTP traffic to HTTPS
    return 301 https://smallworkshop.co.uk$request_uri;
}
As mentioned above, this block is initially selected based on the listen directives.
HTTP requests use port 80 and HTTPS requests use port 443, so the first listen directive looks request received on port 80.
The standard listen directive listen 80 only matches requests made by clients using IPv4, so an additional directive is needed handle clients that use IPv6[3] . The [::] address contained on the second line is a wildcard address that ensures NGINX listens on all available IPv6 addresses.
The server directive tells the block to match requests made to the smallworkshop.co.uk domain, and also matches requests made to the www subdomain (the reason for this extra server specification is explained below).
The return directive tells Nginx to stop processing the request and to a send status code 301 (Moved Permanently) to the client. The return statement includes a rewritten redirect address that uses https rather than http (the $host and $request_uri are variables set automatically by Nginx for each client request). On receiving the 301 message the client will then try again using the https address instead of the original url.
When the server receives the redirected request it will be matched by the next block which is listening for requests received on the HTTPS port (443).
Note that some cloud based load balancers are set up to automatically redirect HTTP requests to HTTPS before your server sees them but - even if you use one of these services - it is still good practice to include an explicit redirection in your local configuration in any case.
HTTPS configuration
To allow the server block to handle HTTPS the ssl parameter must be set on the listen directive and you must also specify the location of the site SSL certificate and private key. If you are using certbot to manage installation and renewal of your certificate, it will create your letsencrypt keys and add the details to your nginx configuration automatically:
server {
    listen 443 ssl;                   # IPv4
    listen [::]:443 ssl;              # IPv6
    http2 on;

    server_name smallworkshop.co.uk;

    ssl_certificate /etc/letsencrypt/live/smallworkshop.co.uk/fullchain.pem; # managed by Certbot
    ssl_certificate_key /etc/letsencrypt/live/smallworkshop.co.uk/privkey.pem; # managed by Certbot
    include /etc/letsencrypt/options-ssl-nginx.conf; # managed by Certbot
    ssl_dhparam /etc/letsencrypt/ssl-dhparams.pem; # managed by Certbot

    ...
The http2 directive enables support for the latest version of the HTTP protocol[4].
Note that certbot also adds links to two other configuration files
options-ssl-nginx.confssl-dhparams.pem
... which configure the recommended SSL/TLS settings to secure HTTPS. When the Certbot software is upgraded on the server these files will be updated to keep configurations aligned with evolving security standards and therefore should not be changed manually.
www subdomain mapping
The days where people routinely typed in a "www." subdomain to indicate a world-wide-web url are long gone, however, accounting for use of the subdomain is still good practice. Here's how to set it up:
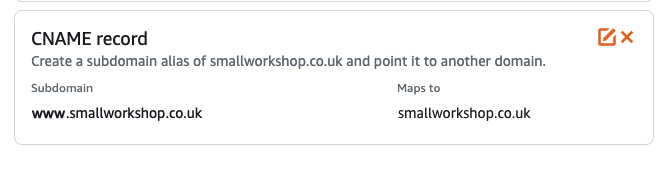
- DNS Configuration:
Add a CNAME record in your DNS settings to point "www" requests to your root domain. This configuration tells the DNS to return the IP address for the root domain whenever a request is made to the "www" subdomain.
- Nginx Configuration:
While the DNS CNAME entry ensures the browser receives the correct IP address, the HTTP host header will still reference "www". To manage these requests on the server, add a redirect block in your Nginx configuration to route "www" requests to the root domain.
In the configuration above, the "www" requests are handled in the first redirection server block which is looking for both requests to both www.smallworkshop.co.uk and smallworkshop.co.uk.
Note the above configuration is not perfect. It will work if someone types www.smallworkshop.co.uk into their browser - because the browser defaults to sending a HTTP request - however if they explicitly request the https address https://www.smallworkshop.co.uk they will get a certificate error as there is no server block to handle the request. If you want to avoid the certificate error you need to install a separate certificate for the www subdomain and create a new redirect server block to handle these requests.
Security Headers
You can set common security headers in the response headers returned to the client that will stop modern browsers from running into some preventable vulnerabilities:
# add security headers
add_header Strict-Transport-Security "max-age=31536000";
add_header Referrer-Policy "no-referrer";
add_header Permissions-Policy "accelerometer=(), camera=(), geolocation=(), gyroscope=(), magnetometer=(), microphone=(), payment=(), usb=()";
add_header X-Content-Type-Options "nosniff";
add_header X-Frame-Options "sameorigin";
add_header X-Xss-Protection "1; mode=block";
proxy_hide_header X-Powered-By;
The first header is particularly important: although requests made to your server using HTTP are redirected to HTTPS (see above), any initial request using HTTP would be in plain text and vulnerable to attackers who can intercept the messages and change the data. The Strict-Transport-Security header is designed to protect against this. The other items are recommended for standard websites.
Ghost proxy server
The location directive sets the headers expected by the server and then passes the request to the Ghost server, which normally runs on port 2368:
location / {
        proxy_set_header X-Forwarded-For $proxy_add_x_forwarded_for;
        proxy_set_header X-Forwarded-Proto $scheme;
        proxy_set_header X-Real-IP $remote_addr;
        proxy_set_header Host $http_host;
        proxy_pass http://127.0.0.1:2368;
    }
location / is a generic handler that covers all requests unless more specific rules apply (like location /images/ etc).
Since this is the only location block, and it matches any URL that starts with a /, it is effectively a catch-all that applies to all requests made to the site.
Nginx will handle SSL termination (the process of decrypting this encrypted traffic) and send data to Ghost using HTTP. Thex-forwarded-proto setting tells Ghost that the requests coming into the proxy are secure. Without this, Ghost will think the requests are insecure, attempt to redirect to the https version of the URL and cause an infinite redirect loop.
Size limits
the client_max_body_size directive sets the maximum client request body, which is primarily used to limit the size of uploaded files (like images, videos, etc.).
The default value of client_max_body_size is 1 megabyte, and you may find some themes or images you want to upload are larger than this, in which case the server will return a 413 Request Entity Too Large error. You can increase the size limit as in the example above.
Safari bug
The typical definition for the X-Content-Type-Option security header is X-Content-Type-Options "nosniff"; which tells the browser to not try and guess the MIME type of the content being served. You may have noticed that in the sample basic configuration above that the parameter is defined with a variable: add_header X-Content-Type-Options $header_content_type_options; . The variable is defined like this :
map $status $header_content_type_options {
    204 "";
    default "nosniff";
}
The map directive sets $header_content_type_options to null for status code 204 and to nosniff for all other status codes.
At the time of writing (Summer 2024) this workaround is needed because Safari mobile users are being prompted to download an "auth-frame" when their browsers encounter the 204 codes returned by the comments UI and the Nginx server is configured with the nosniff security header.
That's all you need for a basic configuration.
Advanced configuration
The configuration actually used on my site is below. The additional changes, compared to the basic configuration above, are:
- serve images and theme assets (css files etc) directly from Nginx rather than via the Ghost proxy
- serve a webp version of requested images (where available) instead of any jpg/png image referenced in the html
- proxy all other requests to the Ghost server
... your site will run perfectly fine without these changes but if you are interested in how they work, read on.
server {
    listen 80;                       # IPv4
    listen [::]:80;                  # IPv6
    server_name www.smallworkshop.co,uk smallworkshop.co,uk;

    # Redirect all HTTP traffic to HTTPS
    return 301 https://smallworkshop.co.uk$request_uri;
}

# fix for IOS safari issue and the Ghost
comments UI (2024.07.19)
map $status $header_content_type_options {
    204 "";
    default "nosniff";
}

server {
    listen 443 ssl;                   # IPv4
    listen [::]:443 ssl;              # IPv6
    http2 on;

    server_name smallworkshop.co.uk;

    ssl_certificate /etc/letsencrypt/live/smallworkshop.co.uk/fullchain.pem; # managed by Certbot
    ssl_certificate_key /etc/letsencrypt/live/smallworkshop.co.uk/privkey.pem; # managed by Certbot
    include /etc/letsencrypt/options-ssl-nginx.conf; # managed by Certbot
    ssl_dhparam /etc/letsencrypt/ssl-dhparams.pem; # managed by Certbot

    # add security headers
    add_header Strict-Transport-Security "max-age=31536000";
    add_header Referrer-Policy "no-referrer";
    add_header Permissions-Policy "accelerometer=(), camera=(), geolocation=(), gyroscope=(), magnetometer=(), microphone=(), payment=(), usb=()";
    add_header X-Content-Type-Options  $header_content_type_options;
    add_header X-Frame-Options "sameorigin";
    add_header X-Xss-Protection "1; mode=block";
    proxy_hide_header X-Powered-By;

    root /var/www/ghost;

    #nginx serve the theme files directly

    location ^~ /assets/ {
        root /var/www/ghost/content/themes/transmission;
        # add cache-control header when serving assets from nginx (added by Ghost when using the proxy)
        add_header Cache-Control 'public,max-age=31536000';
        try_files $uri @ghost;
    }

    # serve images via nginx rather than the proxy.
    # Ghost generates responsive image sizes in /content/images/size on request if they do not already exist
    # ..  to preserve this functionality we  pass the request to the Ghost proxy when the image can't be found on the server

    location ~* ^(/content/images/)(.+)\.(png|jpe?g)$ {
        expires max;
        set $webp_image_subdir "/content/images/webp/";
        set $basename $2;

        # look for basename.webp (the $webp_suffix var set in nginx.conf if the browser supports webp)
        # if not found then try the original file, else pass to ghost in case a responsive image needs to be generated by the ghost server
        # add_header X-debug-message "nginx served file: $webp_image_subdir$basename$webp_suffix or $uri" always;
        try_files $webp_image_subdir$basename$webp_suffix $uri @ghost;
    }

    location / {
        try_files _ @ghost;
    }

    location @ghost {
        proxy_ignore_headers Cache-Control;
        proxy_set_header X-Forwarded-For $proxy_add_x_forwarded_for;
        proxy_set_header X-Forwarded-Proto $scheme;
        proxy_set_header X-Real-IP $remote_addr;
        proxy_set_header Host $http_host;
        proxy_pass http://127.0.0.1:2368;
    }
    client_max_body_size 5m;

}
Let's start by looking at how images are served up.
Serving images directly via NGINX
The Ghost server needs to handle all the requests for web pages on your site as it has to render the JSON content held on the database as html before returning it to the client.
When Ghost receives a request for images and other static files that are stored on the local server it will retrieve the file from the file system and, although Ghost can do this very efficiently, this adds in some overheads that can be avoided by serving the files directly through Nginx. In practice this is unlikely to represent a noticeable performance improvement unless you have a very high volume site but - if you are interested - this is how you do it.
All locally stored user data accessible by Ghost is stored in the location specified in the contentPath object in the server congiruation file config.production.json.
The default location is /content, for example on my server images are located in /var/www/ghost/content/images.
The images links in the html are stored like this:
<a href="https://smallworkshop.co.uk" class="m-logo">
    <img src="https://smallworkshop.co.uk/content/images/2021/10/circle-cropped-1.png" alt="The Small Workshop">
</a>
note that the path to the image is a relative location and does not include the /var/www/ghost installation directory.
So that Nginx can locate the local file we use the root directive to add the specified path, /var/www/ghost, to the request URI to form the absolute path to the requested file. So, for instance, /content/images/2018/04/17/img_123.jpg becomes /var/www/ghost/content/images/2018/04/17/img_123.jpg
To retrieve the images using Nginx we need to define a location block. Location blocks divide up request handling within a server block so that any URI matching the specified location receive special handling.
In this case we are matching request URIs that point to image files on the server. This is how the location declaration is specified:
location ~* ^(/content/images/)(.+)\.(png|jpe?g)$ {

}
The ~* parameter tells nginx to do a case insensitive regular expression match. The regex matches URIs that start with /content/images and have a suffix of png, jpg or jpeg.
The () syntax defines three "capture groups" and causes Nginx to set three variables ($1,$2,$3) based on the patterns matched inside each of the three pairs of parentheses.
For example a request for /content/images/2020/10/img_123.jpg will match this location and Nginx will create 3 variables:
- $1 = /content/images
- $2 = 2020/10/img_123
- $3 = .jpg
Variables like this are useful when arranging subsequent handling of requested files, as shown below.
Serving webp images
I have created webp versions of all the png and jpg images stored on my Ghost server and stored them in a directory called /var/www/ghost/content/images/webp. This was done so that, where a webp alternative is available, it can be served up in preference to the (larger) jpg/png files I originally used.
The following directives define two variables, the first is hard coded to the location of the webp files and the next is set to the second variable returned by the capture groups in the regex above:
set $webp_image_subdir "/content/images/webp/";
set $basename $2;
The commented out directive below creates a header named X-debug-message (this can be helpful when trying to establish which file was actually served by Nginx) and the following line specifies a try_files directive:
# add_header X-debug-message "nginx served file: $webp_image_subdir$basename$webp_suffix or $uri" always;
try_files $webp_image_subdir$basename$webp_suffix $uri @ghost;
the try_files directive tells Nginx to check the existence of files in the specified order and to use the first found file for request processing. In this case, if a file can't be found at either of the first two locations, the request is passed to the @ghost location (the “@” prefix defines a named location that is used for request redirection inside the Nginx config file).
The first file location is constructed using three variables, $web_image_subdir, $basename, $web_suffix. For example a request URI of /content/images/2021/10/img_123.jpg would result in a file location of /content/images/webp/2021/10/img_123.webp as follows:
- $web_image_subdir = /content/images/webp/
- $basename = 2020/10/img_123
- $webp_suffix = .webp
The first two variables are explained above. The $webp_suffix variable is set in /etc/nginx/nginx.conf with this directive:
map $http_accept $webp_suffix {
    "~*webp" ".webp";
}
The map directive matches the http_accept header provided by the client to see if it contains a reference to "webp" (indicating the browser supports webp images) and, if it does, sets $webp_suffix = .webp.
The effect of this directive is that the $webp_suffix variable is only set if the browser supports webp.
The root directive adds the specified path, /var/www/ghost, to the request URI (the portion of the request that comes after the domain name/port combination in the URL) to form the path to the requested file on the local file system. For instance /content/images/2021/10/img_123.jpg becomes /var/www/ghost/content/images/2021/10/img_123.jpg
Thus in the case of a request for /content/images/img_123.jpg made from a browser with webp support, Nginx will initially try /var/www/ghost/content/images/webp/2021/10/img_123.webp and, if that file does not exist, will then try the original file /var/www/ghost/content/images/2021/10/img_123.jpg.
If the browser does not support webp images then the initial filename will be rendered as /var/www/ghost/content/images/webp/2021/10/img_123 and - because this will not point to an image file - nginx will move on and try for a file at the URI specified in the original request instead.
In the event that neither of the files specified in the first two try_file parameters then Nginx will pass the request to the @ghost location. The reason for this step is explained in the next section.
Preserving Ghost's dynamic responsive images.
Ghost supports responsive images which means it can serve up appropriate sized images according to the resolution of the screen being used to browse the site. It does this by creating the img elements in the rendered html with a srcset attribute:
<img srcset="
    /content/images/size/w300/2021/10/img_123.jpg 300w,
    /content/images/size/w600/2021/10/img_123.jpg 600w,
    /content/images/size/w1000/2021/10/img_123.jpg 1000w,
    /content/images/size/w2000/2021/10/img_123.jpg 2000w
    "
    sizes="(max-width: 600px) 600px, (max-width: 1000px) 1000px, 2000px"
    src="/content/images/size/w1000/2021/10/img_123.jpg"
    alt=""
/>
Browsers that support srcset will request an appropriate size image based on the resolution of the client device. With a standard Ghost set-up all image request are passed to the Ghost server, which - if it can't locate a reduced size image in the /content/images/size directory - will automatically create the appropriately sized file so that it can be served up in future requests. This means Ghost is able to build up an archive of responsive image sizes as they are requested for the first time.
To preserve this functionality the final location on the try_files directive must be set to the @ghost location so that, in the event a request is made for a responsive image that has yet to be created , the Ghost server still has an opportunity to create it.
Serving theme assets directly
As with images, there is no need to pass .css and other theme files to the Ghost server and this block below server them directly via Nginx. Note we have to hard code the theme location - this is not ideal since you will need to update it whenever you change theme, however, it is not the end of the world if you forget since, when nginx can't find the file, the request is then passed to the ghost server which will know about the new theme location.
#nginx serve the theme files directly
    location ^~ /assets/ {
        root /var/www/ghost/content/themes/transmission;
        # add cache-control header when serving assets from nginx (added by Ghost when using the proxy)
        add_header Cache-Control 'public,max-age=31536000';
        try_files $uri @ghost;
    }
Ghost proxy server
The @ghost location sets the headers expected by the server and then passes the request to the Ghost server.
The final location block is needed to make sure all the standard page requests are also sent to the ghost server:
location / {
        try_files _ @ghost;
    }
tryfiles always expects 2 or more parameters and by convention _ is used to represent a location that should never be matched, therefore causing all requests that were not handled by the image and asset locations to be passed to Ghost.
nginx.conf
You will only need to change this file if you are using the advanced nginx features, such as content caching. Note that the standard Ghost cache will be adequate for most applications, and the Ghost developers generally recommend implementing a CDN if you have high traffic volumes or lots of static content (they use Fastly on their managed GhostPro service).
The '.well-known' directory
Although I used certbot to directly install the Let's Encrypt certificates used on this site, there is also an option to get the Ghost installer to deploy a certificate and using this option also sets up a certificate renewal service. At the time of writing Ghost is using acme.sh to manage certificate renewals and - as part of the process to establish you control the domain - acme.sh places a file inside a directory called .well-known in the web server's root directory. So when using a Ghost installed certificate the following directive is needed in the main server block to allow this file to be accessed remotely:
location ~ /.well-known {
    allow all;
}
You may also need to add this location block when using other services that use this method - called HTTP-01 challenge - to confirm domain ownership. For example, it is one of the options provided by the AT protocol used by services like Bluesky.
Note that certbot also uses the HTTP-01 challenge during certificate renewal, however it automatically creates a temporary web server and handles the .well-known/acme-challenge/ directory itself. This temporary server runs just long enough to complete the validation process and means you don't need to configure your own webserver to handle the .well-known path.
That's it! The next job is to sort out your system backups.
References
| 1⏎ | this is the directory structure used in Ubuntu and most othe debian derived distribitutions, it may vary on other distributions. |
| 2⏎ | It is normal practice to only keep symbolic links to files in this directory as it makes it easier to switch between site configurations while retaining the original files. |
| 3⏎ | IPv6 is replacing IPv4 because IPv4's 32-bit address space (allowing for about 4.3 billion unique addresses) is insufficient to meet the growing number of internet-connected devices. IPv6, with its 128-bit address space, can support a vast number of unique addresses, but is not yet fully rolled-out. |
| 4⏎ | this is the latest syntax, replacing the deprecated syntax where http2 was included as a parameter in the listen directive. |