The earliest CT90s shared the same leading link suspension as the C90 Super Cubs. This is a great design, offering a comfortable ride and minimising maintenance issues by tucking the moving parts away from the elements. However, the forks were designed for road use and therefore only allowed a small amount of suspension travel; not ideal for the CT models which are meant for scrambling over rough terrain...
the leading link suspension fitted to the older CTs. Bar the occasional replacement of the rubber bushes in the suspension arm, there is not much to go wrong.
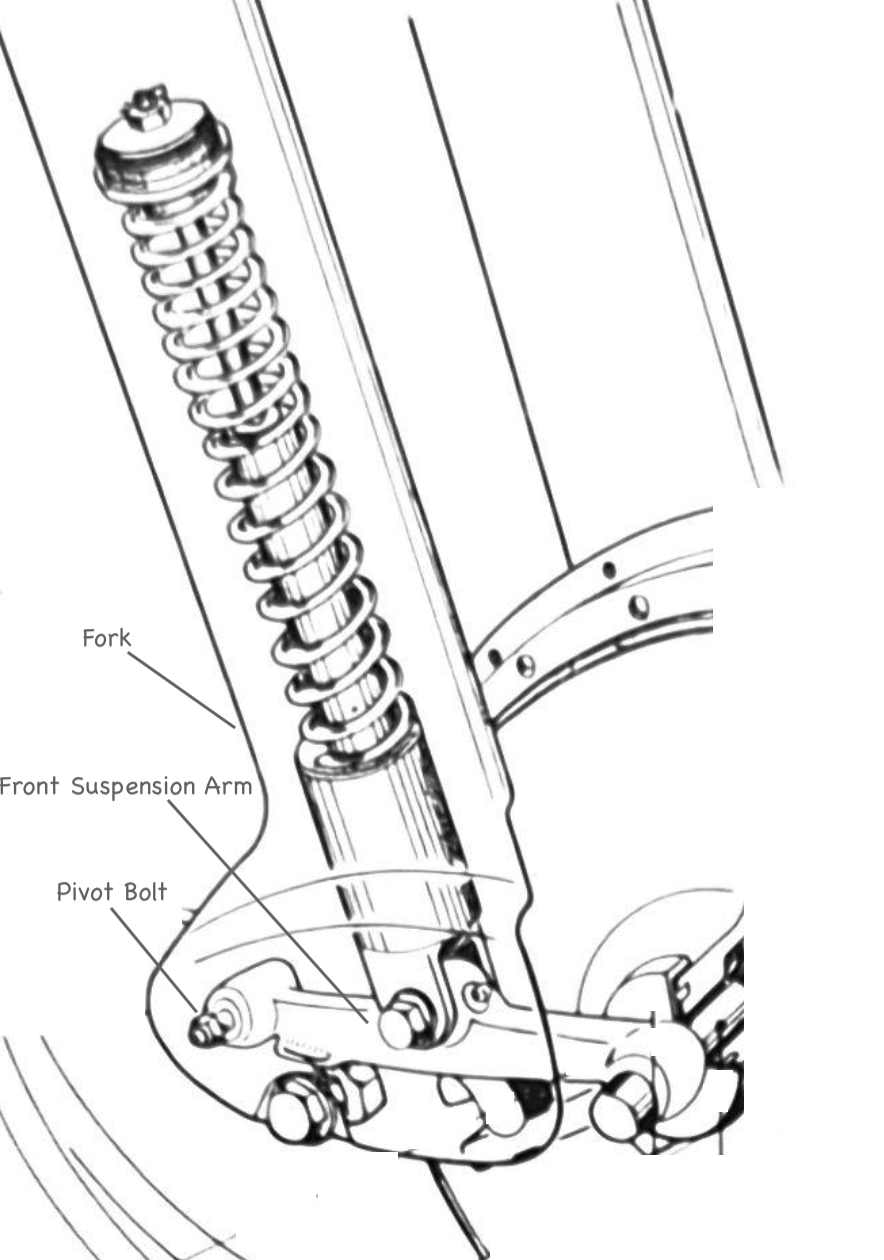
The 1969 CT90 K1 model came with a number of improvements, the most obvious being the introduction of telescopic forks which increased front suspension travel significantly.
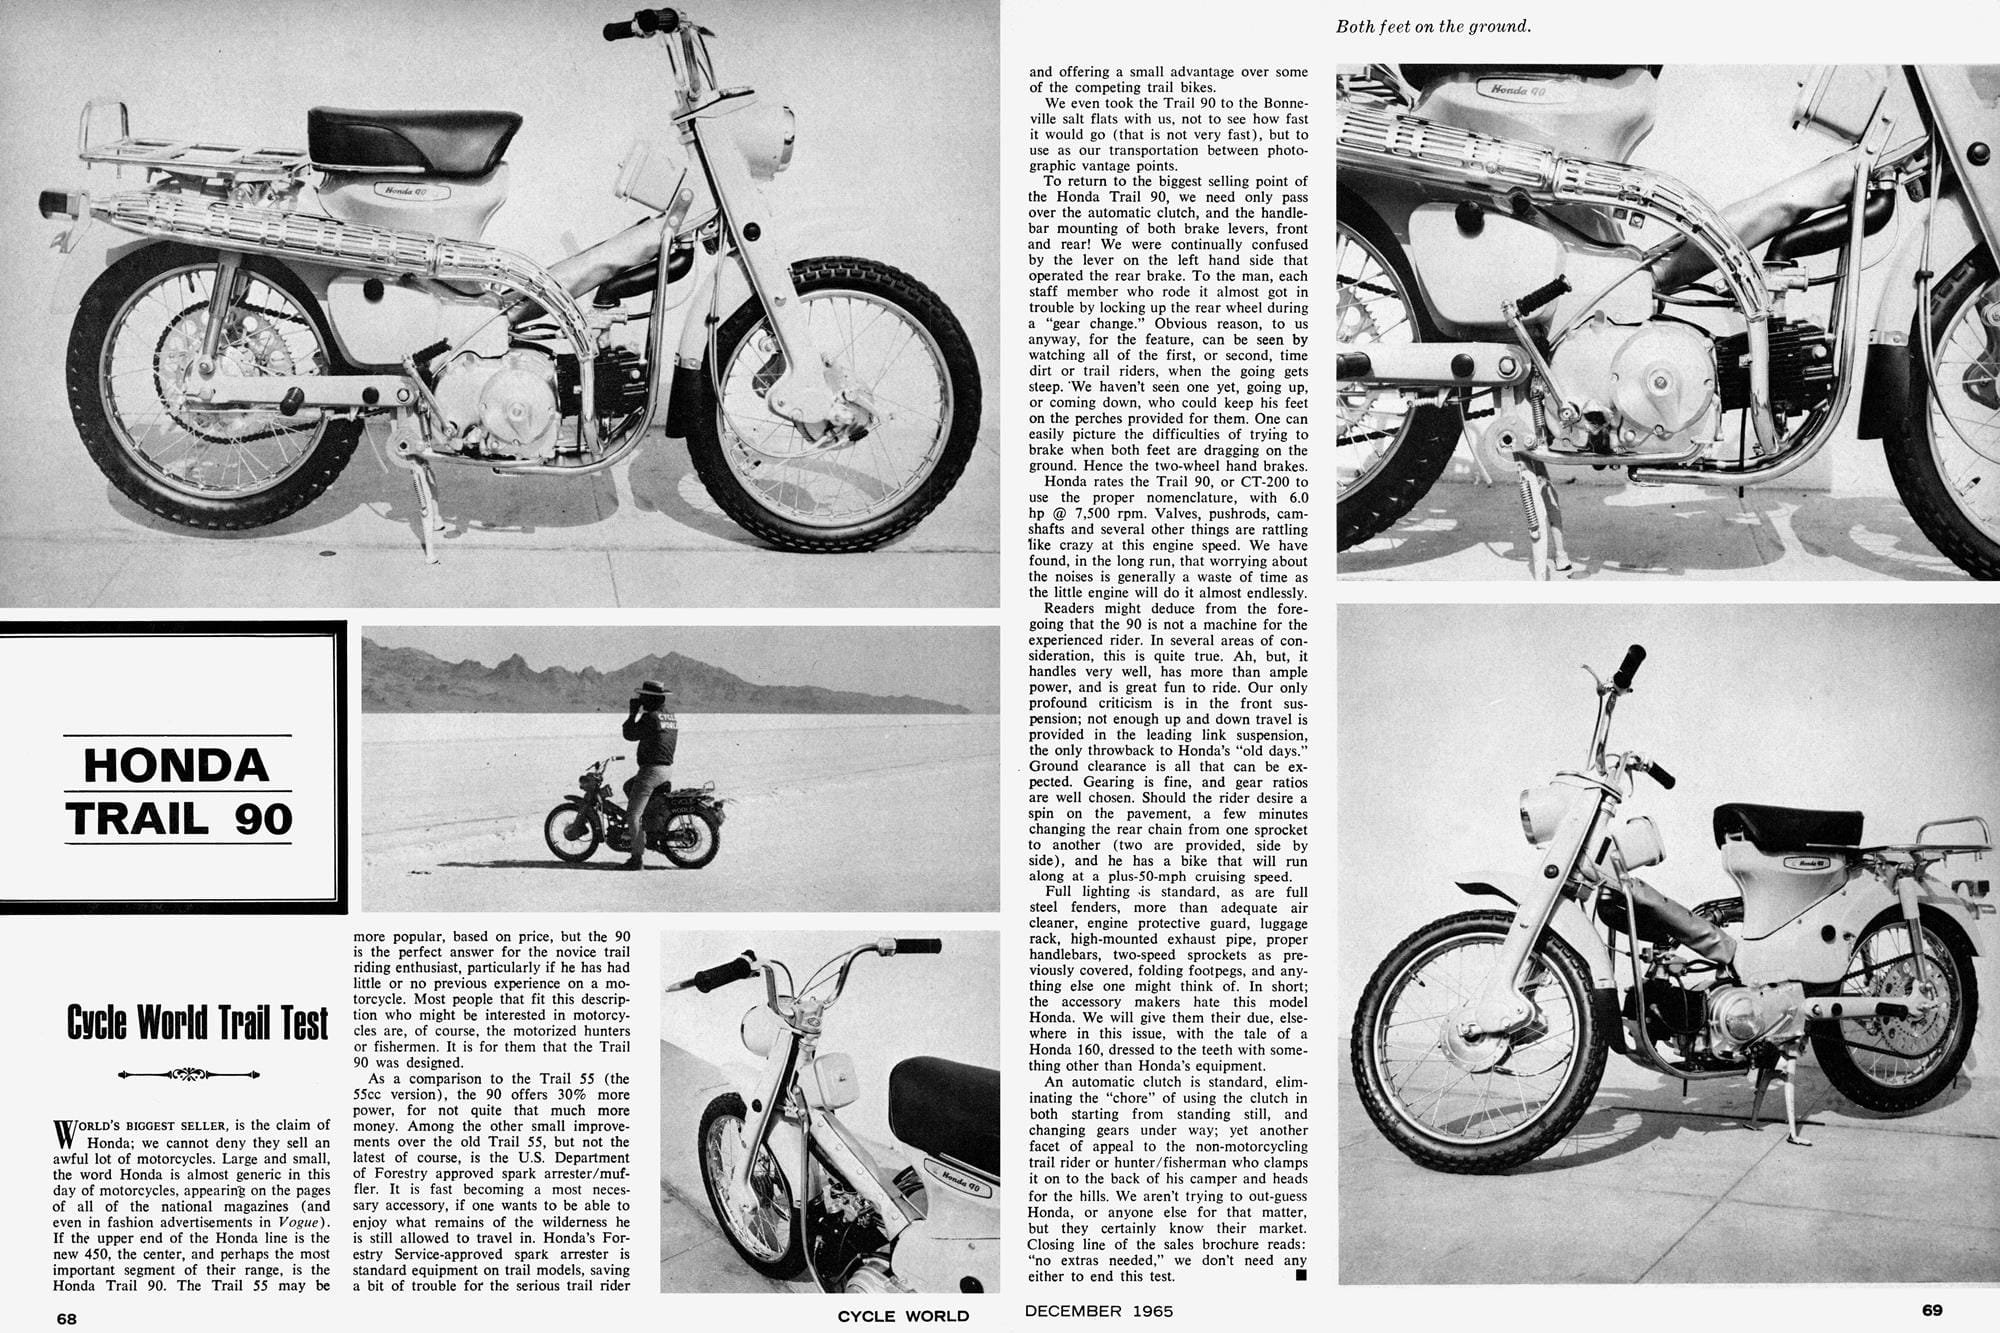
It is a shame Honda did not go with the more adventurous option to adapt the leading link design, an approach that at the time was widely regarded as a being more than up to the job of competing with the telescopic alternative:

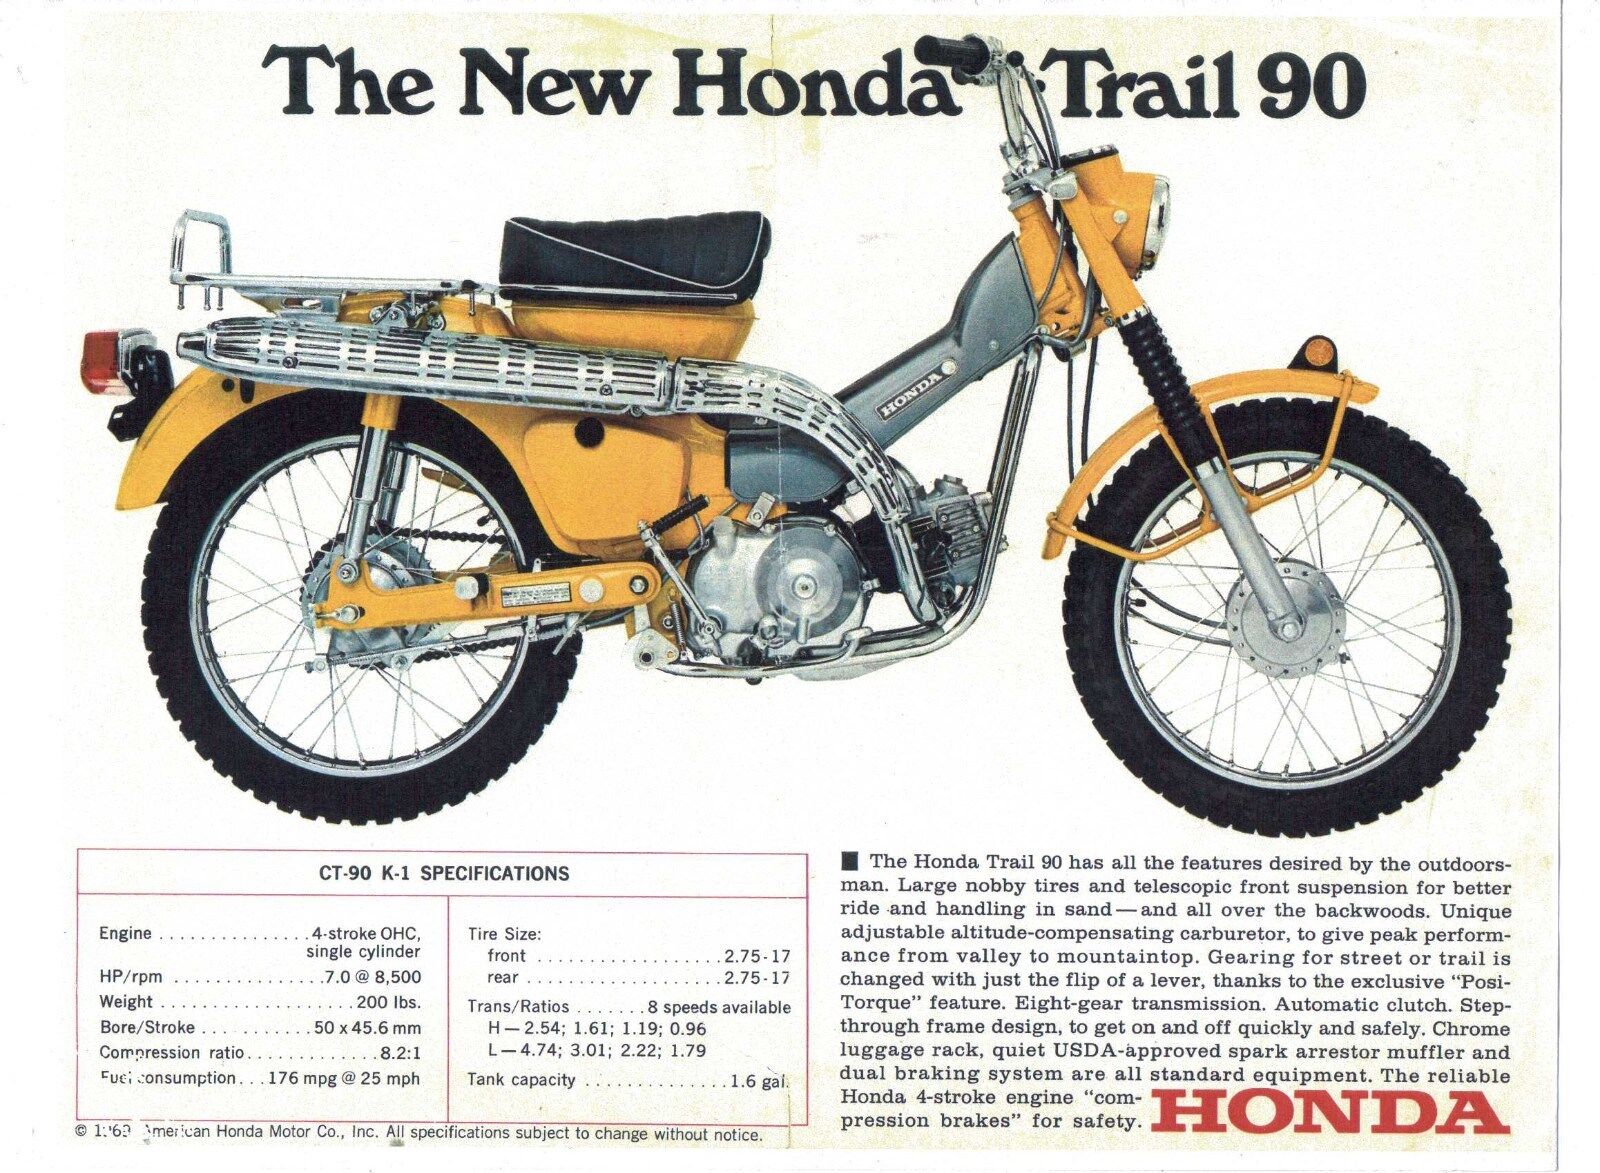
(left) A Greeves from the early 60s with leading link forks, a popular option on scramblers of this era / (right) the new CT-90 K1, equipped with telescopic suspension
…but I suppose telescopic forks look better and are cheaper to make.
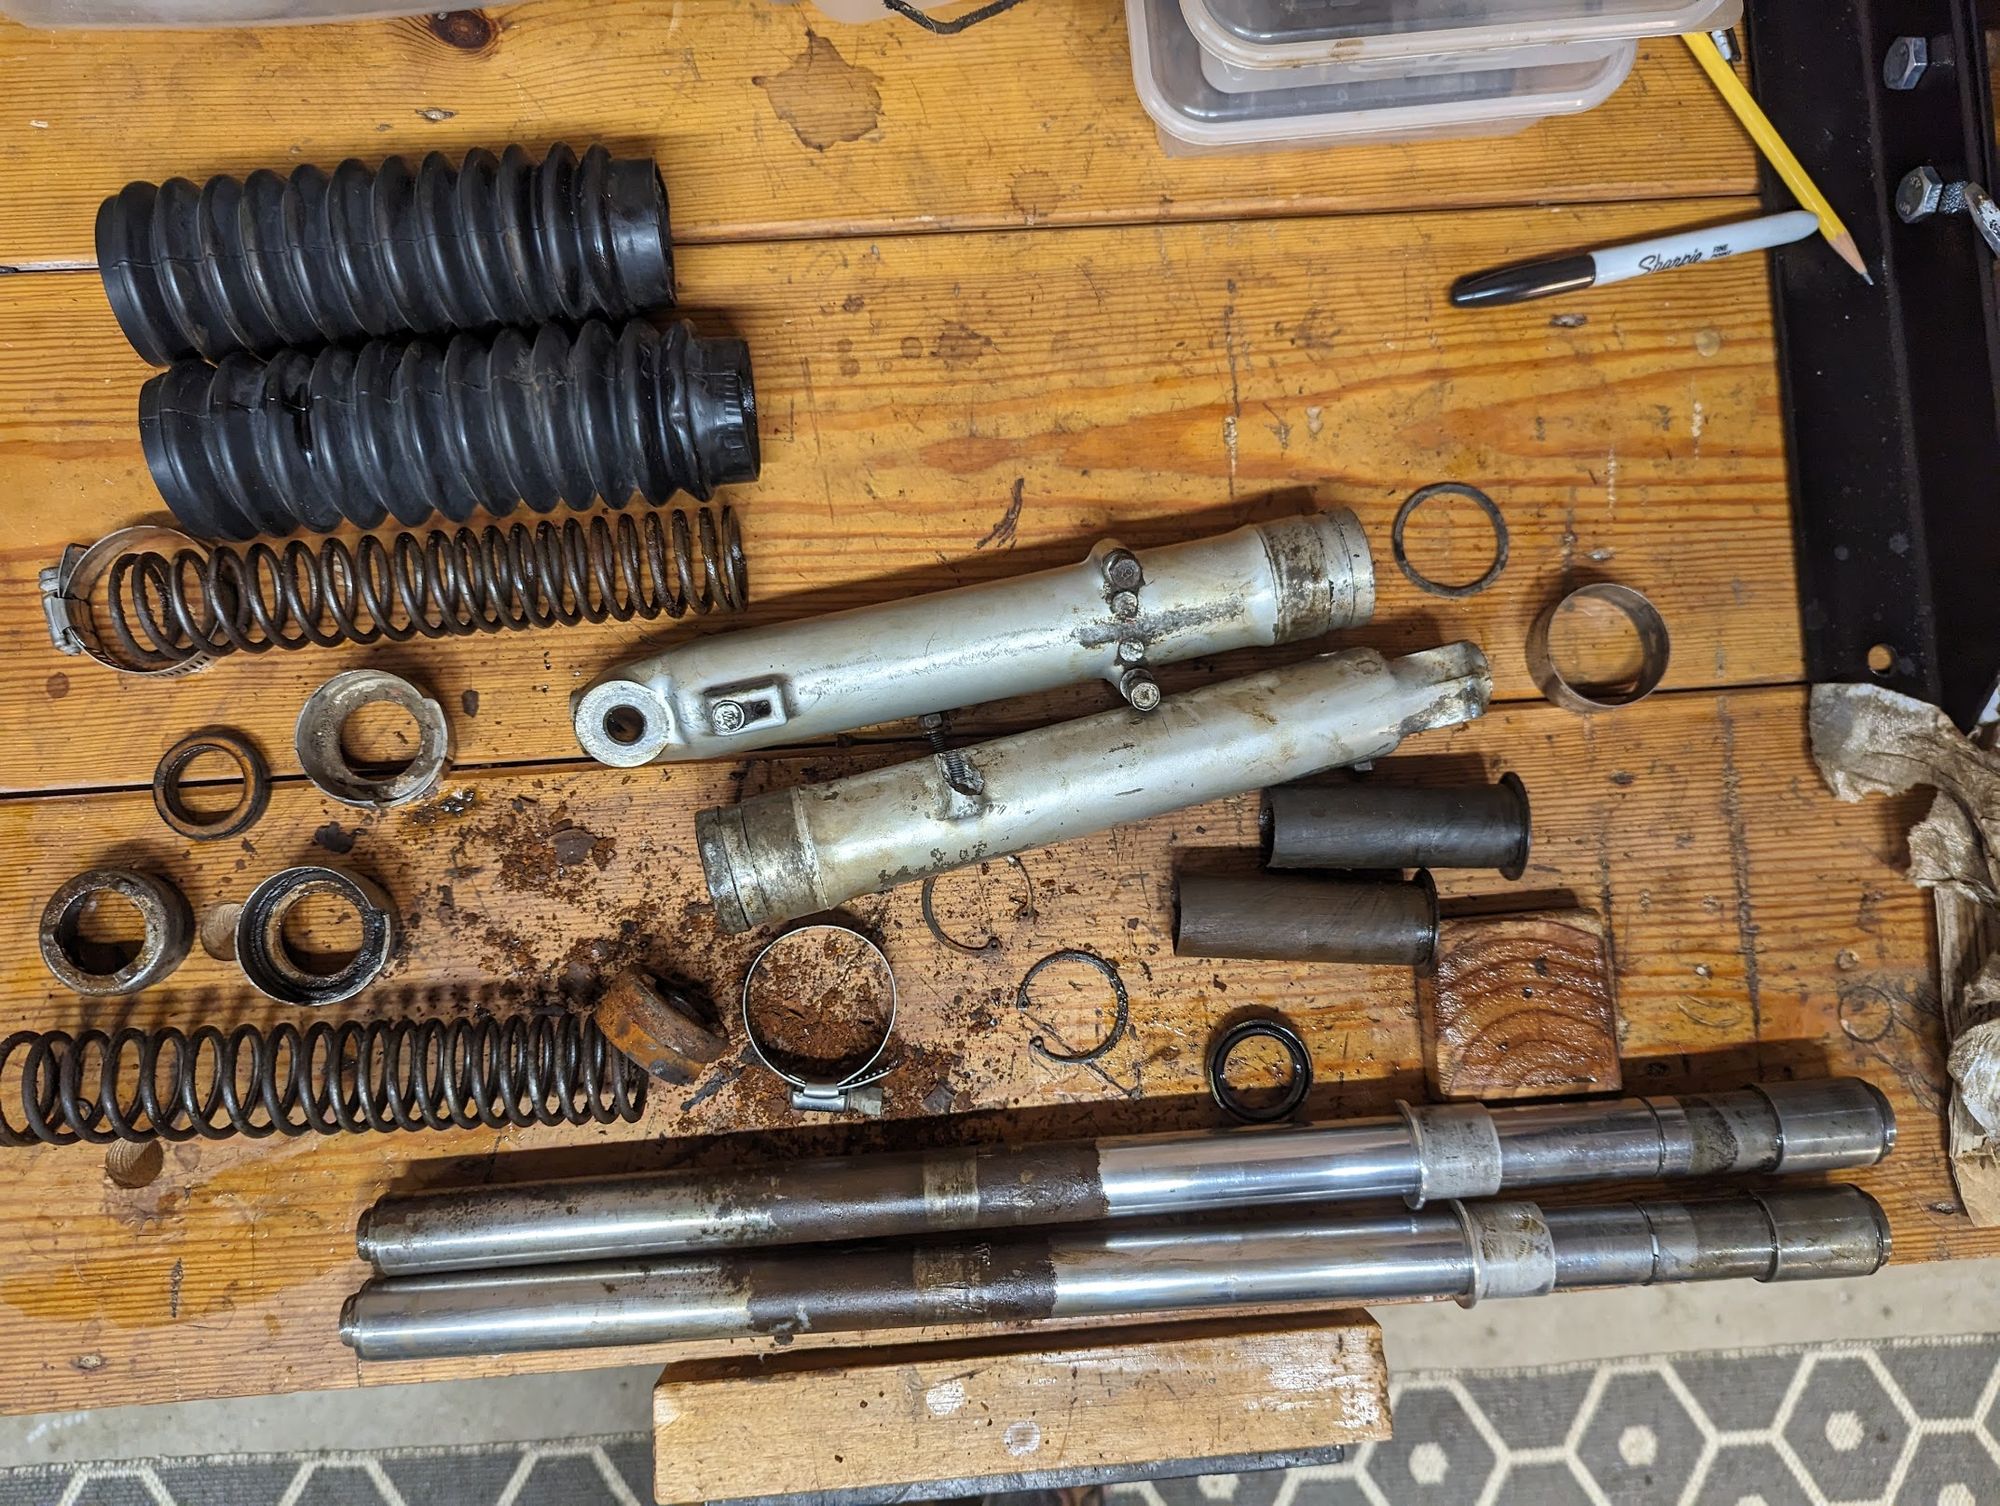
disassembly
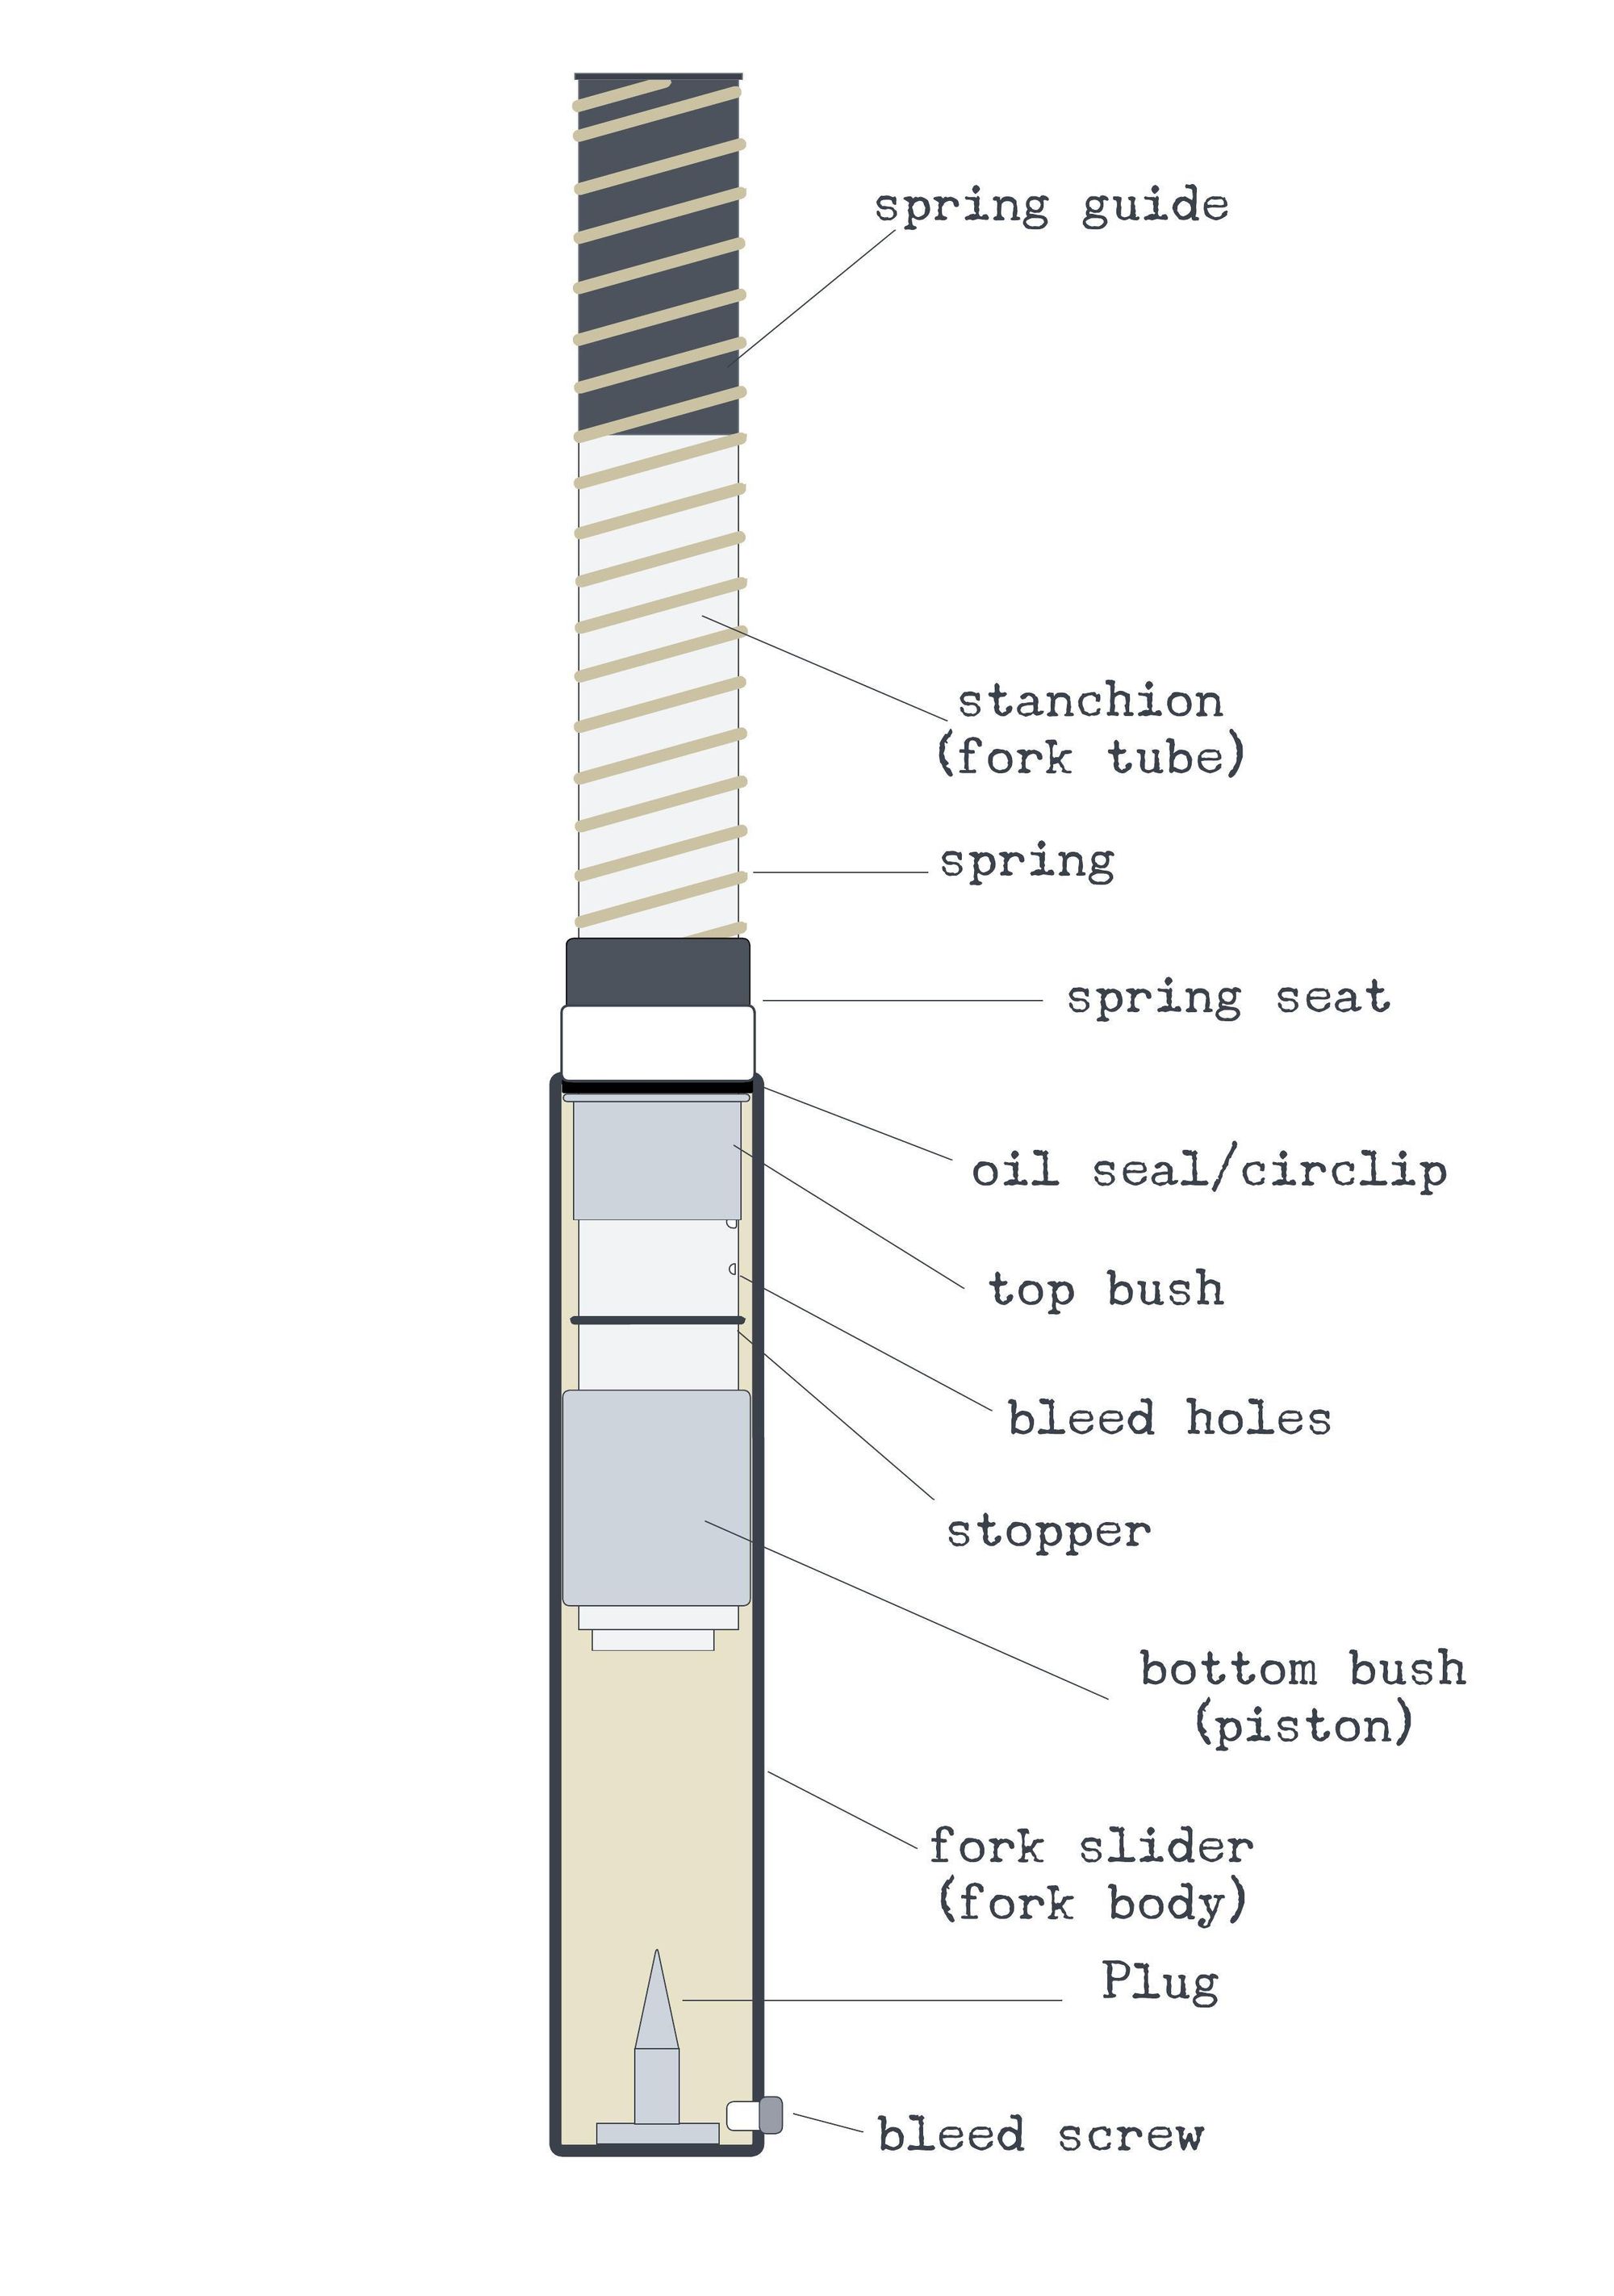
One of the problems with these forks, in common with many similar designs, is that any dirt or water getting behind the seal at the top of the fork slider (or “fork body”, as Honda calls them) can damage the chrome on the stanchions and the rough surface that results will prevent the oil seal from performing properly so that the oil in the damper can leak out.
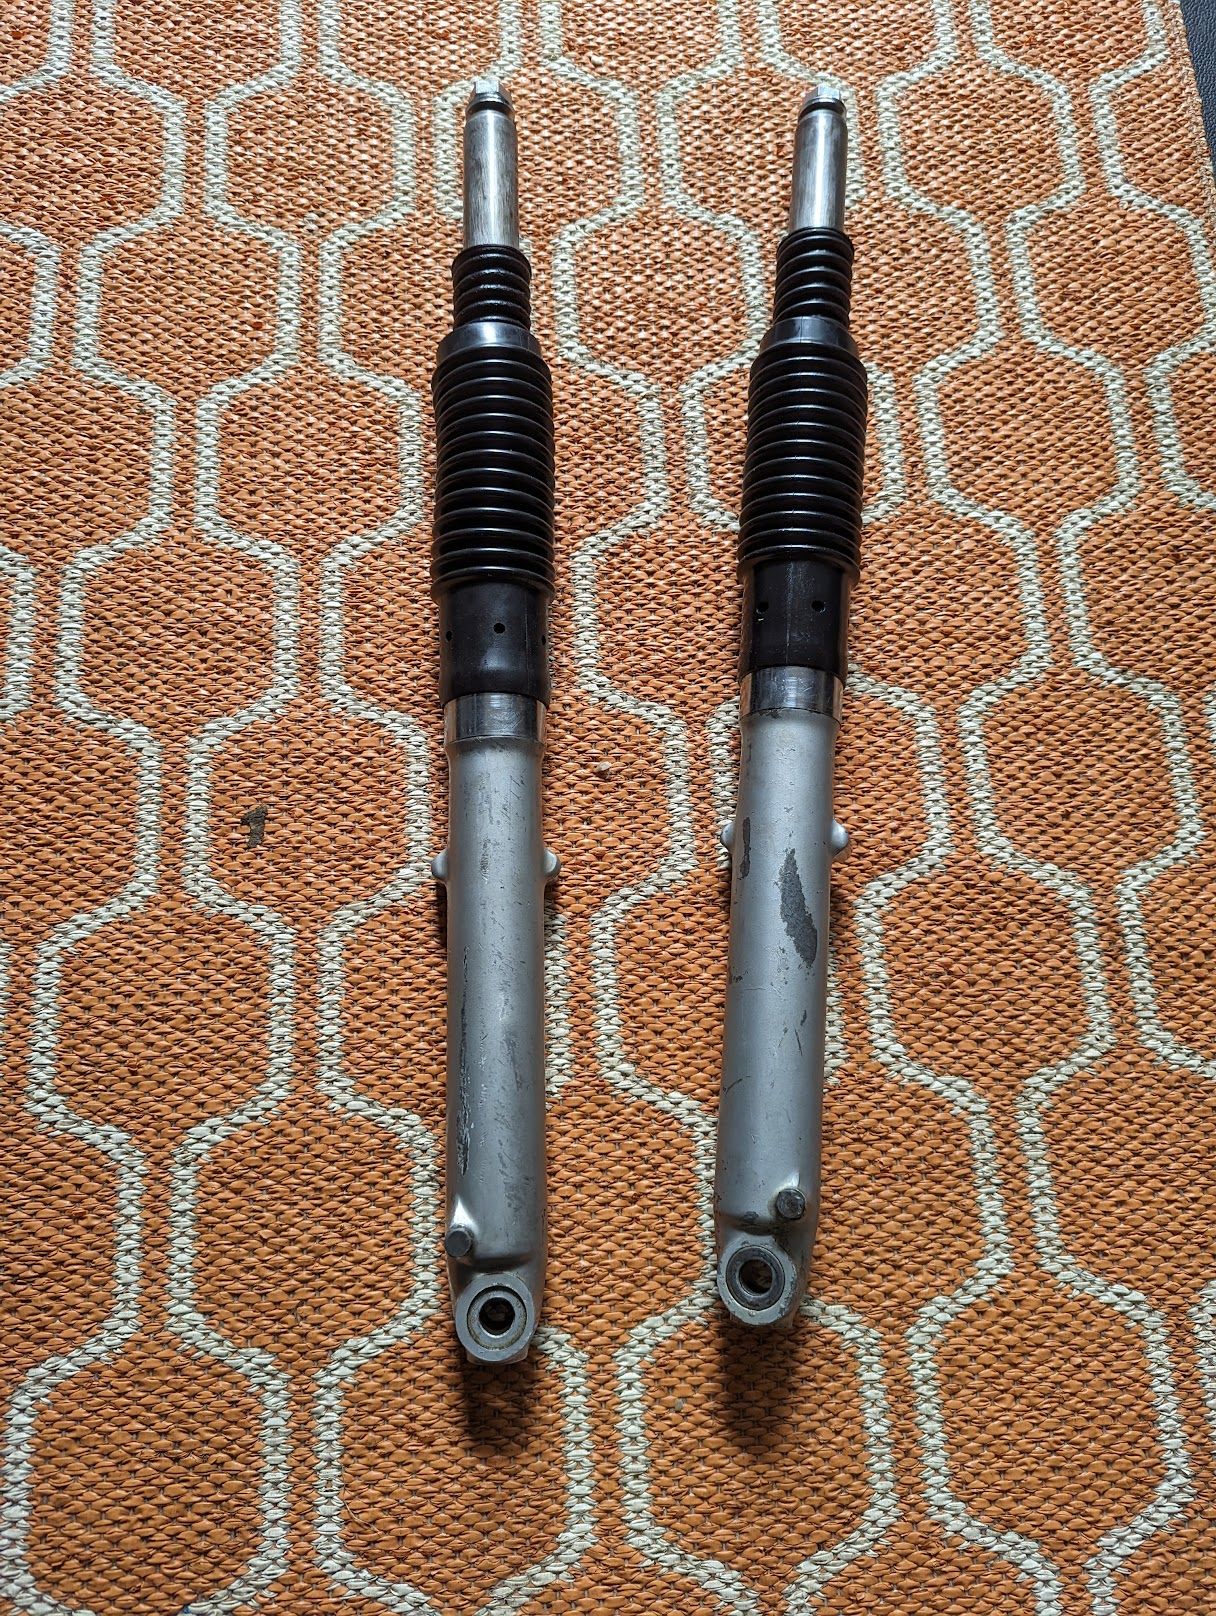
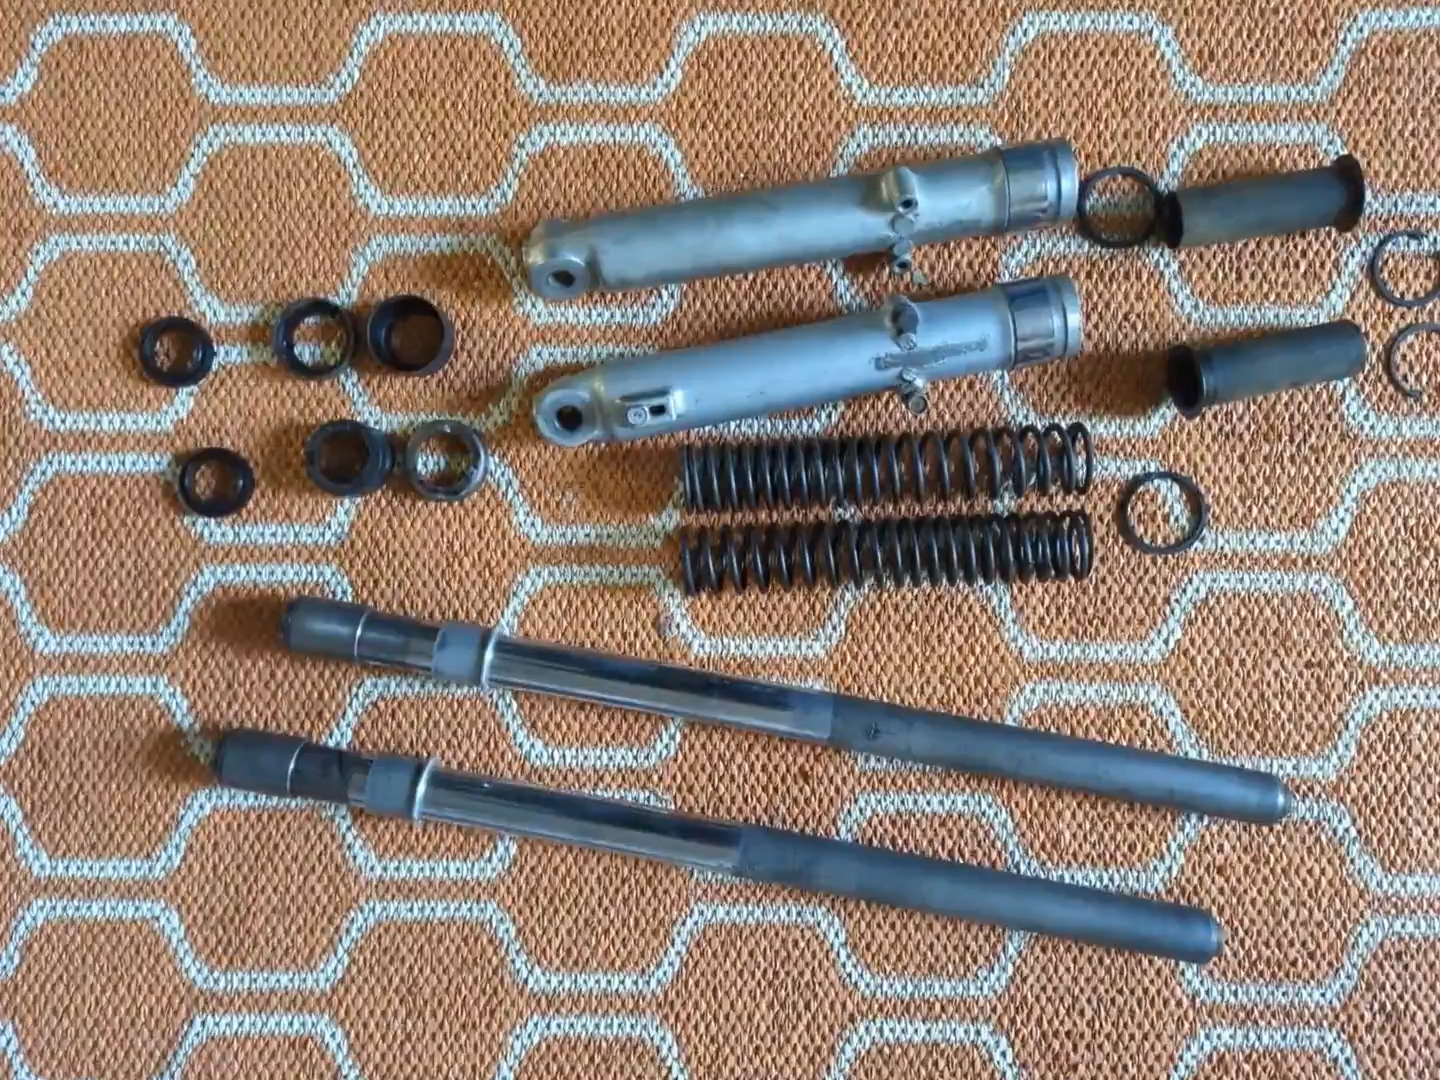
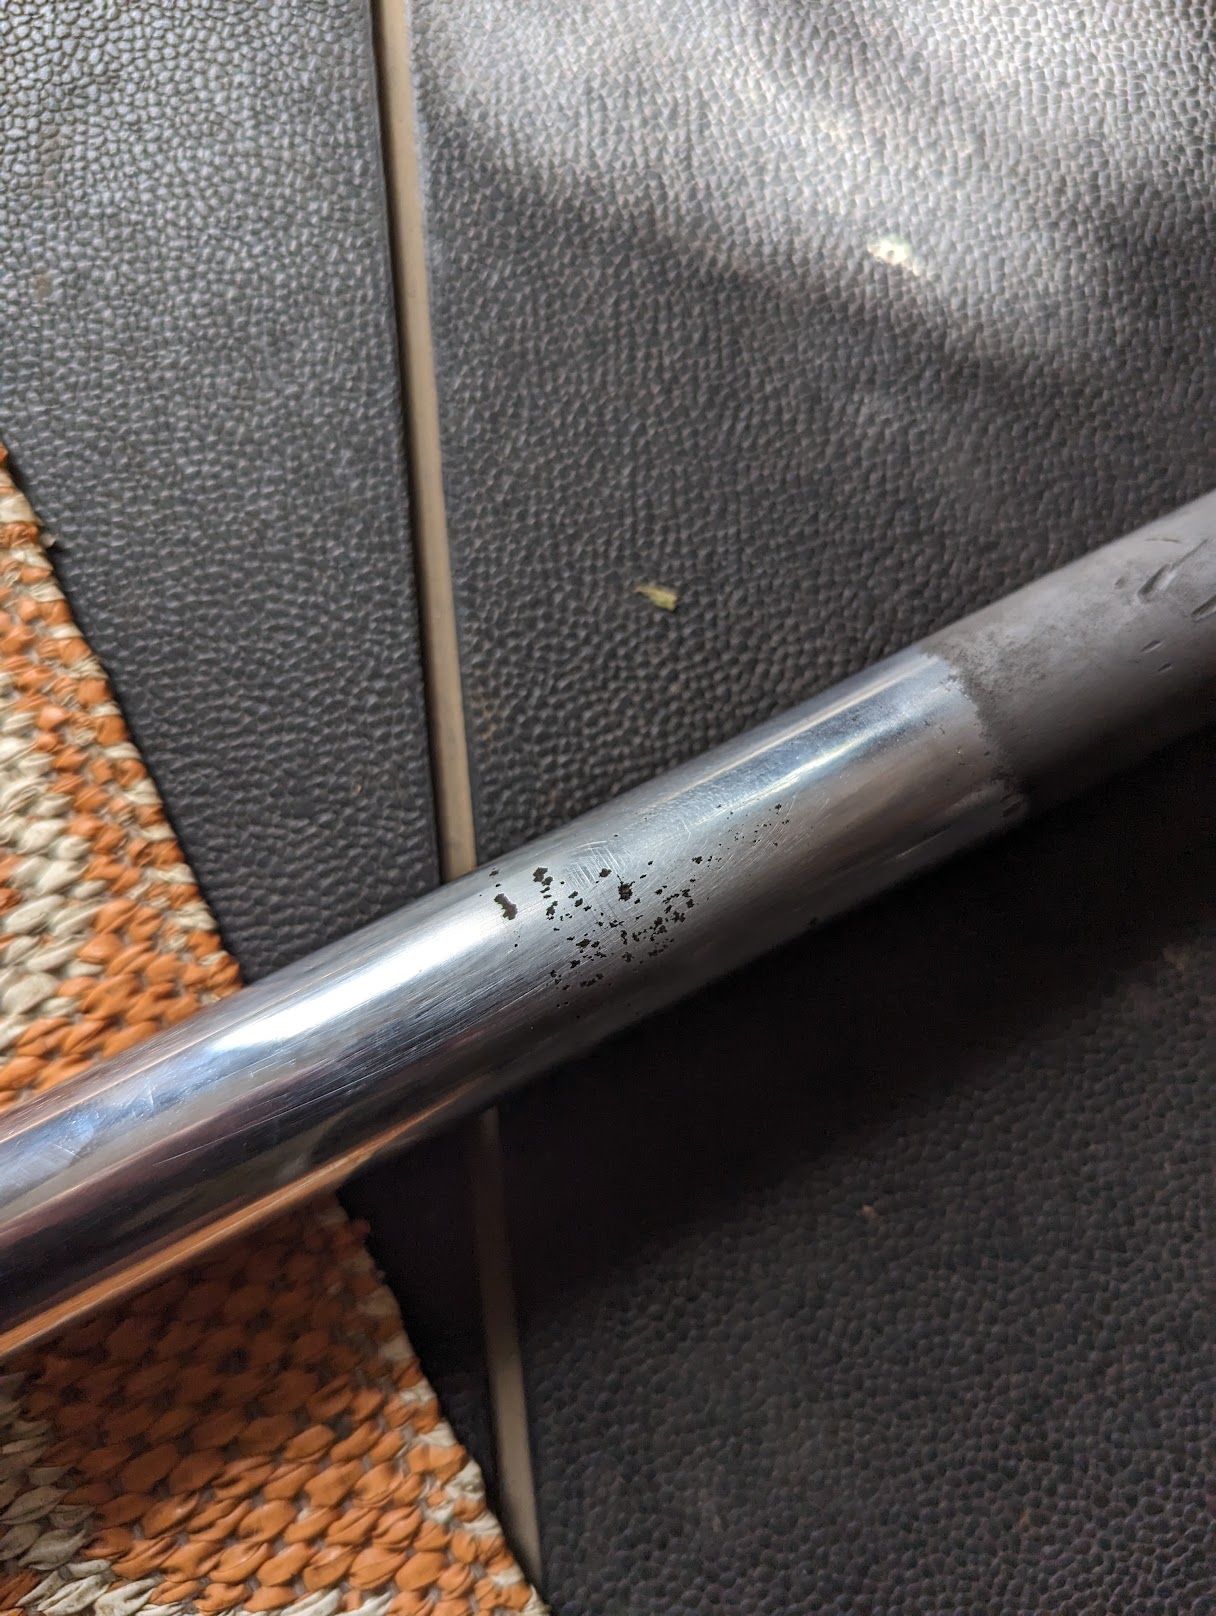
It is common for the top section of the stanchions to rust, particularly where water tends to collect behind the rubber boots (gaiters) and the fork 'ears' that hold the headlight. As you can see below, mine were no exception.
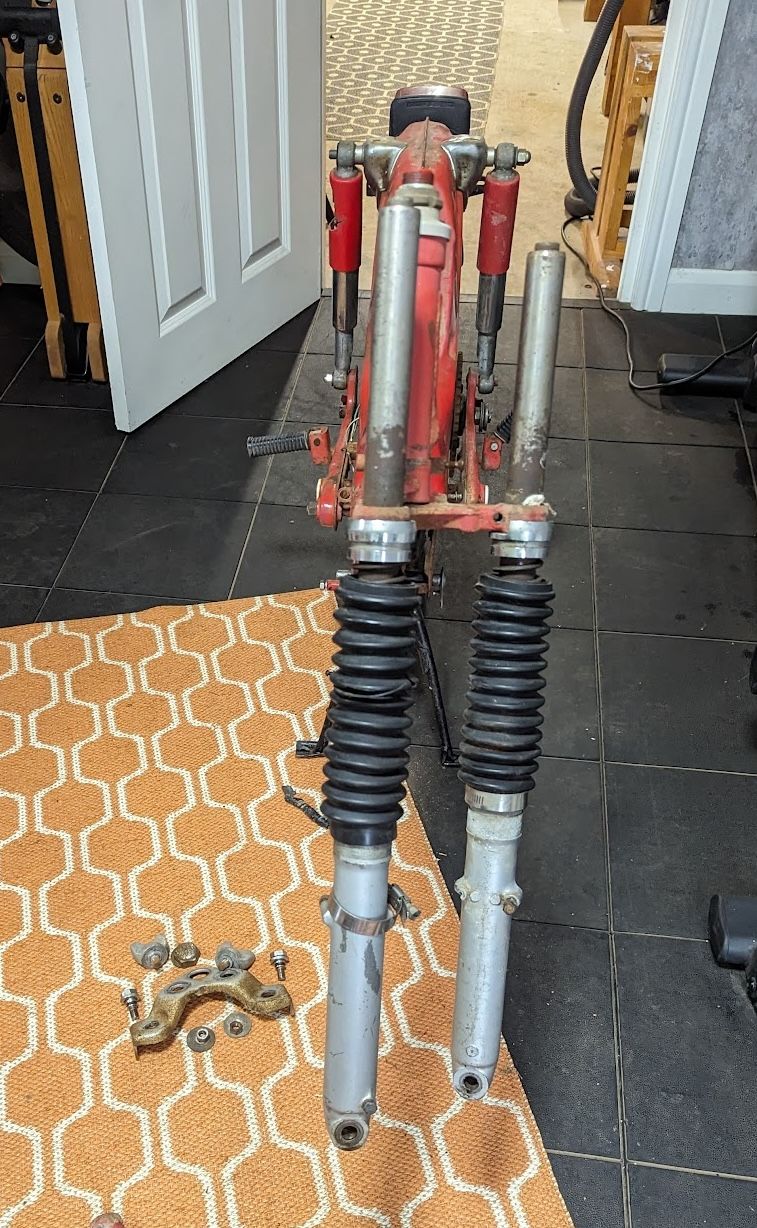
There is no real magic to getting the forks off the bike although some persuasion may be needed to get them free of the bottom fork yoke ("triple tree" as it is known in the US). Where the stanchions are very rusty it helps to clean them up as much as possible before removal. After you have removed the pinch bolts on the bottom yoke it also helps to gently pry open the clamp, either by using a screwdriver to wedge open the gap slightly or by blocking the slot in the clamp with a large washer or similar and then threading the bolt back into the clamp to widen the space. Some combination of twisting and tapping may still be needed to get the stanchions out, but obviously care must be taken not to damage any of the parts.
To remove the stanchion from the slider, first remove the circlip and then jerk the stanchion sharply upwards while holding on to the slider - this will unseat the seal and they will come apart.
The forks on my CT90 were not in particularly bad shape, but one of the sliders was broken and there were a couple of other missing or damaged parts. I managed to get hold another set which, although in a terrible state, had enough of the bits I needed to create a full set. The second set was badly corroded and much harder to dismantle than the originals: the piston and guides had rusted solid inside the fork sliders and I had to break the circlips into small pieces to remove them. However, after much banging and twisting I was was able to extract the stanchions from the sliders and get the bits I needed.
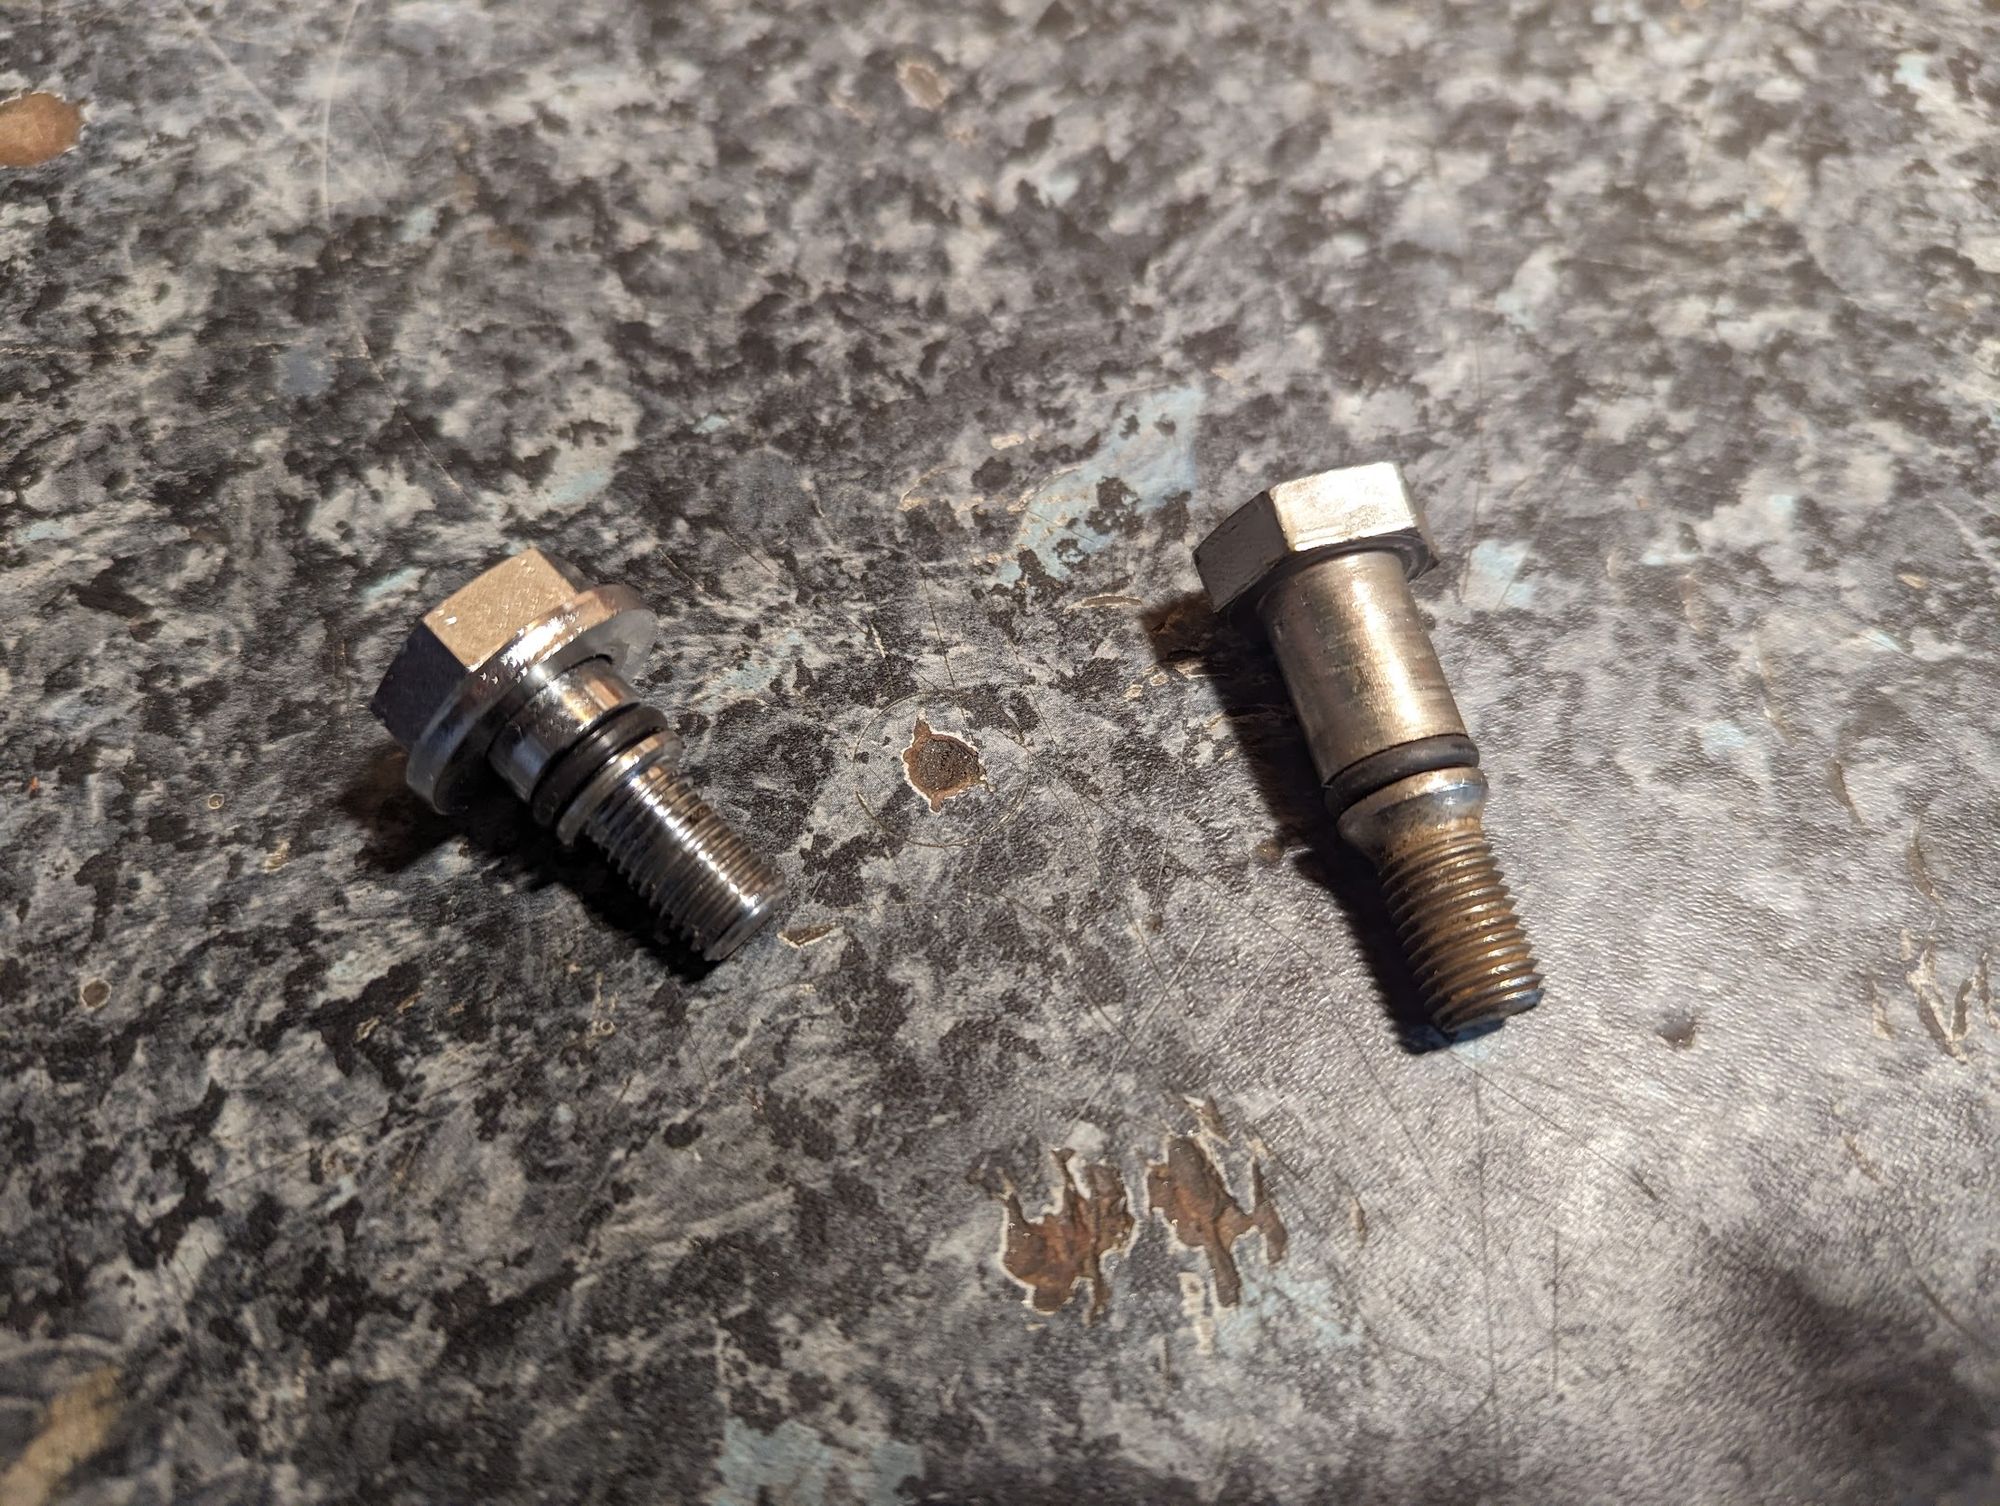
K1 and later model compatibility
The second set of forks I acquired were from a later bike and I noticed that the stanchions are slightly longer than those on the K1, as are the bolts that fix them to the top yoke (this is to accommodate the different handlebar assembly used from the K2 onwards). All the other parts are interchangeable though.
fixing the oil leaks
It is best practice to replace the oil seals when refurbishing the shocks and the original seals are still available from Honda. Where corrosion extends to the section of the stanchion that the oil seal rides up and down on, the rough edges of the pitted surface can damage the seal, so you will need to rectify this before fitting the new seals. I was lucky with mine and there was only a small amount of pitting on one of the forks.
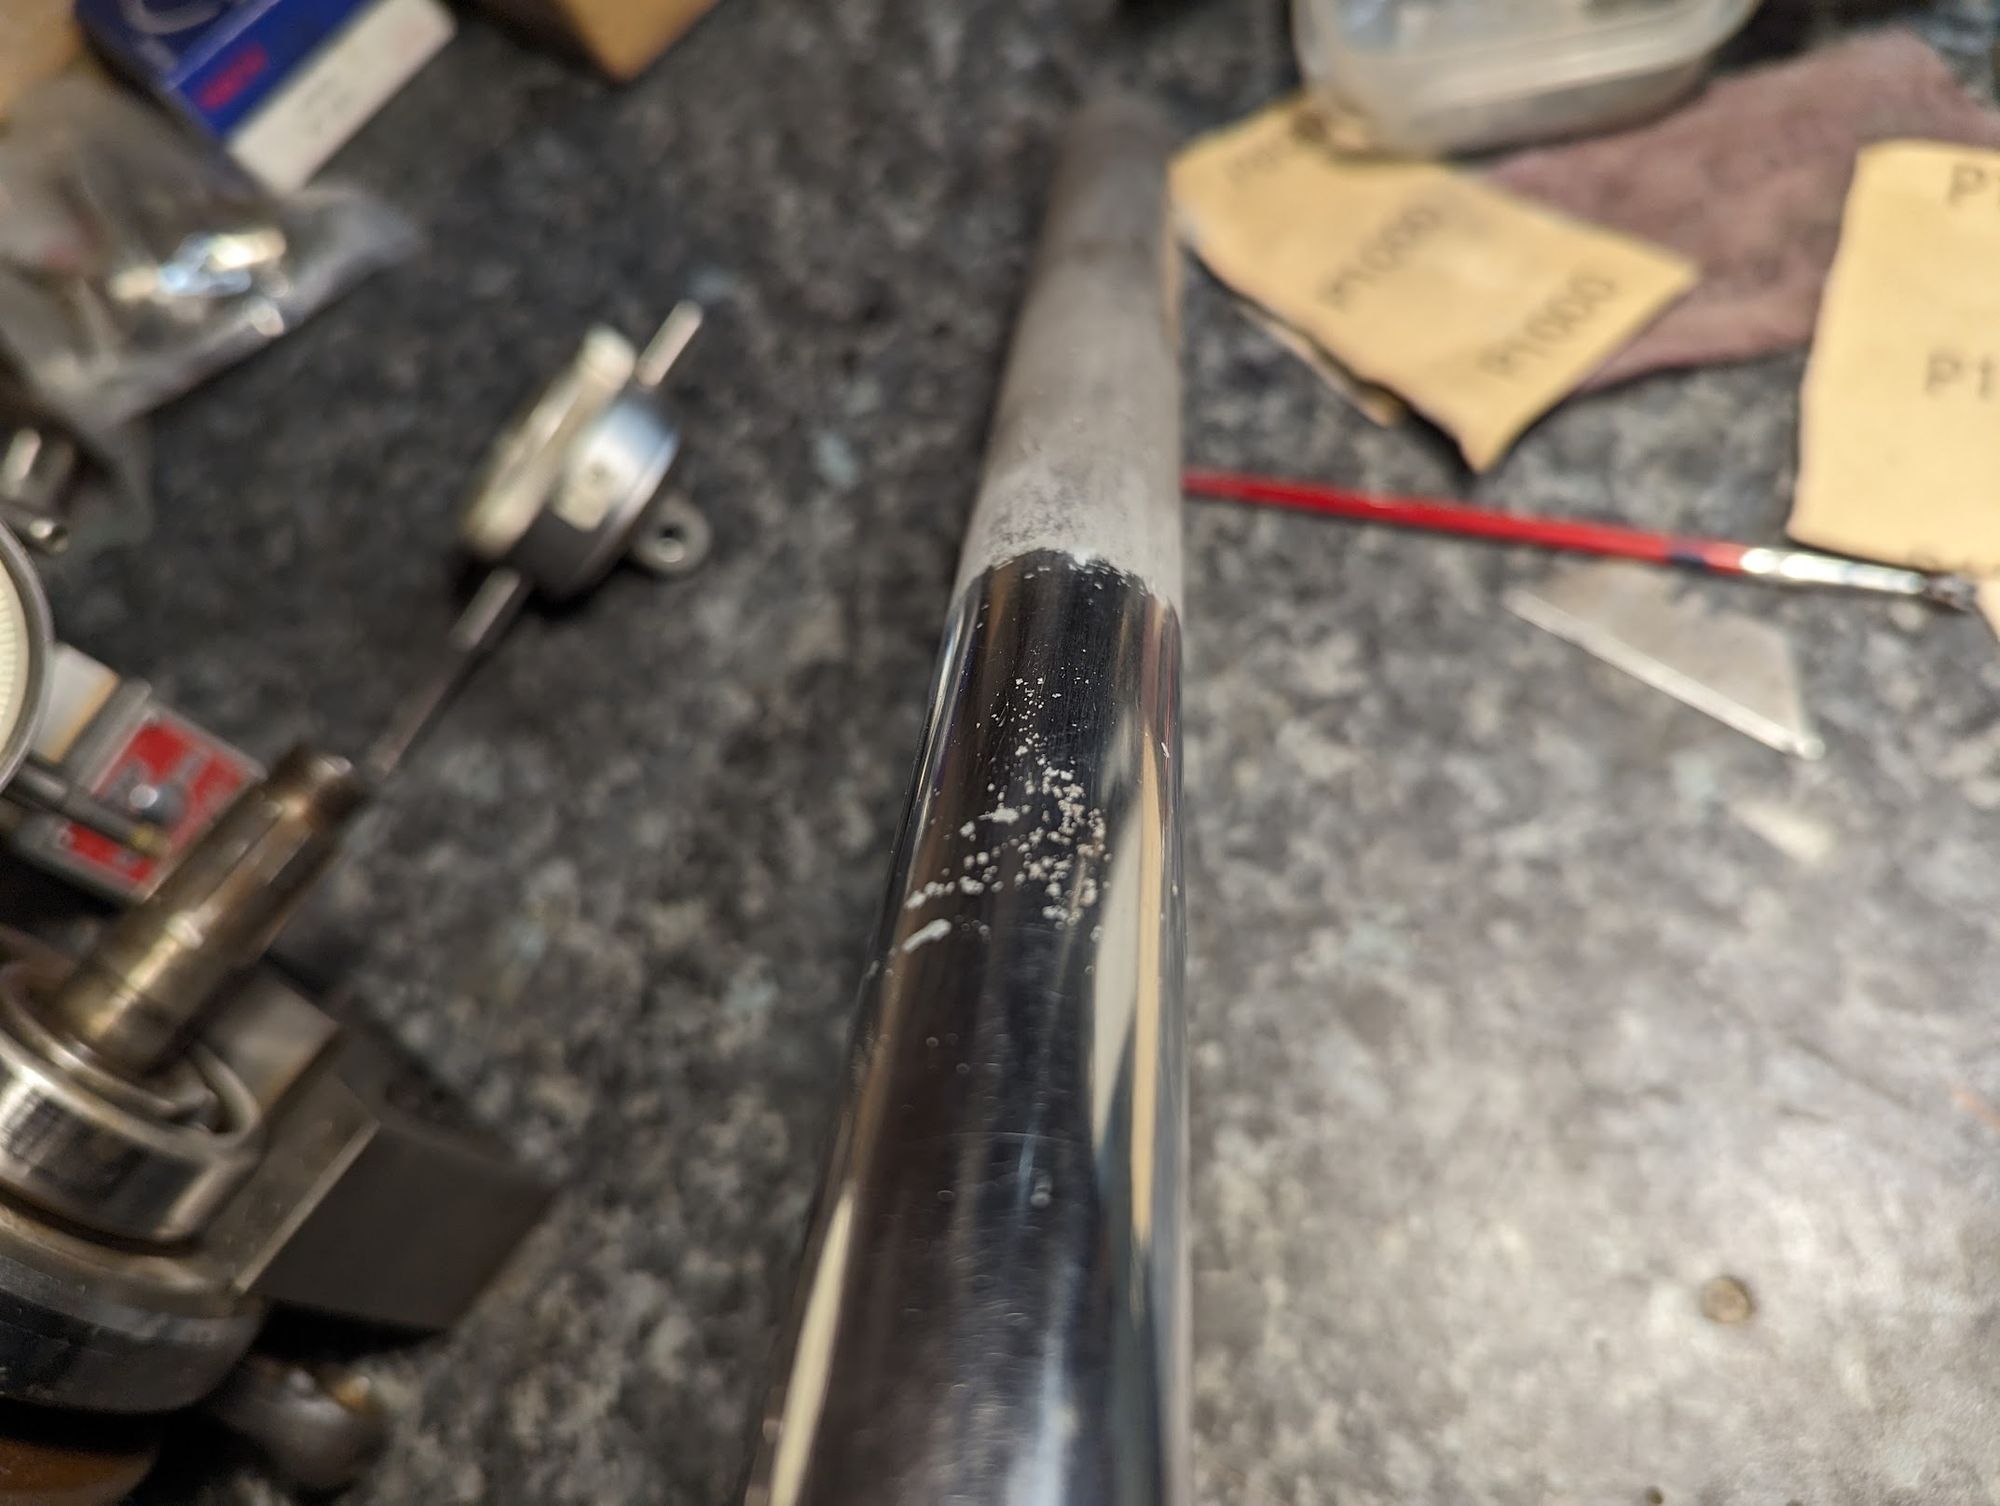
I smoothed out the rough edges and then filled the pits with J B Weld which I hope will at least help delay any leaks.
One of the fork bodies leaked from the base, so I had to remove the cone shaped plug installed in the bottom of the fork slider (see the section on damping for an explanation on what this part is for). This is a bit of a pain, since they are not really designed to be removed.
The plug is held in the bottom of the fork body by a screw accessed from the underside of the slider, and this was impossible to free up. In the end I had to drill the screw head off but, although this allowed me to extract the plug, I was subsequently unable to remove the remaining shank from the plug (it appeared to have been glued in place and eventually broke off flush with the base of the plug). Luckily I was able retrieve the same part from one of the spare fork bodies and this time the screw came out with minimal fuss after a sharp whack with the impact driver: you can jam a long screwdriver inside the body to stop the plug part spinning as you undo the screw from underneath (it might be worth apply some gentle heat before trying to remove the screw in case this helps break the glue bond).
When refitting the plug I applied some liquid gasket to the base and used a copper washer and some locktite on the screw. Not a job I'd recommend doing unless you really have to.
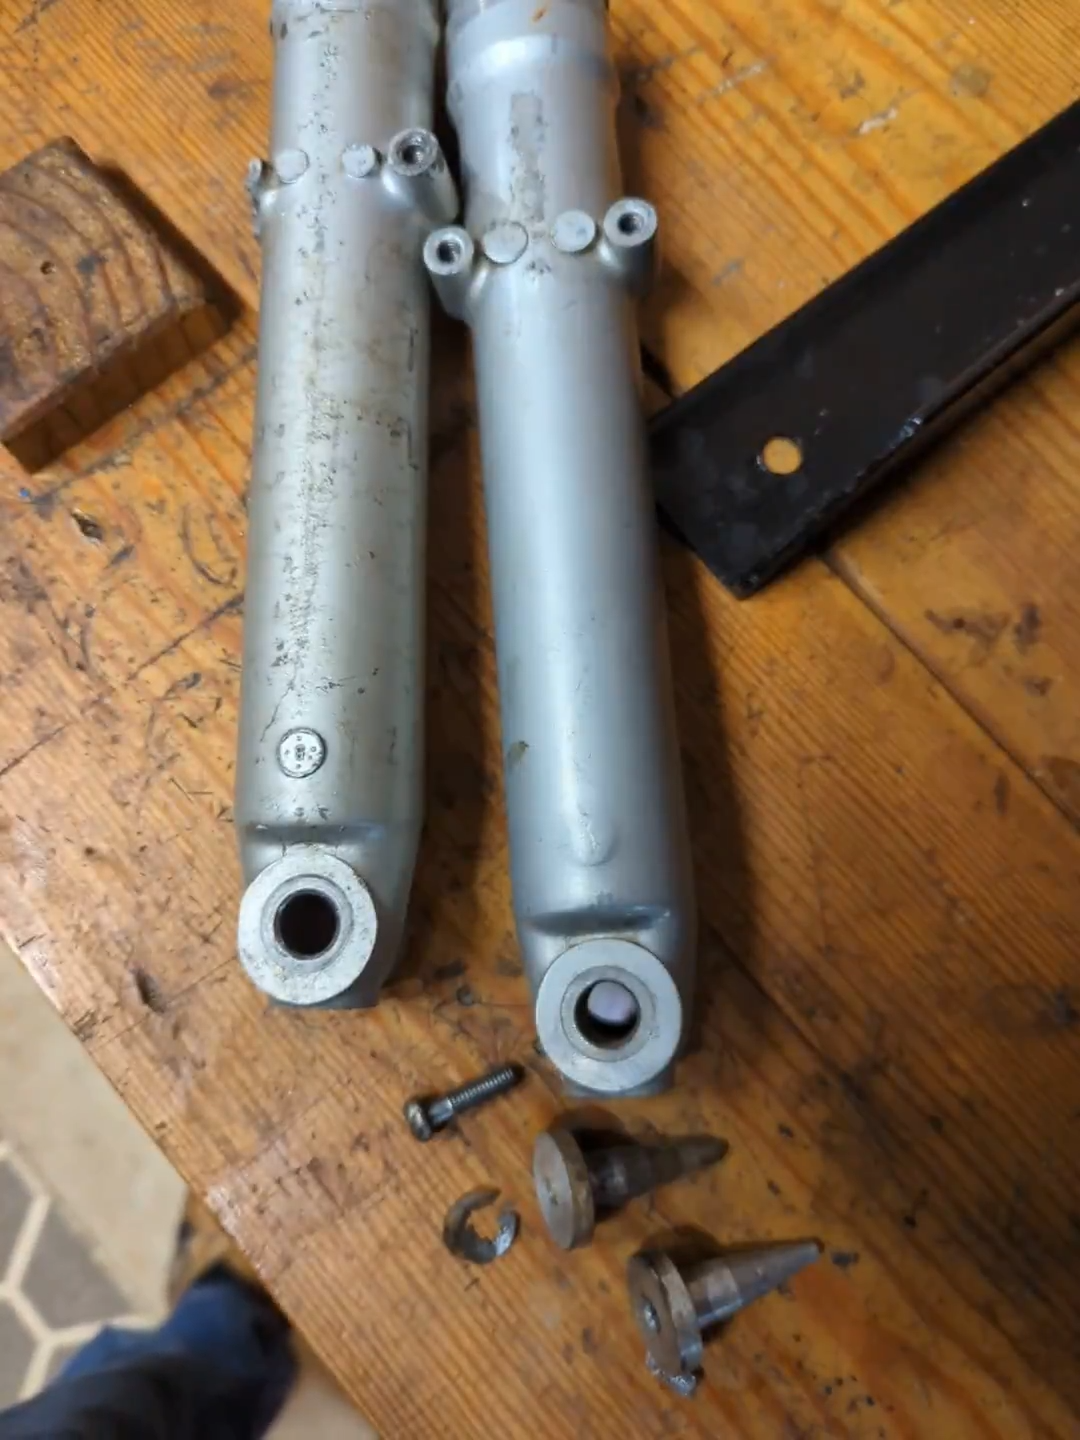

plugs removed (left) / refitting (right)
damping
I was intrigued about what the cone shaped plug was for and initially assumed that it was some form of guide for the stanchion. However, having referred to a couple of ancient Norton and Matchless manuals, I now learn that this is nonsense and it is in fact part of the damping mechanism.
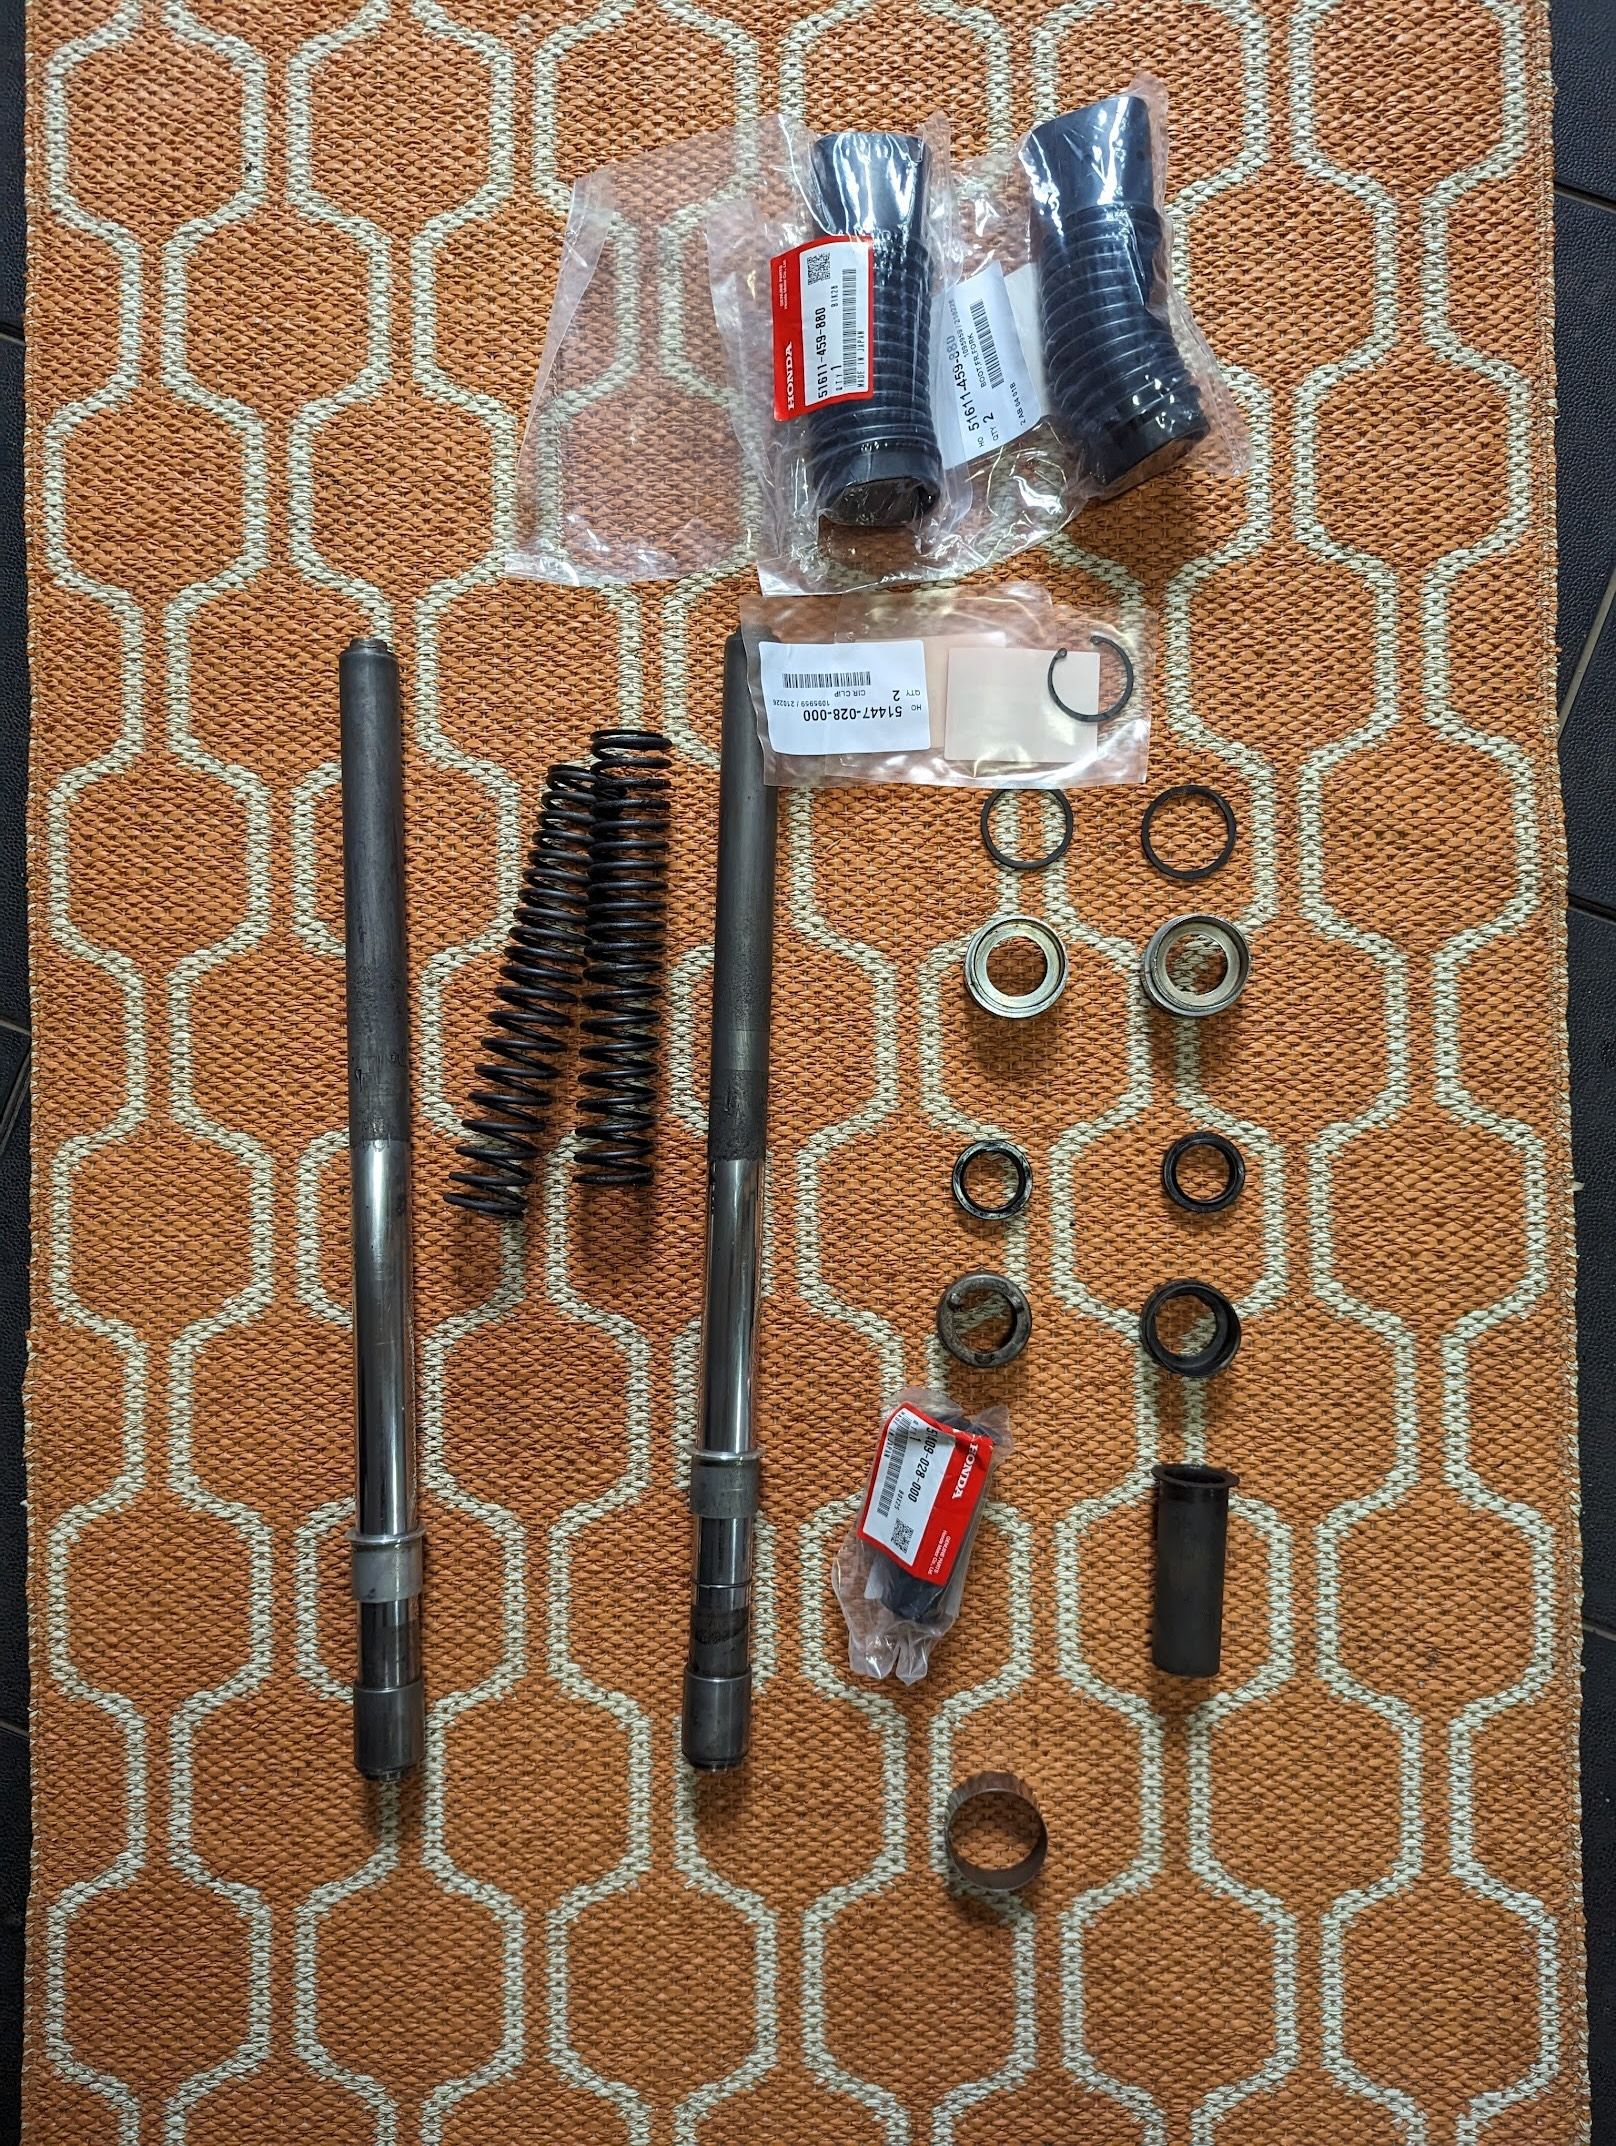
Damping is primarily controlled by the two bushings and the bleed holes shown below:
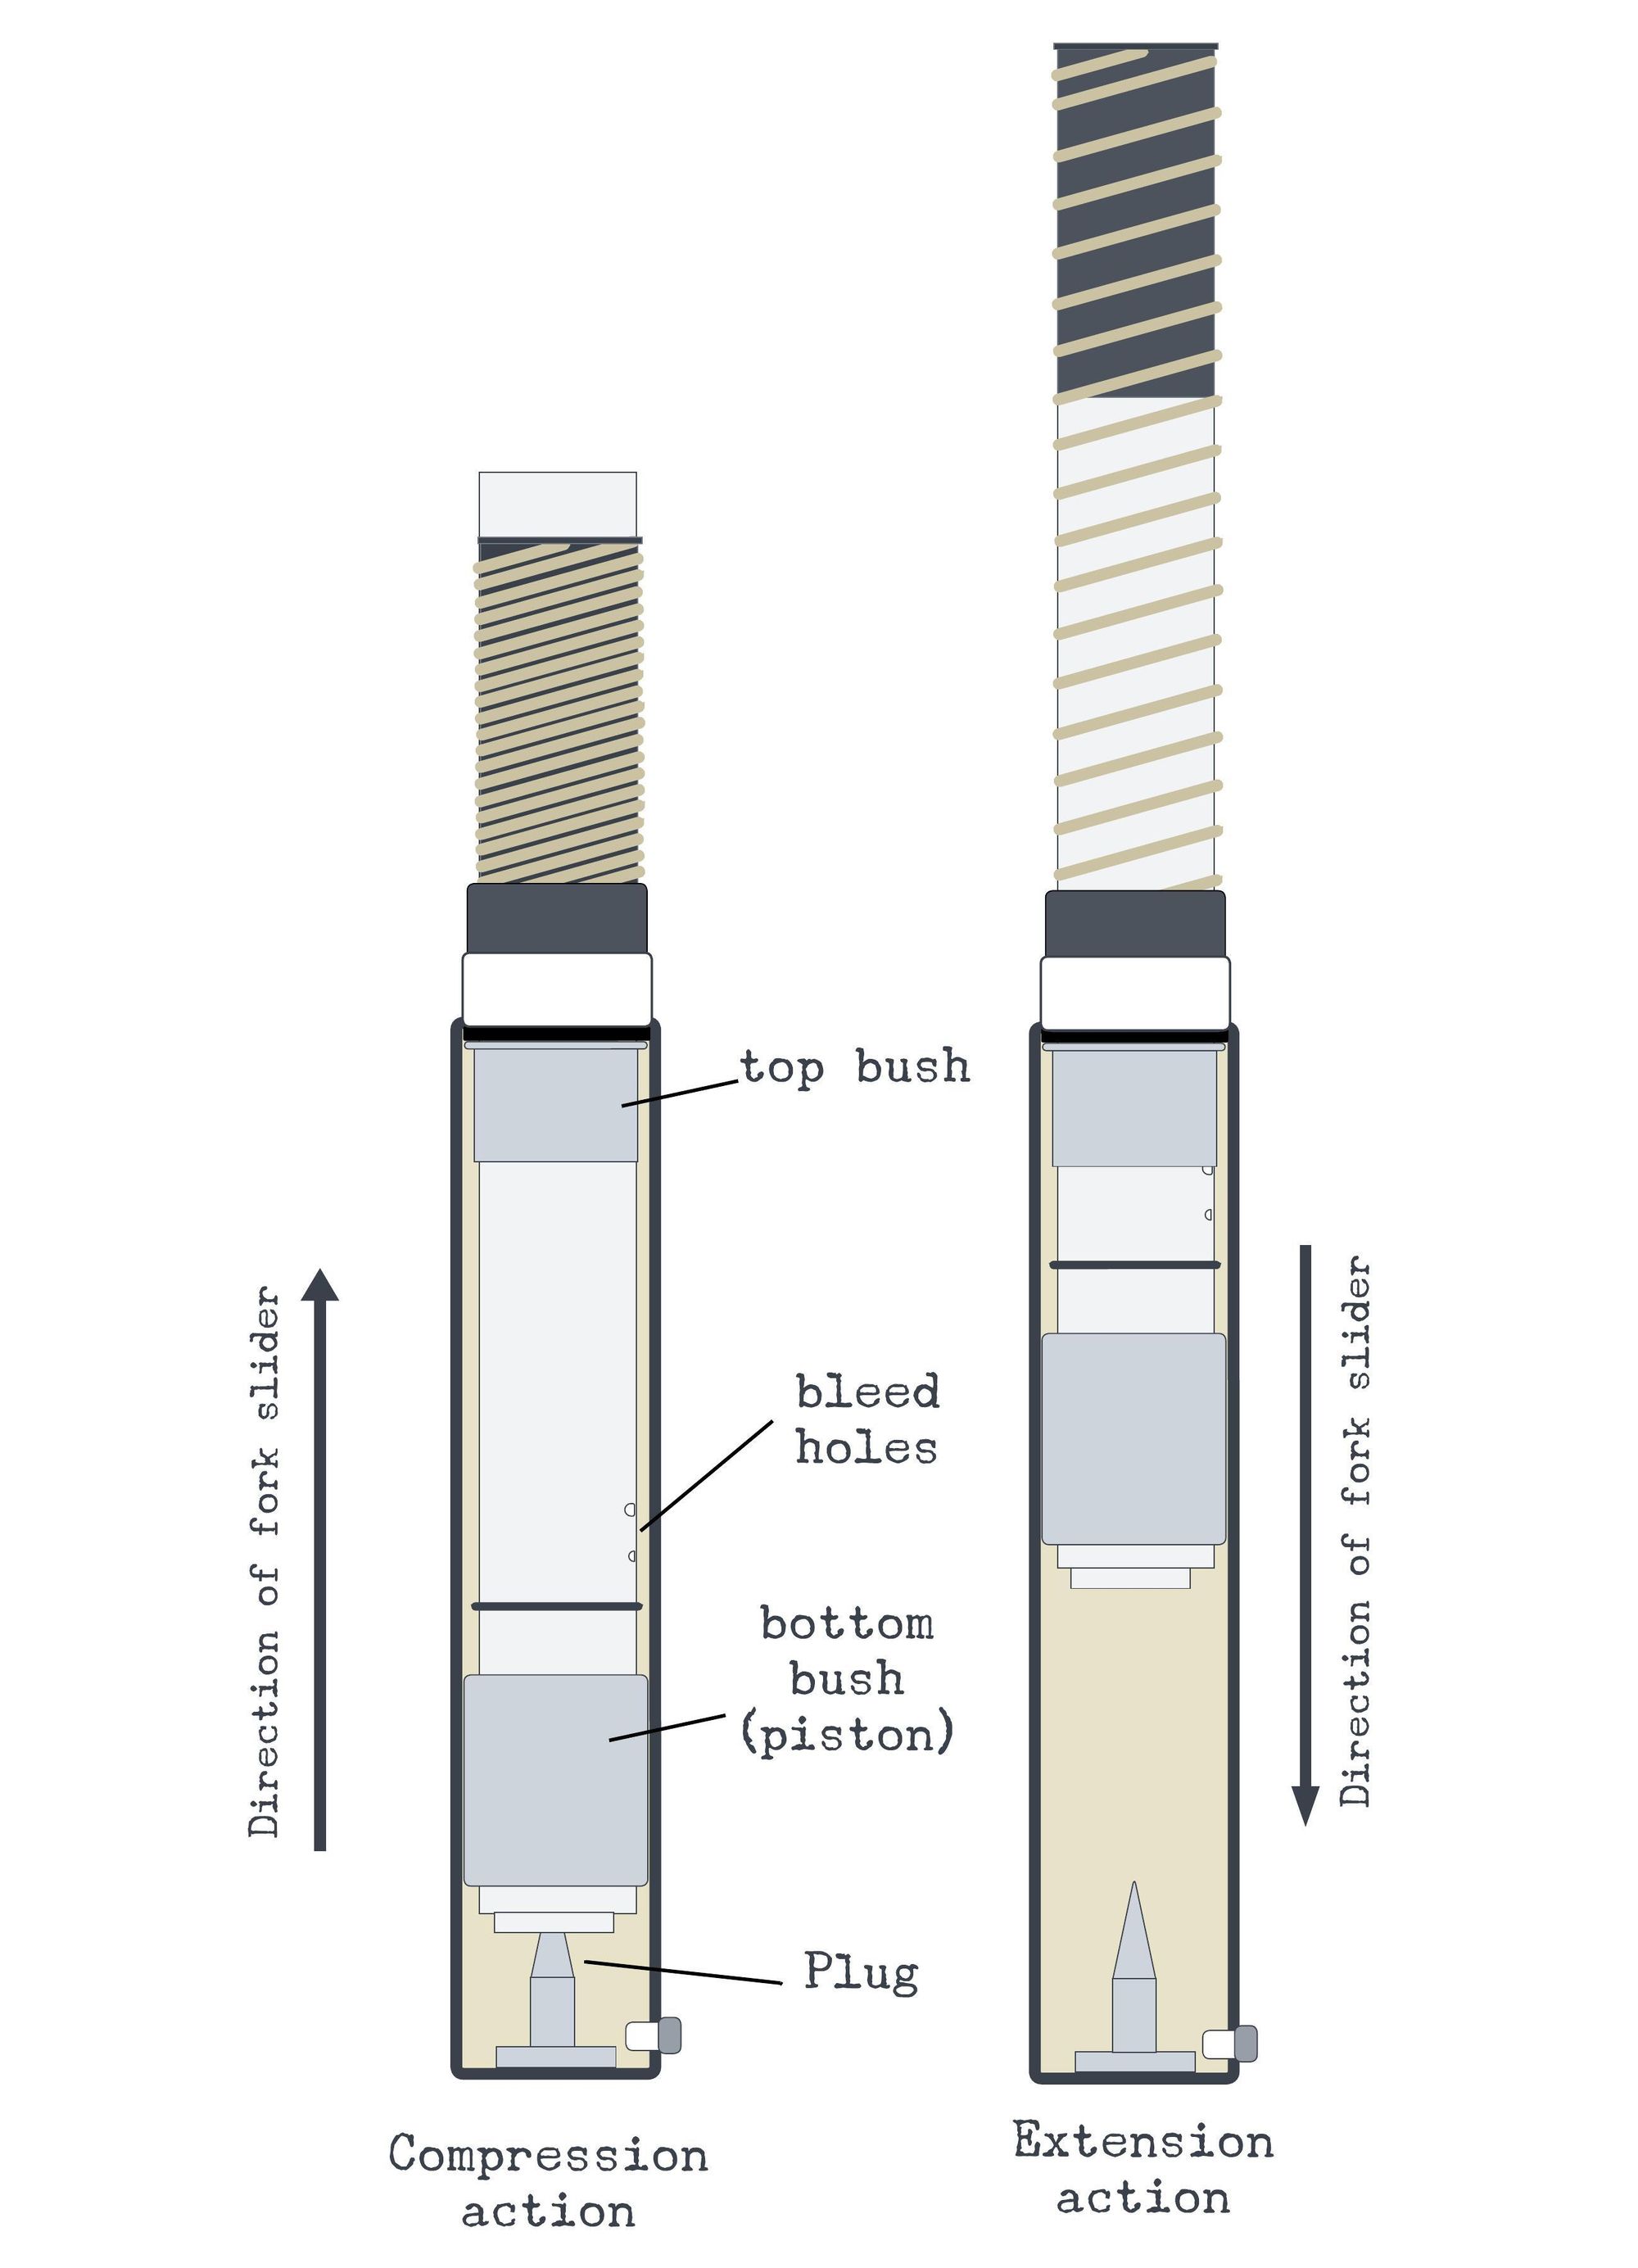
Circlips are used to fix the lower bush in position on the end of the stanchion and the top bush is fixed inside the fork body (slider) so that the lower bush behaves like a piston:
The fork body and stanchions are filled with oil so that, as the forks compress and the fork body rises up the stanchion, the space between the bushes increases and oil is drawn from the inside of the stanchion through the bleed holes. As the spring recoils and the forks extend the space between the two bushes reduces and the trapped oil is forced back into the stanchion. The resistance to the oil flowing back and forwards helps damp the oscillation of the springs.
The reason there are two bleed holes in the stanchion is because, as the forks approach full extension the top bush will cover the first (larger) hole, restricting the passage of oil and increasing the damping effect. As the forks extend further the smaller hole is covered leaving a pocket of oil that helps create a cushion for the mechanism at full extension and helping to make the action of the damping more progressive.
The tapered plug at the bottom of the fork slider has a similar purpose: as the forks approach full compression, the stanchion passes over the plug and the oil passage is progressively restricted by the tapered cone, slowing down the movement of the fork. Once the hole in the base of the stanchion is sealed off completely, the remaining pocket of oil acts as a sort of hydraulic bumper to reduce the impact as the forks bottom out.
service limits
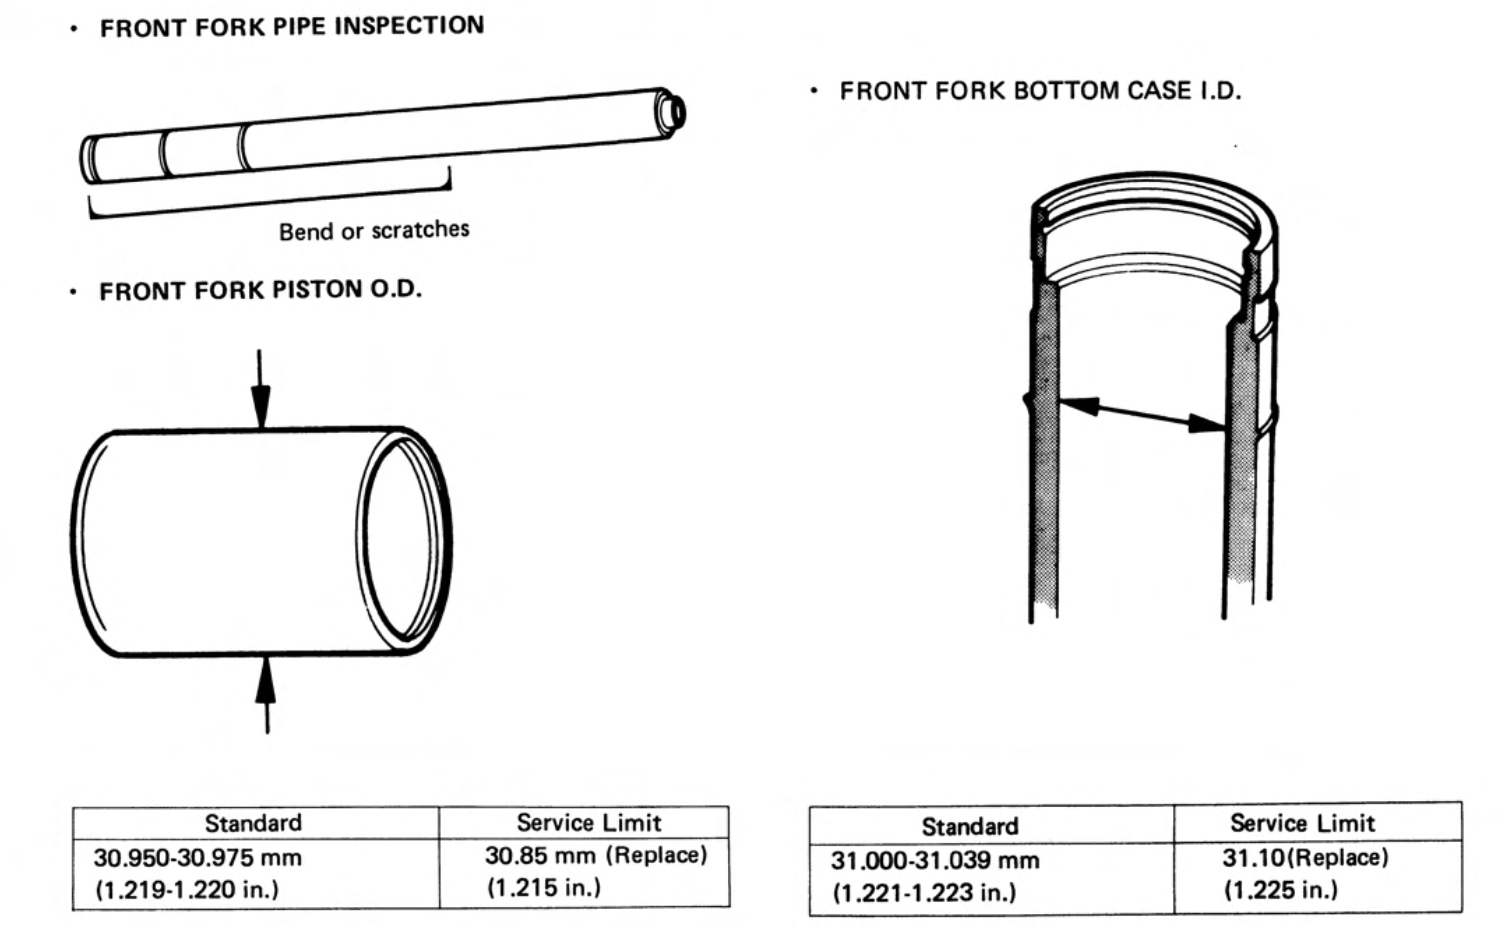
Because the forks are effectively acting like a syringe, the bottom bush - which Honda refers to as a piston - has to be a snug fit against the inner walls of the fork slider. These are the measurements:
There is a service limit for free spring length (203mm when new, replace at 185mm) so I kept the longest pair from my two sets of forks, both of which were well within specification.
reassembly
While you have them apart you should give the sliders a good sluice out so that any rust or dirt, which might scratch the surface of the stanchions, is removed. I used soapy water followed by a bit of petrol - a surprising amount of debris came out.
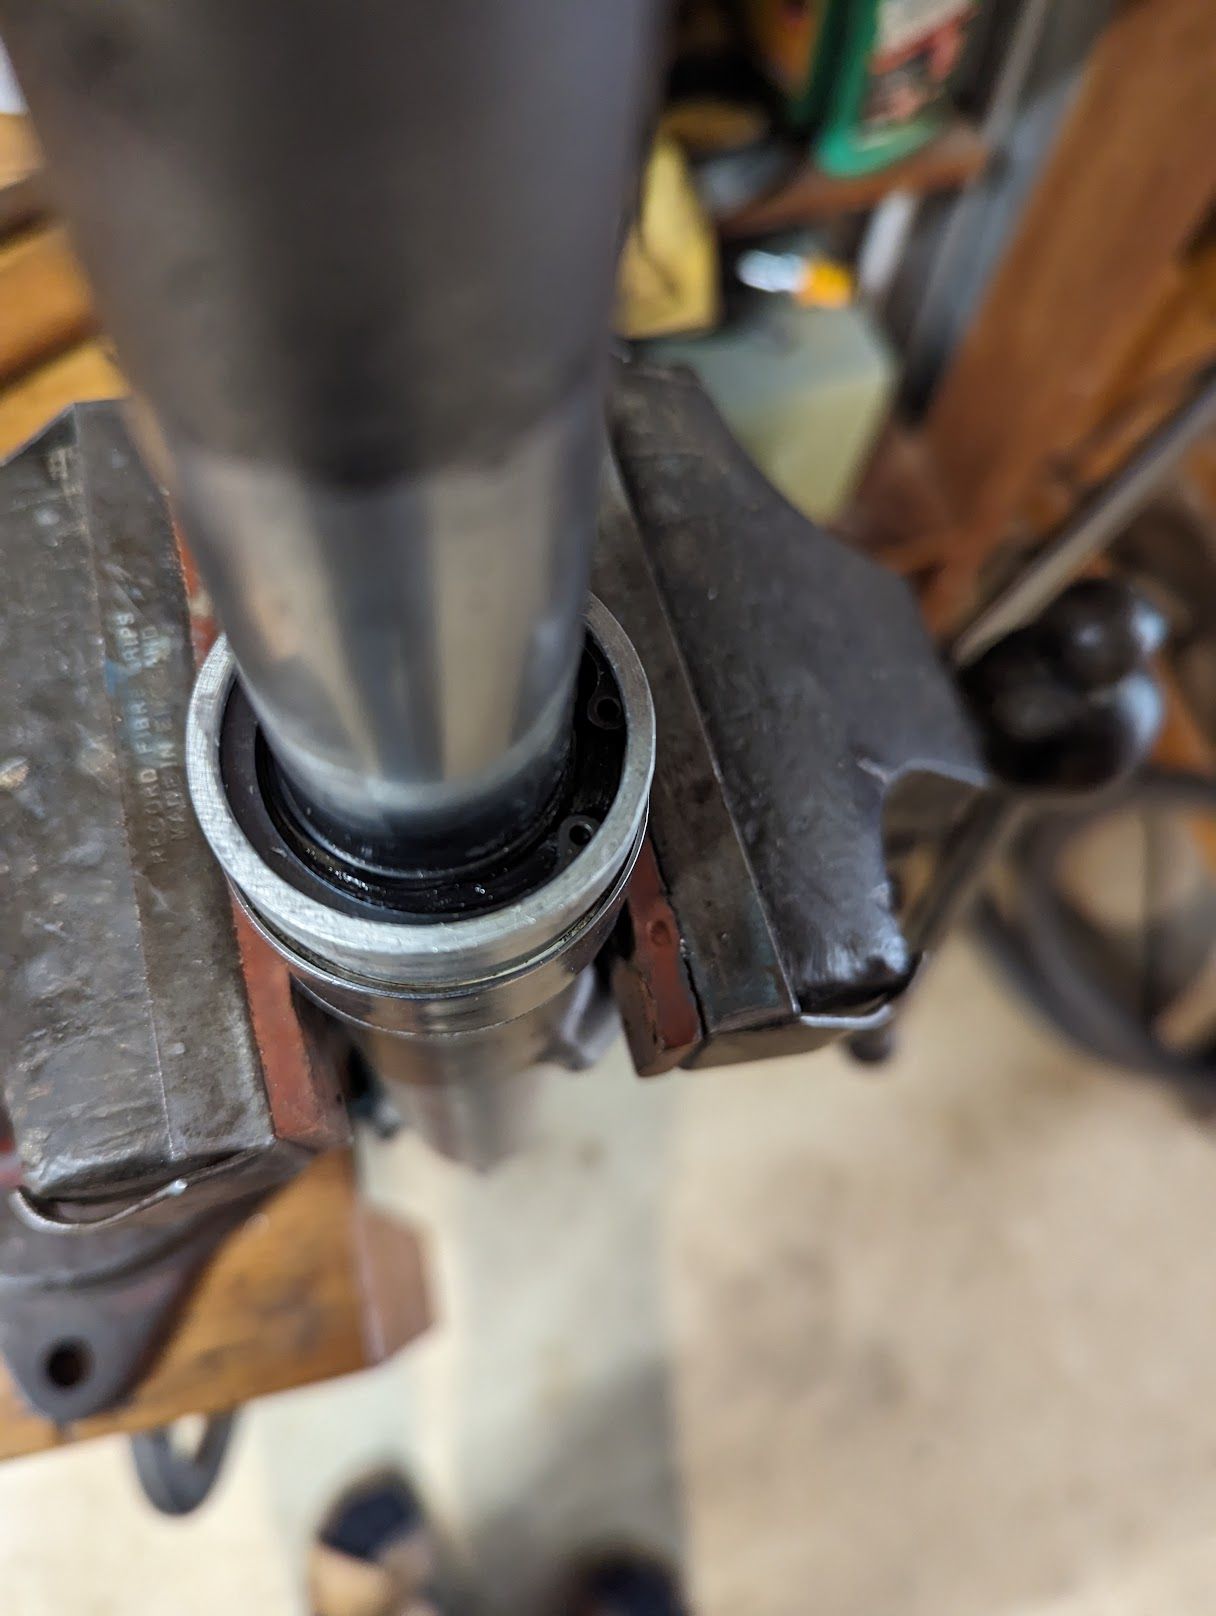
The oil seal needs to be driven completely home to make room for the circlip that goes in the top of the slider. I used the old seal to drive the new one in - best not to start banging directly on the new one as it may damage the seal.
Don't forget to insert the circlip with the chamfered edge facing away from the thrust of the stanchion (i.e with the sharp edge facing up - this will maximise contact with the top of the groove in the slider).
A long threaded bolt can be used to help refit the forks. When filling the forks with oil, the shop manual calls for 130-140 cc of ATF (Automatic Transmission Fluid) for dry forks following a rebuild (120-130cc after draining). Some of the user manuals specify SAE 10W-30 grade rather than ATF (and some people prefer to use a heavier fork oil to stiffen up the suspension).
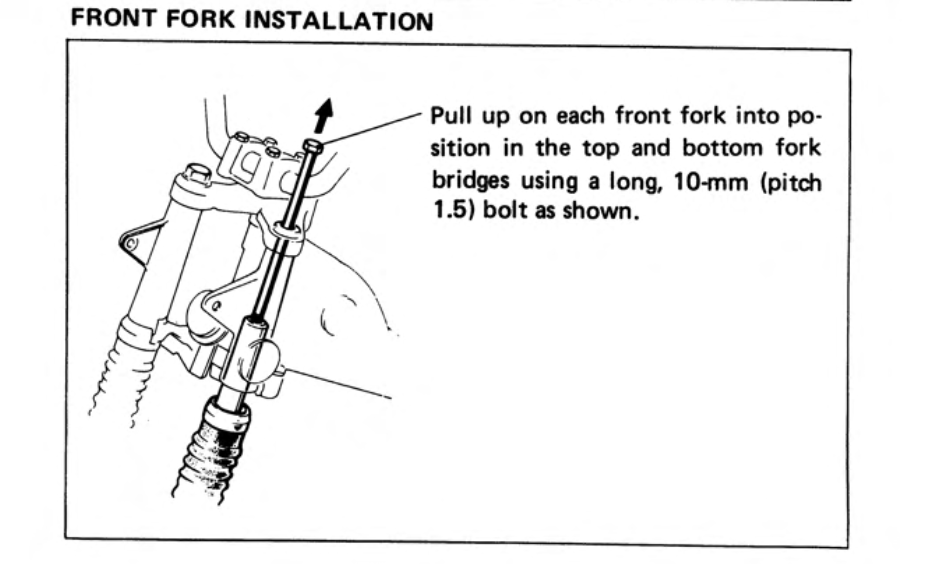
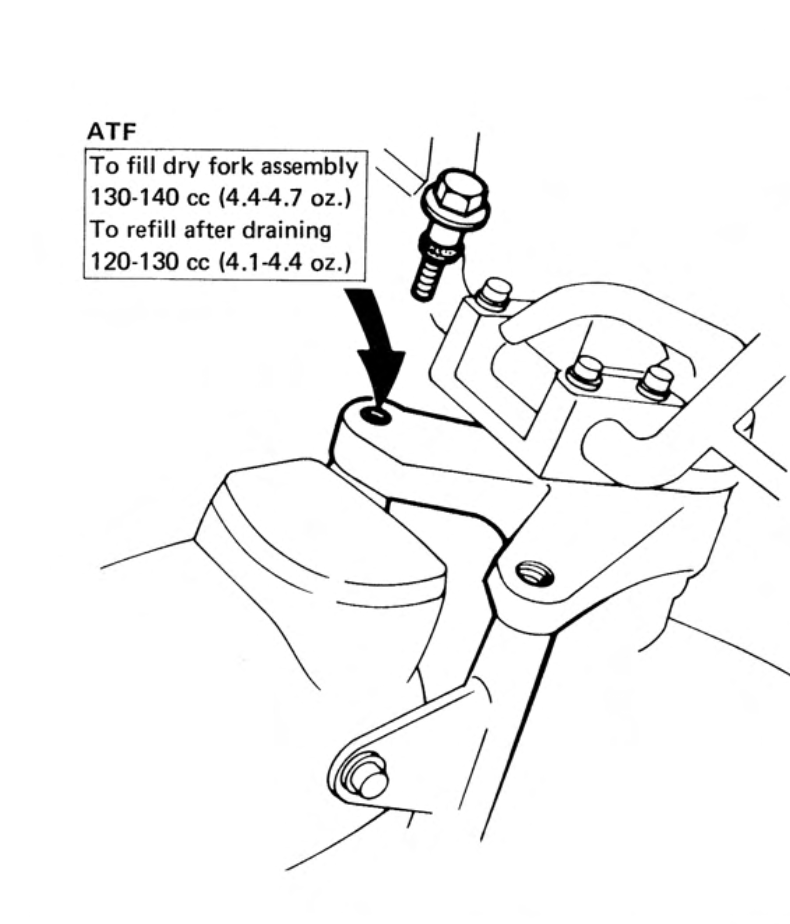
the rear fork bolt has a 10mm thread and can be used for the job shown on the left / filling the forks with oil - note a smaller volume is required if you are replacing the oil after draining since some residual oil will remain in the forks (right)
Finally fit some genuine Honda boots, circlips and seals, reassemble and done.