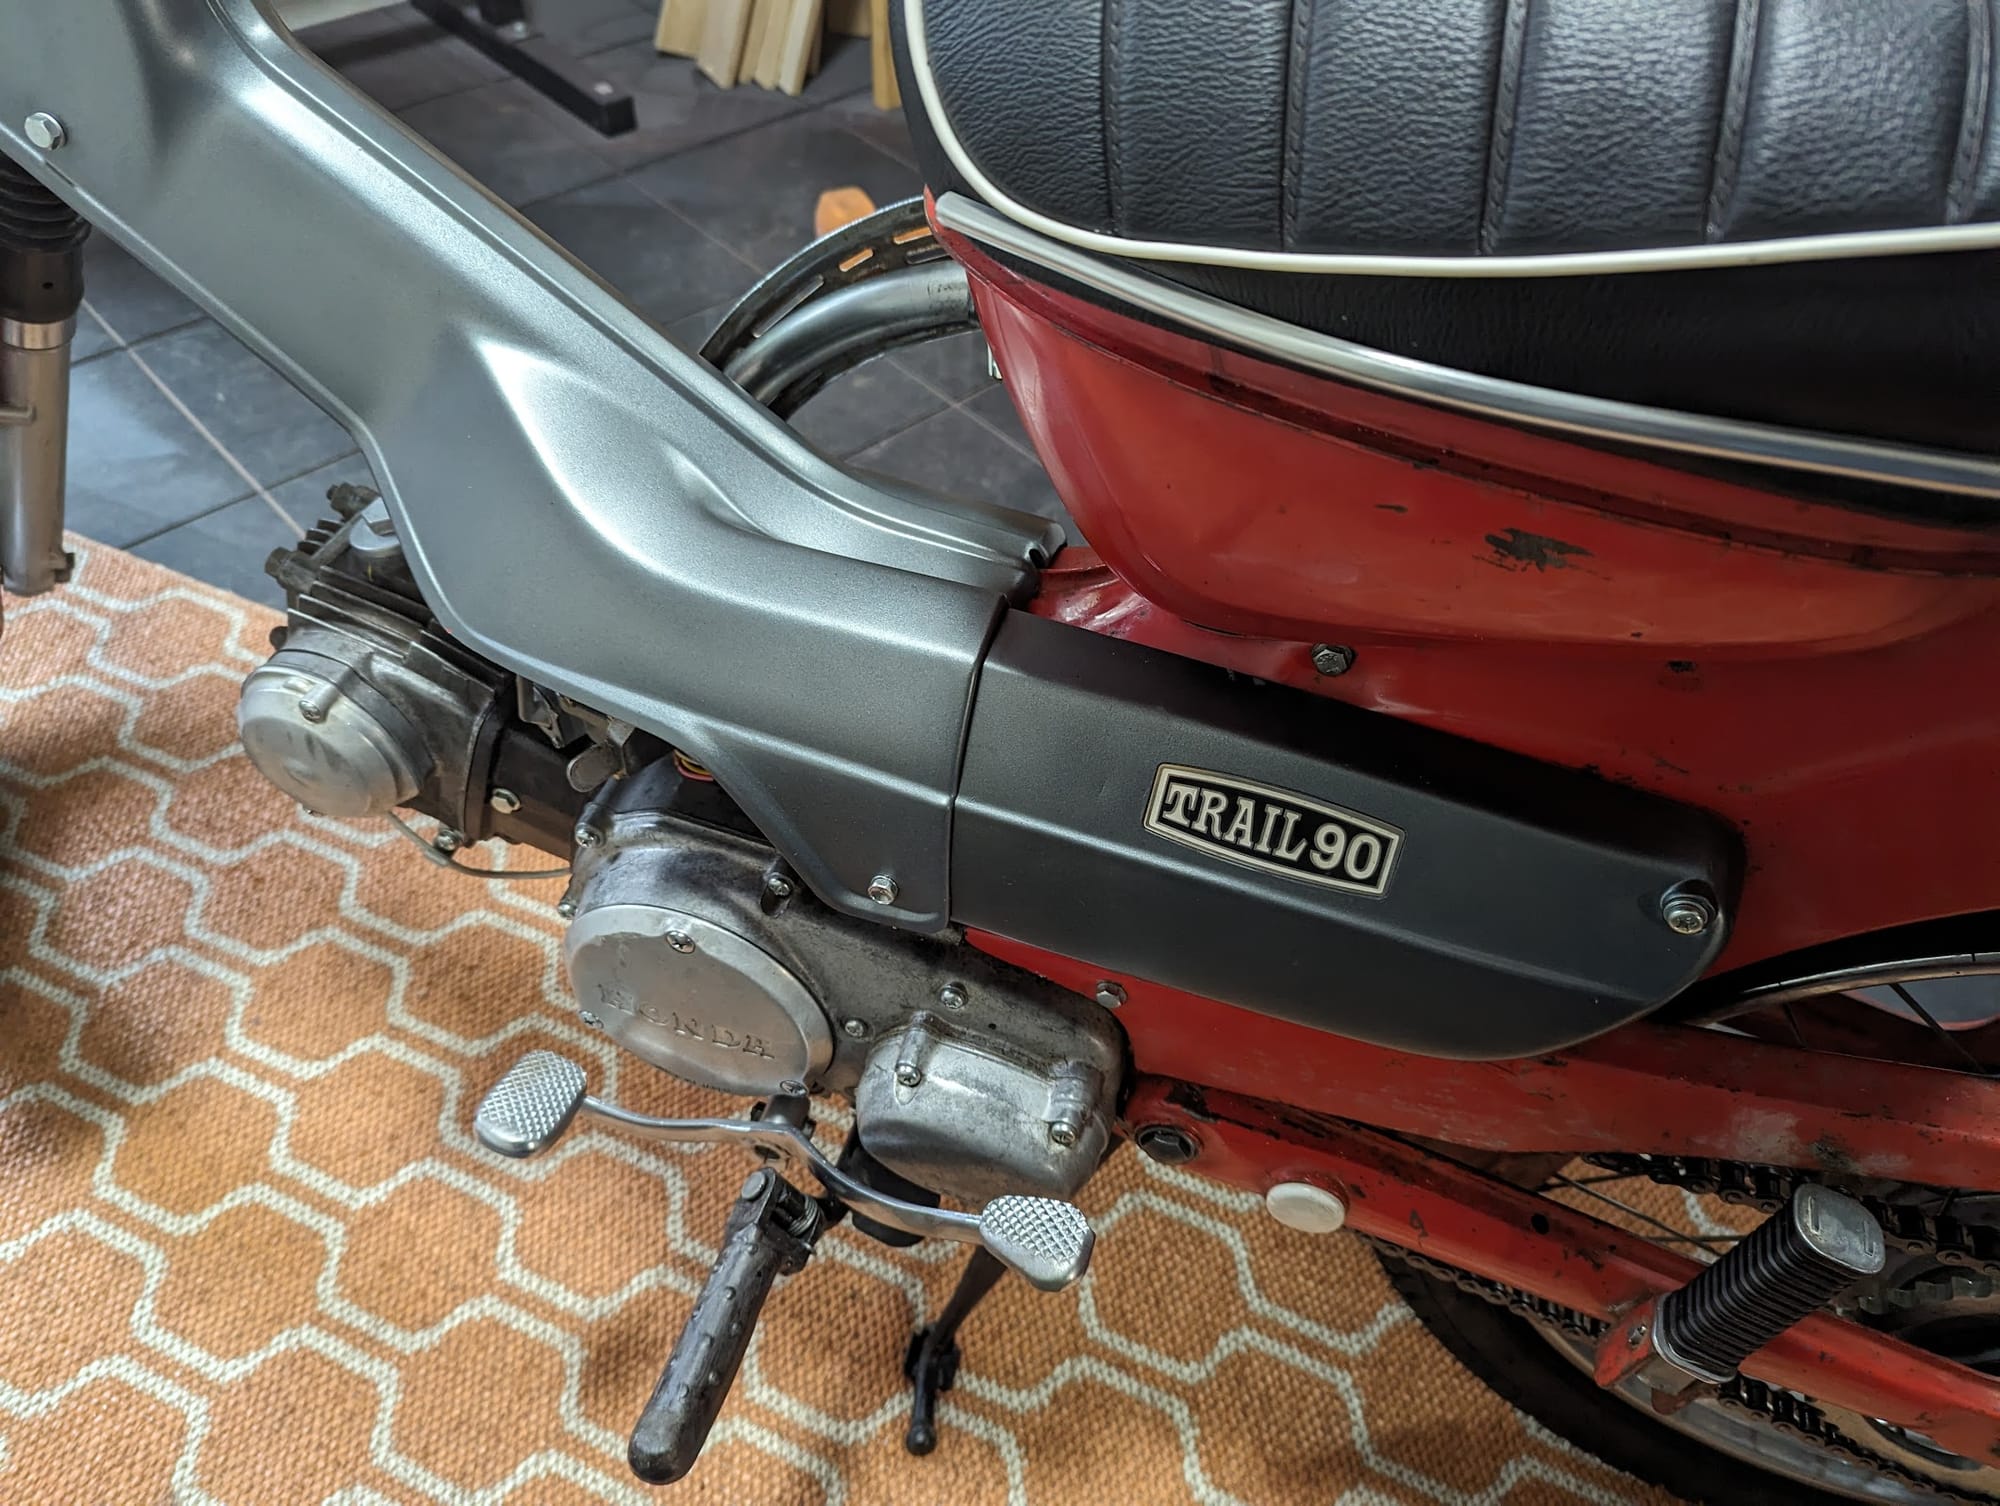
carburettor models
The various models fitted to the CT90 are listed below. Keihin followed their usual bewildering naming convention.
T20A, T90, 572A (1966-1968)
The K0 Models (pre-1969) were based on the Super Cub of the same era, where the air filter was mounted on the down tube of the frame. These carburettors are all therefore designed with their "mouth" towards the front of the bike. It seems the T20A, T90B, T90C, T90D and 572A all made an appearance. Some of the carbs were marked T9A - possibly an alternative model number for the T90A?
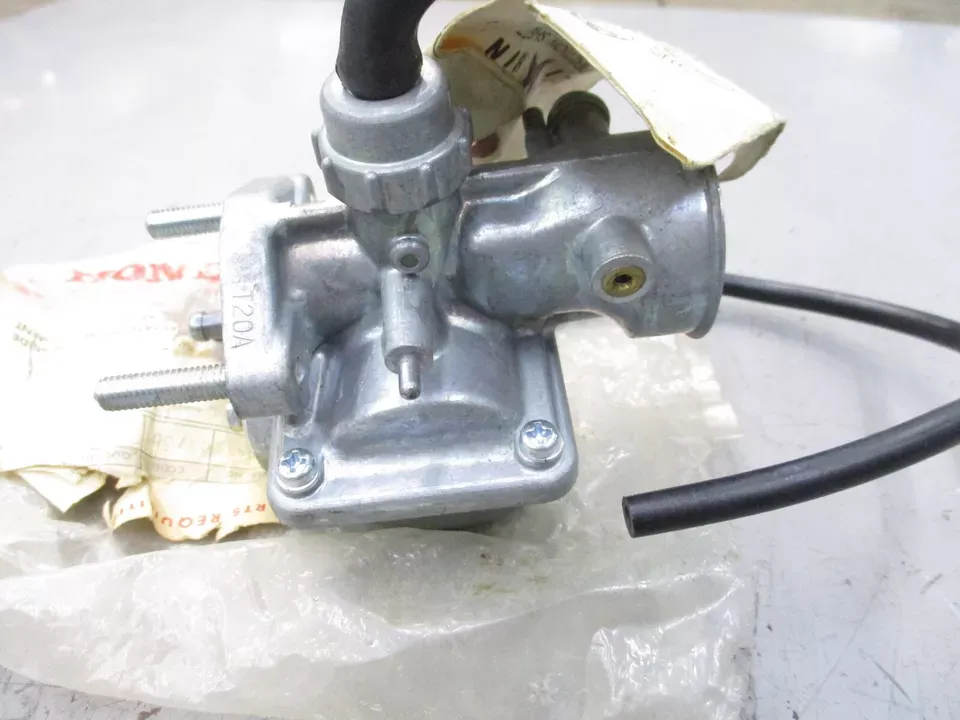
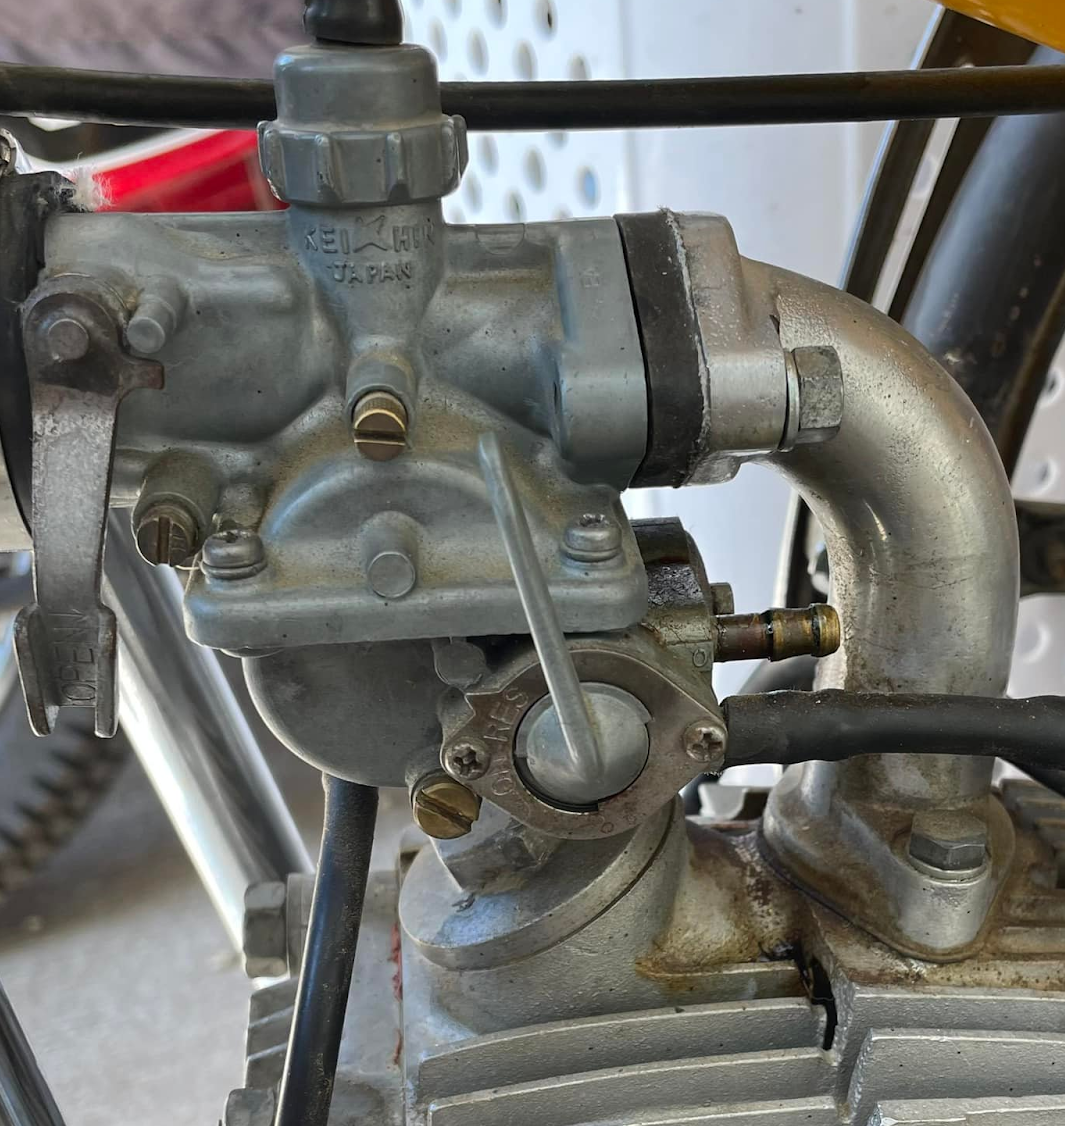
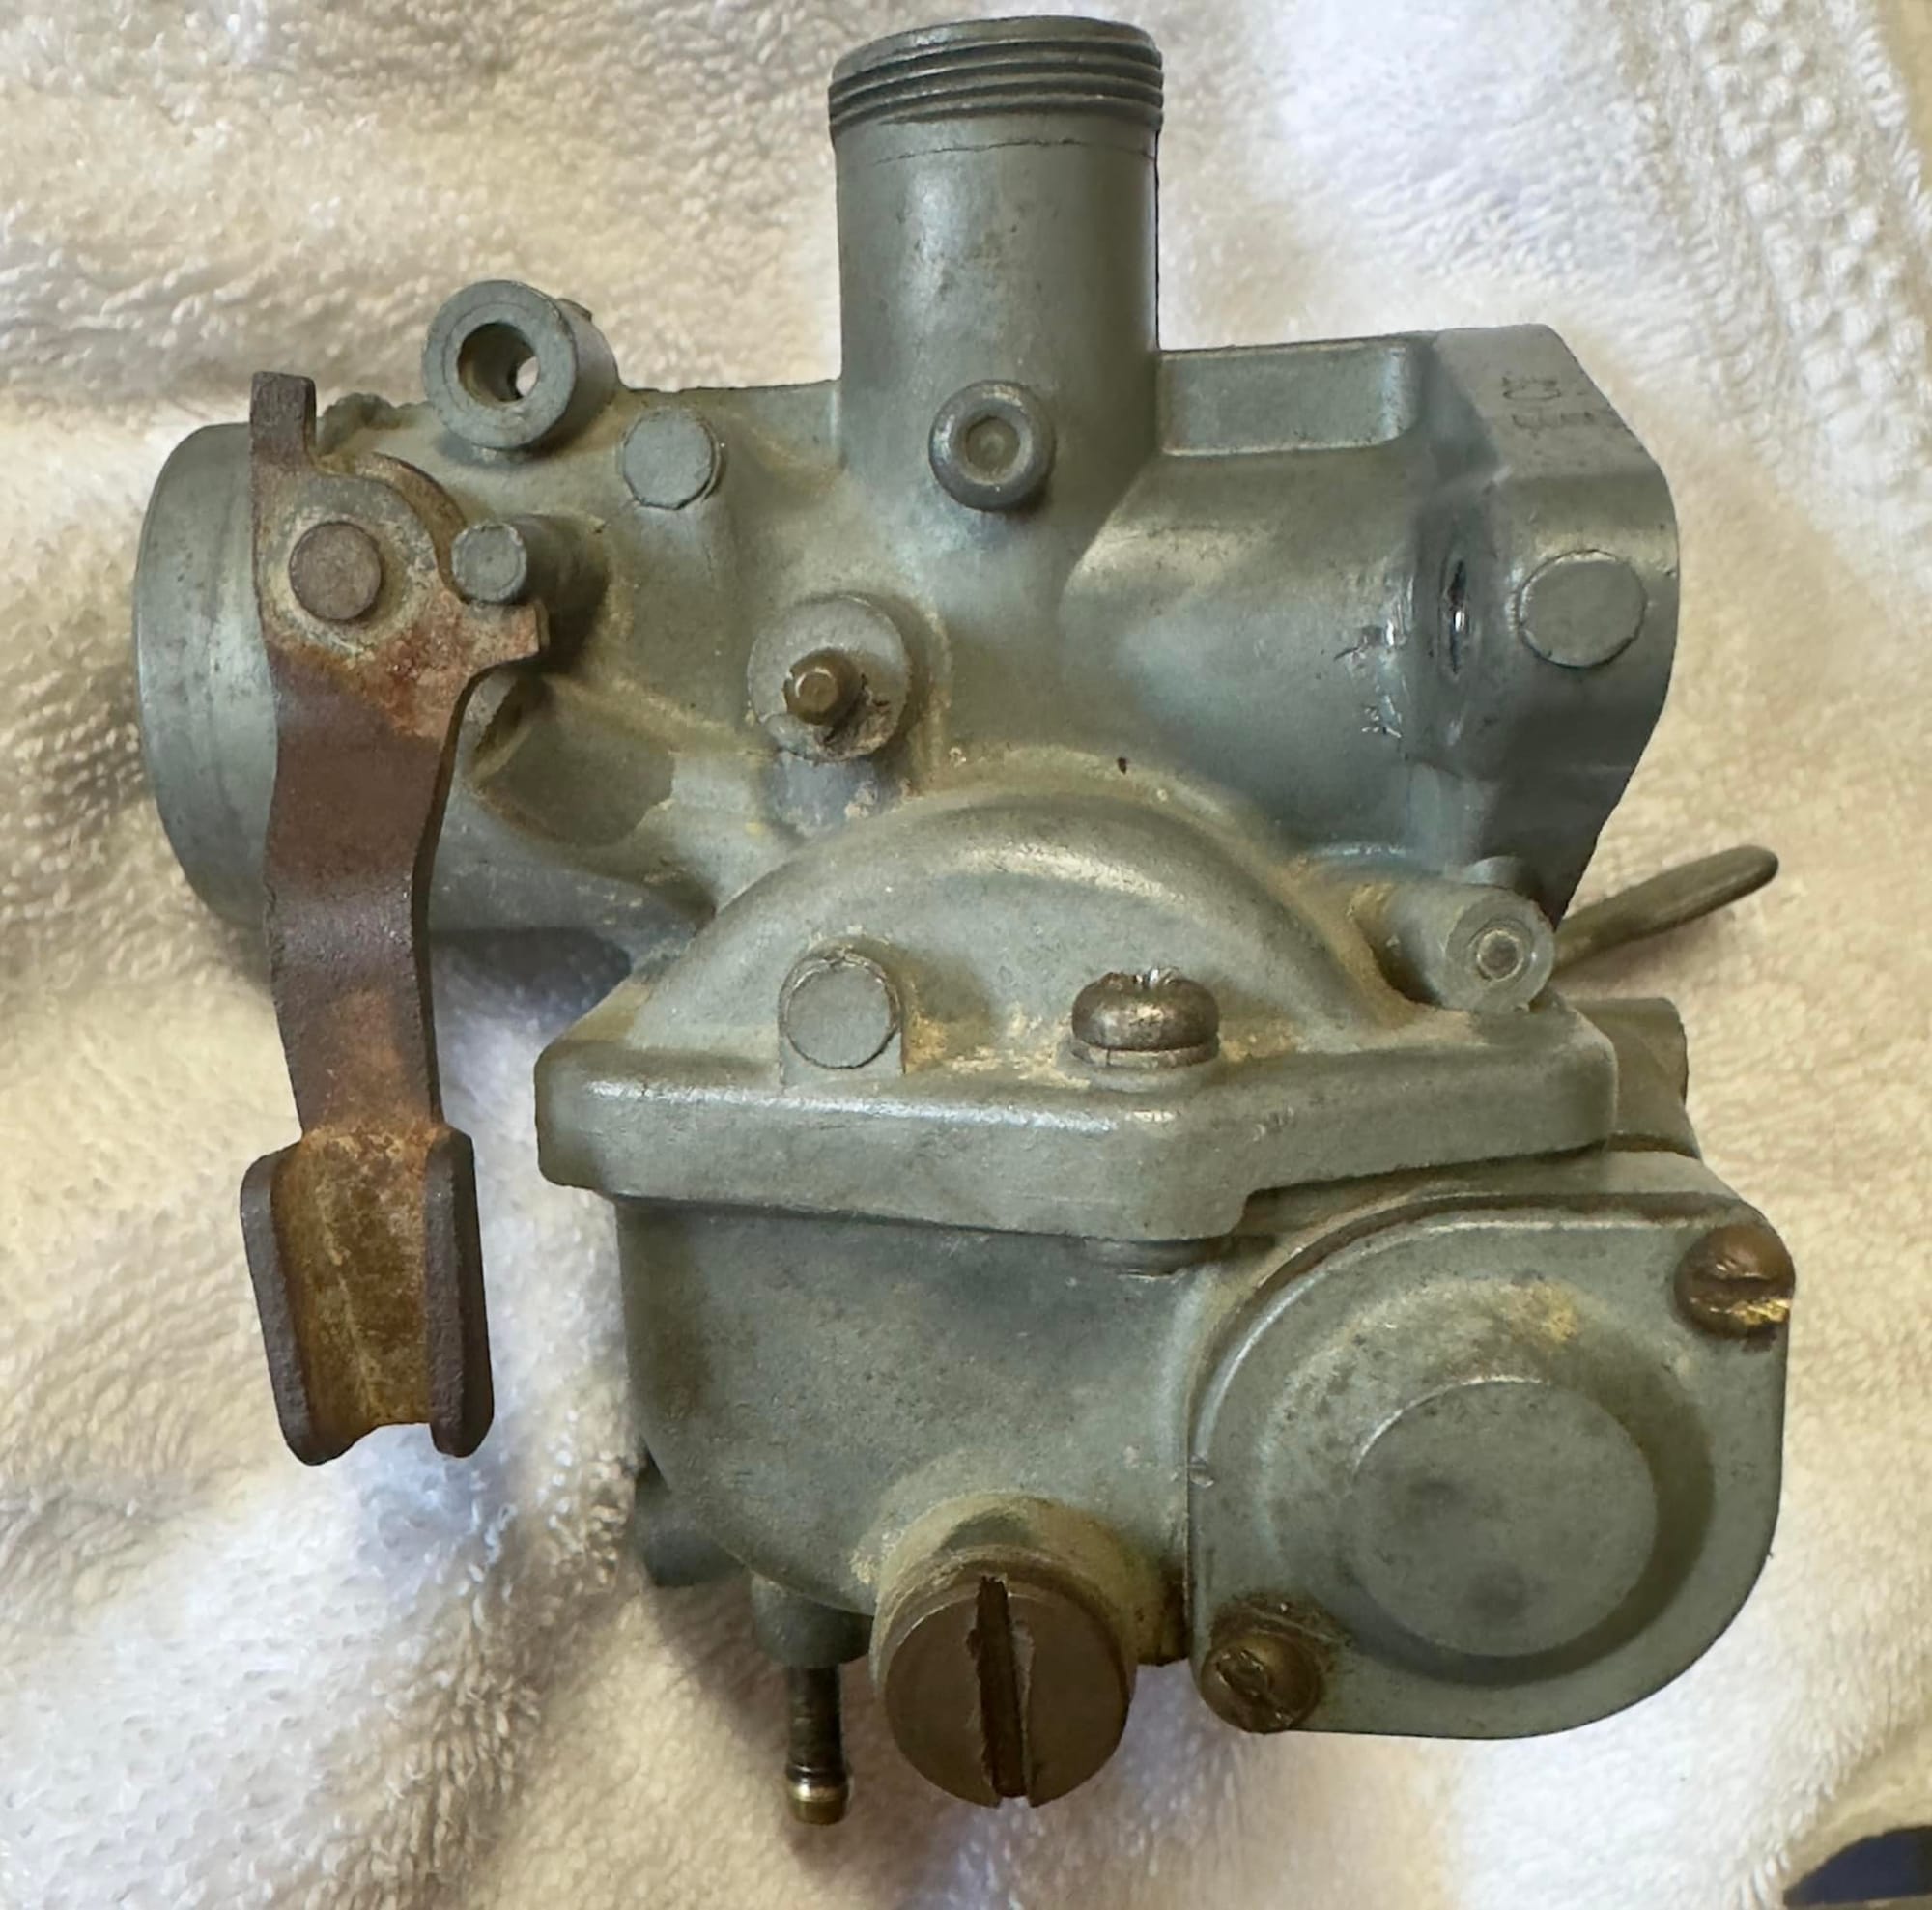
left & centre - T20A (1967?) - note the air intake is towards the front of the bike / right - 572A (1968)
T90KA (early 1969)
The early and late K1 (1969) models came with different carburettors. The early model carburettor - the T90KA - was fitted to K1 engines with serial numbers below 23941. This is the first model to be fitted with an altitude compensation knob (see below for an explanation). The early model is easily identified by the 4 screws used to hold the float bowl (the later carbs used 2 screws).
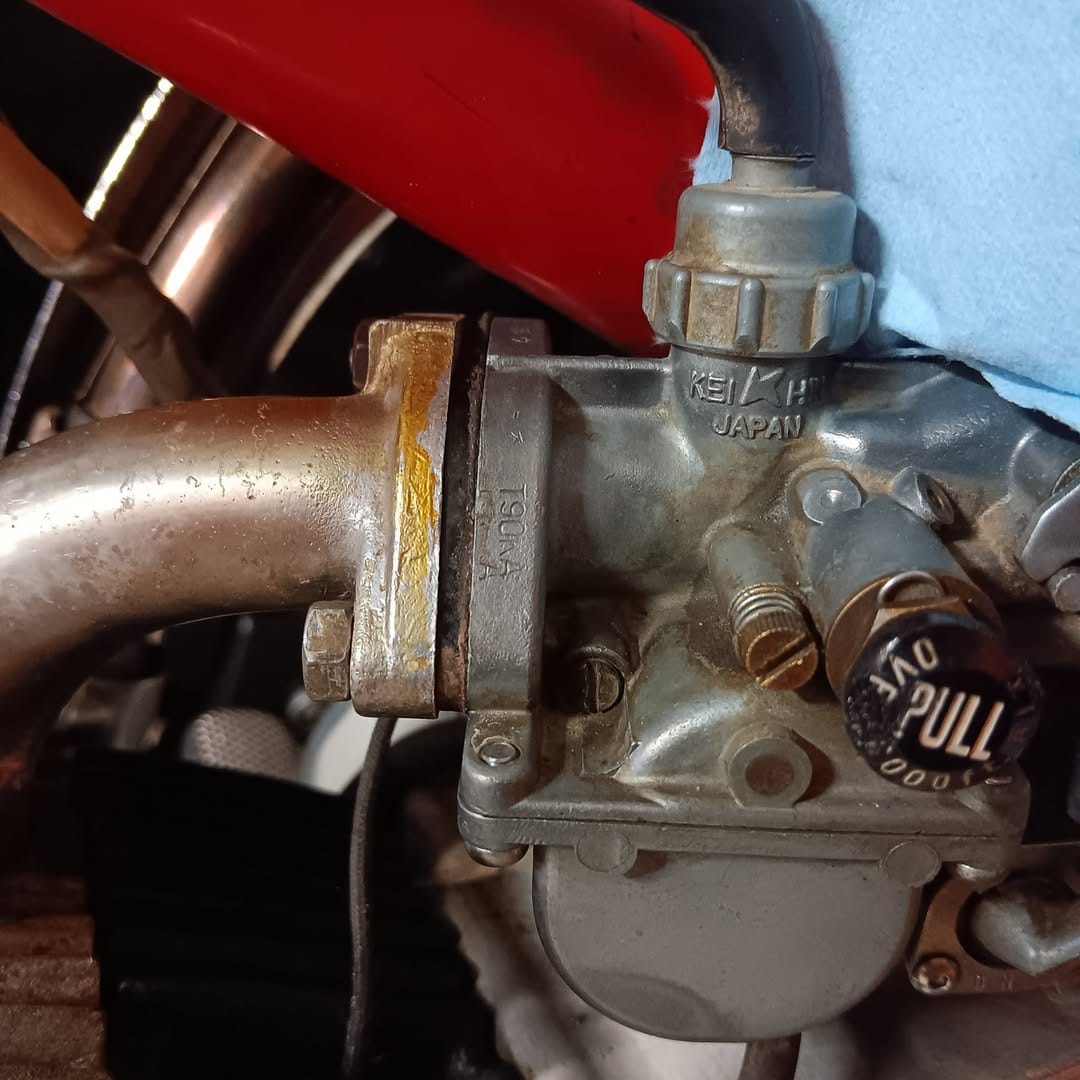
T90KA - note the 4 screws and the angled mounting point for the intake tube that connects the carb to the engine, plus the first model to support an altitude adjuster knob. The intake tube will not fit the later model carbs.
K9A/K29A (late 1969)
Later in 1969 Honda introduced a new model, the K9A, which was quickly replaced with the K29A - the only difference being that the K9A had a #78 main jet, rather than the #62 fitted in the K29A - in all other respects they are identical.
These carbs were installed on bikes from frame number CT90-233448/engine number CT90E-234852.
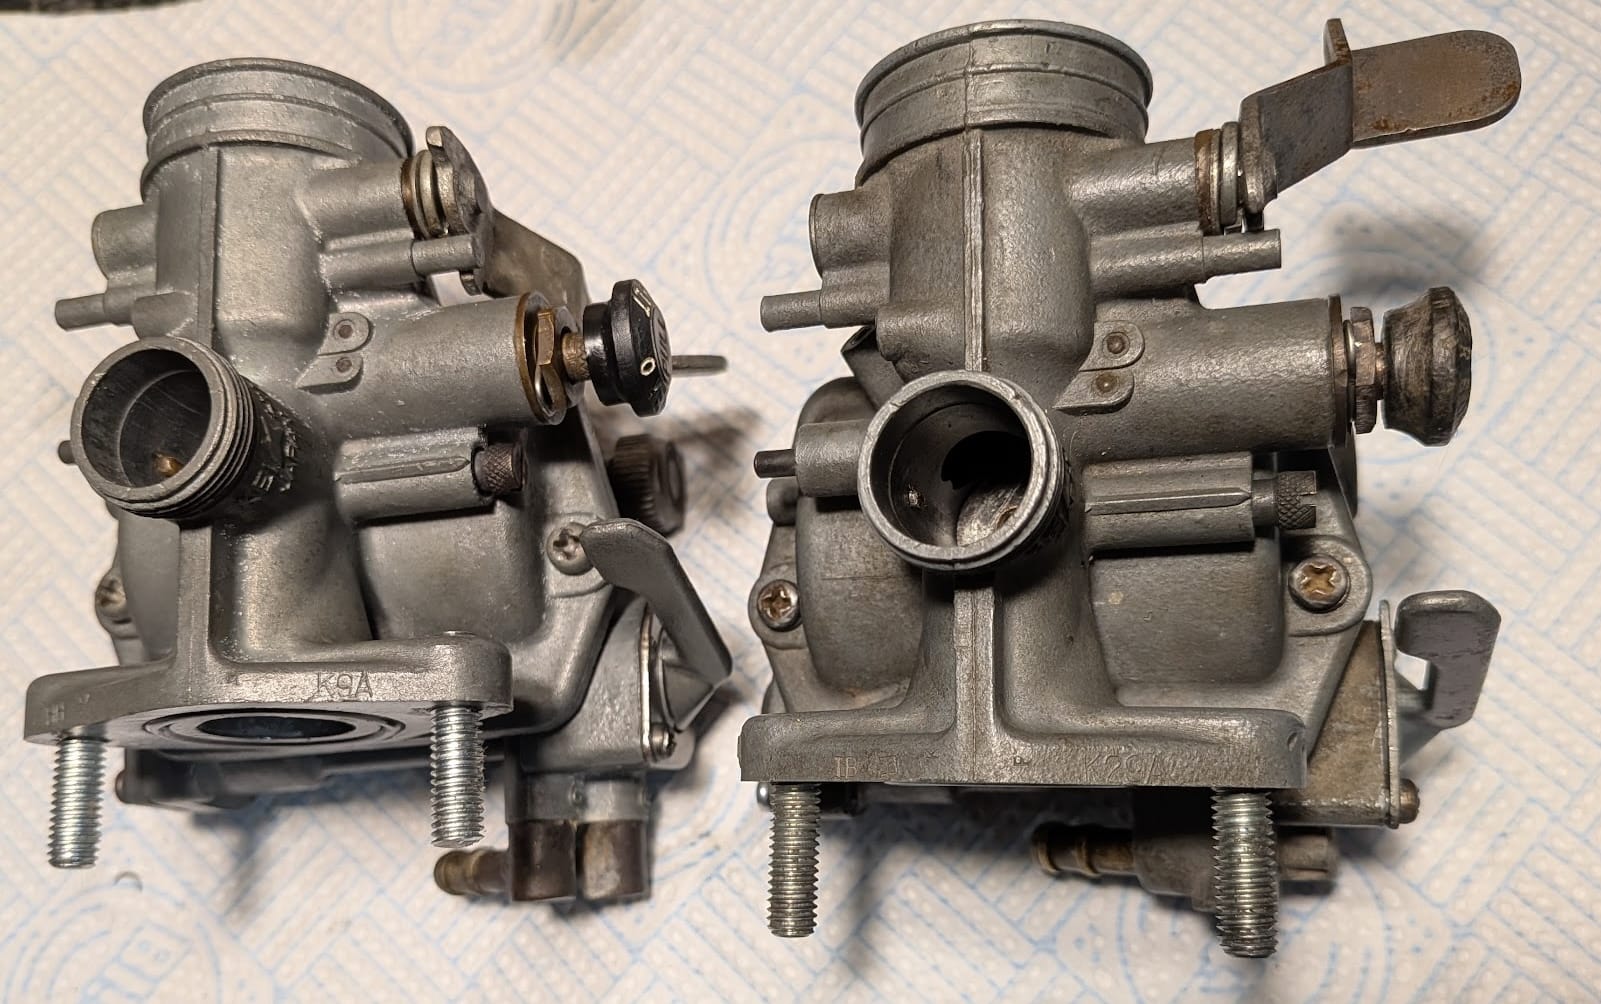
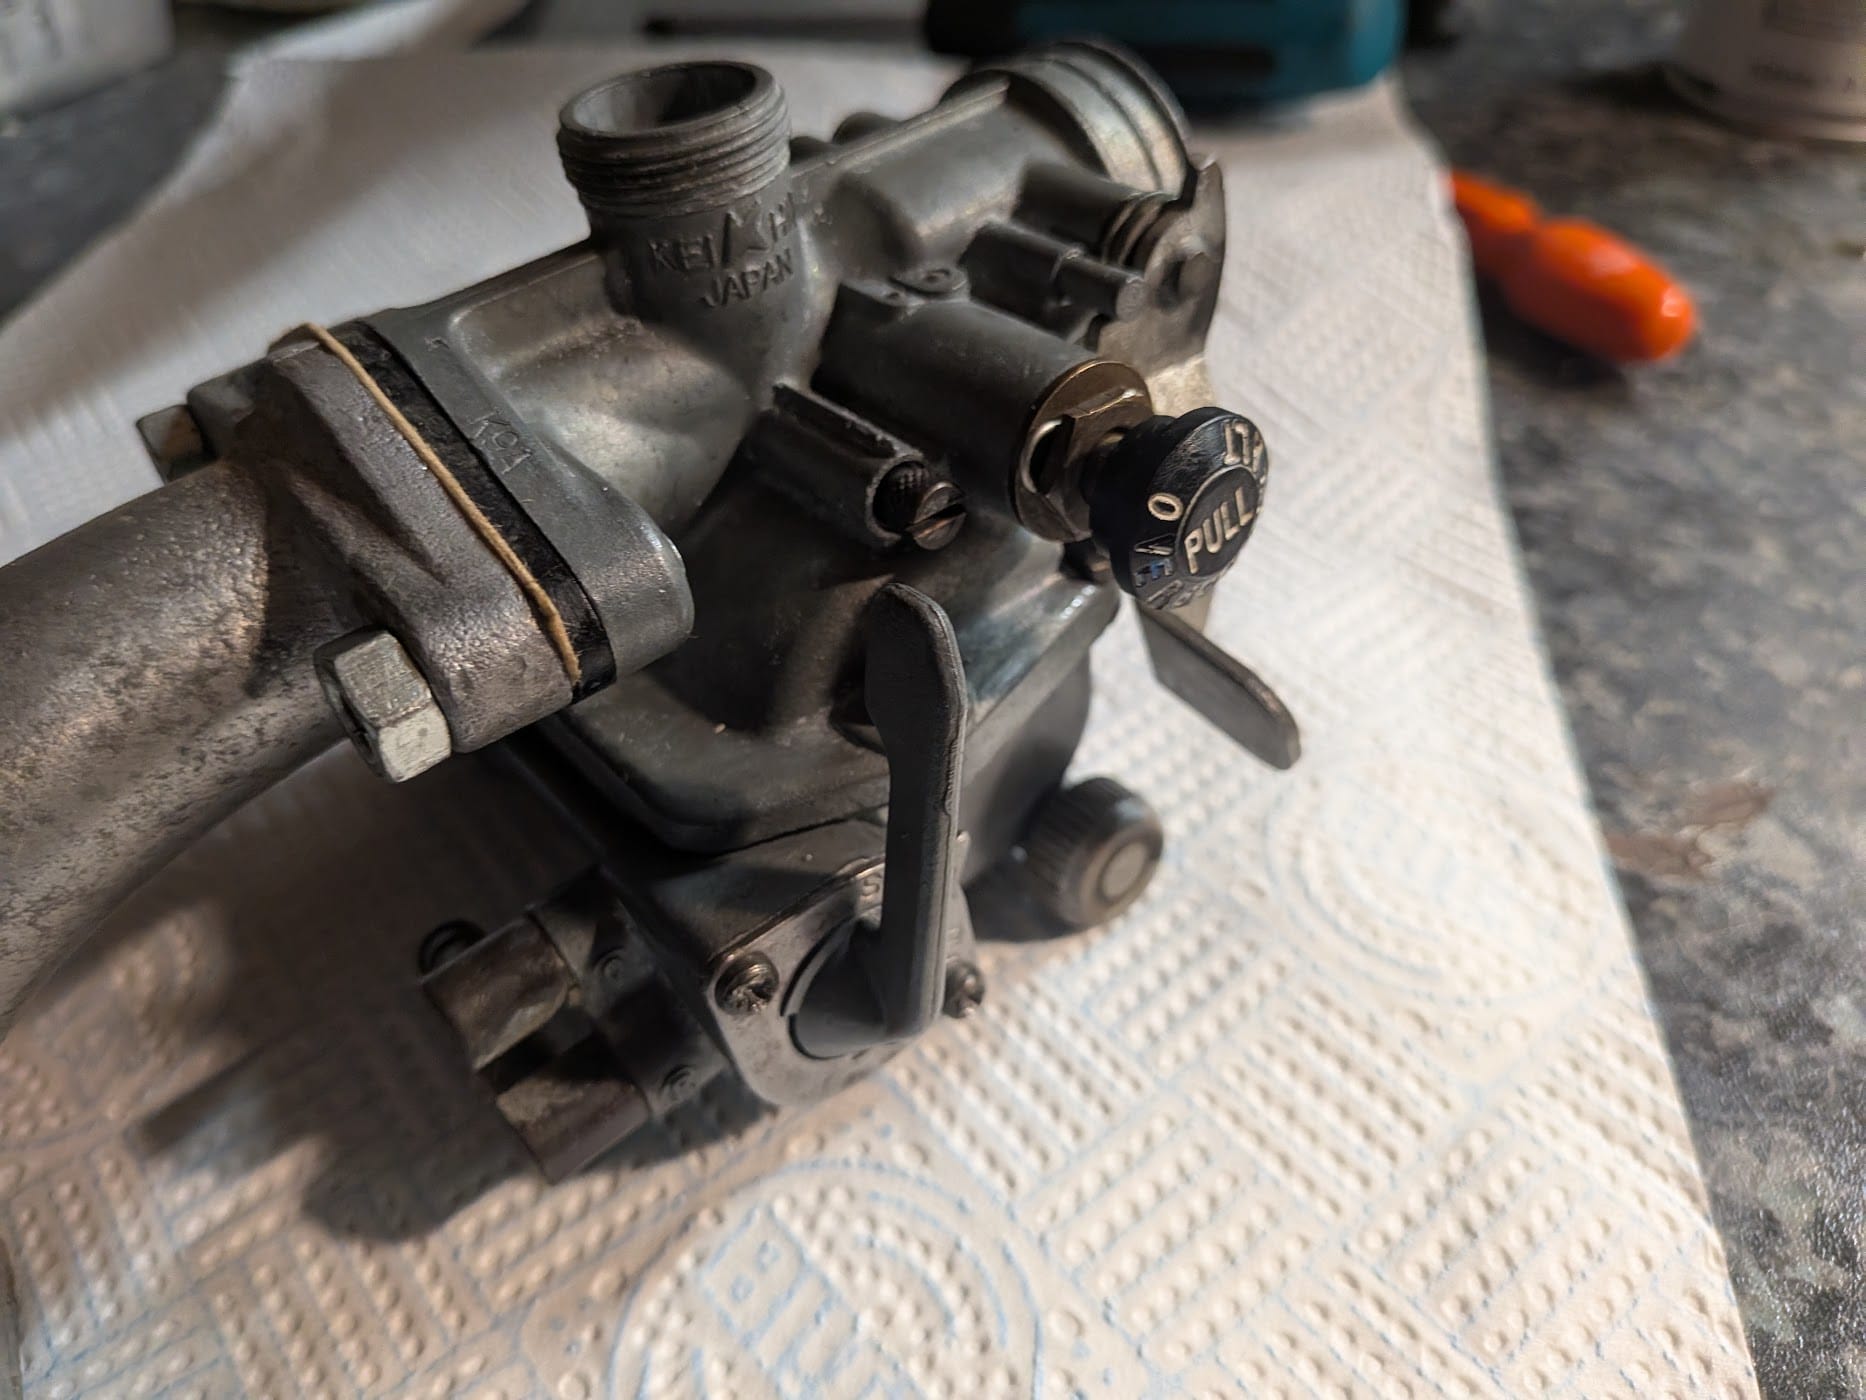
left : K9A next to a K29A - the carbs are identical bar the main jet (#78 vs #62)
K29B (1970-1971)
The carbs fitted to the K2 and K3 models are the same as the K29A but the main jet was increased from a #62 to #65. This change coincided with the decision to move the air intake from the side of the frame below the seat to a vent built into the luggage rack.
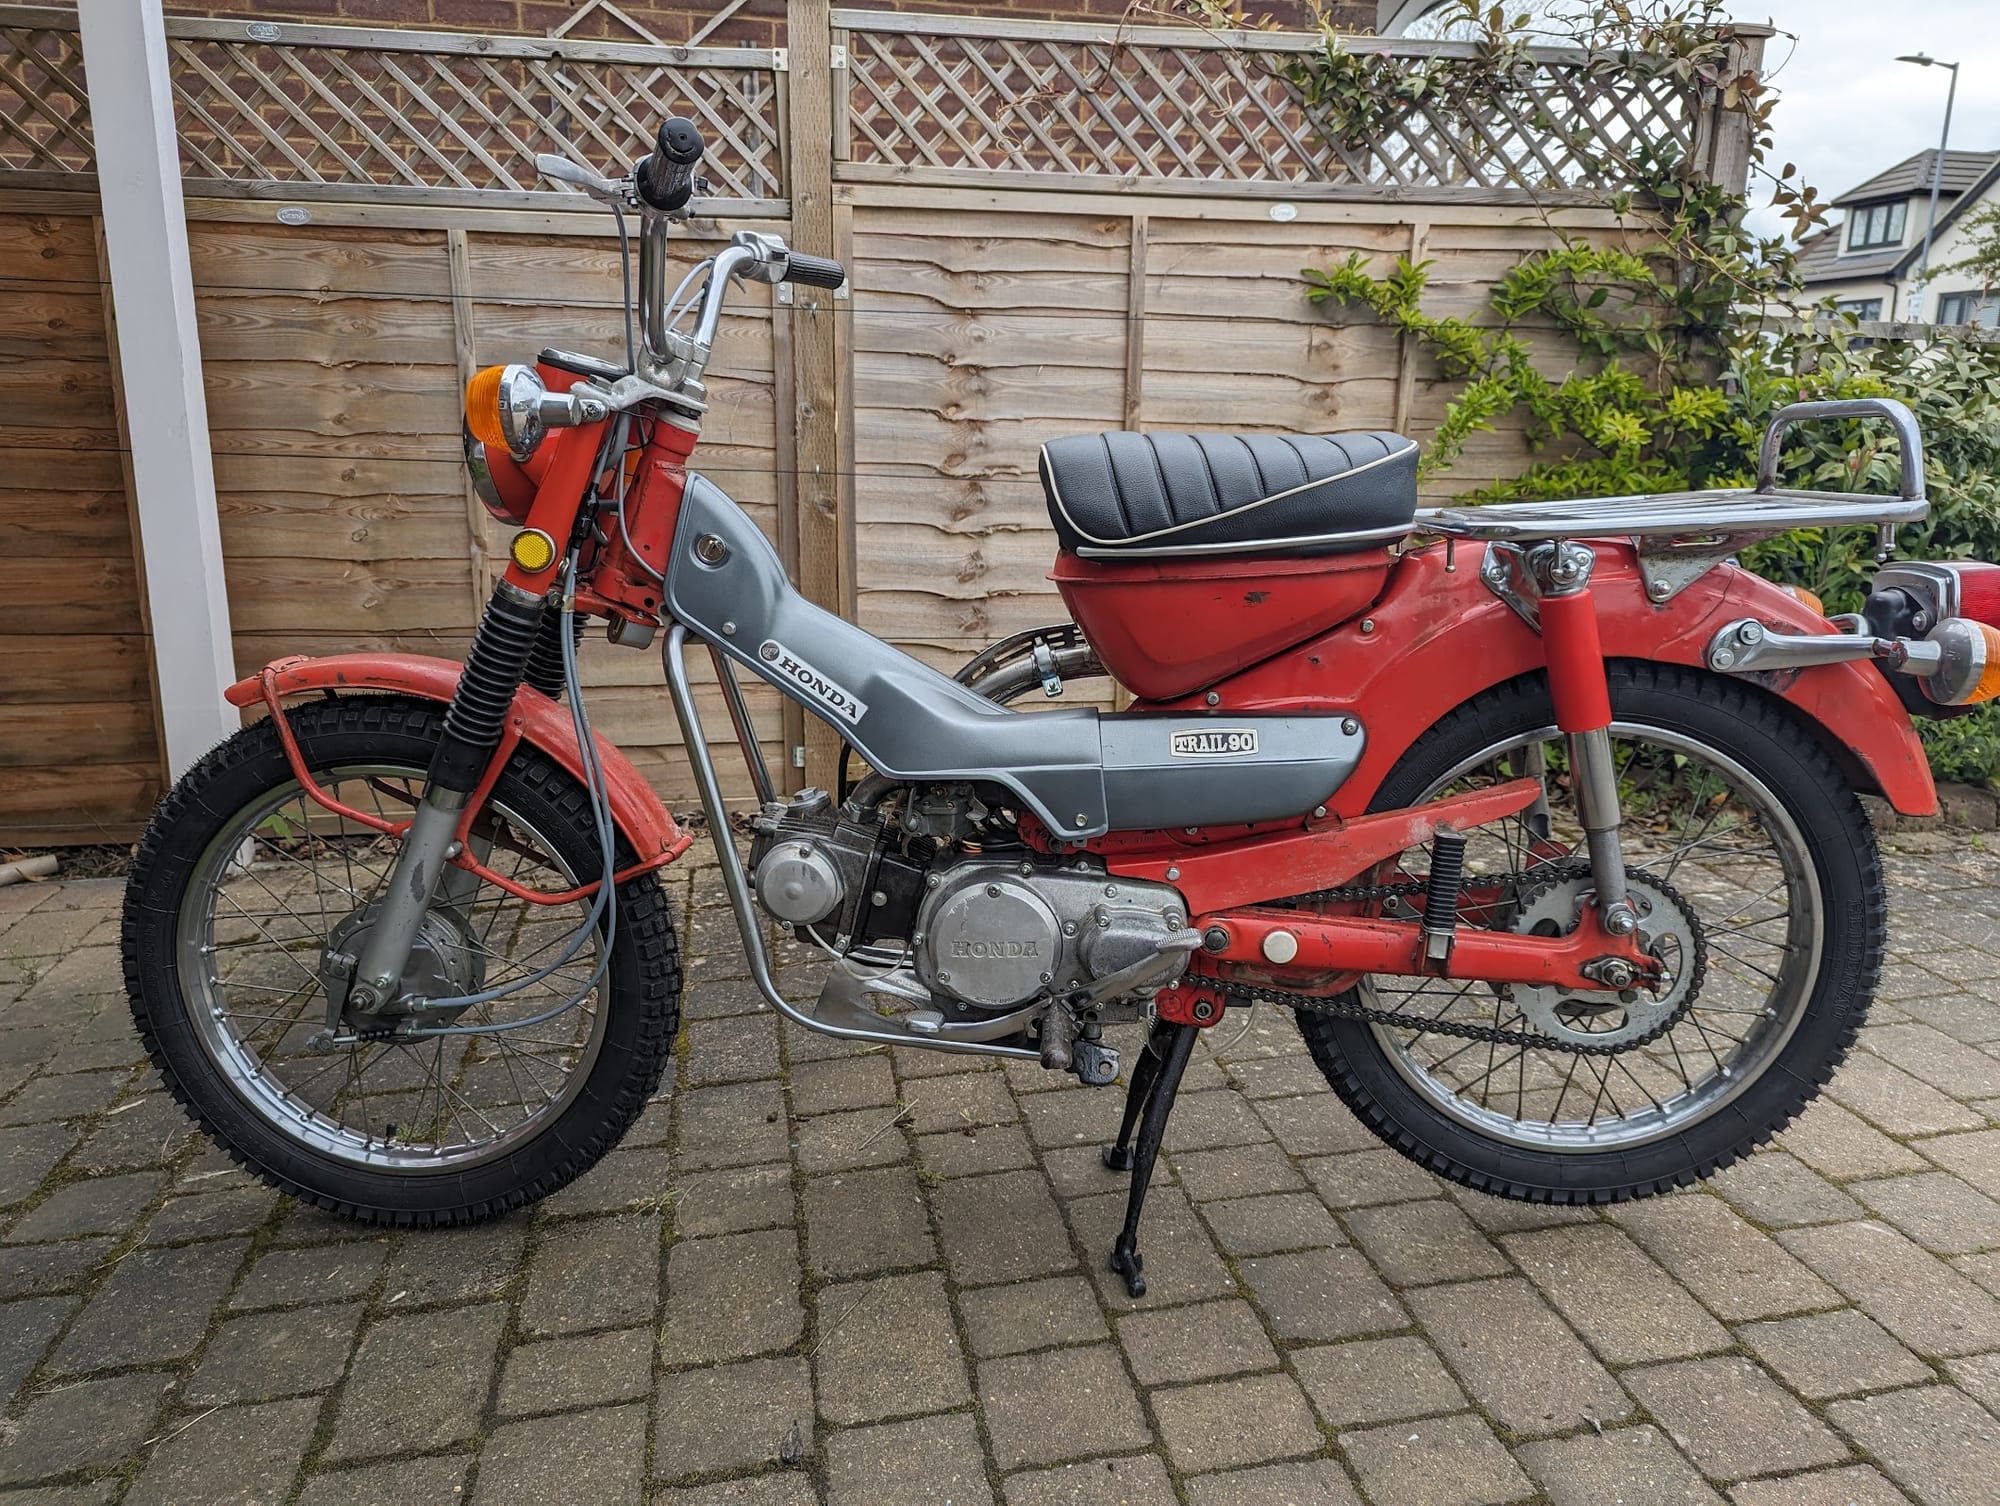
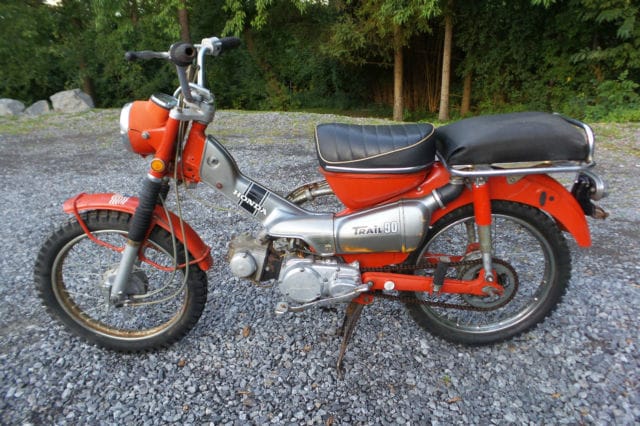
The air cleaner arrangement on the left is unique to the 1969 K1 / The 1971 bike on the right has the updated air cleaner arrangement that allows the bike to pass through deeper water.
556A (1972-1977)
The 556A replaced the K29 - it is visually similar to the earlier carb, but has a different top cap:

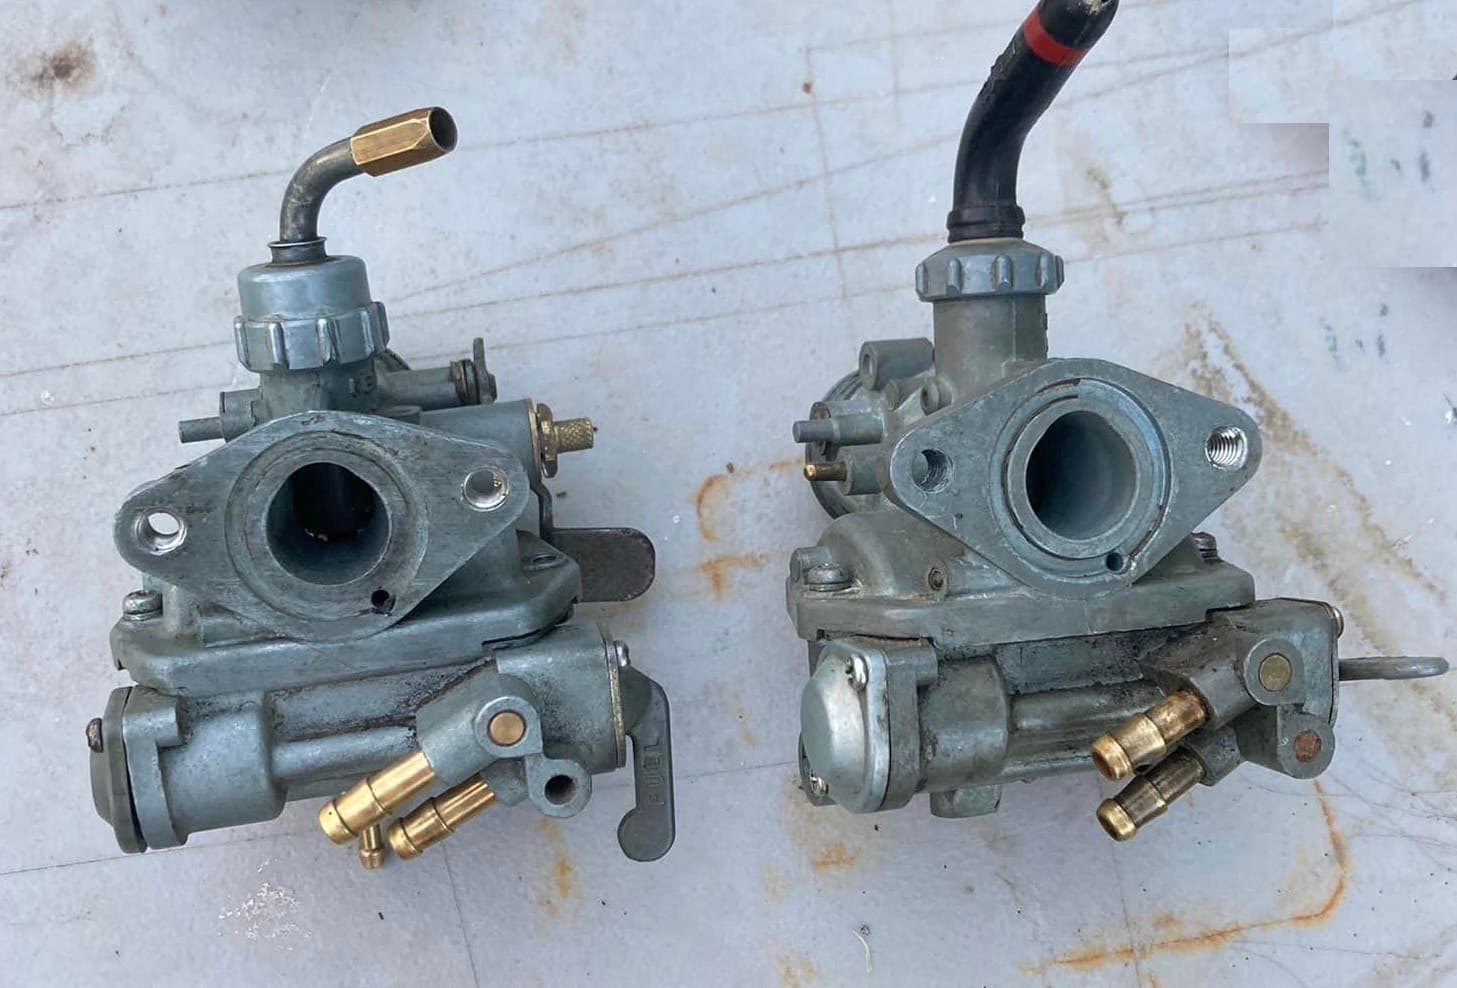
note the top cap on the top cap design on the 556A (pictured on the far right, next to a K29B).
Note this model uses a #62 main jet.
B27A, PB28A (1978-1979)
A one year only model (the B27A) was introduced in 1978
The 1978 engine was also equipped with a system to prevent crankcase emissions from entering the atmosphere: Combustion blow-by gas that has passed from the combustion chamber into the crankcase is returned through the air cleaner back to the combustion chamber rather than being ejected directly to the atmosphere:

The PB28A adopted in 1979 is based on the same range of carbs fitted to the C90 Super Cubs of the same era, and this range of carbs is described below:

This was the end of the high-altitude selector device - instead Honda recommended fitting a smaller main jet (#60 vs #65) for high altitude riding.
Jets
*note: the K9A used a 78 jet, which apparently was too rich, and thus replaced with a #62 in the K29A. Although several parts lists reference a #62 main jet for the 1969-77 bikes, at least one shows the change to a #65 during the run of K2 models:
Float Heights
The level of fuel in the float chamber effects the ratio of fuel and air passed to the engine: when the level is too high the additional pressure exerted by the higher volume of fuel in the chamber means that it is delivered faster and the mixture becomes richer, when it is too low the mixture is made correspondingly lean.
See the tables below for the CT90 settings:
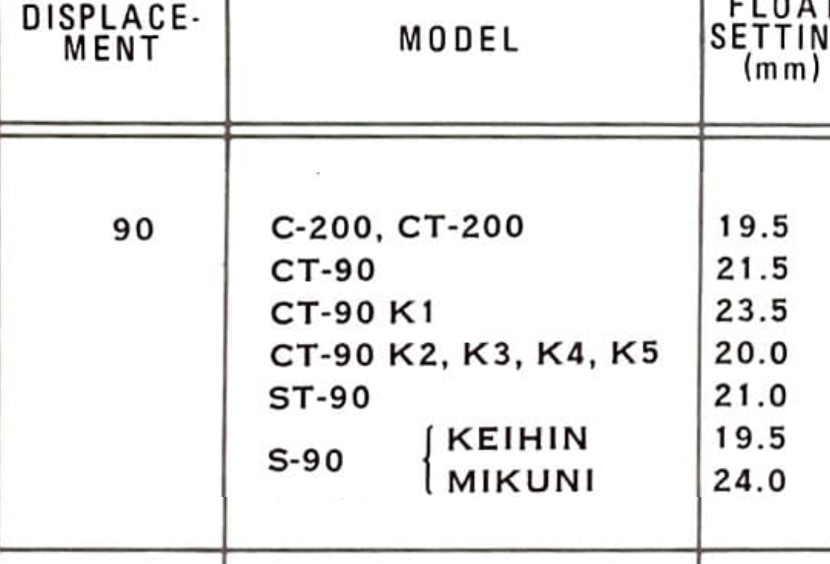
Note that the 23.5 measurement on the left applies to the T90KA carb fitted to the early 1969 models, the later model K1s should be set to 20mm.
To measure the float height:
- Hold the carburettor vertically so the float arm tang will just close the float valve, without compressing the spring loaded pin in the end of the valve (see diagram below):.

- If float height is incorrect, carefully bend the float arm tang toward or away from the float valve until the specified float height is obtained.
This type of gauge shown below is helpful for checking the measurement. Set the gauge to the right depth and position the 'legs' on the either side of the float chamber with the end of the float height indicator against the float. If the carburettor float level is properly adjusted the end of the indicator will just touch the float, without causing the float to move.

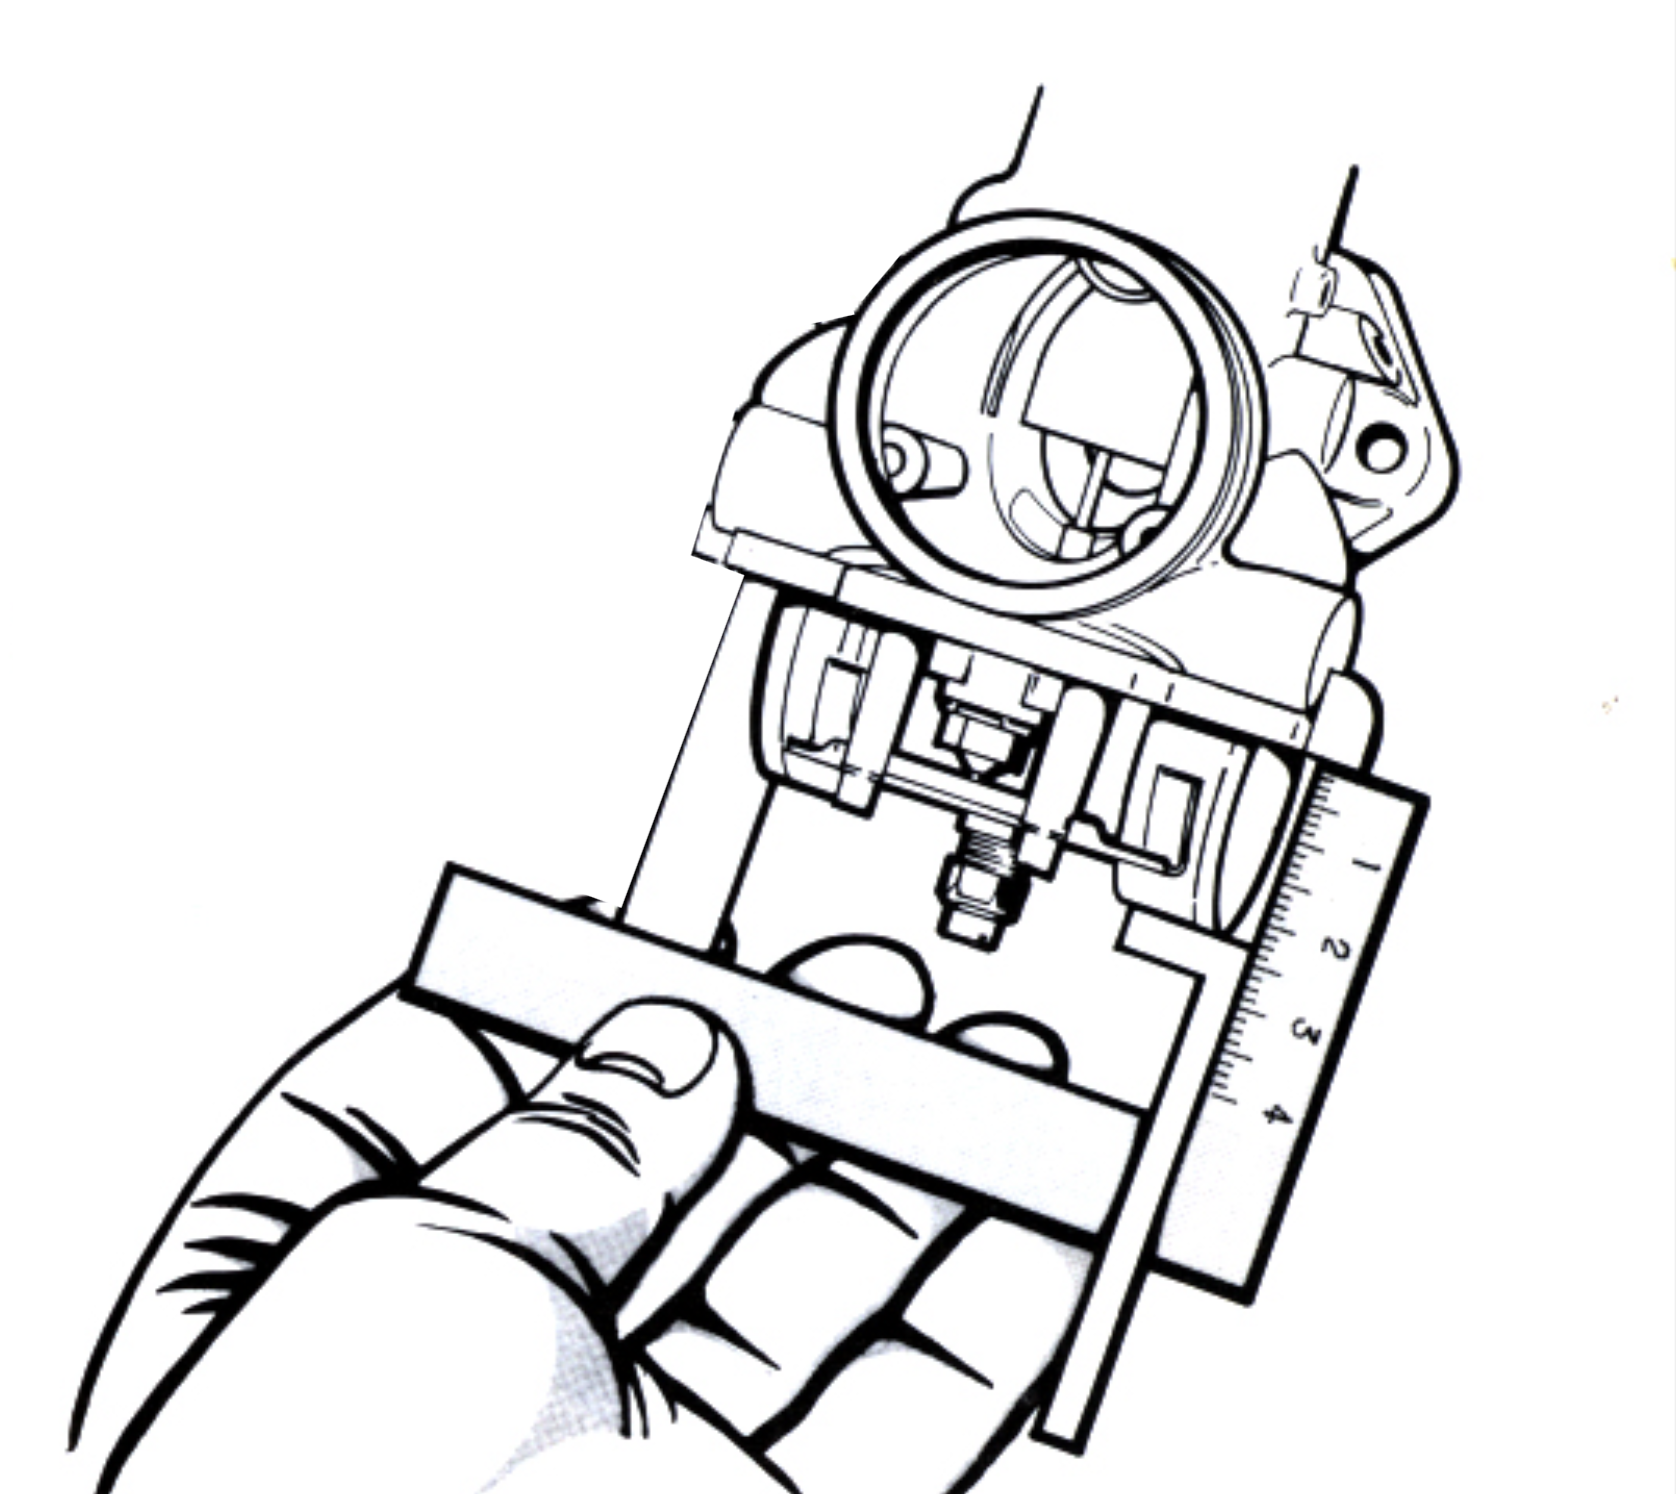
Float height gauge
Note there is some confusion about this topic and it is sometimes suggested that the measurement should be taken from the gasket surface. However, as shown in the Honda illustrations above, the measurement is taken from the raised lip of the carb body.
high altitude selector
Between late 1969 and 1977, all CT90 carbs were fitted with a high altitude selector (see diagram below).
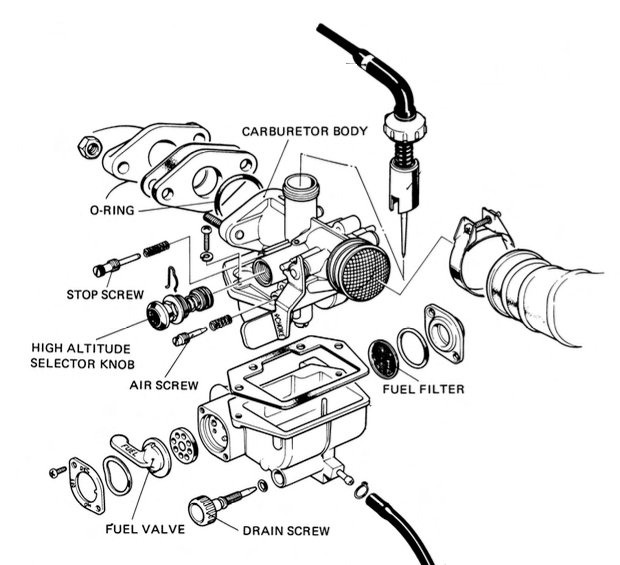
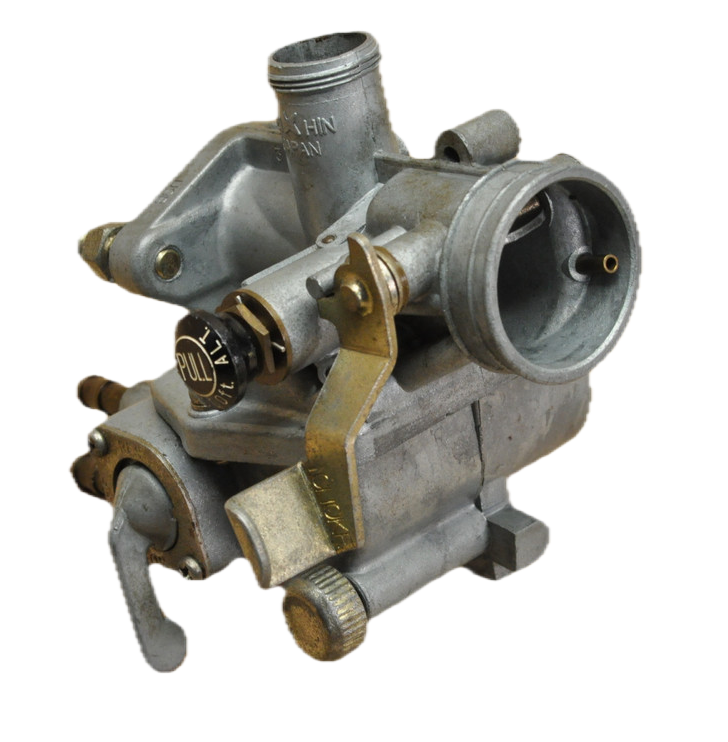
as shown in the diagram on the left, the high altitude selector knob is really a plunger that - when pulled outwards - unseals two holes in the body of the carb, allowing additional air into the fuel/air mixture.
The instructions are to pull the knob out when riding above 6000ft. When the knob is pulled out an internal check valve exposes three separate passages: the first connection is to an air passage that opens in the mouth of the carb, and this air is feed to to the main jet air passage and the idle air passage. The additional air added to the main and idle circuits compensates for the lower oxygen levels found when up high.
cleaning and repairs
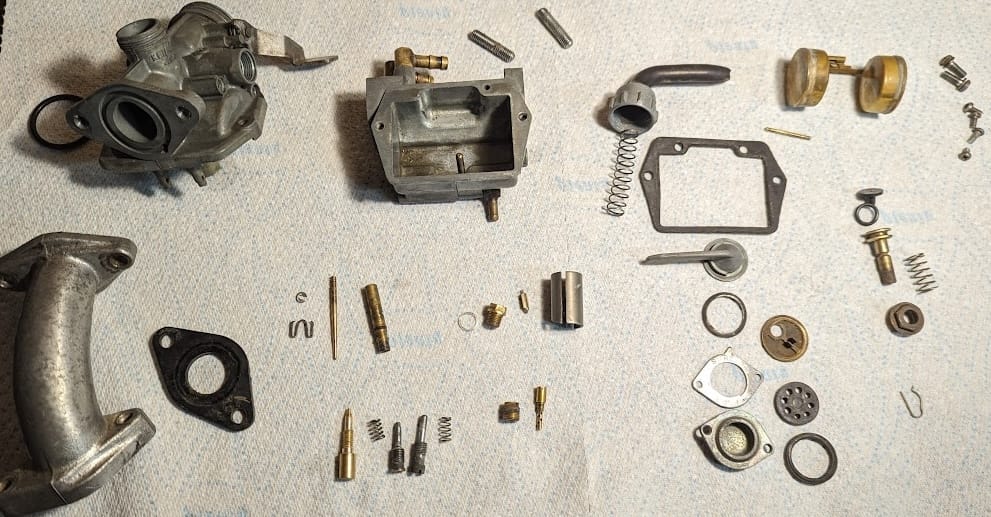
all the parts
It is getting difficult to find original brass parts for carburettors of this era, and Honda stopped selling some critical parts like the needle jet and jet needle years ago. If at all possible, try and make use of any original brass parts as the aftermarket parts are not guaranteed to be exact replacements.
The high altitude jets mean there are more than the normal number of orifices to check for blockages: in addition to the air passage for the high altitude supply, you need to check the main and idle air passage that go from the mouth of the carb to emulsion tube and idle jet holder respectively. Then check the pilot and main jets are clear and that fuel flows from the fuel tap (the filter is on the other side to the on/off/reserve switch and passes through a passage in the fuel bowl). Finally check the float bowl breather is clear.
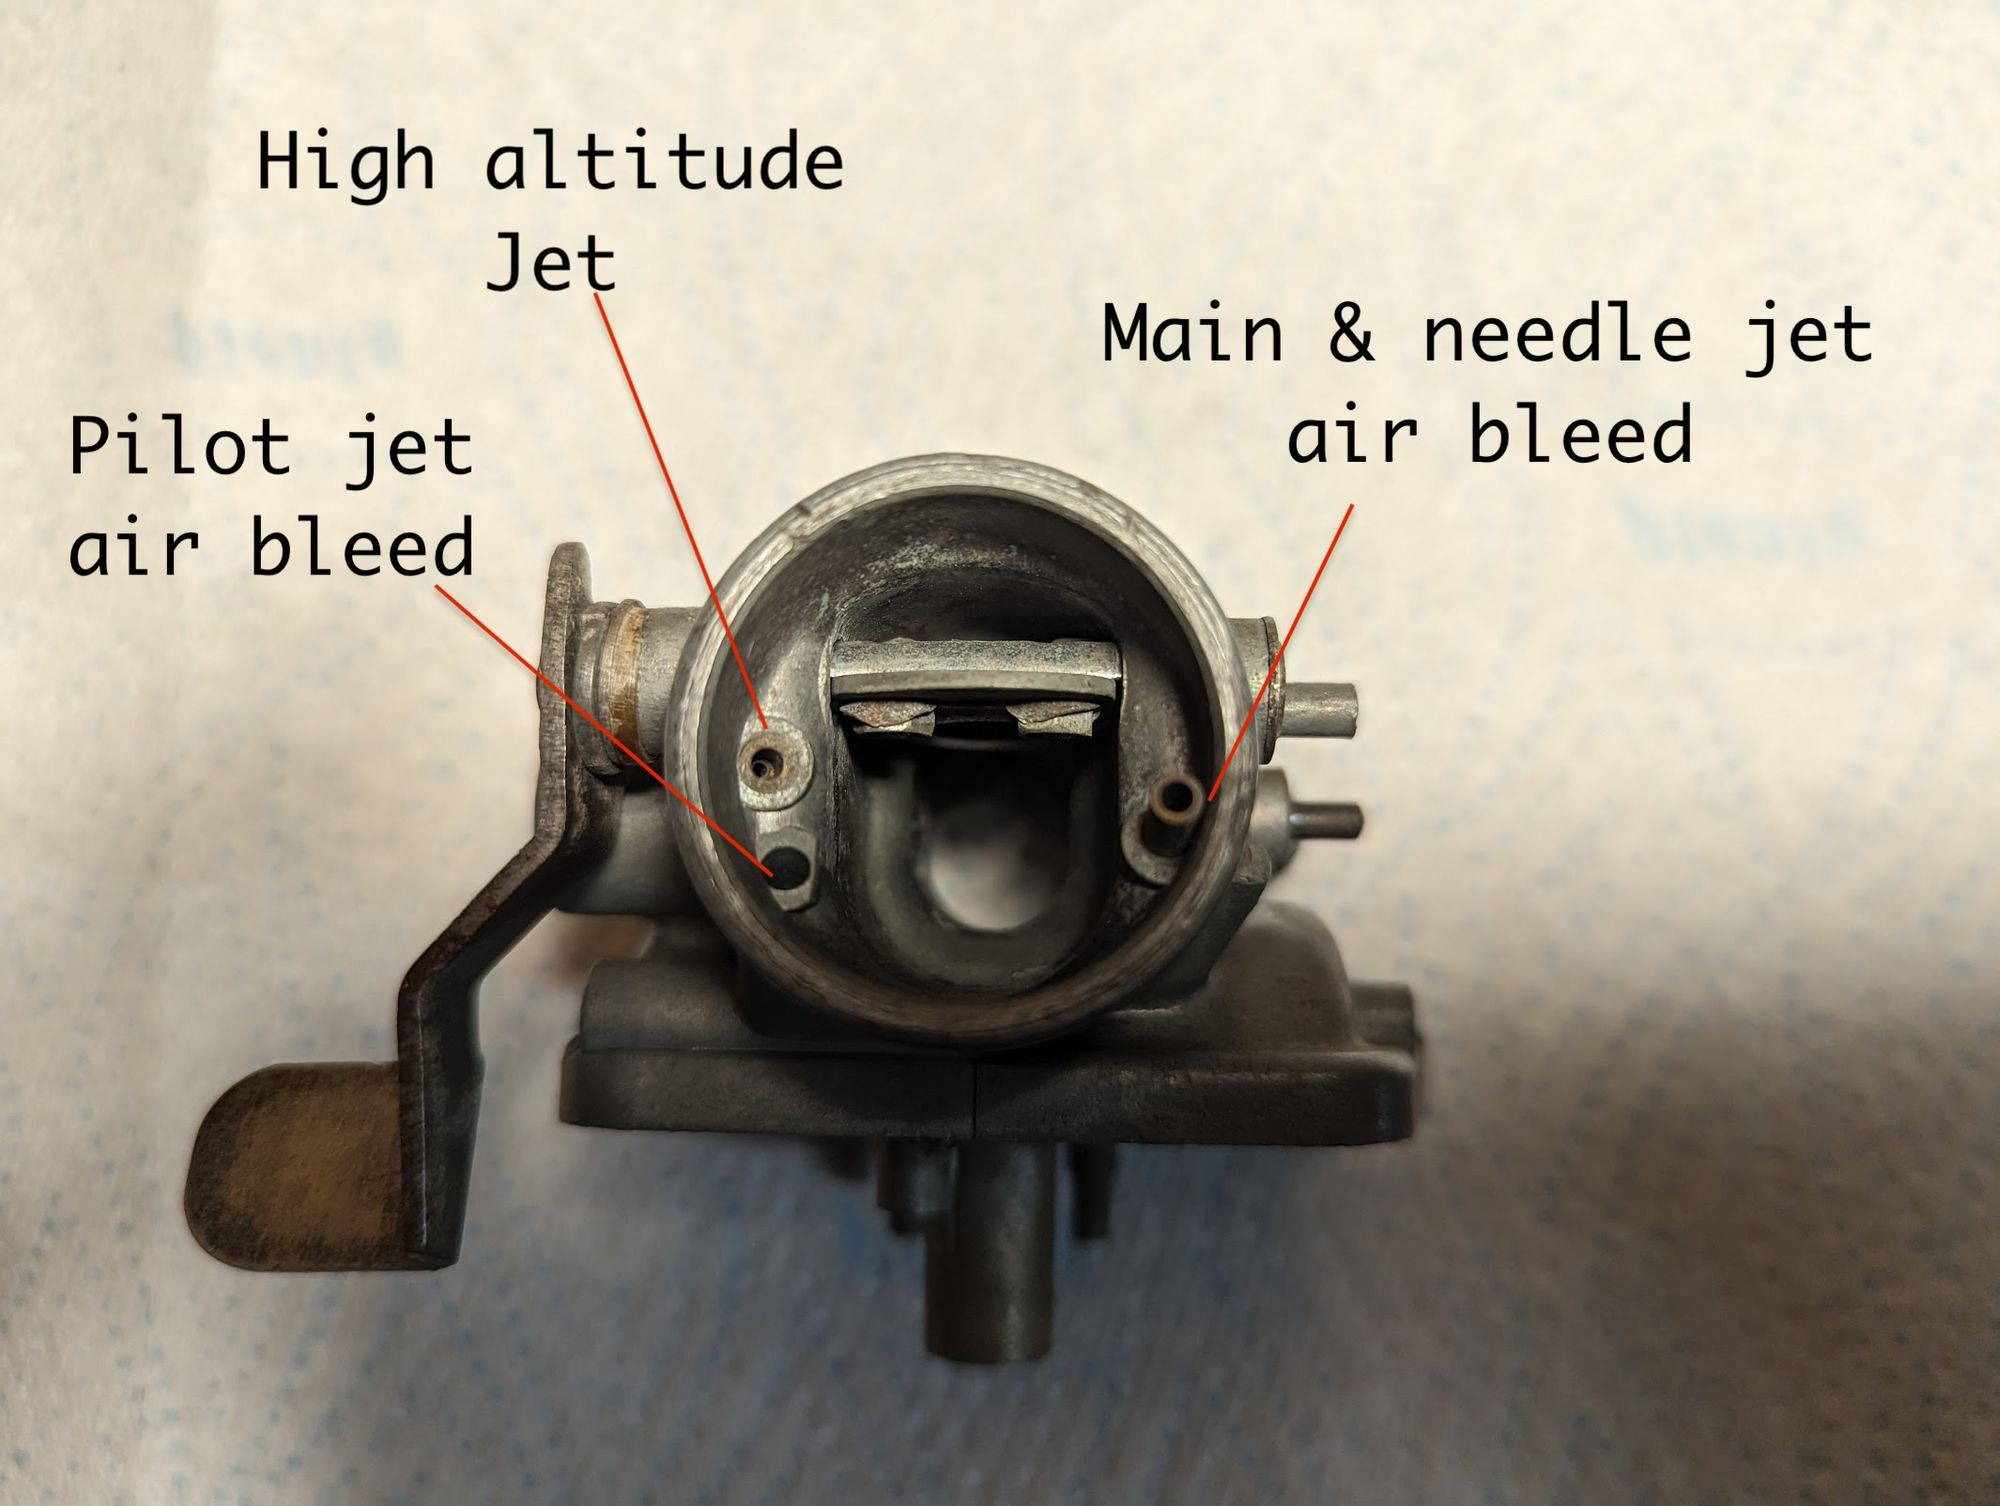
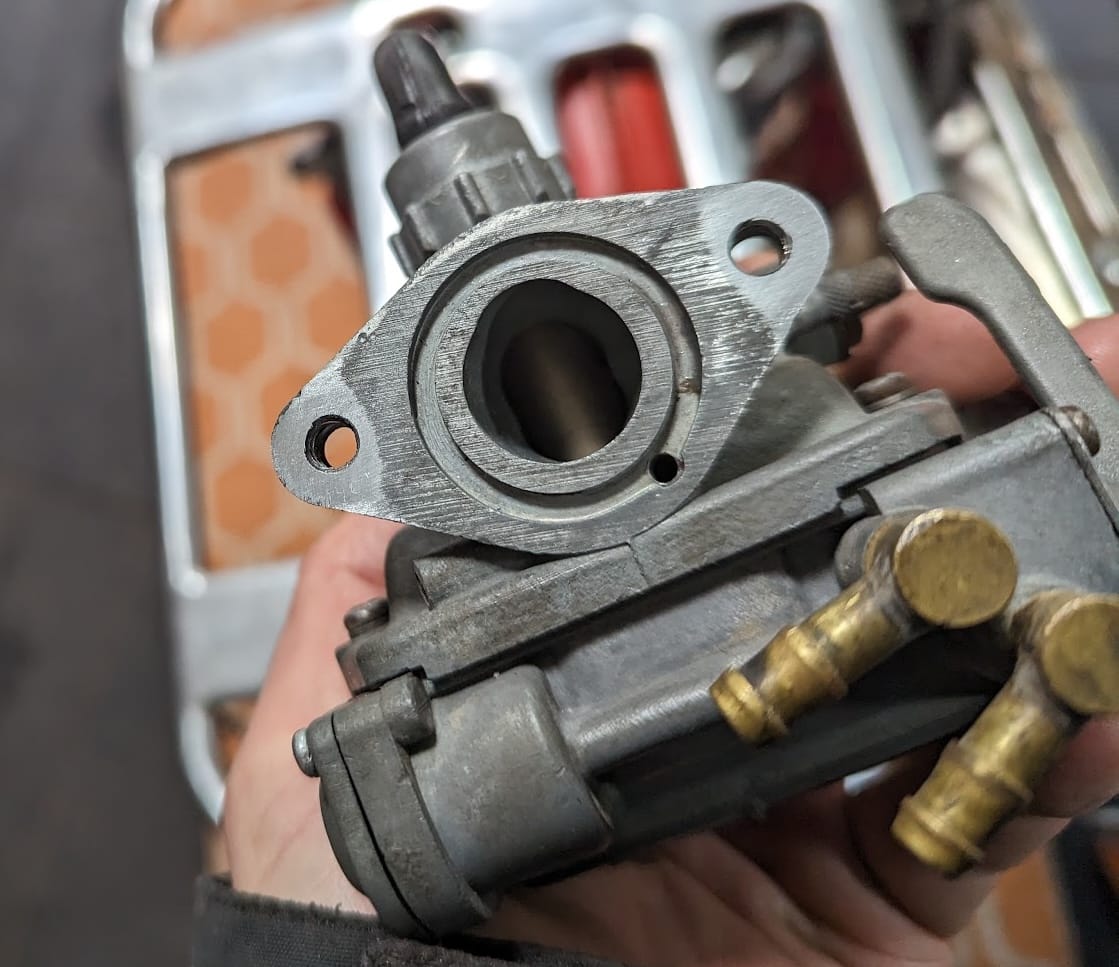
The airways accessible from the mouth of the carb must all be clear (left) / Note the hole in the channel for the o-ring on the other side of the carb (right) is not an airway but an artefact of the manufacturing process where access was needed to cross drill one of the internal passages.
reassembly
here is how the components fit together
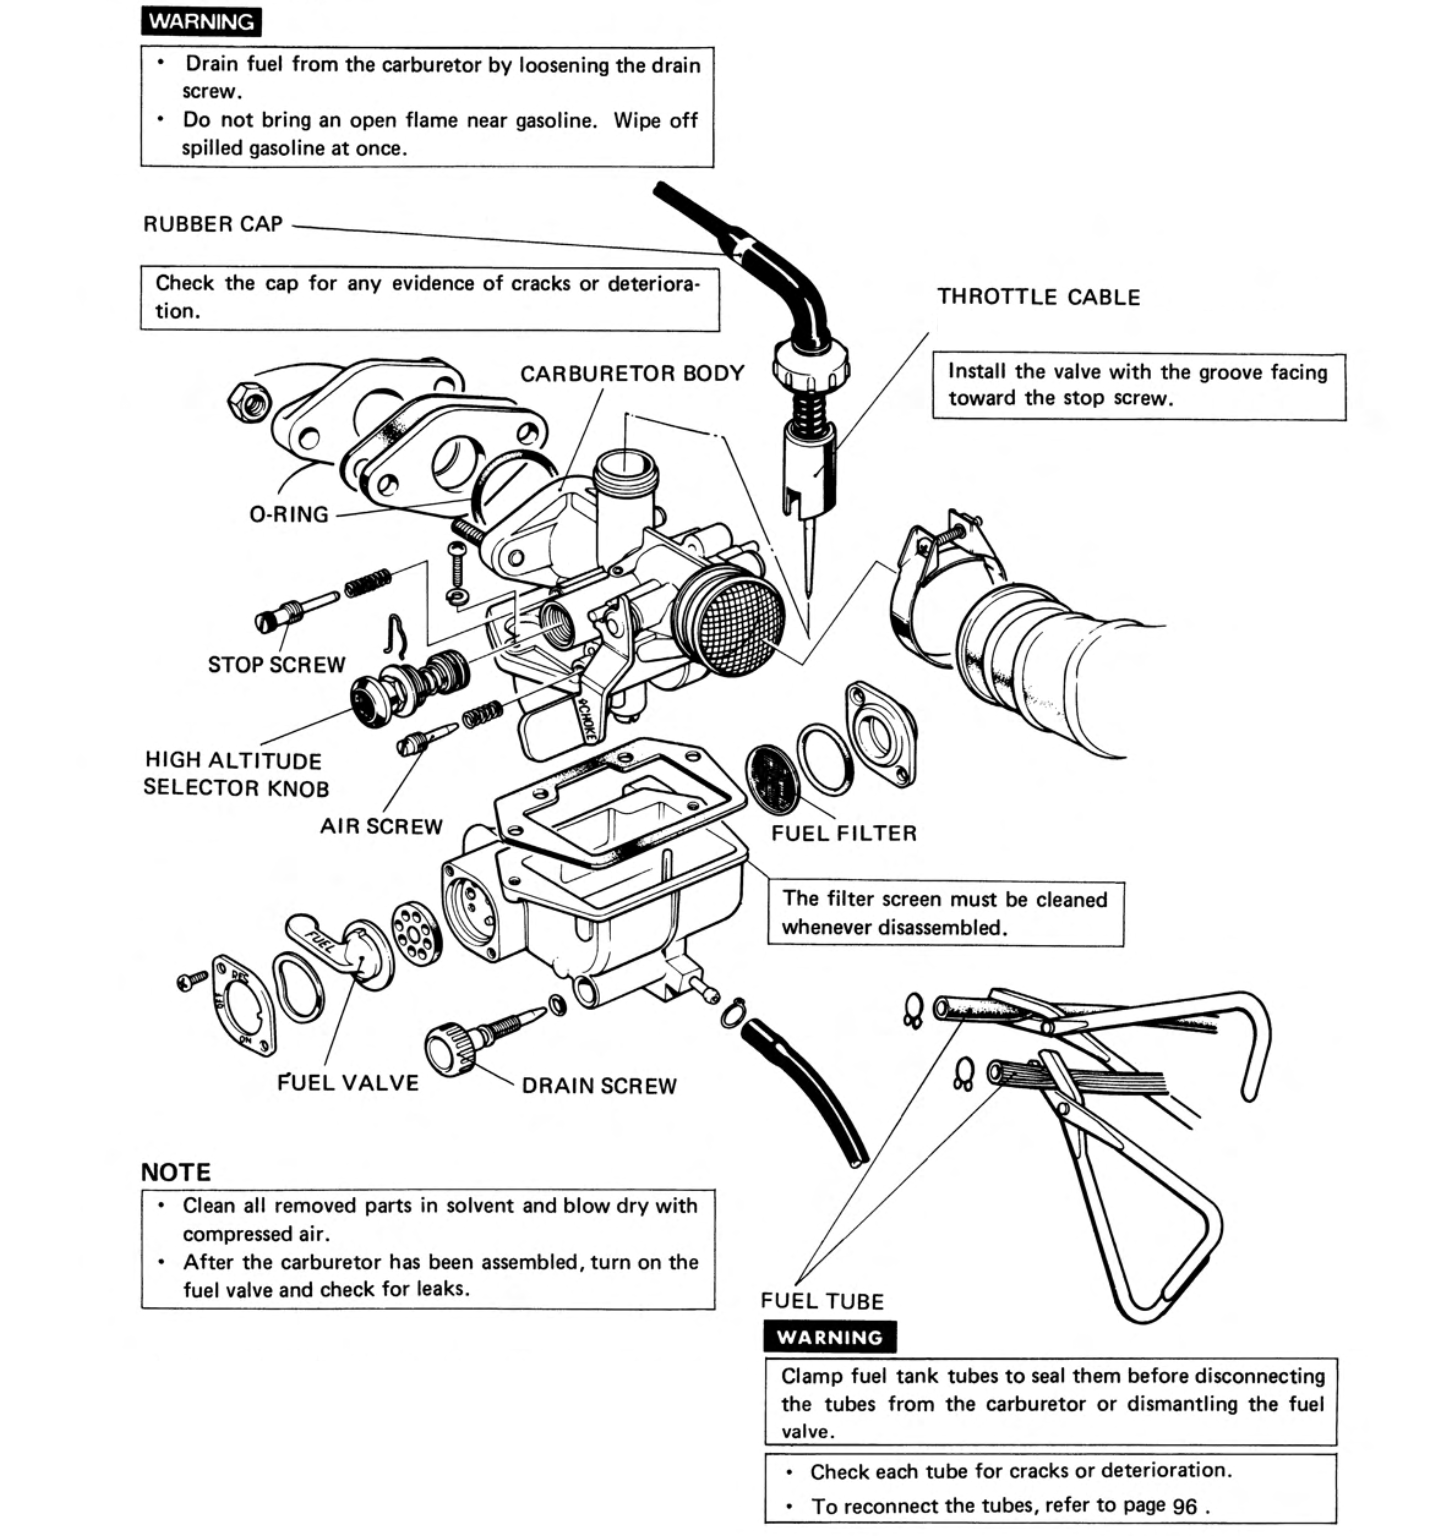

late 69-77 (left) - note the earlier carbs do not have the wire mesh flame arrestor shown in this illustration / 78-79 (right)
You can still get a "packing" kit from Honda with the gaskets, o-rings, fuel tap filter and high altitude plunger tip , so I replaced all those. The carb was fitted with the original 62 main and 35 idle jet. I swapped the main jet to a #65: as mentioned above, in 1970 Honda changed over to a 65 main - apparently a service bulletin at the time explained the smaller jet was too lean and causing overheating problem when the bikes were driven flat-out for long periods.
Other points of note:
- There is a small o-ring on the emulsion tube/needle jet which seals off the emulsion tube passage - don't forget to replace that as it must seal properly to avoid an air leak.
- The black insulator on the K1 goes between the carb and the inlet pipe (carb > insulator > gasket > inlet pipe> gasket > cylinder head).
- Finally don't be alarmed by the bent washer behind the fuel tap - this wavy washer acts as a spring and puts pressure on the fuel lever cover which presses on the rubber packing to seal it.
You will need to clean out the fuel filter periodically, here are the instructions for the 69-77 models

Carb adjustment
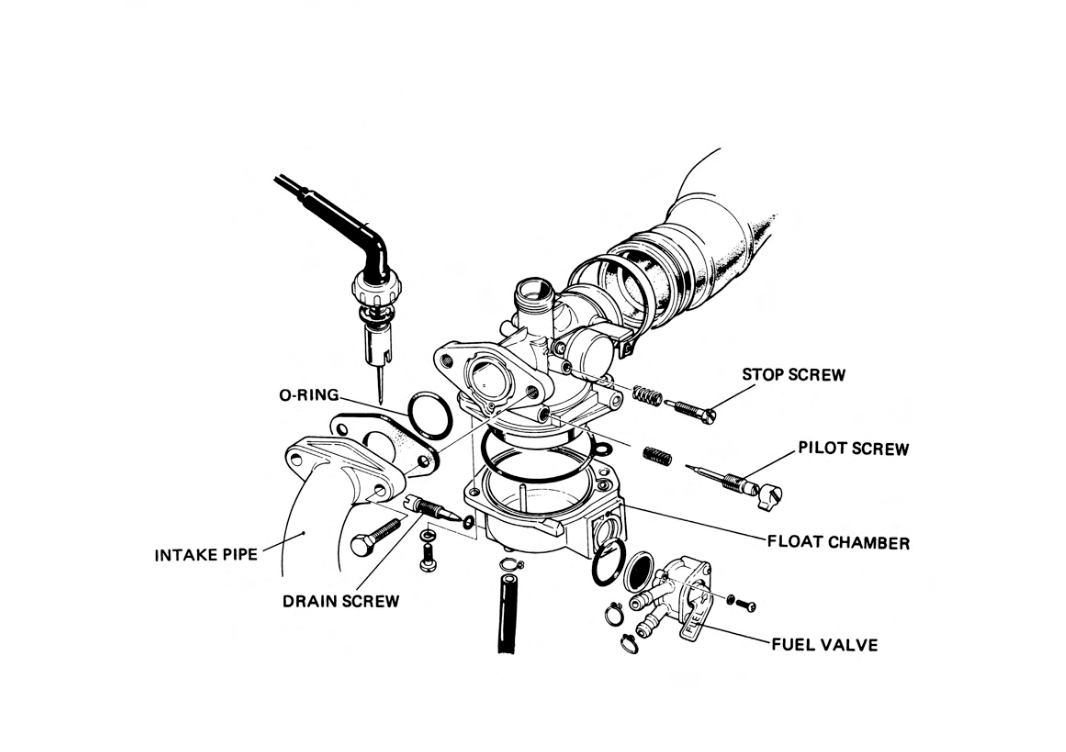
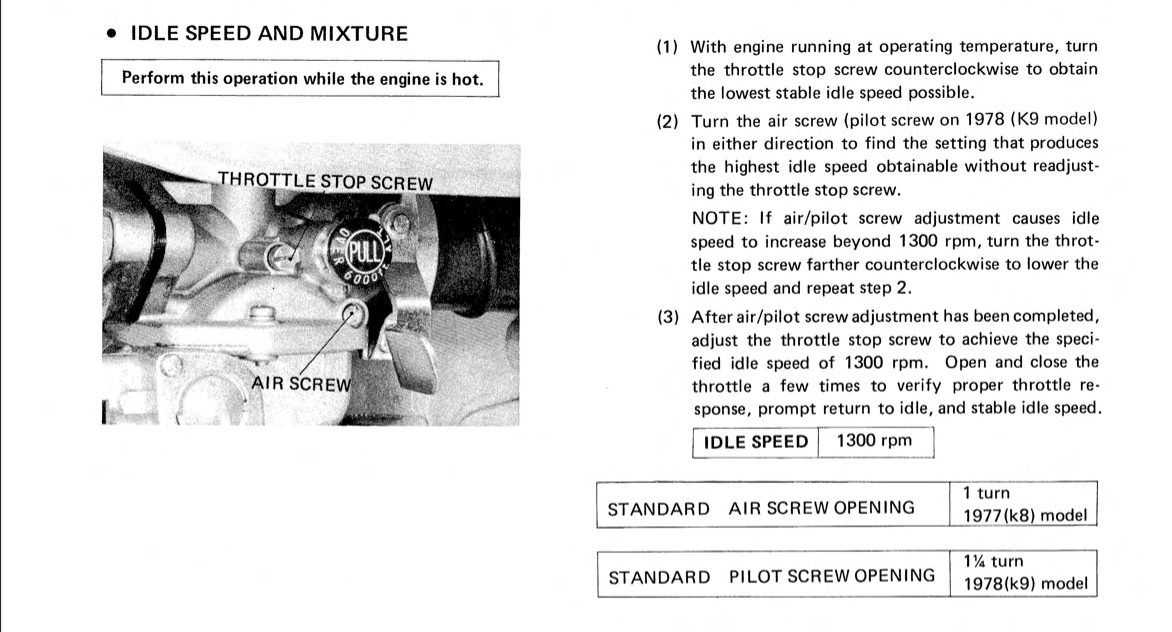
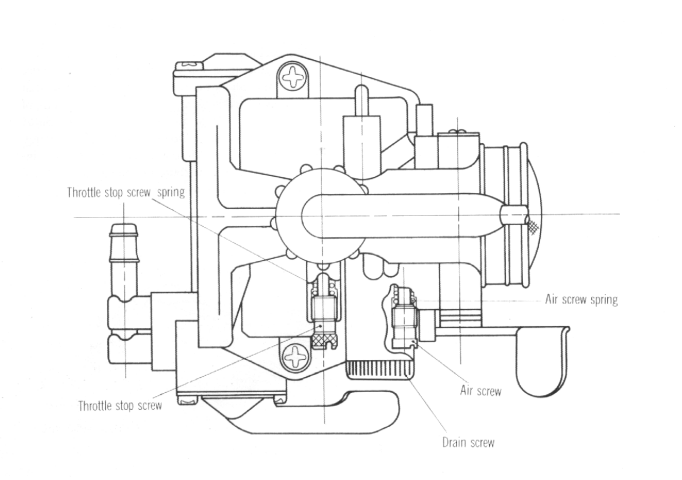
See the instructions below - note that the 1978/1979 carbs have a mixture ('pilot') adjustment screw, rather than the air adjustment screw fitted to the earlier carbs (the photo and diagram below are for the earlier versions).
Mixture screws work the other way round to pilot screws: turning the screw inwards reduces the amount of aerated fuel that is added to the air entering the bore of the carburettor and this results in a leaner mixture. Air adjustment screws, when screwed inwards, reduce the amount of air mixed with the fuel and thus make the mixture richer.
air cleaner
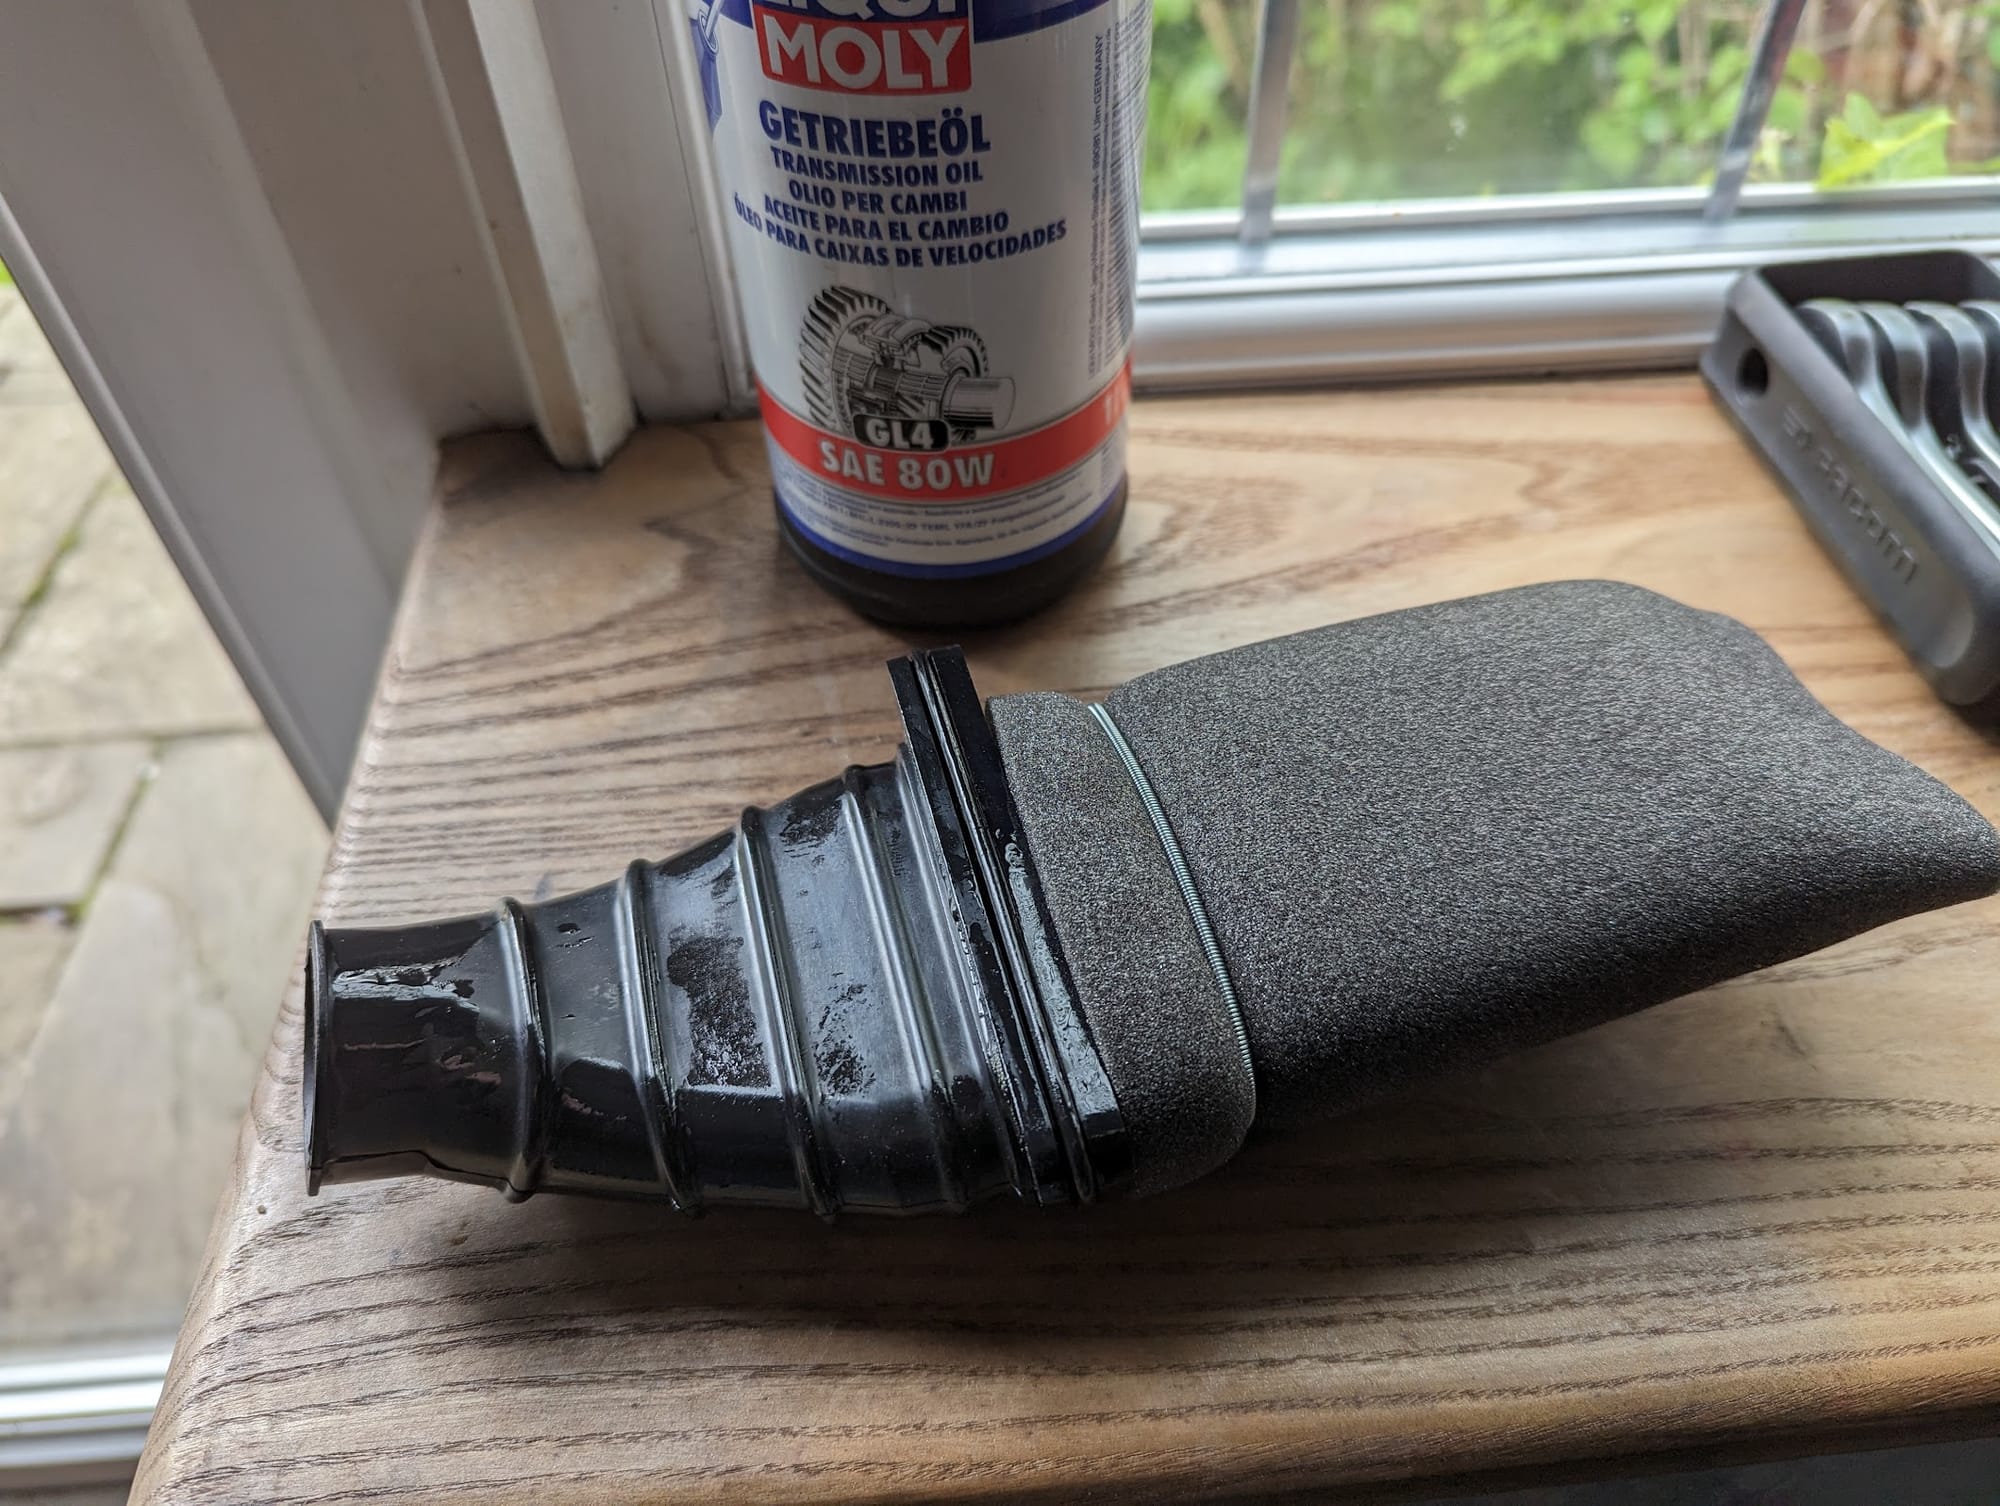
Hard to believe, but the air cleaner used on the 1969 K1 model is still available new from Honda (note this is a 1 year only design and won't fit on other CT90s).
The foam air cleaner element needs to be soaked in engine oil and then wrung out. It is held on the metal mesh frame of the of the air cleaner by a springy metal band (also still available!)
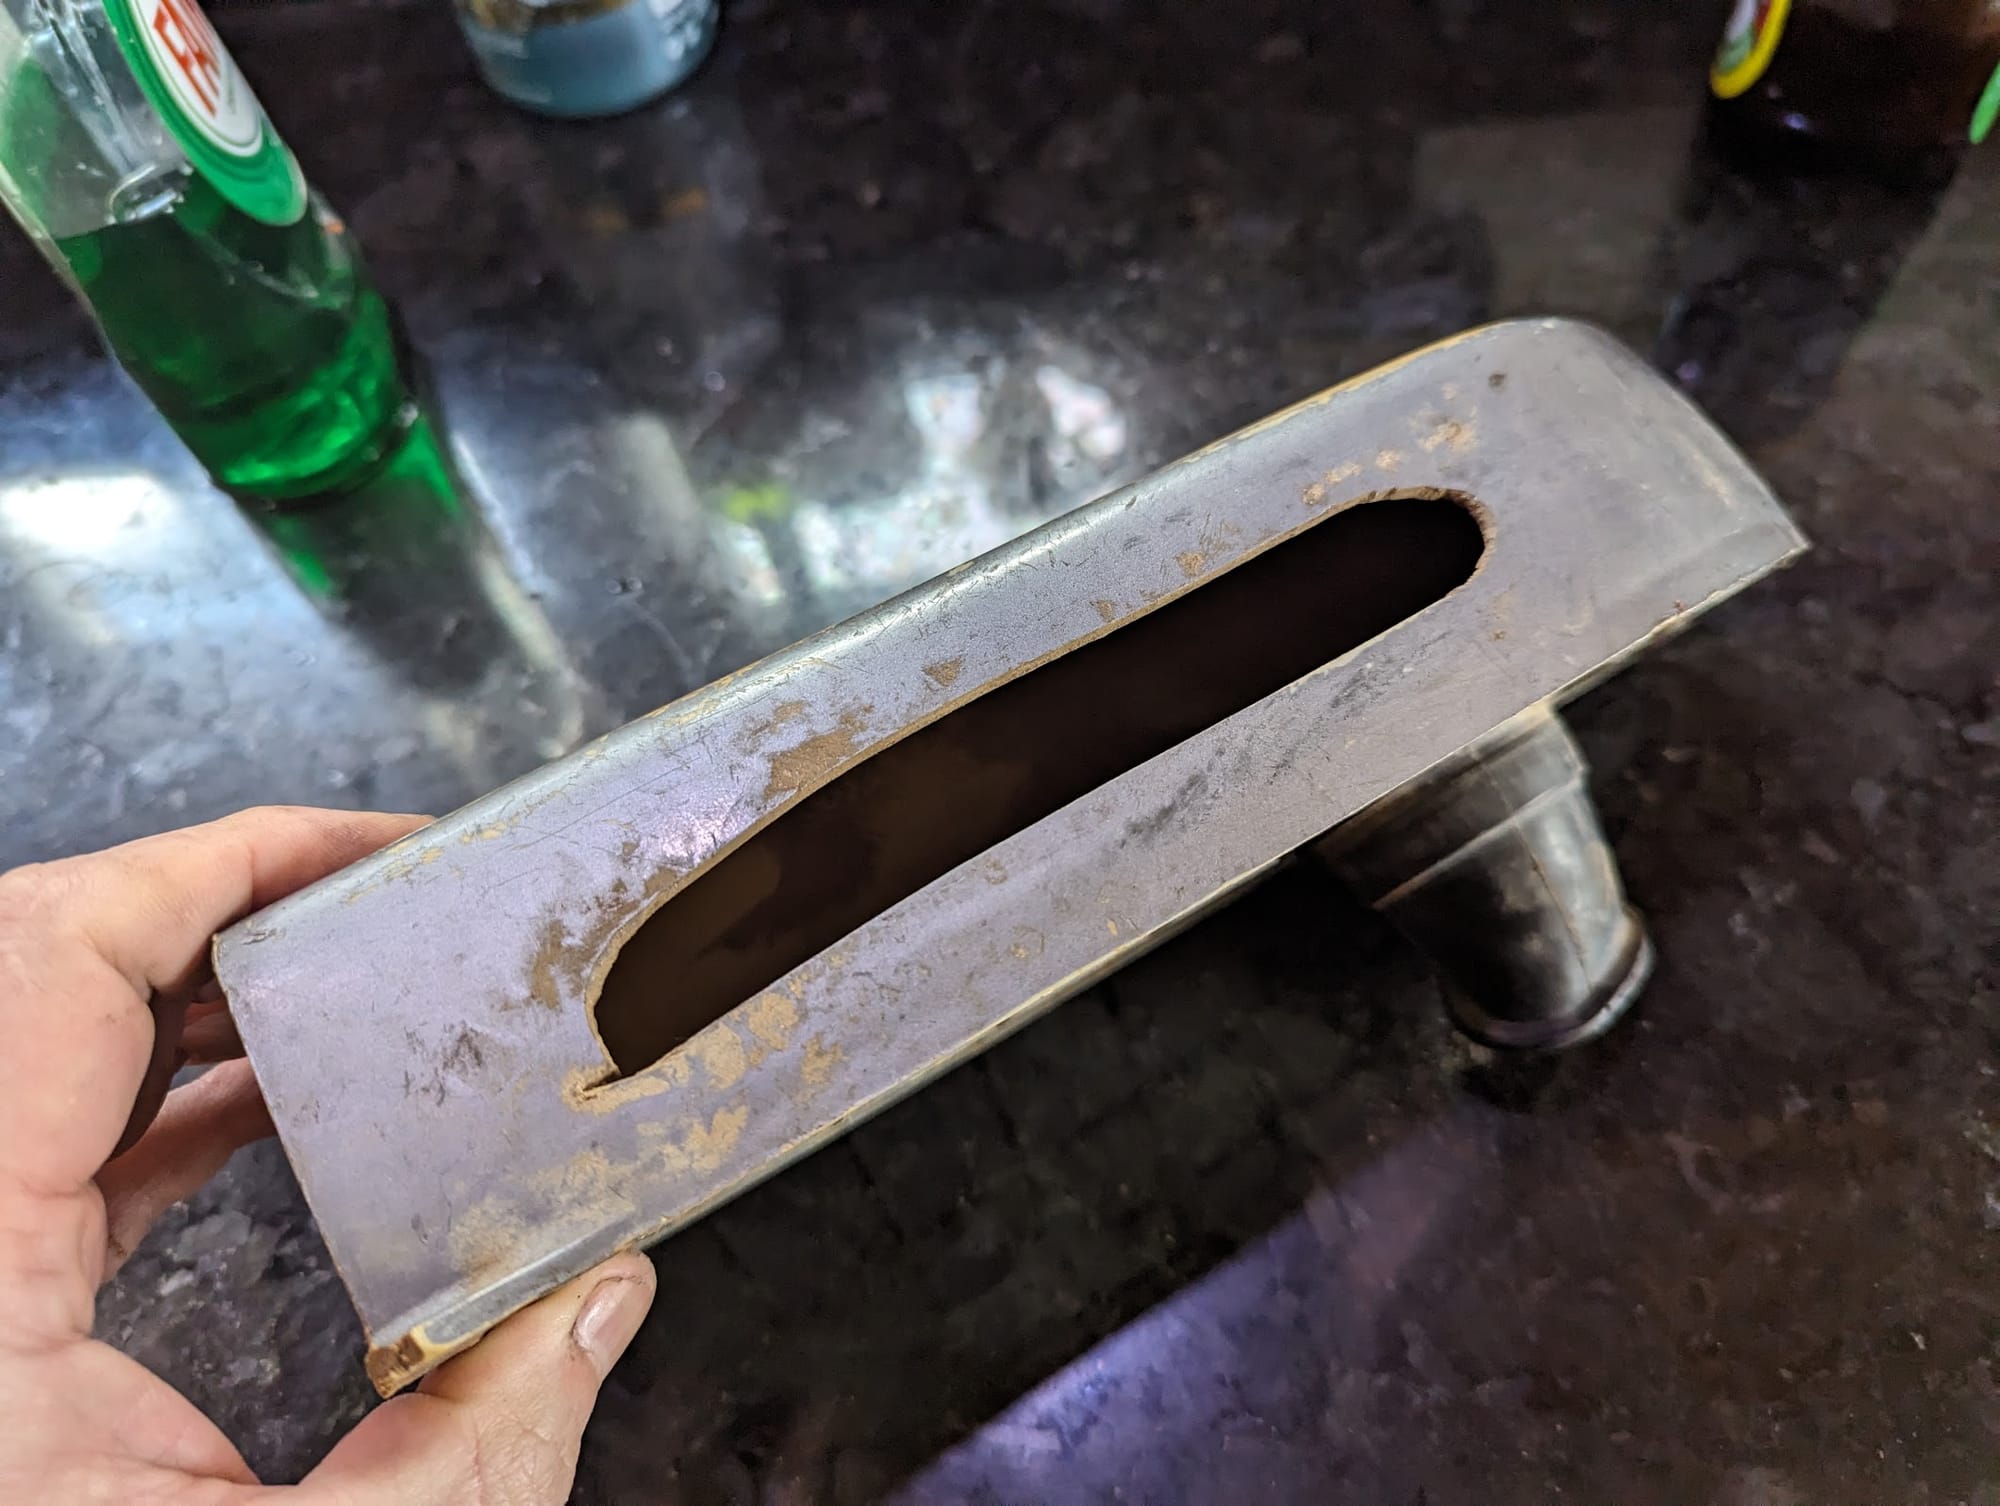
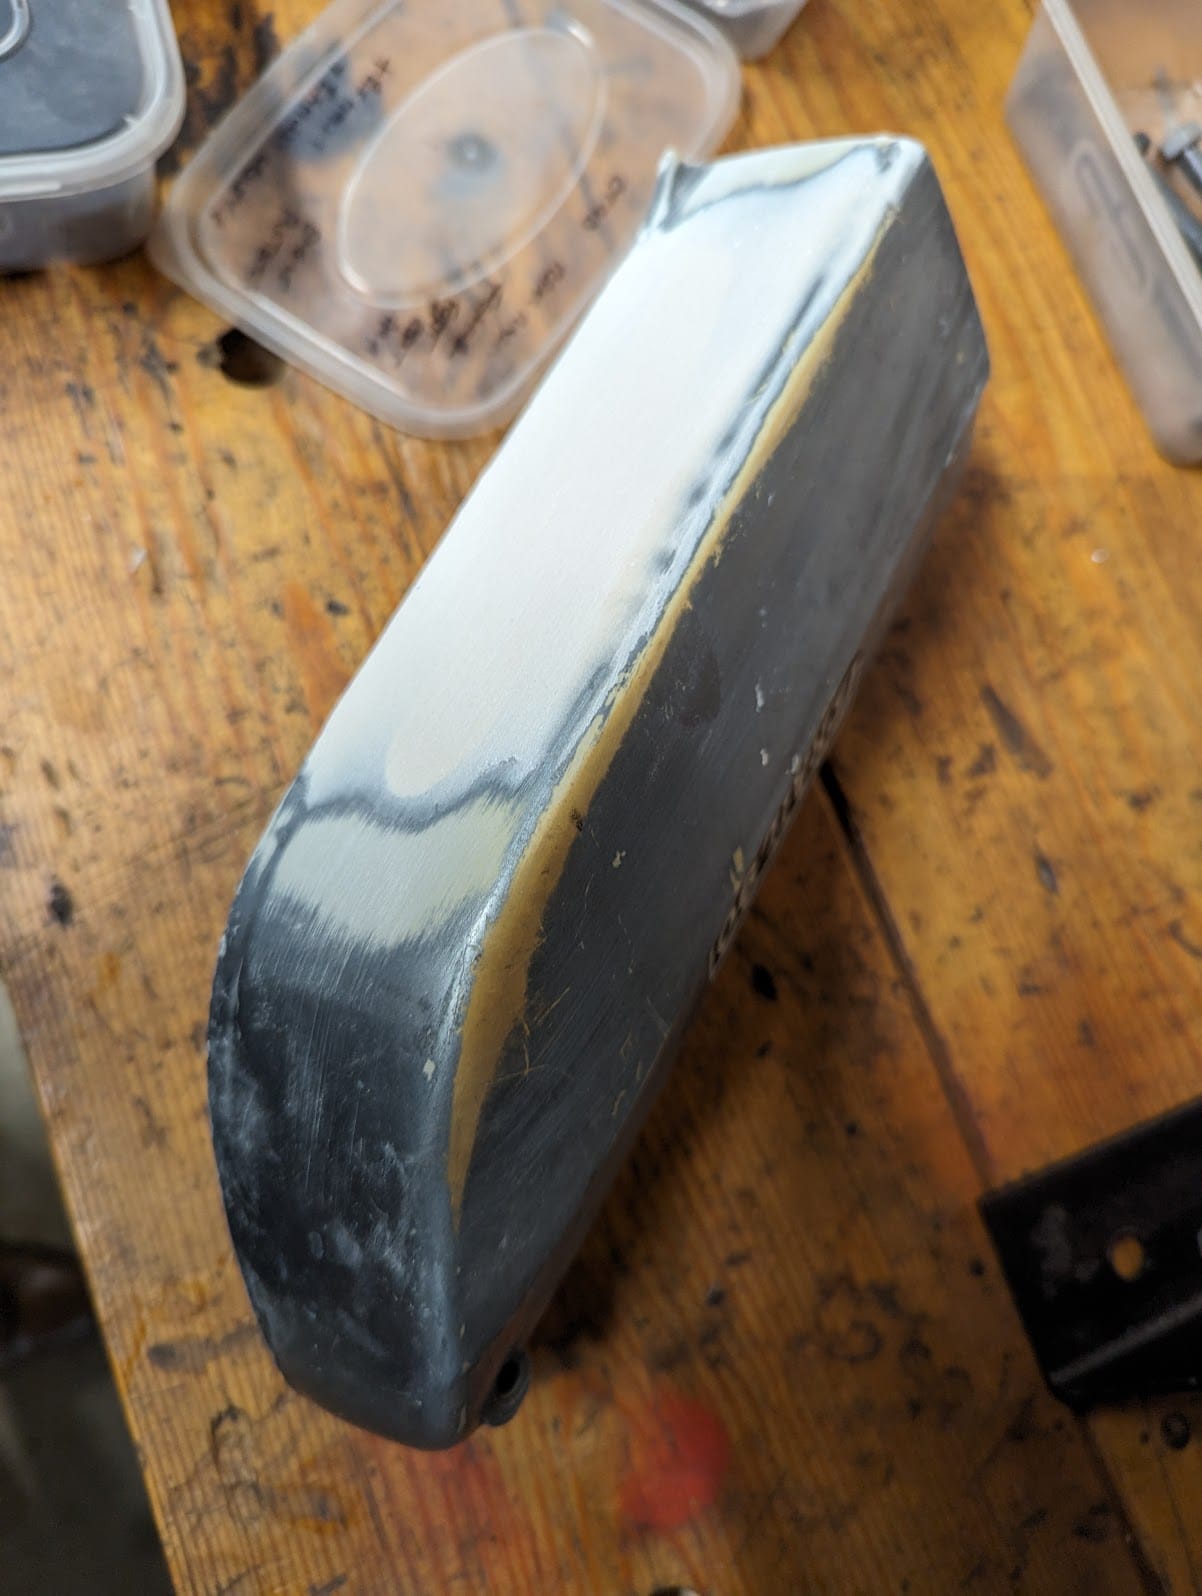
The plastic air cleaner housings are unobtainable, so I had to fix up the damaged one I had (inexplicably, it had a big hole cut into the base). I filled the hole and also reinstated the small plastic tab that is used to fix the casing to the frame (this bit seems to always break off - perhaps because people forget it is there given it is hidden by the rubber part of the air cleaner once installed).
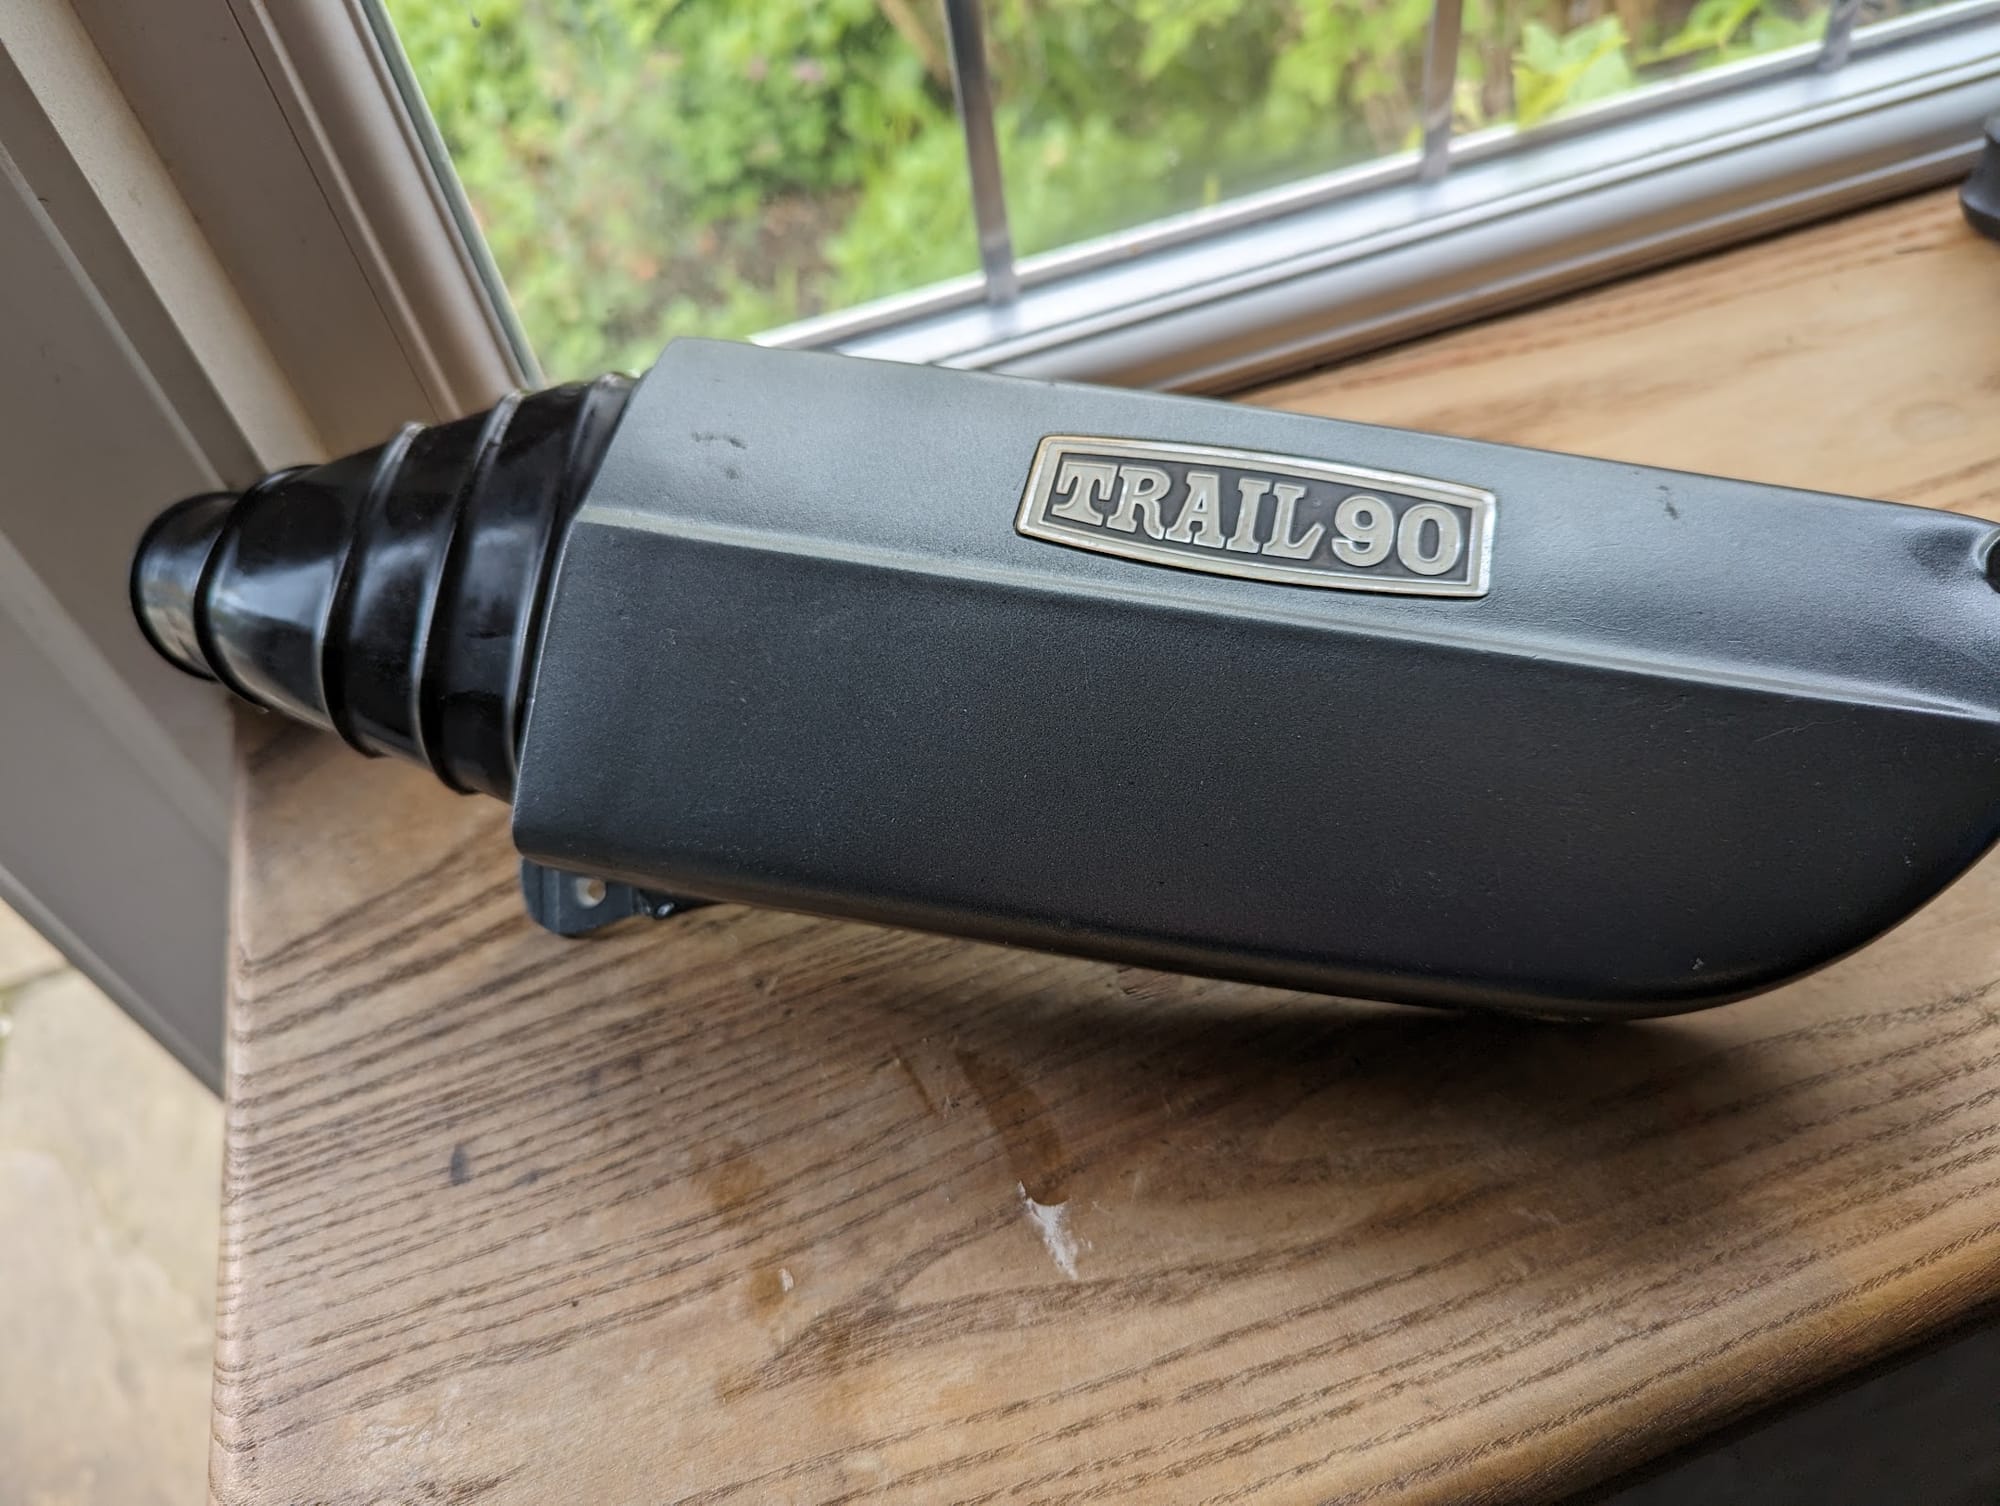
You need a 1.5mm o-ring to seal the air cleaner in the housing. I couldn't find one the right size (about 8.5cm diameter) but it is easy to make one of the correct size by cutting a section from an oversize one (you can super-glue the ends together).
Fixings
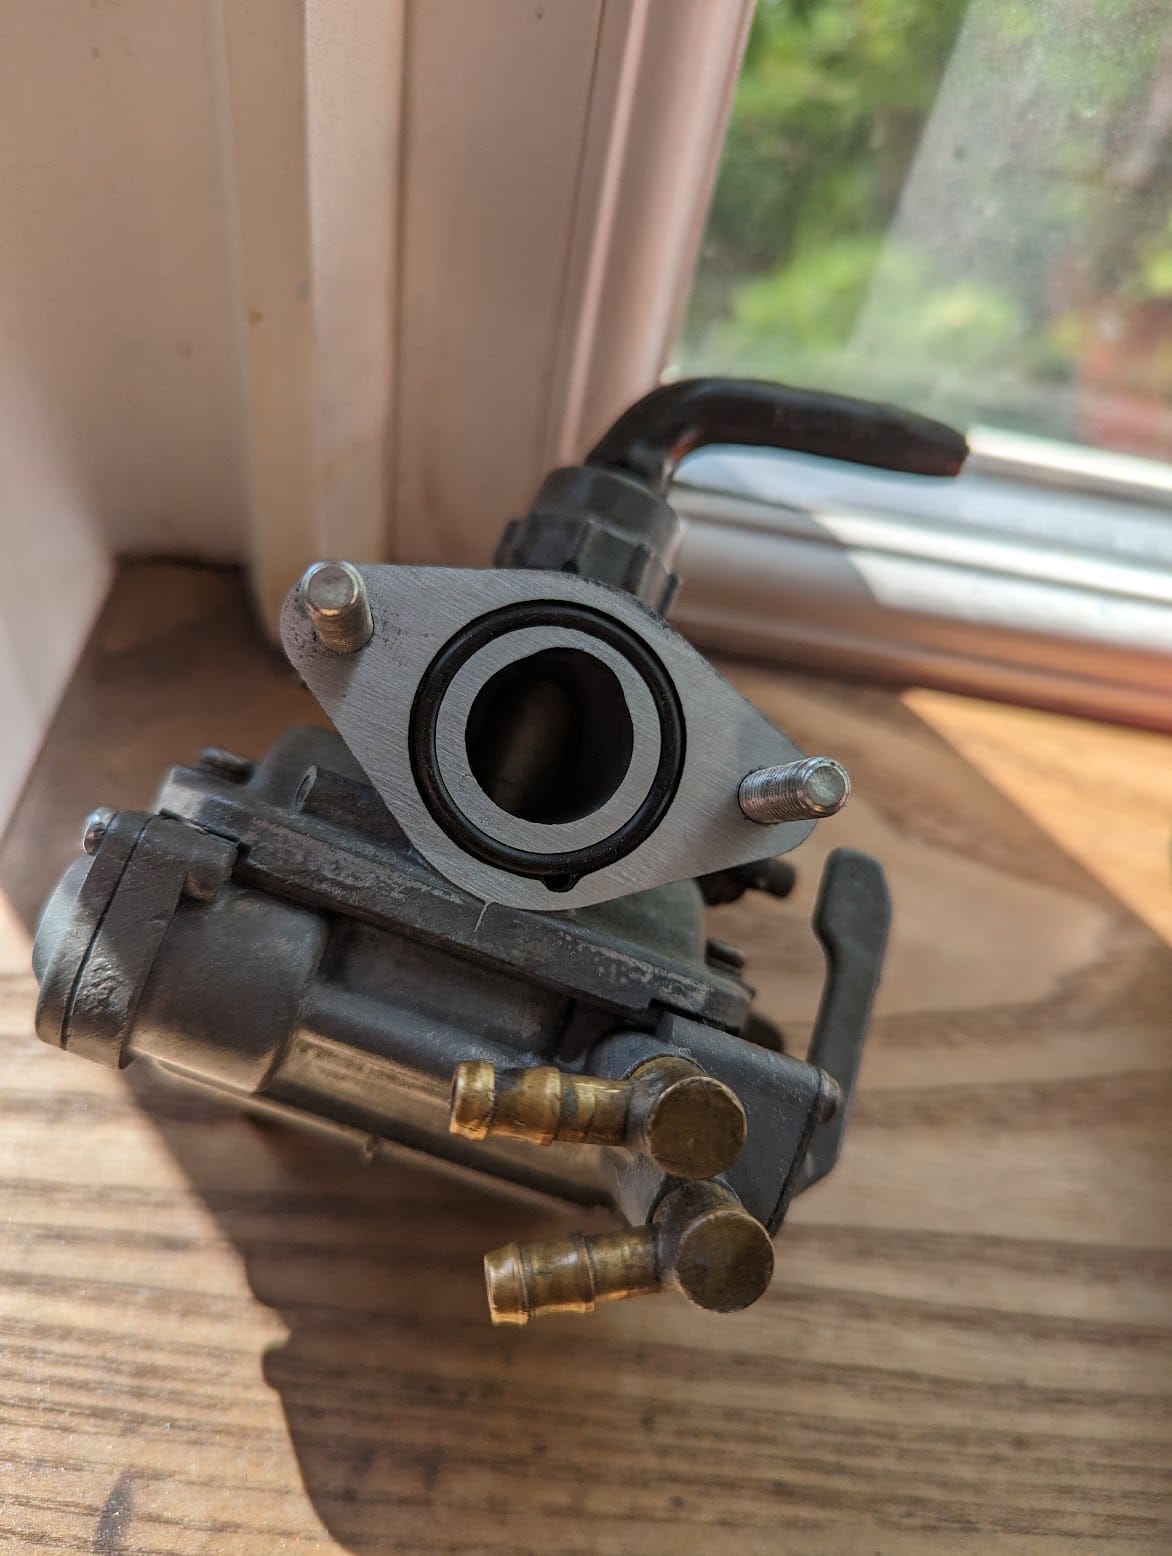
I had to tap the mounting holes in the air inlet flange and make some new studs by cutting short a couple of bolts.
Faults
If you are unlucky and corrosion has got into the upright posts that hold the needle, main and idle jets - if they no longer seal properly the carb may not be repairable. The brass floats can develop small pin holes which are hard to see (submerge the floats and listen for liquid inside them).
Frost can also cause issues - despite a thorough refurb, the carb below continued to leak through the drain outlet because of a split overflow tube:
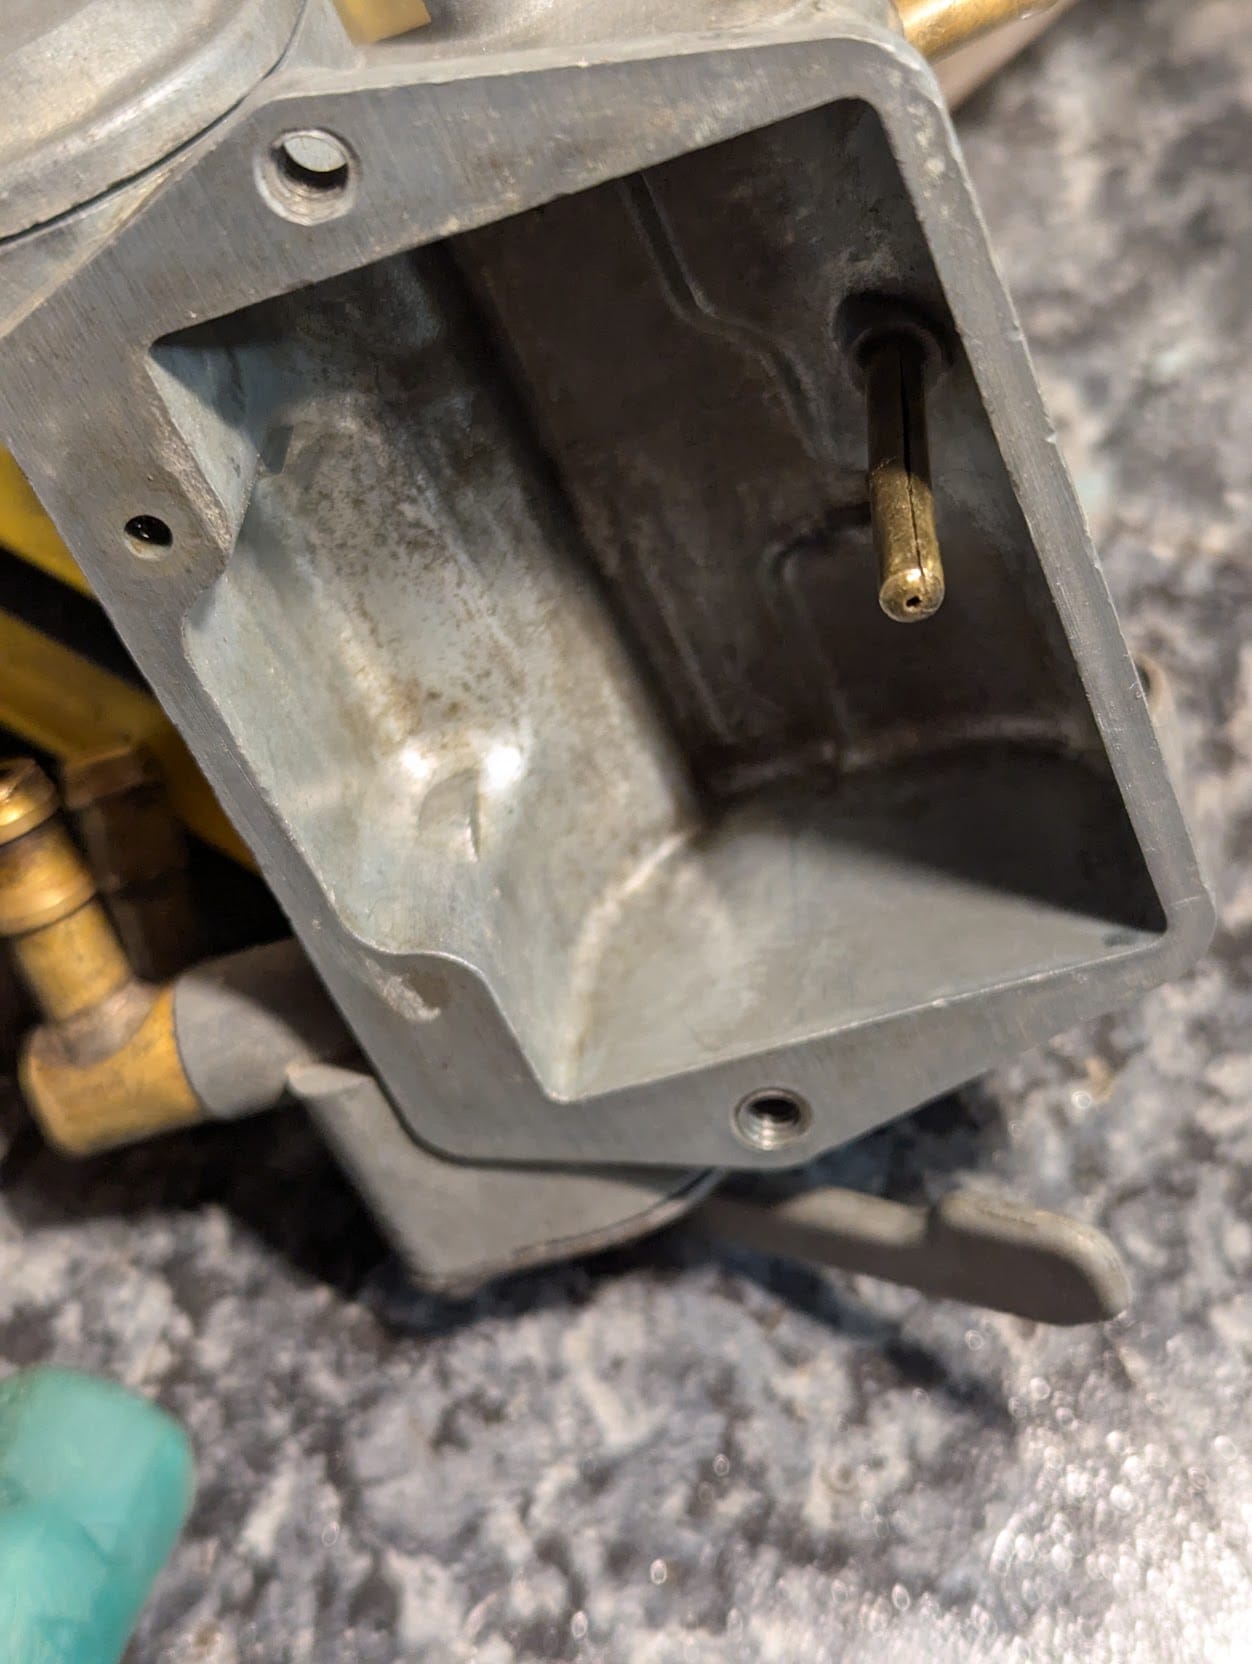
This is a common fault in carbs from bikes that have been unused for extended periods, since condensation collects inside the brass overflow tube and - when this freezes - causes it to split (you may also find crushed floats, another symptom of water freezing inside the carb).
I found a partial C70 carb on ebay that used a similar design bowl, to get it to fit I had to move the overflow outlet, which points down on the C70 version, to vertical so it clears the frame. The brass fittings are push fit - so just a matter of drilling a new 3.5m hole and refitting. I cut of the end of the brass fitting to use as a plug in the original hole (a dab of solder seals it off completely).
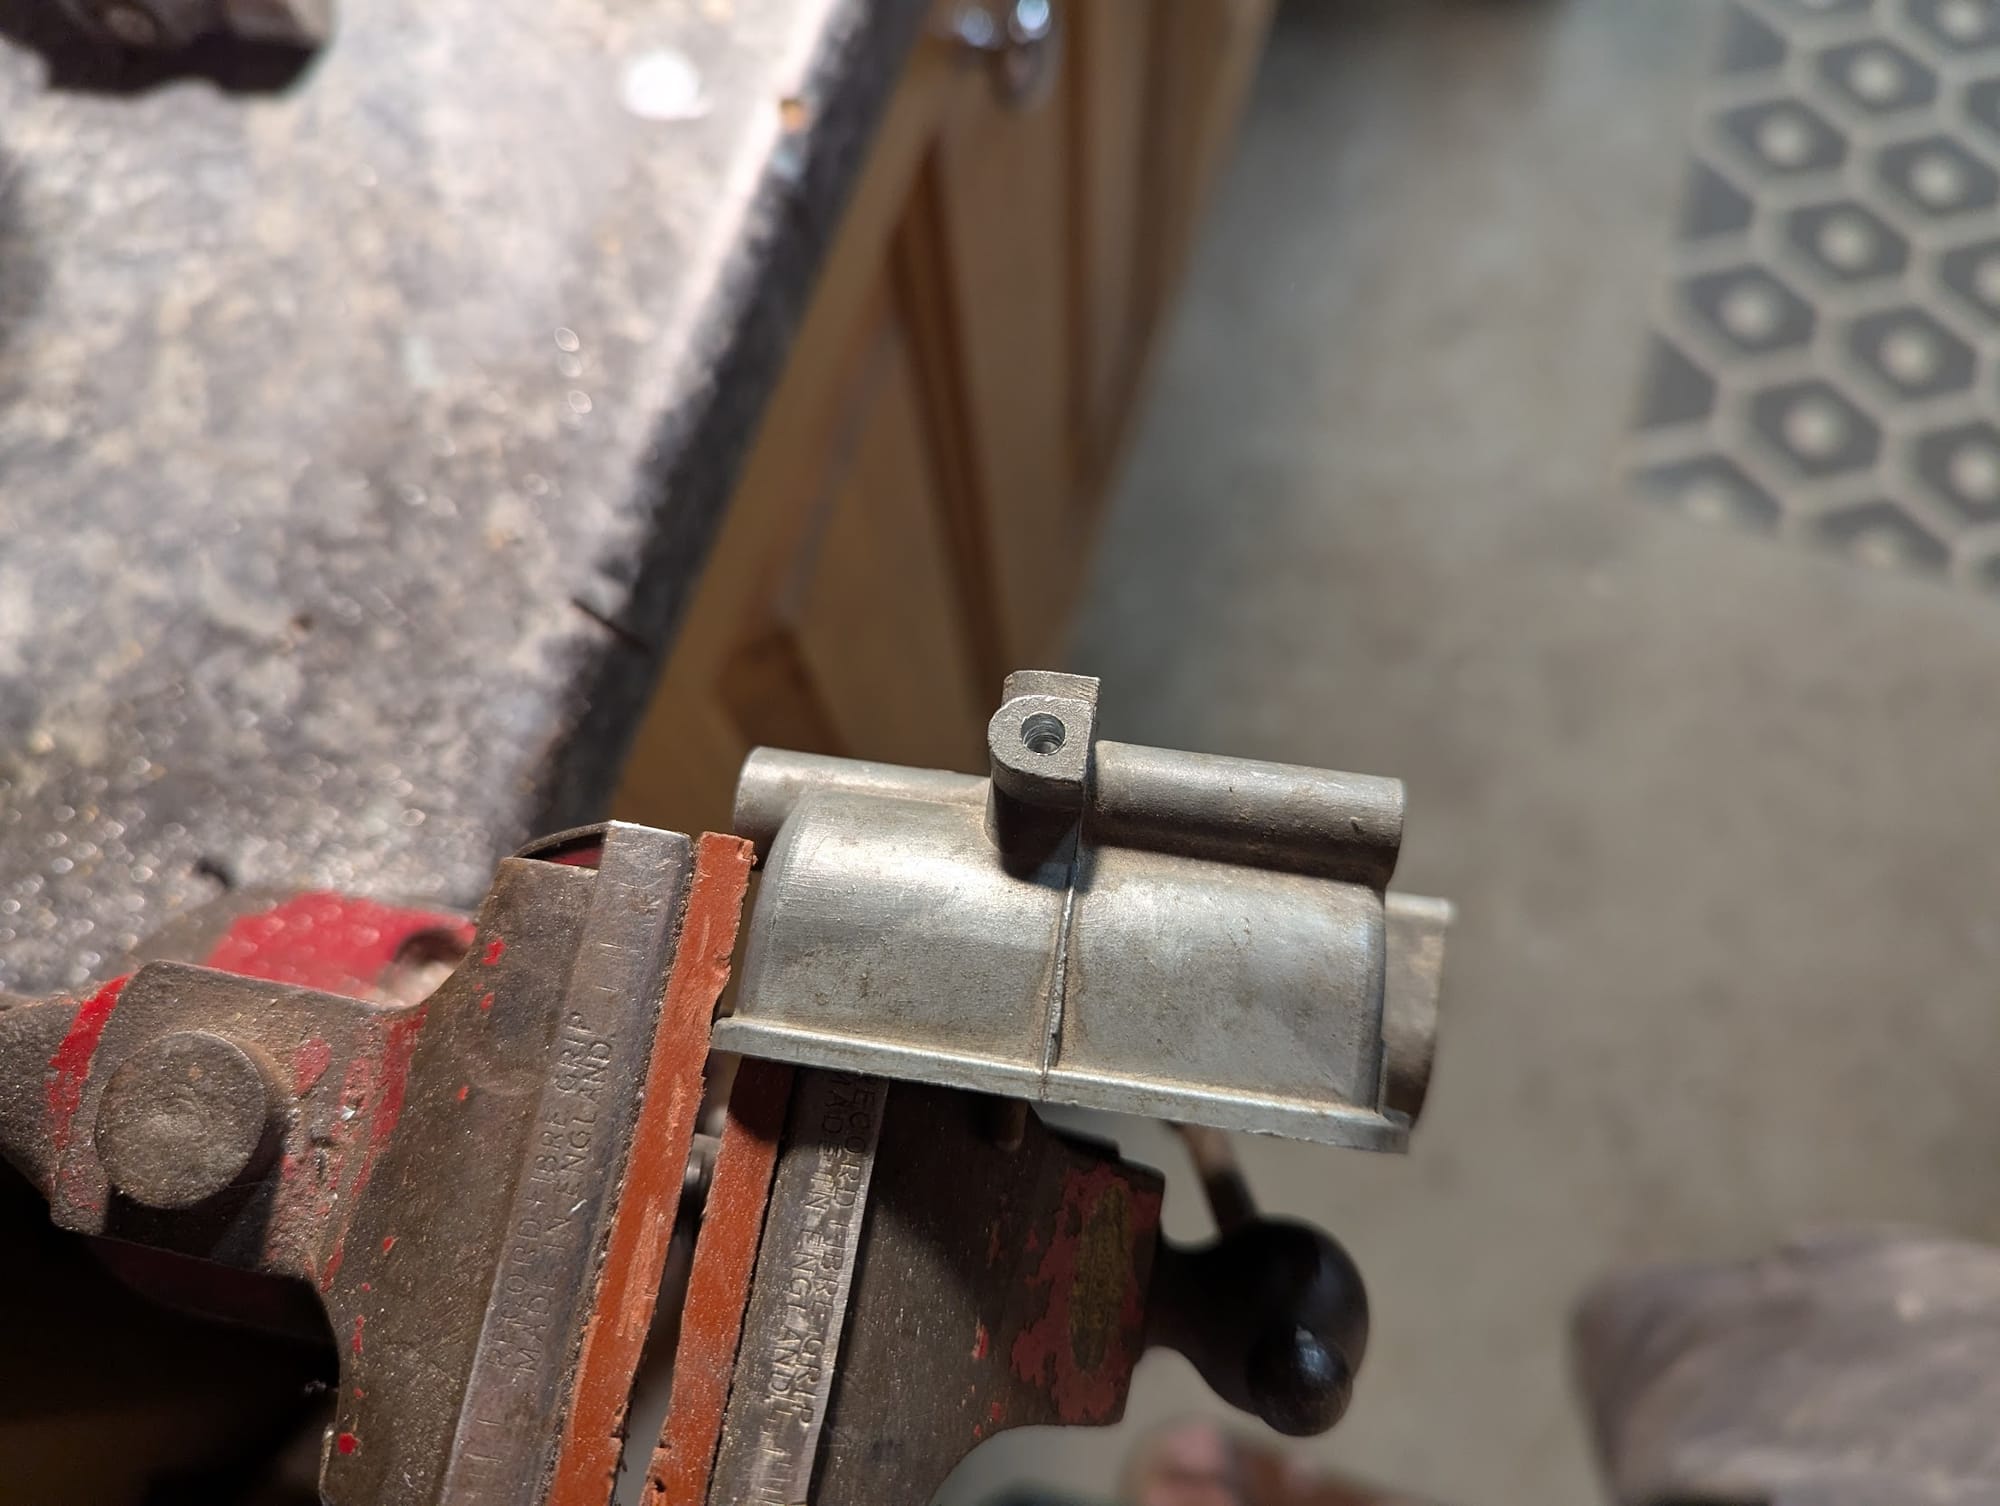
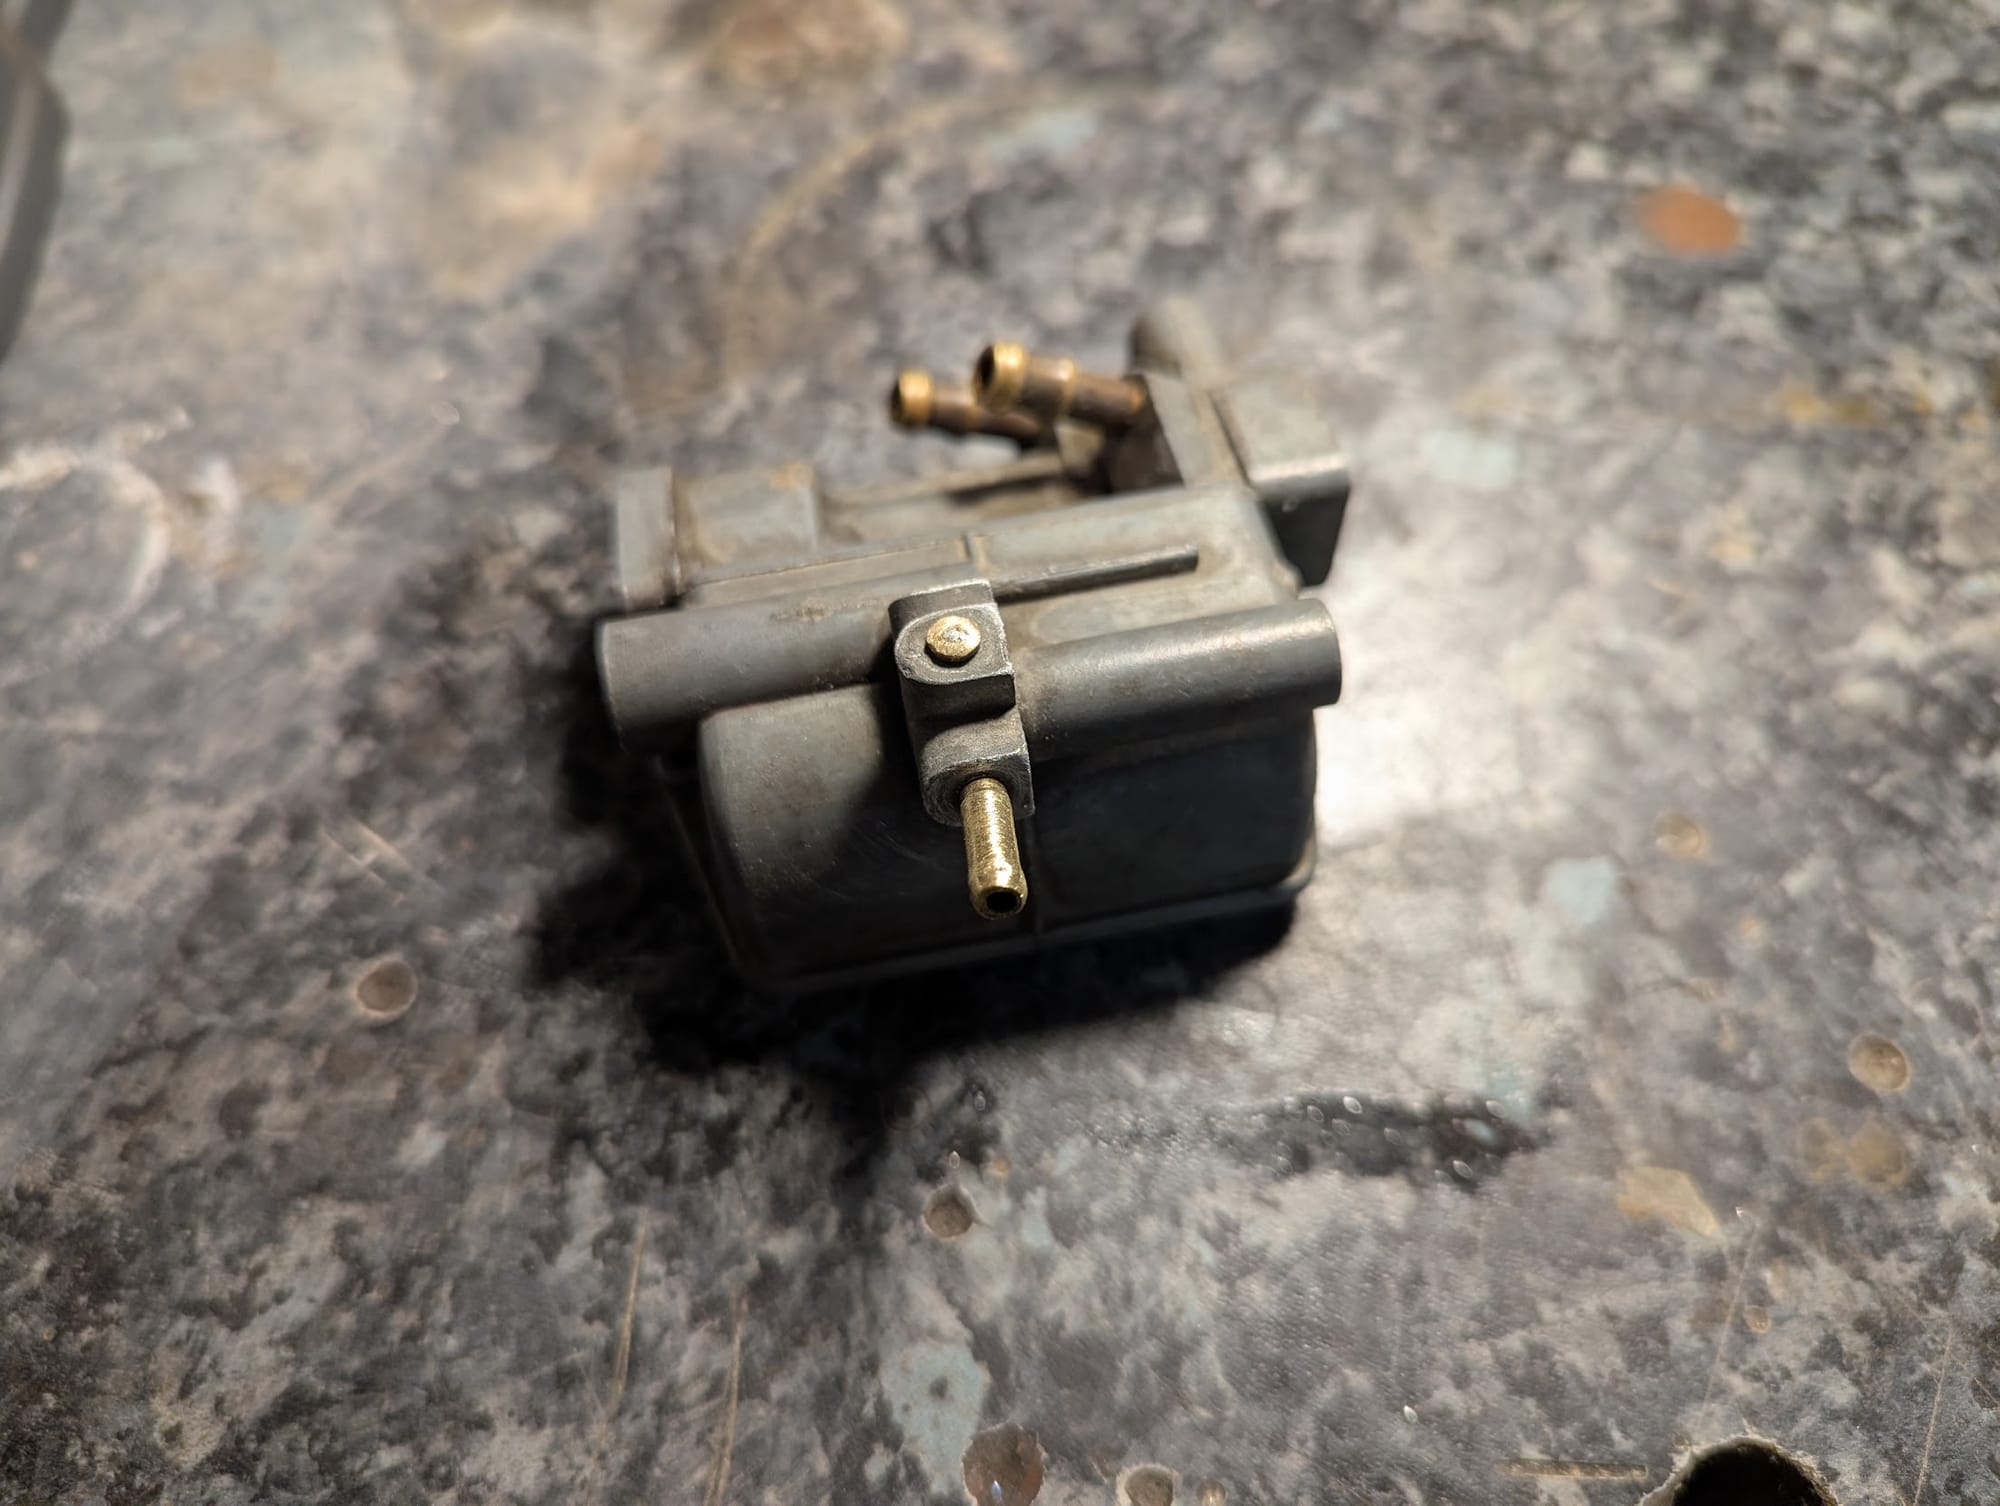
relocating the overflow/drain
Fitting
This model carb is fitted with a bakelite insulator that reduced the heat transfer from the hot engine to the carburettor. A paper gasket is needed between the insulator and the inlet pipe and another is needed between the other end of the pipe and the cylinder head
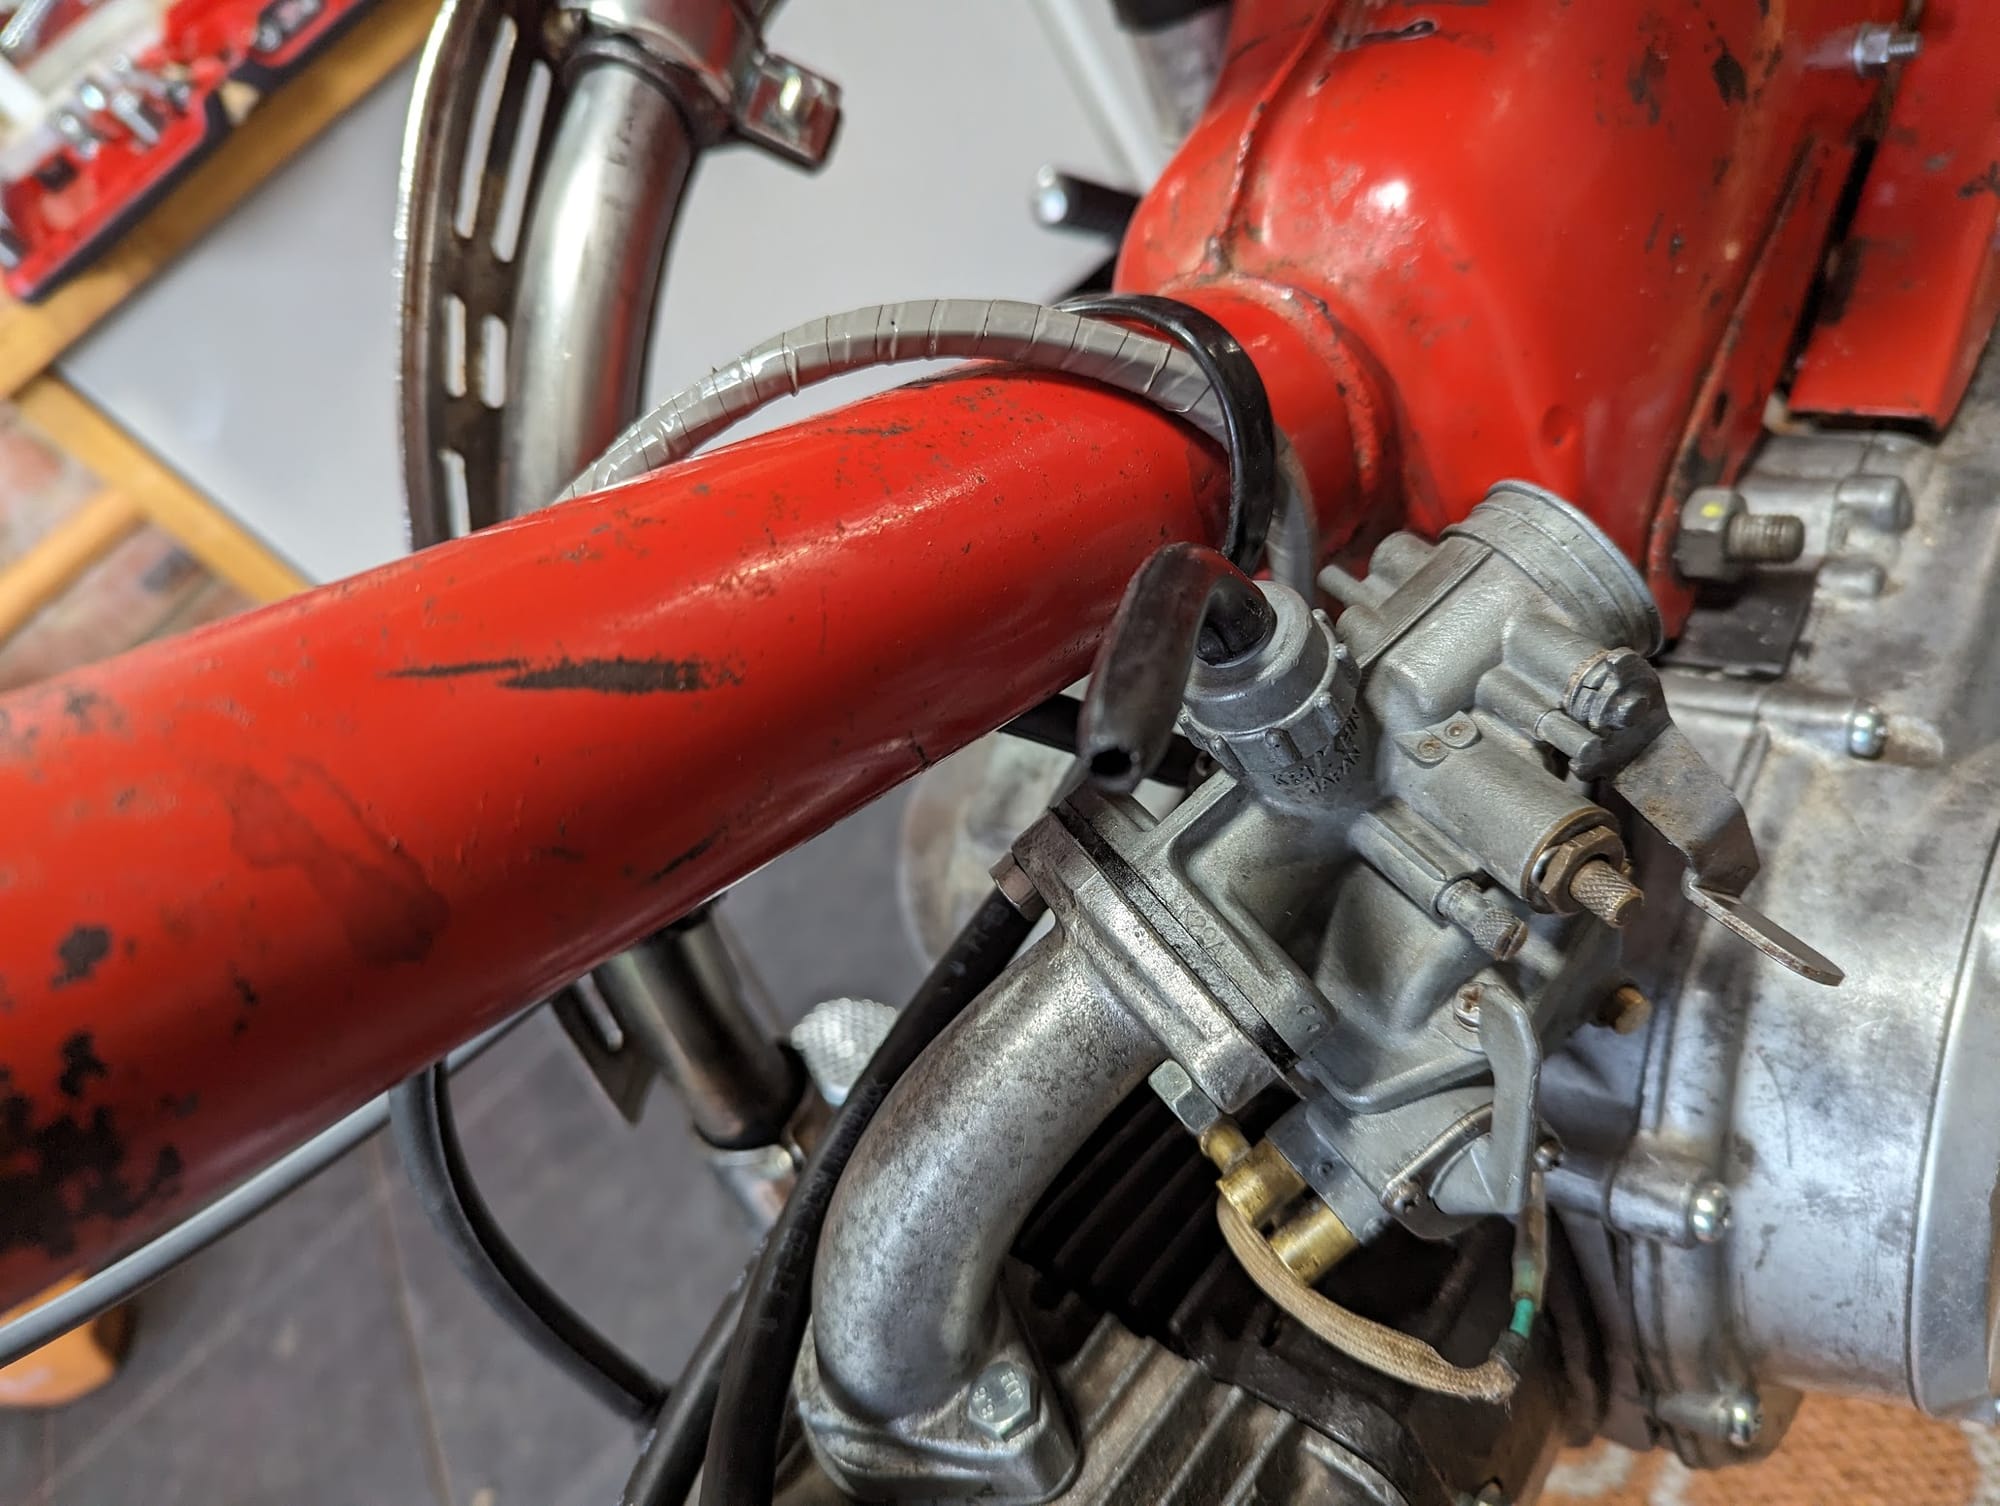
insulator
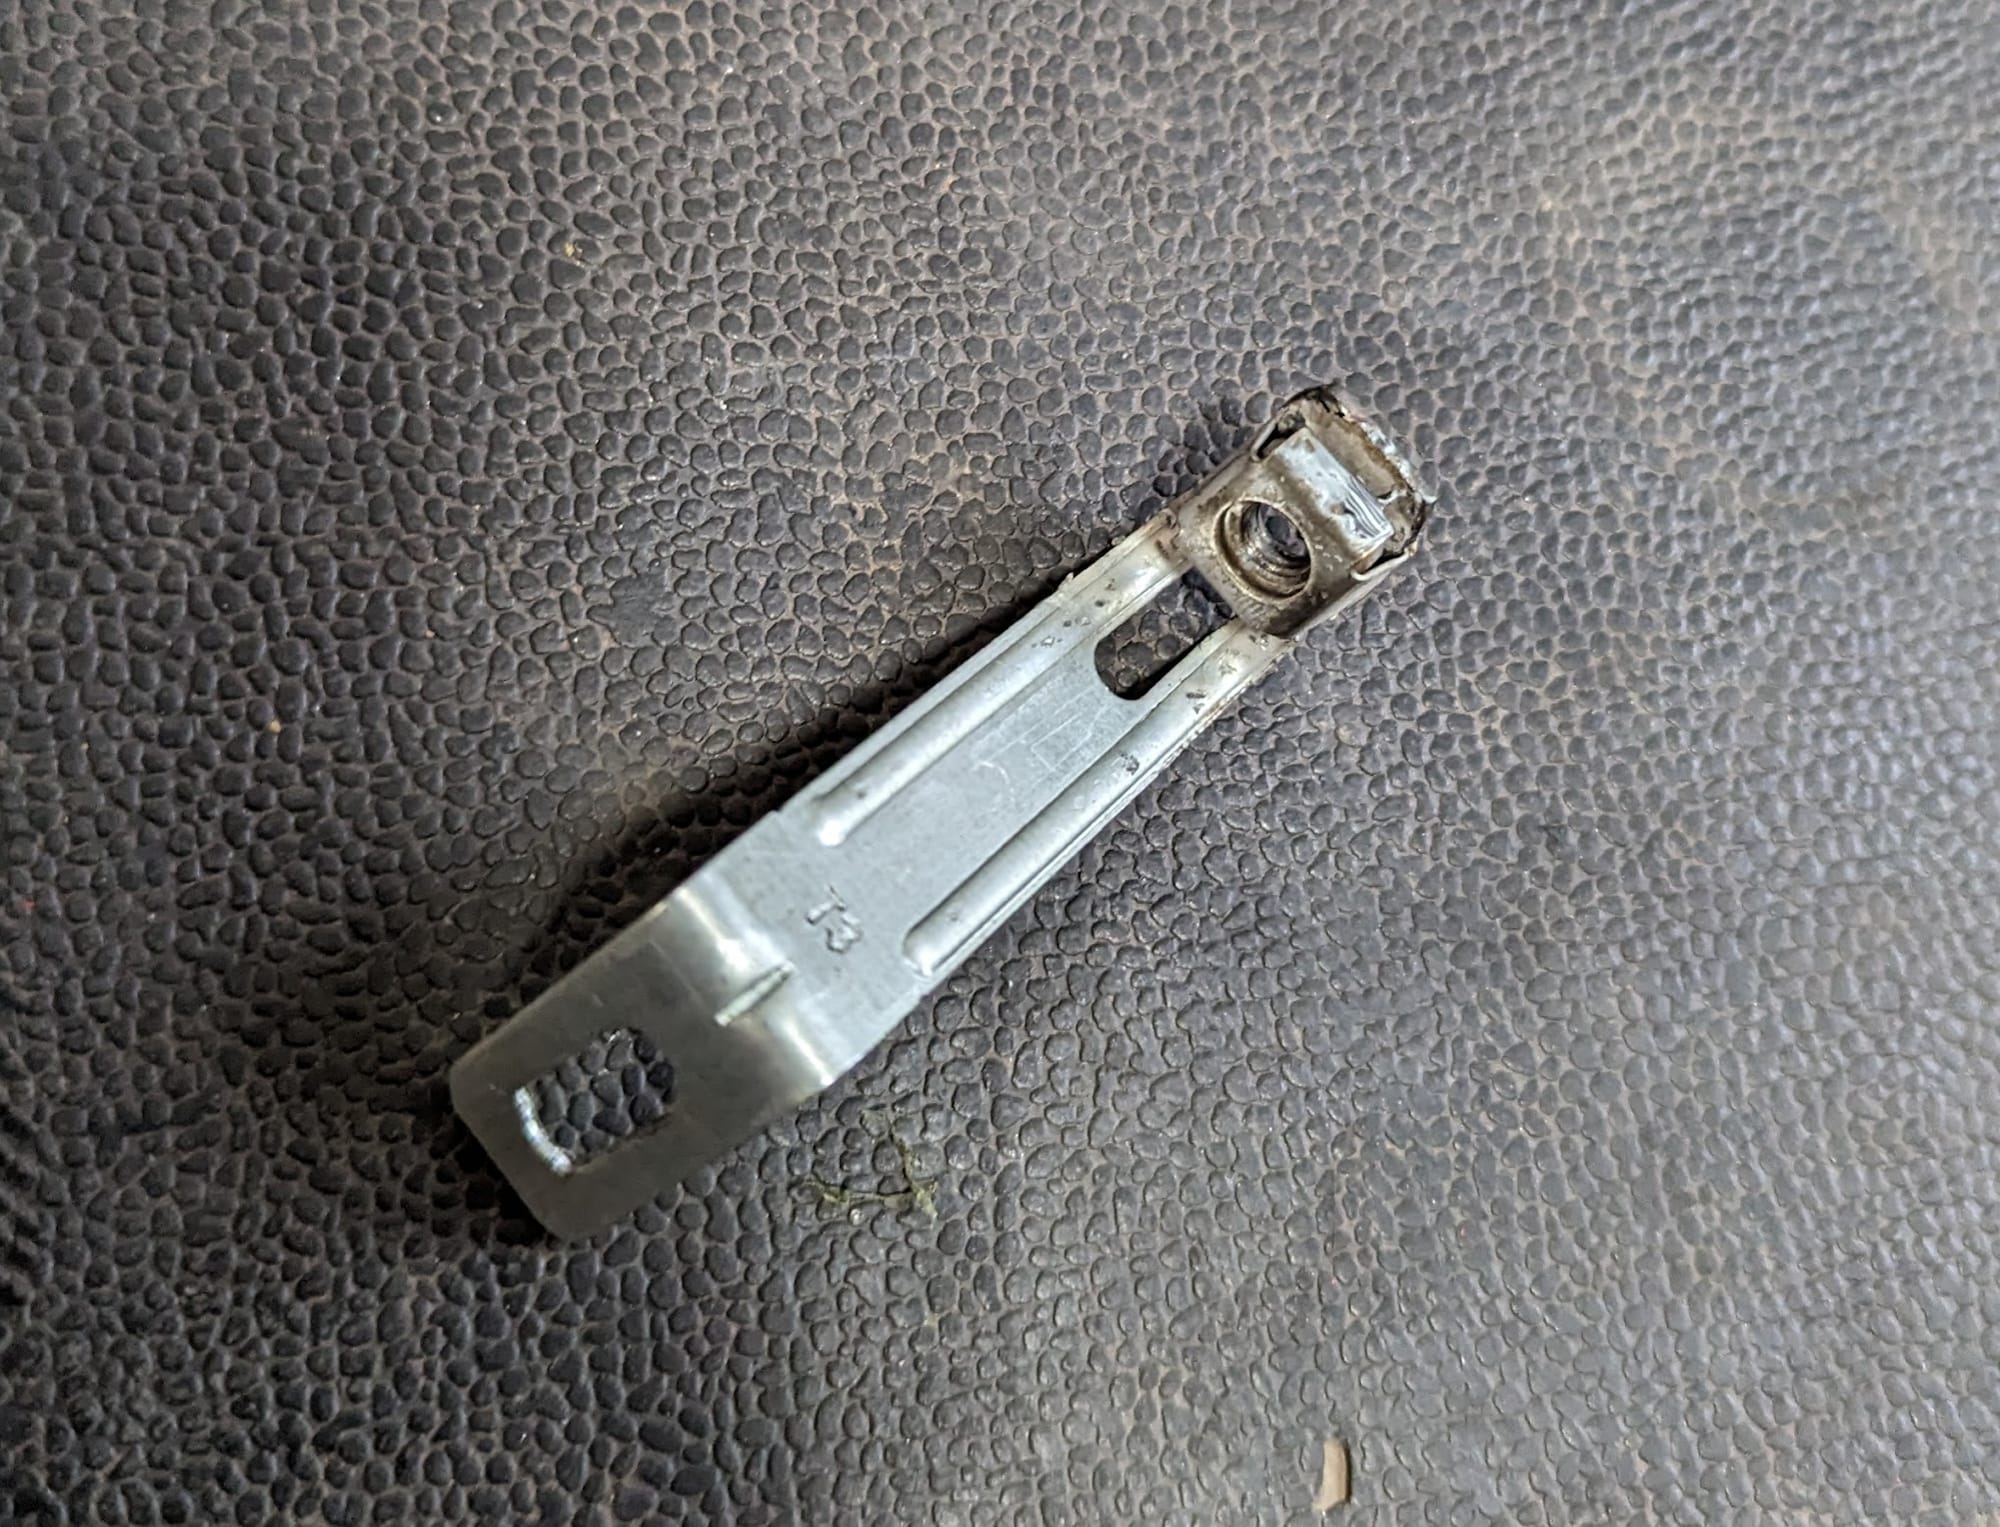
finally I had to make this bracket to mount the housing to the frame

The down tube cover is new (from a C110, but these fit the older bikes too). It was the wrong colour so I painted it and the air cleaner cover GM Dark Grey. To my eyes it is a not bad match to the colour shown on the adverts I've seen for later models, but it seems much darker that the photos of original 1969 models I've seen (although presumably these are all pretty faded by now).
